
How Interpretation Should Be
Sign In to Account Management
To access Account Management, click the
“Account Management Login” link located
in the top right corner of the CyraCom
homepage. Afterwards, you will be directed
to the Account Management Login page
where you will be prompted to enter your
Username and Password.
To sign up for CyraCom Account Management,
contact your account manager or email
support@cyracom.com
Problems logging in? Contact Client Services at 1-800-481-3289
After reading this guide, you will be able to:
• Sign In to Account Management
• Modify your User Profi le
• Add Users/Give Account Management
Controls to Users (Administrators only)
• View and Modify PINs
• Run, View, Export and Print Real-Time Business
Intelligence Reports
• View, Export, Print, and Pay Invoices
• Submit Inbound Access Requests
• Submit Interpretation Requests
• View Items In your Document Library
Account Management
User Guide
Learn more at www.cyracom.com
© 2016 Copyright. CyraCom. All Rights Reserved.

How Interpretation Should Be
Learn more at www.cyracom.com
© 2016 Copyright. CyraCom. All Rights Reserved.
2
Modify your user information
and contact information by
clicking the “Edit” button
next to the section, entering
your information in the fi elds
provided, and clicking “Save”.
Change your password by clicking
the “Change Password” link, typing
in your old and new passwords in
the fi elds provided, and clicking
“Submit.” Your password must be
at least six characters long and
contain at least one letter and
one number. If you forgot your
password, you will be prompted
to enter an answer to your preset
security question. Afterwards,
an email providing a temporary
password will be sent to your
address. If you do not have a
preset security question, you
must contact Client Services
or your account manager.
Create or change your security
question and answer by clicking
the “Change Security Question
& Answer” link. Type in your
current password, select a
security question, and provide
an answer in the fi eld, and click
“Save”. You will be required to
answer this question if you
ever forget your password.
Change your homepage by
clicking the drop-down menu
and either scrolling or typing
to fi nd your new home page.
Upon making a change, you will
get a green pop-up notifi cation
in the bottom right-hand
corner, confi rming the user
information has been updated.
Change your time zone
preference by clicking the
drop-down menu and selecting
your desired time zone.
Upon selection, you will get
a green pop-up notifi cation
in the bottom right hand
corner, confi rming the user
information has been updated.
Modify your email address by
clicking the “Update Email”
button, entering your email in
the fi eld provided, and clicking
“Update”. A message with a
verifi cation link will be sent
to the new address entered.
Follow the link in the email to
validate the new email address
and access your account.
Modify Your User Profi le
After you sign in, you’ll arrive on
the Account Management home
page. To begin modifying your
profi le information or change your
password, click Profi le.
the Account Management home
profi le information or change your
Once on the Profi le page, you can view and edit your personal information and settings to:

How Interpretation Should Be
Learn more at www.cyracom.com
© 2016 Copyright. CyraCom. All Rights Reserved.
3
Add Users/ Give Account Management Controls to Users (Administrators Only)
With Account Management Administrator Permissions you can create new User Profi les with
access customizations. Additionally, you can give users in your organization access to PIN
Management, Invoicing, Reporting, Interpretation Requests, and Administrator Permissions.
1. To perform any of these functions, select
User Administration on the Account
Management main page.
To remove a user, select the user and click the Remove
button at the top of the table.
If you are an administrator for multiple accounts, you will need
to search for desired account by entering a customer number
or customer name in the search fi eld.
2. On the User Administration landing page, you can view and
modify user information:
• To view or edit a user’s profi le or to reset their login password, select
the user and click the “Manage” button at the top of the table.
• To remove a user, select the user and click the “Remove” button at the
top of the table.
• To add a new user, click the “+Add New” button.
a. You will be prompted to type in the email address for the new user
and click the “Add User” button. You will be taken to a new page
to enter in the user’s information. Click “Save”. Once the new user’s
information is entered, an email will be sent to the user’s email
address providing instructions on how they can access their account.
*Note: New user must follow email verifi cation instructions within 48 hours, or the
request will become inactive. To resend the request, click the “Resend Veri cation”
button under Unveri ed User, which will re-send the verifi cation email.
b. You must check what features the user should have access to - default
access is for Inbound Access Setup Request and Profi le only. Features
available include Administrator, PIN Management, Video & Phone
Interpretation Request, Reports & Call Analysis, Inbound Access Setup
Request, and Profi le.
*Note: Invoices and video Scheduling can be set up CyraCom only. Please
contact your account manager if you are interested in these features.

How Interpretation Should Be
Learn more at www.cyracom.com
© 2016 Copyright. CyraCom. All Rights Reserved.
4
Modify Your User Profi le
1. After you sign in, you’ll arrive on the
Account Management home page. To begin
modifying your profi le information or change your
password, click the Profi le link.
2. Once on the Profi le page, you can view and
edit your personal information and settings to:
3. To enable/deny users access to Administrator, PIN
Management, Video & Phone Interpretation Request,
Reports & Call Analysis, Inbound Access Setup
Request, and Profi le controls, check or uncheck
boxes next to the feature. These operations give
specifi c access permissions to a user:
• Administrator permissions enable a user to enable/deny
permissions in User Administration, create new user profi les
with customized access options, and provide Administrator
Permissions to other users.
• PIN Management controls enable a user to create, manage,
and modify PINs associated with your organization. This
includes adding new PINs and PIN features such as PIN
descriptions, language selection prompts associated with
a PIN, PIN Tags, and PIN hold music options. Users with PIN
Management controls can also view phones associated with
specifi c PINs.
• Phone and Video Interpretation Request permissions enable a
user to access phone and video interpretation services from the
CyraCom web site or from the CyraCom mobile app for iPhone,
iPad and Android devices. Permissions can be set to enable
requests from specifi c account(s) or PIN(s).
*Note: Video access is only available for video-activated accounts. If
you are interested in setting up video access, please contact your
account manager.
• Reports & Call Analysis permissions enable a user to view
data with fi lters such as Call Information, PIN Information
and Tags, Language Usage, and Phone-Minute Usage.
Reporting grants access to the Call Analysis and Reports
sections of Account Management.
• Inbound Access Setup Request permissions enable a user
to request a connection process which enables Limited
English Profi cient individuals to call your organization with an
interpreter already on the line.
• Profi le permissions enable a user to manage and modify their
profi le information and preferences.
• Invoices permissions enable a user to access, pay, view and
print monthly invoices. This feature can only be turned on
by CyraCom.
Add Users/ Give Ac-
count Management
Controls to Users (Ad-
ministrators Only)
Add Users/ Give Account Management Controls to Users (Cont.)
How Interpretation Should Be
Learn more at www.cyracom.com
© 2016 Copyright. CyraCom. All Rights Reserved.
5
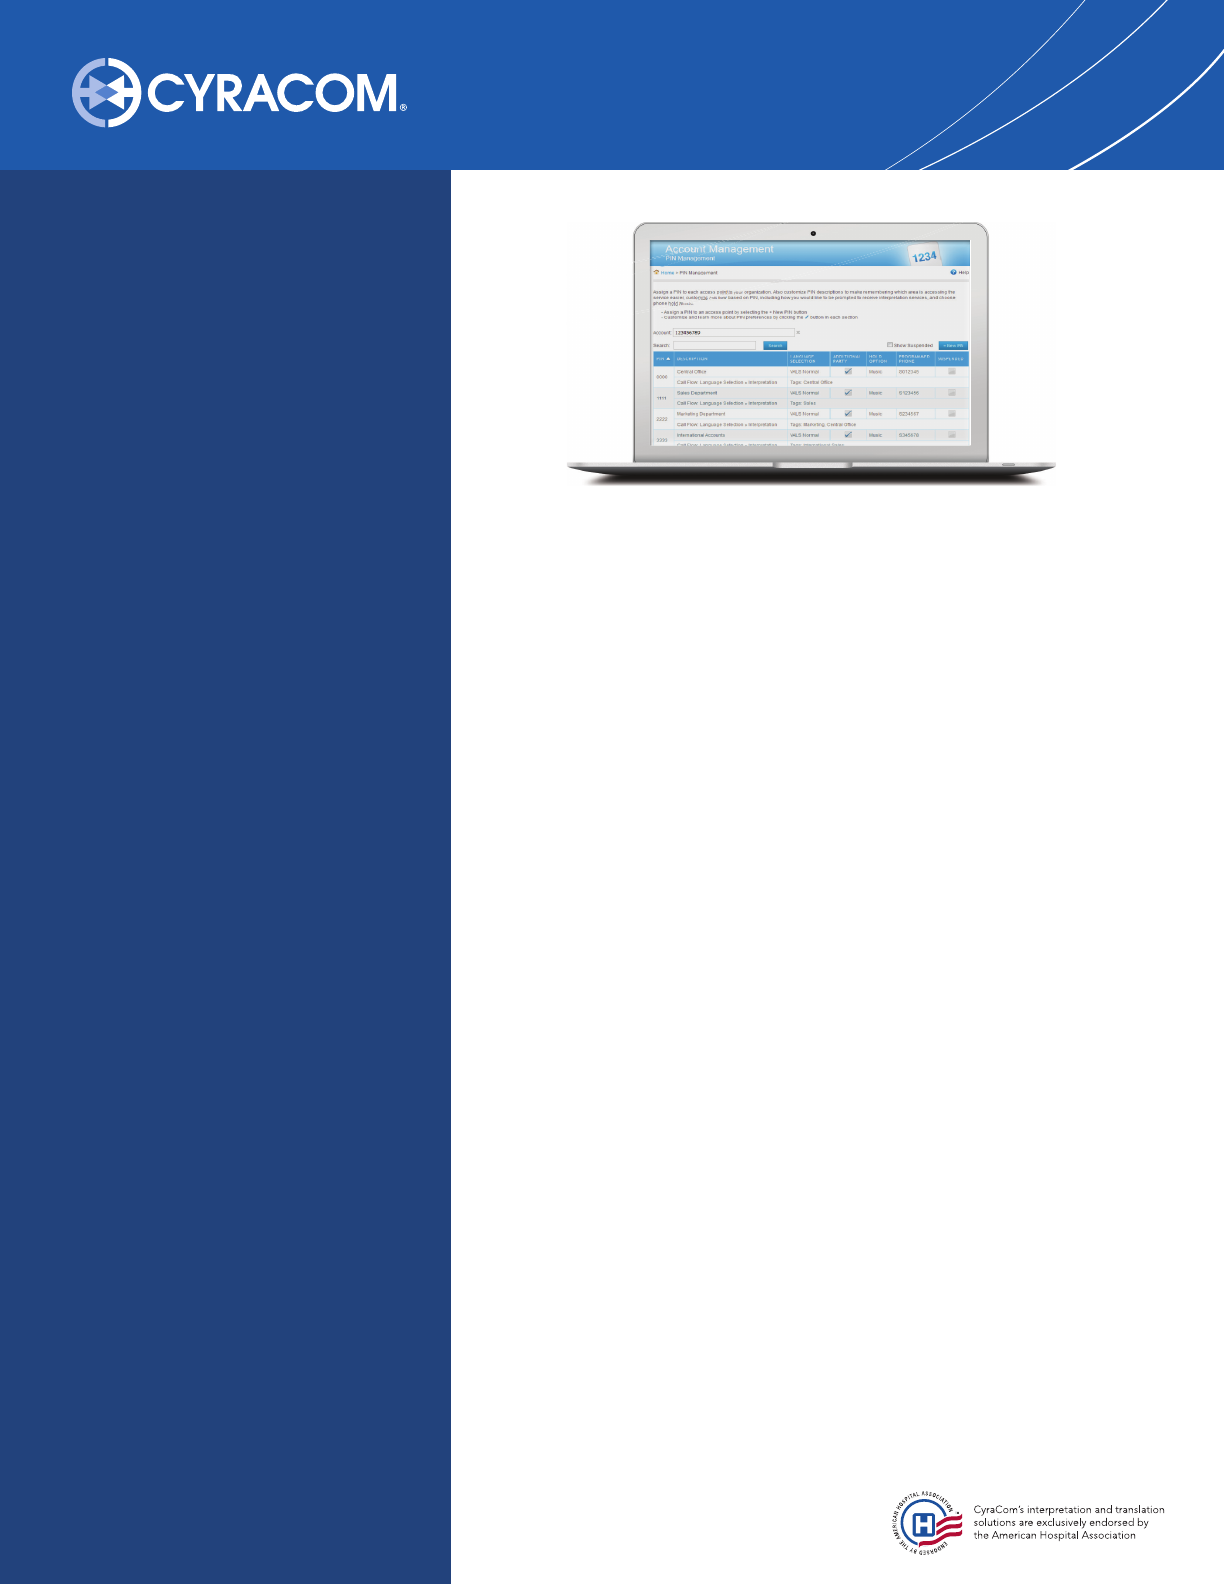
View and Modify PINs
Access PIN Management by clicking the “PIN Management” link on the Account
Management main page. If you have more than one account, the fi rst account (in
numerical order) will be displayed by default. You can search for other accounts
by name or number in the Account fi eld. You can also search for a PIN by number,
description, programmed phone ID, or tag.
To create a new PIN, click the “+New PIN” button. Type the desired 4-digit PIN
number in the PIN fi eld or use the auto-generate button to create a random PIN.
Enter a PIN description in the description fi eld, which is required for new PINs.
Adding a PIN description helps identify PIN usage for easier location in reports
and invoices. Example descriptions could be the name of a person, department,
location, or a combination of each. Descriptions can be up to 30 characters. If
you would like to create a new PIN with the same features as another PIN on
the account, type the number you would like to clone in the clone fi eld.
To make existing PINs easier to view in reports and invoices,
create a PIN description by clicking the (pen) hover button in the
Description section for the PIN you would like to change.
Then enter the PIN description in the fi eld provided and click ‘save.’
To view suspended PINs associated with an account,
click the “Show Suspended’” box.
To modify a PIN’s hold music, click the (pen) hover button in
the Hold Option section for the PIN you would like to change.
Then make your desired selection and click “Save”.
To create a PIN tag, click the (pen) hover button in the Tags section for
the PIN you would like to change. Afterwards, create one or multiple tags
for the PIN by clicking the “Add” button. Once fi nished, click “Save”
Users can also view phones associated with each PIN in
the Programmed Phone section if applicable.
PIN Management permissions enable you to manage and modify PINs associated
with your organization. This includes adding new PINs and PIN features such as PIN
description, language selection prompts associated with a PIN, and PIN hold music
options. Users with PIN Management controls can also view phones associated with
specifi c PINs. Instructions and descriptions of these PIN controls are listed below:
Language Menu Options
To modify how you would like to
be prompted to receive
language interpretation, click
the (pen) hover button for the
PIN you would like to change. Then select
your desired prompt and click ‘Save.’
Prompt descriptions are listed below:
VALS – Normal (recommended)
The prompt option we recommend.
Prompt accepts speech recognition
or a 3 digit language code.
“Please say the language you need or
enter the 3 digit language code.”
VALS - Legacy Prompt Style
Prompt accepts speech recognition
and has a quick option for Spanish.
“Please say the language you need or, for
Spanish, press 2. To select a language with its 3
digit code, press 3. Otherwise, press 0 to select
a language with an operator’s assistance.”
VALS - No DTMF Prompt
Prompt accepts speech recognition or a 3
digit language code but doesn’t state it.
“Please say the language you need.”
DTMF (Keypad) Language Code Entry
No speech recognition- Digit entry only. “For
Spanish press 2. To select a language by its 3
digit code press 3. Otherwise press 0 to select
a language with an operator’s assistance.”
No Prompt on First Attempt
This feature is silent and does not give a prompt,
but can accept speech recognition or a three
digit language code. If an entry isn’t made,
the “No Prompt on First Attempt” option will
function the same as VALS - Normal.
Express Language Menu
Prompt accepts digit entry only and can be
modifi ed to list up to nine languages for the
menu. Language confi rmation is bypassed.
Default prompt says,
“Please select the language you need. For
Spanish press 1. For all other languages
please press 0.”
Express Language Menu ASR
Prompt accepts speech recognition and digit
entry. The menu can be modifi ed to list up
to nine languages. Language confi rmation is
bypassed. Default prompt says,
“Please say the language you need or for
Spanish press 1. For all other languages
please press 0.”

How Interpretation Should Be
Learn more at www.cyracom.com
© 2016 Copyright. CyraCom. All Rights Reserved.
6
If you cannot see yourself in the Preview window:
• Right click on the Preview window.
• Click on “Settings” to open Adobe Flash Player Settings.
• On second tab, Privacy, click “Allow” and “Remember” to enable www.cyracom.com to
access your camera and microphone.
• Close the Preview window.
If you are having other issues with connecting to a CyraCom video interpreter, please
contact your account manager or Client Services at 1-800-481-3289 or support@cyracom.com
for troubleshooting.
Accessing a Video Interpreter
Users with Video Interpretation Request permission can access a video interpreter
for their organization (must have video set up in-contract for this option to appear).
You can access a video interpreter for American Sign Language and over 20 spoken
languages.
1. Enter in Additional Session Information, if applicable.
2. Select language.
3. Click “Start Session”.

Standard Reporting
Running a Report
To run and print reports for your account and PIN information, follow the instructions below:
1. Sign in to the Account Management main page.
2. Click on “Reports”.
3. Select the report you wish to view by clicking on its title. (Reports will automatically run for last full month.)
4. Change the report parameters to manipulate the content of your report data. Click the “View Report” button to
refresh the report content after you’ve adjusted the parameters.
a. Select the account from which you would like to pull data.
(Most users will only have one account). You may also run reports using all accessible accounts or only those
accounts which you choose to view by checking the box next to the account number in the drop down menu.)
b. Change the Start/End Dates for when your report data is being calculated by typing in the new dates or
clicking on the Calendar Icon to select a date.
c. The time zone setting will adjust all call time detail in the report. Reports will automatically run in the time
zone specifi ed in your profi le. (To change the time zone in your profi le, see the Edit Profi le section of this User
Guide.) You can also change this setting for each report individually by selecting a time zone from the drop
down menu.
(NOTE: Run Time defaults to the time zone set in the user profi le, however Run Time will change with the
selection of time zone in the report parameters.)
How Interpretation Should Be
Learn more at www.cyracom.com
© 2016 Copyright. CyraCom. All Rights Reserved.
7
Run, View, Export and
Print Real Time Business
Intelligence Reports
Users with Reporting permissions
can run, view, export and print real-
time reports for their organization.
You can view report data either
through standard reporting or call
analysis methods.
Run, View, Export and
Print Real Time Business
Intelligence Reports
Users with Reporting permissions
can run, view, export and print real-
time reports for their organization.
You can view report data either
through standard reporting or call
analysis methods.
Learn more at www.cyracom.com
© 2016 Copyright. CyraCom. All Rights Reserved.

How Interpretation Should Be
Learn more at www.cyracom.com
© 2016 Copyright. CyraCom. All Rights Reserved.
Modify Your User Profi le
1. After you sign in, you’ll arrive on the
Account Management home page. To begin
modifying your profi le information or change your
password, click the Profi le link.
2. Once on the Profi le page, you can view and
edit your personal information and settings to:
Export Your Data
Follow the directions to export your data into one of six available formats:
1. Open the report of your choice, adjust the parameters as needed, and click “Export”.
2. Select from the drop down menu the format into which you would like to export your data:
XML – Extensible Markup Language File - enables easy interchange of documents
CSV - Comma-Separated Variables - text fi les standard that can be imported into a database or Excel
TIFF - Tagged Image Format File - can be viewed by Windows Picture and fax viewer
PDF - Portable Document Format - opened by Adobe Acrobat Reader
Web Archive - MHTML Web Page Document - opened by any compatible web browser
Excel - Excel Worksheet - opened by Microsoft Excel
3. Save the fi le in the specifi ed format.
Report Viewer
Search for Text or Data
1. Open the report of your choice, adjust the parameters as needed, and click on the button.
2. While in the report view, type the text or data you are searching for into the text box located in the
parameter section of the report.
3. Click “Find” to fi nd the item(s). The selected text will be highlighted where it fi rst appears in the
report. Click “Next” to see the next location of that data in the content of your report.
Inserting Graphs into Other Documents
Complete the following steps to copy graphs into other documents:
1. Right-click on the graph in the report.
2. Select “Copy”.
3. Go to the document where you would like to insert the graph.
4. Go to the Edit menu.
5. Select “Paste Special”.
6. Choose to paste the object as Device Independent Bitmap.
7. Click “Okay”.
8
Learn more at www.cyracom.com
© 2016 Copyright. CyraCom. All Rights Reserved.

How Interpretation Should Be
Learn more at www.cyracom.com
© 2016 Copyright. CyraCom. All Rights Reserved.
Modify Your User Profi le
1. After you sign in, you’ll arrive on the
Account Management home page. To begin
modifying your profi le information or change your
password, click the Profi le link.
2. Once on the Profi le page, you can view and
edit your personal information and settings to:
Call Analysis
Call Analysis enables users to view call information with our innovative Microsoft® Silverlight-powered
Interactive Reporting tool. Users can analyze times, languages, tags and other information.
To access Call Analysis, click the link on the Account Management main page. Afterwards, enter your
account number to pull up your organization’s data and click the data you wish to view.
• Call Analysis enables users to view call information in a few diff erent ways:
• Users can search call data by language, PIN, tagging, call information, call start time, day of week,
time of day, or by utilizing the search box. In order to view and sort call data, click the box next to the
desired sorting option(s). Afterwards, call data will appear based upon the sorting option(s) chosen.
• Example: In order to search all Spanish language calls, click the Language section and then check the
box next to Spanish. Afterwards, all of your Spanish language calls for the time period will be listed.
Follow this method for all searches.
• Once call data appears, users can specify search criteria by clicking on individual boxes to narrow
down results. Simply click on the box you wish to view.
• Users can view call data by grid or graph by clicking on the appropriate icon
• Users can also zoom in or zoom out on data by dragging the + - Bar.
9
Learn more at www.cyracom.com
© 2016 Copyright. CyraCom. All Rights Reserved.

How Interpretation Should Be
Learn more at www.cyracom.com
© 2016 Copyright. CyraCom. All Rights Reserved.
Modify Your User Profi le
1. After you sign in, you’ll arrive on the
Account Management home page. To begin
modifying your profi le information or change your
password, click the Profi le link.
2. Once on the Profi le page, you can view and
edit your personal information and settings to:
Invoices
Invoicing permissions enable users to
view and pay paperless, eco-friendly
invoices.
To access Invoices, click the link on the Account
Management main page. Your current and
past invoices are displayed here. If you have
more than one customer number associated to
your profi le, you can enter alternate customer
numbers in the fi eld provided and your invoices
will appear.
Select the invoice you wish to view by clicking
on the invoice number. The invoice cover page
will appear in a separate window and can then
be exported or printed. To view the Invoice Detail
click on the hyperlinked Quantity number to
view invoice details including call date and time,
language, Interpreter ID, call length and call cost.
Pay Invoices Online
Select the invoice you wish to pay by checking the selected box and clicking Pay Online. Follow the steps to
choose your method of payment and fi ll in the corresponding fi elds, review the amount details for each invoice
you have selected, and verify that everything is correct and submit your payment.
10
Learn more at www.cyracom.com
© 2016 Copyright. CyraCom. All Rights Reserved.

How Interpretation Should Be
Learn more at www.cyracom.com
© 2016 Copyright. CyraCom. All Rights Reserved.
11
Modify Your User Profi le
1. After you sign in, you’ll arrive on the
Account Management home page. To begin
modifying your profi le information or change your
password, click the Profi le link.
2. Once on the Profi le page, you can view and
edit your personal information and settings to:

How Interpretation Should Be
Learn more at www.cyracom.com
© 2016 Copyright. CyraCom. All Rights Reserved.
12
Modify Your User Profi le
1. After you sign in, you’ll arrive on the
Account Management home page. To begin
modifying your profi le information or change your
password, click the Profi le link.
2. Once on the Profi le page, you can view and
edit your personal information and settings to:
Inbound Access Request
Inbound Access Controls enable users to request access to our inbound calling
platform, which enables LEP individuals to access an interpreter before calling your
organization.
To access the Inbound Access Request page, click Inbound Access Request on the
Account Management main page. Afterwards enter your information in the fi elds
provided and click Submit Request.

How Interpretation Should Be
Learn more at www.cyracom.com
© 2016 Copyright. CyraCom. All Rights Reserved.
13
Modify Your User Profi le
1. After you sign in, you’ll arrive on the
Account Management home page. To begin
modifying your profi le information or change your
password, click the Profi le link.
2. Once on the Profi le page, you can view and
edit your personal information and settings to:
Interpretation Request
Interpretation Request Controls enable you to submit an
interpretation request from the web.
To access the Interpretation Request page, click the Interpretation
Request link on the Account Management main page. Enter your
account and PIN numbers in the fi elds provided. Once logged in,
fi ll out the fi elds provided and click Request Interpretation.
Get an Interpreter
1. Select the proper account. If you only have one account number, it will
default and you will not see an account option.
2. Enter your PIN
3. Select a language.
4. Enter a callback number. You can choose to receive an interpretation call
on your mobile device or any other phone.
5. Fill out any other required call information (These fi elds are displayed
based on the PIN you entered).
6. Optionally, fi ll out any of the optional call information.
7. If all of the information you provided is valid, the Call button will be
enabled.
8. Press the Call button. If you requested a callback on your mobile device,
activate your speaker-phone once you receive the interpretation call, or
utilize the Additional Party feature to conference in another phone.
You can also submit an interpretation request on your Android, iPhone, iPod,
or iPad. Instructions on how to perform this operation and frequently asked
questions are listed in the sidebar and following.
Frequently
Asked Questions
What is a Callback Number?
The Callback Number is the
phone number that the
CyraCom system will dial.
The person who answers this
call will be connected to an
interpreter. Enter your mobile
phone number (iPhone,
Android) or an alternative
number for iPod, iPad
What is the purpose of
adding an Additional
Party (phone line)?
If you are not using a dual-
handset phone, you can add
another phone to facilitate
an interpretation session
without the need to pass
a receiver back and forth
or use speaker-phone.
Can I request a Callback
on a phone number which
requires an extension?
All phone numbers must
be 10 digits long.
Can I schedule a callback
for a specifi c time?
You can currently
only request an
immediate callback.
For additional information,
assistance, or for a
demonstration on how to
use the mobile application,
please contact your
account manager.

How Interpretation Should Be
Learn more at www.cyracom.com
© 2016 Copyright. CyraCom. All Rights Reserved.
Download
Search for “CyraCom” in the App Store
on your iOS device or the Android
Marketplace on your Android device.
Sign In
1. Requires email address and
password (can use same email
address and password as Account
Management) .
Call Menu | Session Settings
2. Choose account
If you only have one account, it
will be populated automatically.
3. Choose PIN
If you only have one PIN, it will be
populated automatically.
4. Choose call fi elds
If there are custom call fl ow
fi elds tied to an account/PIN
combination, those will appear
after selecting account and pin.
If there is only one account and
one pin and custom call fl ow
fi elds are tied to that account/
pin combination, those fi elds
will appear automatically.
Custom call fi elds can be
required and/or optional and
will be labeled as such.
5. Choose language
Video languages are identifi ed
with a camera icon.
Phone languages have no icon.
Languages can be easily found
by scrolling, using the letter
jump on the right side of the
screen, or by using the search
function at the top of the screen.
Call Menu | Voice Call
6. After entering all session
setting information, press
the “Voice Call” button.
7. You will be given an option for an
“Internet Call” or “Phone Callback”.
Choose “Internet Call” if you
wish to use VoIP to place
voice call (use data plan).
Choose “Phone Callback” if you
wish to use cell phone or regular
phone to place voice call.
8. If you choose “Internet Call”
Call will be placed.
Hold music and image
will be displayed.
Call can be canceled prior to being
connecting by pressing “Cancel”
or the red phone “End Call” icon.
Once call is connected you can
toggle speaker-phone on/off ,
toggle mute on/off , or end the call.
If you don’t see icons to toggle,
simply tap the screen to activate
the menu bar at the bottom
of your screen. After a short
period of time the menu bar
will hide itself automatically.
9. If you choose “Phone Callback”
You can choose a phone number
from your contacts list, a recently
used phone number, or you
can enter a new phone number
(Note that when selecting a
number using “Choose From
Contacts” that contains an
extension, the phone number
may not populate correctly).
Once a phone number is
chosen click “Send”.
Our system will call back
your desired number.
Call Menu | Video Call
After entering all session setting
information press “Video Call” button.
• “Please Wait” message will be
displayed while we connect
you to an interpreter.
• You can cancel the call prior
to being connected.
CyraCom Mobile App
14

How Interpretation Should Be
Learn more at www.cyracom.com
© 2016 Copyright. CyraCom. All Rights Reserved.
15
• Call can be placed as a voice
call instead while waiting to
be connected to interpreter.
Press the red phone “End Call”
icon and you will see two options
to fall back to voice call. Choose
“Internet Call” or “Phone Callback”.
• Call is connected to interpreter.
You can switch cameras, toggle
video on/off , toggle mute on/
off , toggle thumbnail, end call.
If you don’t see icons to toggle,
simply tap the screen to activate
the menu bar at the bottom of
your screen. After a short period of
time, the menu bar will hide itself
automatically.
During the call you can also
choose to fall back to voice
call. Press the red end call
icon and choose “Internet
Call” or “Phone Callback”.
• If call is not during supported
business hours, you will receive a
prompt stating “Sorry, you can’t use
Video Call at this time, please choose
Voice Call instead. Business hours for
[language name] [business hours]”.
History Menu | Call History
1. Recently placed calls will be
shown in your call history with
the following information:
Type of call
Length of call
Time of call
Date of call - calls grouped by date
Phone icon (voice calls)
Camera icon (video calls)
2. You can place a call from history
by selecting the desired call from
your history. The information
for that call will be populated
into the session settings
screen in the Call Menu.
3. You can delete a call by
swiping and pressing delete.
Settings Menu | Defaults
1. You can choose defaults for
account, PIN, and language.
2. Setting default account
If you only have one account you
will not have this option available.
If you have more than one
account, select “Default Account”.
Choose what account you
want as your default.
To clear default choose “Default
Account” and click the trash can
icon. Your default account will
be reset and you will be placed
back to the settings page.
3. Setting default PIN
If you only have one pin you will
not have this option available.
You need to set a default account
before you can select a default pin.
Once default account is
selected choose “Default PIN”.
Choose what PIN you
want as your default.
To clear default choose “Default
PIN” and click the trash can
icon. Your default PIN will be
reset and you will be placed
back to the settings page.
4. Setting default Language
Select “Default Language”.
Choose what language you
want as your default.
To clear default choose “Default
Language” and click the trash can
icon. Your default language will
be reset and you will be placed
back to the settings page.
Clear History
You can clear all items from your
history by clicking “Clear Call History”.
Sign Out
Press “Sign Out” to sign out
of the application.
Terms & Conditions
Click “Terms and Conditions”
to read content about our
Terms and Conditions.
About CyraCom
Click “About CyraCom” to read
content about CyraCom.
Also, application version
information is found here.
Privacy Policy
Click “Privacy Policy” to read
content about our Privacy Policy.
FAQ
Click “FAQ” to fi nd answers to some
frequently asked questions.
Additional Help
Please contact Client Services
at 1 (800) 481-3289,
at support@Cyracom.com, or your
account manager for additional help.
CyraCom Mobile App (Cont.)

How Interpretation Should Be
Learn more at www.cyracom.com
© 2016 Copyright. CyraCom. All Rights Reserved.
Modify Your User Profi le
1. After you sign in, you’ll arrive on the
Account Management home page. To begin
modifying your profi le information or change your
password, click the Profi le link.
2. Once on the Profi le page, you can view and
edit your personal information and settings to:
Document Library
Document Library enables you to fi nd important account-related
documents that your account manager has shared with you.
Contact CyraCom:
Phone: (800) 713-4950 | info@cyracom.com | www.cyracom.com
Mailing Address: CyraCom | 5780 North Swan Road | Tucson, AZ 85718
16
Learn more at www.cyracom.com
© 2016 Copyright. CyraCom. All Rights Reserved.
