
I
The Tracker Mini Notebook : Reference & Guide
Polyend
Tracker Mini
Manual
An Ofcial Reference for The Polyend Tracker Mini
Polyend Tracker Mini is a handheld version of
Polyend’s desktop Tracker. This is a modern
hardware implementation of a classic software
music application which emerged in the late
80’s as music making tools mainly on gaming
machines and later on personal computers. A
Tracker is a utility that assembles a linear
series of notes that typically triggers samples
and associated parameters. Unlike standard
digital audio workstations (DAW’s), Trackers
generally run top to bottom when playing
tracks. Trackers usually had a niche community
of followers and never reached the same height
of popularity as other DAW’s. Polyend Tracker
Mini reignites the interest and presents the
composition features of a Tracker into a
portable and immediate format. Don't be fooled
by this quirky programming style of music
making which may appear unusual, but does
provide a very powerful and creative approach
to production. Polyend Tracker Mini presents
this vintage application in a modern and stylish
handheld box with 8 sequenced tracks and a
variety of effects, MIDI and Audio In / Out and
multiple workow environments. With a small
form factor and rechargeable battery, Tracker
Mini is an ideal portable ‘all in one’ workstation.
The feature set is wide with some interestingly
creative functions. Tracker Mini isn't a particularly
difcult instrument to use but the unusual and
less familiar core concept and workow may
mean that getting started is a little confusing and
the learning curve is drawn out. This may be a
different twist on music production but hey, that’s
what makes it fun. This guide aims to help with
the speed up of learning and also to get the very
best from the device. As always the Synthdawg
notebook style allows for your notes to be added
and to make the guidebook personal for you. The
Tracker Mini journey is unusual, yet fun and at
the same time a powerful music making unit
giving some rewarding results. Enjoy.
Overview
5
Polyend Tracker Mini Manual
IV
Polyend Tracker Mini Manual
1

Overview
1
7
Polyend Tracker Mini Manual
6
Polyend Tracker Mini Manual
Overview
1
On / Off ButtonUSB Power Charge Input
USB-C to USB-A Cable Supplied
Line In Line Out MIDI In MIDI Out
Stereo audio output also
serves as headphone out.
Micro SD Card Slot.
Pins facing to the front panel.
16GB Micro SD Card & Adapter Supplied
3.5mm Male Stereo TRS Jack
to 2 x 6.3mm TR Mono Female.
Adapter supplied.
3.5mm Jack to 5 Pin MIDI.
Adapter (Type B) supplied
1.1 How to Use This Notebook
Sections are laid out to cover the full workow with walkthroughs, step by
step guides and tips. Some pages carry a wide margin and some are
intentionally blank enabling you to make your own notes.
Control conventions.
(Enter)
D-Pad for navigation options are shown with rounded parentheses. These
represent the 5 physical direction buttons. These include, (Up), (Down),
(Right), (Left) as well as the central (Enter) button.
[+] / [-]
The Master [+] & [-] buttons navigate and for some parameters adjust it’s
values. The outer buttons make changes in larger increments. Also used to
adjust the master volume level.
[Function]
Square parentheses contain general functions that are selectable by one of
the other 15 physically dedicated buttons - either as a primary or secondary
function. Examples are [Rec], [Play], [Shift]. .
When using the [Menu] button, the pop-up menu will open while the button
is held. Highlight the specic menu option by navigating with the D-Pad
Navigation buttons while holding [Menu]. Options with multiple pages are
shown by the dots underneath the option text. The currently highlighted
option is selected when the [Menu] button is released.
[Function] + [Option]
Functions which require multiple button selections simultaneously are
shown with a + symbol between each required button. An example is the
[Shift] + [Copy] command.
[Dynamic Screen Key]
The 8 dynamic screen buttons located directly under the display will be
written using italic text. The actual function that each button serves will
change depending on the current context. The function it serves will be
labelled on the screen label above each button on the device. Currently
unavailable options will show on the screen as dimmed text. Dynamic
screen key examples include [Create Project], [Up] or [Down] options.
1.2 Hardware Overview
Your Notes Can be written here Here
Did you know?
Music Trackers emerged
in the late 1980’s on
gaming computers?
130 mm
170 mm
20 mm
NOTES
Master Volume
+
-
+
-

9
Polyend Tracker Mini Manual
8
Polyend Tracker Mini Manual
LCD Display
5 Inch, LCD TFT 800 x 480 Display.
Screen Buttons
Dynamic [Screen buttons] are dependant on the
function displayed above each button.
Dedicated Note Button
Selection of the [Note] element of a step.
Dedicated Instrument Button
Selection of the [Instrument] for a step.
Dedicated FX1 Button
Effect selection for [FX1] of a step.
Function Buttons
Assignable function buttons. Default: 1 - Pattern,
2 - Inst Automation, 3 - Sample Playback, 4 - Master.
Menu Button
Hold to open the menu. Navigate to highlight a selection
from the available options. Release to select.
Play Button
Plays when pressing [Play] the pattern or song. Pressing
again stops playback. Play again restarts.
Insert / Home Button
Pressing [Insert] will insert. Pressing [Shift] + [Insert] will
return ‘home’, to the top of the pattern.
Rec Button
Pressing [Rec] will toggle the record mode on or off for
editing patterns and perform settings.
D-Pad Navigator Buttons
Four navigation pad buttons (Up), (Down), (Left), (Right)
and one (Enter). Manoeuvre through the grid and options.
Dedicated FX2 Button
Effect selection for [FX2] of a step.
Master [+] / [-] Buttons - Course
Adjusts the master volume +/- in large increments. Also
navigates and adjusts values within certain menus.
Microphone
Internal microphone.
Master [+] / [-] Buttons - Fine
Increases the master volume +/- in ne increments.
Also navigates and adjusts values within certain menus.
Copy Button
Pressing [Copy] will copy the selected item.
Use [Shift] + [Copy] to paste any copied item.
Delete Button
Pressing [Delete] will reset or step back.
[Shift] + [Delete] will backspace delete the selected item.
Shift Button
Pressing [Shift] + Another button will select its
secondary function.
Overview
1
Overview
1
Note Instr
FX1
FX2
Play Rec
Master Volume
Insert Menu
Delete Copy
Shift
Line In MIDI InLine Out MIDI Out
21 3 4
+
-
+
-
Master Volume
1
5
4
10
15
5
7
15 16
1817
9 10
11 12
13 14
6
11
16
16
7
12
17
18
8
13
9
14
8
6
4
2
2
3
3
1
NOTES
1.3 Start Up
Tracker Mini is powered from the an internal rechargeable battery which is
charged using the supplied USB cable and charger. When restarting
Tracker Mini the previously open project will be be re-opened.
▌ POWERING ON / OFF TRACKER MINI
1. To recharge Tracker Mini, connect the supplied USB-C Mains cable
between Tracker Mini and the supplied USB plug to charge the unit.
Once charged Tracker Mini will operate without the USB power supply
being connected.
2. Ensure the SD Card is installed correctly for Tracker Mini to operate.
Pins should face up towards the front panel.
3. To power up, hold the small power on/off button located on the top right
(looking from the front) for 1 second. Start up will open the previously
opened project.
4. To power off, press and hold the small power button located on the top
right (looking from the top) until the timer bar ends. Tracker Mini will
then power off.
5. To check battery power charge when the unit is off, press quickly the
power button. The battery indicator will display for a short period to
indicate the charging state. The battery state is also displayed if the
power cable is connected while powered off.
The charging supply is 5V, 2A from the supplied mains to USB adapter.
Press the On/Off Button to Power Up
Hold the On/Off Button to Power Down

11
Polyend Tracker Mini Manual
10
Polyend Tracker Mini Manual
1.4 Generic Button & Control Functions.
There are a number of button commands that operate generically
throughout Tracker Mini. These are applied in a variety of situations.
Main Menu Browsing
Typically the [Menu] Button is held while navigating the main menu. The
navigation can be performed by various button combinations.
+
-
+
-
Hold
Release
(Up)
(Down)
(Left) (Right)
Up button scrolls one row up the order.
Hold [Menu] button throughout the navigation process.
The menu item is selected when [Menu] button is released.
+ Scrolls multiple steps in the menu.
Left button scrolls one column left.
Right button scrolls one column right.
Down button scrolls one row down the order.
- Scrolls one item down the order.
+ Scrolls one item up the order.
- Scrolls multiple items down the order.
NOTES
Overview
1
Overview
1
NOTES
Menu
Menu
Pattern
Song
Perform
Sample
Playback
File
Sample
Recorder
Instrument
Parameters
Sample
Loader
Sample
Editor
Master
Config
Games
1.5 Generic Parameter Editing.
Pages may contain parameters and functions which once selected can be
adjusted in value. These are applied in a variety of situations.
Parameter Editing
A page will need to be selected which contains the parameters to edit. For
example the ‘Master’ page contains a series of adjustable settings. The
highlighted and selected parameter will be indicated with a red bounding
box. It is this parameter that will be changed when using the D-Pad
Navigator and +/- buttons.
Within xed page menu options, the D-Pad navigation buttons and +/-
master buttons will scroll through the available options. The option is also
automatically selected when it is highlighted. The respective screen button
may also cycle through menu options when pressed repeatedly in pages.
* Inner +/- and D-Pad Up / down may operate in similar fashion in some menu and value setting options
+
-
+
-
(Up)
(Down)
(Left) (Right)
Up button increases parameter value.
D-Pad Navigation
Master +/- Buttons
D-Pad Menu Navigation
Menu Page
Master +/- Buttons
[+] Increases value in larger increments.
Left button navigates parameter selection.
Right button navigates parameter selection.
Down button decreases parameter value.
[-] Decreases value, same as (Down) Button*.
[+] Increases value, same as (Up) Button*.
[-] Decreases value in larger increments.
The central navigation button typically acts as a ‘select’ or ‘enter’ button

13
Polyend Tracker Mini Manual
12
Polyend Tracker Mini Manual
1.6 Functions Buttons.
There are 4 dedicated function buttons which allow quick access to 8 pre-
dened pages. These are numbered 1 - 4 for the rst 4 functions and also
have an additional set of 4 functions by using [Shift]. These function buttons
are assignable and can be recongured to a range of page options but it is
recommended to start with the defaults in order to build your workow.
Using the assignable Function Buttons
Tap one of the Function buttons or use [Shift] + Tap, to immediately access
the dened page. The default pages that are assigned are illustrated below.
There are 12 available functions which can be assigned to the Function
buttons with up to 8 slots available, 2 for each button. Other than those
assigned by default, the ‘Sample Recorder’, ‘Sample Editor’, ‘Perform’ and
‘Games’ functions can also be assigned in place of the default settings. The
process of binding a page to a button is explained in the conguration
settings section.
The processes described in this manual will assume the default function
button assignments as stated here. The [Menu] options are an alternate
method of selecting a specic function page.
Pattern
Song
Instrument
Parameters
Sample
Loader
Sample
Playback
File
Press [1] - [4] to Select a Dened Function Page
Hold [Shift] + [1] - [4] to Select a Dened Function Page
Master
Cong
The main page is selected when pressing the function buttons. If multiple pages exist,
continue to tap the respective function button to cycle through the available pages.
Shift
21 3 4
NOTES
Overview
1
Overview
1
NOTES
1.7 First Steps with Factory Projects.
At rst glance, operation of Tracker Mini appears unusual. However the
workow is quite simple once a few fundamentals are clearly understood.
The quick start button commands shown here can be applied with the
factory projects to get familiar with the essential processes to help speed
up the learning curve. Ensure the SD Card is installed.
▌ OPENING A PROJECT
1. When powering on, the previous project will be restored. Projects can
be changed or new ones created. Tracker Mini will only be able to view
up to 100 Projects per folder although user folders can be created.
2. Hold [Shift] + Function [3] to perform a quick selection of the ‘le’
function page. This assumes the default ‘File’ assignment for button 3.
3. Alternatively use the menu navigation to access the le menu.
• Hold [Menu] + Press (Up), (Down), (Left) or (Right) to scroll to
highlight the ‘File’ option. The red bounding box will indicate the
highlighted item.
• Release the [Menu] button. Releasing the button will select and
open the highlighted ‘File’ option.
4. Press [Open] - 2
nd
screen button from the left. The list of available
projects will be displayed on the screen.
5. Press (Up) or (Down) to navigate the list of project options. Alternatively
press 1
st
screen button for [Up] or 2
nd
screen button for [Down] to scroll
the list selection. The highlighted option will show with a bounding box.
6. With the desired project highlighted, Press [Open] - 8
th
/ last screen
button to open the project.
7. If the currently active project has been edited a prompt, ‘Do you want to
save the changes to xxxx’ will be presented. Press [Save] - 8
th
/ last
screen button to save or [Don’t Save] - 7
th
screen button to proceed
without saving. The option to cancel is also presented.
8. Although not essential, it is usually good practice to select and display
the pattern page at this stage. If required, Function key [1] is assigned
by default to display the pattern page or navigate within the [Menu].

15
Polyend Tracker Mini Manual
14
Polyend Tracker Mini Manual
The master volume may be set loud when initially starting up. Care should
be taken when playing songs and especially if listening with headphones. It
is advised to rstly set the master volume lower before listening into a song
▌ QUICK ADJUSTMENT OF THE MASTER VOLUME.
1. Hold [Shift] + [+] / [-] Buttons. The upper and lower +/- buttons change
in larger increments and the central +/- in ne increments.
▌ GENERAL ADJUSTMENT OF THE MASTER VOLUME.
1. Hold Function [4] + Press [-] to reduce the master volume. Use the
outer buttons for larger increments in volume. This assumes the default
assignment of button [4] to the Master function pages.
2. To reduce in smaller increments:-
• Hold [4] + Press [-] inner button.
or
• Hold [4] + Press (Down)
3. Hold Function [4] + Press [+] to increase the master volume. Use the
outer [+] button for larger increments in volume. This assumes the
default assignment of button [4] to the Master function pages.
4. To increase in smaller increments:-
• Hold [4] + Press [+] inner button.
or
• Hold [4] + Press (Up)
5. The Master page can also be selected from the Menu options. Hold
[Menu] and use the (Left), (Right), (Up) and (Down) D-Pad buttons.
6. The Master Volume, as displayed on the left side bar indicator and can
be adjusted between -51.5dB to +12dB.
▌ PLAYING A PATTERN FROM THE PATTERN OR ANY GENERIC PAGE.
1. Ensure a project with patterns is loaded.
2. Although not essential, it is usually good practice to display the pattern
page at this stage. If required, Press Function [1] to display the pattern
page, this button is assigned as default. Pattern page can also be
selected in the [Menu] options.
3. Press [Play] to play the currently active pattern. Note that this process
will only play and loop the currently selected pattern and not the entire
song, unless the Song page is on display when pressing [Play].
4. Press [Play] to stop playback on the current step.
• Pressing [Play] again restarts from the pattern beginning.
• Pressing [Shift] + [Play] will restart playback from the current
paused position.
• Press [Shift] + [Insert] when play is stopped to reset the playhead to
the start position without commencing play.
▌ PLAYING A SONG FROM SONG PAGE.
1. Select song mode, Hold [Shift] + [1] where this is the default Function
button assigned. This will be applicable only when a song structure has
previously been created. Songs are typically setup in factory projects.
2. Press [Play] to play from the currently active song row. Playback in the
Song page is different to the generic pattern play from within other page
views. Each row will represent a series of patterns across the 8 tracks
and will play the rows top to bottom.
3. Press [Play] to stop playback on the current row.
• Pressing [Play] again restarts playback starting from the beginning
of the current row.
• Pressing [Shift] + [Play] will toggle loop playback for the current row
on or off. If playback is in a stopped state, playback will start at the
beginning of the current row.
• Press [Shift] + [Insert] when play is stopped to reset the playhead to
the start of the song without commencing play.
NOTES
Overview
1
Overview
1
NOTES

17
Polyend Tracker Mini Manual
16
Polyend Tracker Mini Manual
NOTES
Overview
1
Overview
1
NOTES
1.9 QWERTY Keyboard.
Some pages will require text editing for naming tracks or projects etc. The
same functionality applies whenever the Alpha numeric pop-up editor is
used. The screen will display the QWERTY keys and the text to edit. The
screen buttons are used to enter, cancel or save while the D-Pad Navigator
buttons perform the editing. Auto naming is also an option.
The characters and the title can be selected by using (Up), (Down), (Left) or
(Right) to navigate and Press the centre D-Pad Navigator button or Press [Insert]
or Press [Enter] - 1
st
Screen Button to select and add the selected character.
Option to [Cancel] - 7
th
from Left Screen Button is also possible.
Save when complete using [Save] - 8
th
Screen Button to save the name.
Enter Auto name RenameCancel
The screen will display the keys laid out in a QWERTY formation.
The Tracker Mini buttons operate in the naming editor screen when presented:-
• D-Pad (Up), (Down), (Left), (Right) will navigate the selection across the
keyboard. Will also navigate left / right in the text of the name when the
name is highlighted .
• D-Pad Navigator (Centre) button or [Insert] will insert the currently
highlighted character into the name at the cursor position. Also a screen
button option.
• [Delete] to delete characters and use with [Shift] to backspace in the name
from the text cursor position.
Note Instr
FX1
FX2
Play Rec
Insert Menu
Delete Copy
21 3 4
1
q
a
z
4
r
f
v
7
u
j
m
0
p - +
@
2
w
s
x
5
t
g
b
8
i
k
Backspace
Caps Lock
Space
3
e
d
c
6
y
h
n
9
o
l
1.8 Introduction to Tracks
Tracker Mini has 8 tracks, each of which can be congured with unique
patterns made up of one or more instrument combinations. Tracks are
structural elements and the track mixer is found in the master section.
Some specic track commands are also available in the pattern pages, for
example muting tracks. By default 4 tracks are displayed for patterns and
the pattern page is assigned to Function button [1].
▌NAVIGATING TRACKS IN THE PATTERN PAGE
1. Press Function [1] to open the pattern page. 4 Tracks are displayed by
default. The pattern page can also be selected in the [Menu].
2. Press (Left) or (Right) to navigate across all 8 tracks. The green or red
highlighted step will anchor the navigation point on the track columns.
▌MUTING TRACKS IN PATTERN PAGE
1. Press [1] to ensure pattern page is selected. 4 Tracks are displayed by
default. The pattern page can also be selected in the [Menu].
2. To mute / unmute, Press [Shift] + [Screen] button for the respective
track. All 8 tracks are presented by the screen buttons when holding the
shift button. Muted tracks are displayed with the screen keys dimmed.
3. Muting will be applied immediately the screen button is pressed. This is
different behaviour than in the track mixer, where muting is applied
when the mute button is released.
▌CHANGING TRACK VIEW FOR THE PATTERN PAGE
• 8 Tracks with only Note parameter: Press [1] + [Note].
• 8 Tracks with Instrument parameter: Press [1] + [Instrument].
• 8 Tracks with only FX1 parameter: Press [1] + [FX1].
• 8 Tracks with only FX2 parameter: Press [1] + [FX2].
• 8 Tracks with 2 selected parameters: Press [1] + [P1] + [P2], where
‘P1’ and ‘P2’ are 2 from; [Note], [Instrument], [FX1], FX2].
• Revert to 4 track mode, Press [1].
(Up) (Down)
(Enter)(Left) (Right)

19
Polyend Tracker Mini Manual
18
Polyend Tracker Mini Manual
1.11 Example Workow.
The workow adopted with Tracker Mini will of course develop to t your personal approach. To get
started a typical journey is described below.
NOTES
Overview
1
Overview
1
S
E
1
2
3
4
5
6
7
8
10
11
12
13
15
14
9
Create & Save New Project
Set Project Tempo
Load Samples to SD Card
Sample Audio into Tracker Mini
Select Audio Sample for Project
Create Instruments
Create Pattern
Add Steps and Develop Pattern
Add Master Effects
Mix the Tracks
Congure Performance Options
Render Audio Out
Housekeeping
Save Project
Arrange Patterns into a Song
The SD Card must be installed to start a new
project and use Tracker Mini. Projects are stored
on the SD Card. Create a new project
Project Tempo 40-800 BPM. FX can apply
variations as the patterns develop.
Global settings usually setup or
performed once before or at the
start of a new project.
Instruments are created by
conguring samples with
additional settings and features.
Steps are assembled to create
beats and melodies in a
number of patterns.
Patterns arranged into a song.
Master effects can be adjusted
as can a mix of all 8 tracks to
nalise the complete song
production.
Performance settings can be
applied, ideal for a live set.
The project can be saved (is in
fact auto saved) and audio
rendered if required by bouncing
to audio stems.
Project
Instruments
Pattern
Song
Master & Mix
Perform
Output
Option to manually load uncompressed 44.1KHz,
16bit WAV samples to the SD card from PC or
Mac and accessible to Tracker Mini projects.
Also audio can be recorded as monophonic les
and stored in the audio pool.
Samples can be stored on the SD Card and then
loaded into the project audio pool. Up to 48
instruments can be created in a project.
Instruments are created using a sample as the
source. Editing of parameters are applied.
Example instruments include a wavetable or
granular synth or a sample of sliced beats.
An empty pattern can be created by setting the
tracks, length etc. A project can holds up to 255
patterns. Multiple patterns can be created.
An empty pattern is populated with steps. A step
contains a Note, Instrument and has 2 FX slots.
Assemble steps by track into beats, bass-lines,
leads, pads etc.
While effects can be added to instruments, a
master effect section handles the combined
audio at the output stage. Effects include a
limiter, space, bass boost and EQ
Mix and balance the 8 tracks.
Perform mode allows conguration and live
performances with dened control over specic
elements. Adds variety and improvised creativity.
Render out audio stems to mix and master further
in DAWs or to share with others maybe to create
remixes.
Although projects are auto-saved, it is always
good practice to manually save a nished
production. Maybe rename with ‘Save As’.
Yeah yeah…. The boring bit. But it will help as
projects develop to keep things tidy. Maybe delete
old projects or backup the SD Card.
A song is the arrangement of patterns into a
single track. This is the arrangement of a
complete song where patterns are played in a
dened order.
ACTION COMMENTSPROCESS
1.10 Page Layout.
Each page will display the information and control options for the selected
function. While this may be unique to the context there are some common
features and navigation principles that apply across all (or most) of the
generic pages of Tracker Mini.
C3 04 ---- P-20
D3 04 ---- P-10
D3 04 ---- P-10
D3 04 ---- P-10
C4 12 ---- A 4
C4 12 ---- A 4
Pattern
1
1 1
2
C5 40 ---- P-25
C5 40 ----
C5 40 ---- P-25
-- --- ---- ----
-- --- ---- ----
-- --- ---- ----
-- --- ---- ---- -- --- ---- ---- -- --- ---- ---- -- --- ---- ----
-- --- ---- ----
-- --- ---- ----
P 25
-- --- ---- ---- -- --- ---- ----
-- --- ---- ---- -- --- ---- ---- -- --- ---- ---- -- --- ---- ----
-- --- ---- ---- -- --- ---- ---- -- --- ---- ---- -- --- ---- ----
-- --- ---- ---- -- --- ---- ---- -- --- ---- ----
-- --- ---- ---- -- --- ---- ---- -- --- ---- ---- -- --- ---- ----
-- --- ---- ---- -- --- ---- ---- -- --- ---- ----
-- --- ---- ---- -- --- ---- ---- -- --- ---- ---- -- --- ---- ----
-- --- ---- ---- -- --- ---- ---- -- --- ---- ----
-- --- ---- ---- -- --- ---- ---- -- --- ---- ---- -- --- ---- ----
-- --- ---- ---- -- --- ---- ---- -- --- ---- ---- -- --- ---- ----
-- --- ---- ---- -- --- ---- ---- -- --- ---- ---- -- --- ---- ----
C5 02 ---- P-20
C5 40 ---- H-25 C5 40 ---- P-20
2
3 3
4 4
5 5
6 6
7 7
9 9
11 11
13 13
15 15
8 8
10 10
12 12
14 14
Length
32
Step Jump
0
Fill Preview Undo Redo More
Track 2 Track 3 Track 4Track 1
Pattern 1 0m:00s P1.008 1.Analog 3 18p
Pattern
1
-- --- ---- ---- -- --- ---- ---- -- --- ---- ---- -- --- ---- ----
15 15
Length
32
Step Jump
0
Fill Preview Undo Redo More
1 1
C5 40 ---- P-25 C5 40 ---- H-25 C5 40 ---- P-20 C5 40 ---- P-25
Track 2 Track 3 Track 4Track 1
Pattern 1 0m:00s P1.008 1.Analog 3 18p
Central area contains specic
information for the selected function
and settings.
Function / Page currently
selected and represented on the
page. Where multiple pages exist
this will also be shown i.e. 2/3
Time position in Minutes &
Seconds of the current
playhead. This is total play time
not time in a pattern or song
Current Pattern and
Step position
Transport status
Physical Screen Buttons
represent the command displayed
on the screen directly above.
Up to 8 selectable context based
options. These can be menu options,
navigation commands or blank.
The button underscore colours represent the mode in which the command is available. Options
underscored in red are available only in [Rec] mode. Green options are available generically.
Options are dimmed when not currently
available. For example, these may need
an item to be selected rst.
Selected instrument displayed,
although not shown on all pages.
This shows current project when in
the ‘File’ menu page.

21
Polyend Tracker Mini Manual
20
Polyend Tracker Mini Manual
Overview
1
Overview
1
Function Action
Tracker Mini Buttons
Description
Master Master Volume Hold [Shift] + [+] or [-]
Adjusts the master output. The +/- offer ne and course
adjustment options. Also use (Up) or (Down)
General General Navigation (Up), (Down), (Right), (Left) D-Pad, generally navigate, scroll menu selections and options
General Copy [Copy]
Depending on the context, will copy and paste between
functions ie copy patterns. Use [Shift] + [Copy] to Paste.
General Delete [Delete]
Depending on the context, will delete. Will reset any selected
parameter to its default state. Also use with shift to backspace
Pattern Pattern Mode Page [1]
Selects the pattern mode page. Button 1 is by default assigned
to pattern page in the congurable page settings.
Pattern Play Pattern [Play]
Plays the pattern from the start. Stops / Pauses the pattern if it
is already playing. Restarts play if paused mid pattern.
Pattern Continue Play [Shift] + [Play] Restarts play of the pattern from the currently paused position
Pattern 8 Track Note View [1] + [Note]
Display all 8 tracks with only notes instead of default 4 tracks.
2 elements can be displayed i.e. + [FX1], [FX2], [Instrument]
Pattern 8 Track Inst View [1] + [Instrument]
Display 8 tracks with only instrument instead of 4 tracks.
2 elements can be displayed i.e. + [FX1], [FX2], [Note]
Pattern 8 Track FX View [1] + [FX1] or [FX2]
Display all 8 tracks with only FX instead of default 4 tracks.
2 elements can be displayed i.e. + [Note], [Instrument]
Pattern 4 Track View [1] Restores default 4 tracks when viewing 8 tracks
Pattern Select Pattern [1] + (Up), (Down) or [+] / [-] Select Pattern by number.
Pattern Sequential change [1] + (Left) or (Right)
When playing, selects a new pattern to cue playback to start
when the current pattern ends. Pattern blinks red.
Pattern Sequential change [Pattern] + (Left) or (Right)
When playing, selects a new pattern to cue playback to start
when the current pattern ends. Pattern blinks red.
Pattern Immediate change [1] + (Up) (Down) or [+] / [-]
When playing, selects a new pattern to trigger and starts
playback in sync, immediately.
Pattern Immediate change [Pattern] + (Up) (Down) or [+] / [-]
When playing, selects a new pattern to trigger a start
playback, in sync, immediately.
Pattern Multiple Step Select
[Shift] + (Up) (Down) (Left) (Right)
Will select a range of multiple steps for editing collectively.
Pattern Select Top Row [Shift] + [Insert] When stopped, resets the playhead to the top row start.
Pattern Multiple Step Select [Shift] + (Up)
When on the rst step
Will select all steps for the currently selected track
Pattern Multiple Step Select [Shift] + (Up) (Up)
When on the rst step
Will select all steps for all of the tracks
Pattern Mute Tracks [Shift] + [Screen] Button
Screen button 1 - 8 will toggle mute or unmute for tracks 1 - 8
respectively when in pattern mode page.
Pattern
Parameter Selection
Tap Dedicated Param Button
Will lock the selection of the Note, Instrument, FX1 or FX2
parameter when editing or navigating.
Pattern Arm / Disarm [Shift] + [Rec] + [Screen] Button
Arms or Disarms the track for recording. Disarmed tracks will
not allow recording. Screen buttons represent tracks.
Pattern Live Rec Start [Shift] + [Rec]
Start Live Recording. Requires an external keyboard to record
notes into the pattern.
Pattern Live Rec > Play [Rec]
When live recording, pressing [Rec] will continue to play but
exit recording mode.
Function Action
Tracker Mini Buttons
Description
Song Mode Song Press [Shift] + [1] Pressing [Song] switches to song page.
Song Mode Song Hold [Shift] + [1] long press
Holding buttons will temporarily display song page from within
another page i.e. from Pattern page. Release [1] before [Shift]
Song Mode Select Row Press (Up) (Down) or [+] / [-] Navigate the song row slot / pattern. One row can be selected
Song Mode Select Top Row [Shift] + [Insert] When stopped, resets playhead to the top row start.
Song Mode Play Song [Play] Plays the song from the start of the selected slot / pattern row.
Song Mode Stop Song [Play]
Stops / Pauses the song playback. Pressing Play again will
restart in the song at the start of the current slot / pattern row.
Song Mode Loop Row [Shift] + [Play]
Loops playback on the current song slow / pattern row.
Essentially plays the selected pattern.
Song Mode Tempo
Hold [Tempo] + (Up) (Down)
Adjust project tempo, 40 - 800 BPM in 1 BPM increments
Song Mode Tempo
Hold [Tempo] + [+] / [-]
Adjust project tempo, 40 - 800 BPM in 10 BPM increments
when using outer +/- and 1 BPM increments with inner +/-
Perform Perform Use Menu to select perform
Perform Play [Play] Plays current pattern on loop. Also stops playback.
Perform Play [Shift] + [Play] Plays the song on loop. Also toggles pattern / song playback.
Perform Edit [Rec] Edit mode selected. Navigation and slot values in red.
Perform Navigate Column (Left) or (Right) Selects one of the 12 effect slot columns.
Perform Select [Track x] Selects tracks to apply any triggered effect. Track labelled red.
Perform Trigger effect [+], [+], [-], [-]
Triggers, while held, one of the effect value slots in perform,
green mode. In Rec mode this will allow editing of the values.
Perform In Rec Mode (Up), (Down) Change performance effect in the current slot
Perform In Rec Mode [Shift] + (Left) or (Right) Swap effects between slots
Perform In Rec Mode [+] / [-] + (Up) or (Down) Edit the effect value offset for the respective effect and row
Perform Remix
[Track x] + (Up) (Down) or [+] / [-]
Load a new pattern for the selected track(s). Plays
immediately. Live remix mode.
Perform Remix [Track x] + (Left) or (Right)
Arm a new pattern for the selected track(s) once the current
pattern completes. Live remix mode.
Perform Mute / Unmute [Shift] + [Track x] Mute or unmute the selected track
1.12 Quick Reference Commands
Assumes default assignment of function buttons [1] to [4]. D-Pad Navigation referenced in rounded () parenthesis. Dynamic screen keys in italic.
1.12 Quick Reference Commands
Assumes default assignment of function buttons [1] to [4]. D-Pad Navigation referenced in rounded () parenthesis. Dynamic screen keys in italic.

Make no mistake, Tracker Mini is a unique yet
comprehensive device. There are so many
features that are less obvious to producers
more familiar with more traditional sequencers
and DAW’s. The overall structure of Tracker
Mini can seem at rst glance, confusing.
However spending a little time to understand
the overall architecture and its terminology will
set a good starting foundation. For this reason
there are no apologies for taking time to get
intimate with the architecture of the overall
device and bringing this summary upfront in
this guide. Getting a solid understanding and
awareness of the Tracker Mini’s structure will
help enormously in getting to grips later with
the rest of the device. The two basic elements
needed is Tracker Mini itself (of course) fully
charged and the correctly congured Micro SD
Card which is integral to Tracker Mini’s
operation. While more in depth details for
specic topics are covered in the following
sections of this notebook, the overall foundation
and structure is laid out in this chapter. The
hierarchical structure and organisation of data
and functions such as Projects, Patterns and
Steps are summarised collectively and how they
work together. It is therefore worth the
investment of time and focus in understanding
the architectural hierarchy. Developing a
fundamental workow and efcient process will
help get the most out of Tracker Mini’s features.
Architecture
23
Polyend Tracker Mini Manual
22
Polyend Tracker Mini Manual
NOTES
2

Architecture
2
25
Polyend Tracker Mini Manual
24
Polyend Tracker Mini Manual
2.1 Glossary of Terms
While you may think this should be hidden at the back of this book, understanding the terminology
associated with these topics and especially the Tracker Mini will help unlock it’s power and
performance. It makes sense to become familiar early with the essential terms to help embed into
your workow
Architecture
2
Beta: Pre-release software versions used for
testing purposes. Polyend often release beta
versions of Tracker Mini.
Effects: Refers to the master effects used across
the overall output audio.
Envelope: An envelope is used to modulate and
shape parameters and audio over time. Tracker
Mini has Envelopes which can be assigned
FX: A number of assignable effects are provided to
steps in the pattern. These are not traditional style
effects but more like mini-applications and
automation controls.
Instrument: In Tracker Mini, an instrument starts
with a sample as its source. Various parameter
congurations can be applied including wavetable
or granular synth applications to operate as the
sound within a step. MIDI instruments to set
channel and settings also can be congured.
Instrument List: Also called an instrument pool or
audio pool. This is the internal memory. Samples
and instruments are loaded here to be accessed
by patterns.
LFO: Low frequency oscillator which is not
specically used for sound generation but to
modulate parameters for sound design and
movement. Tracker Mini has LFO’s which can be
assigned.
Looping: The process of replaying audio or a
pattern continuously in a dened cycle e.g. start to
end then start to end.
MIDI: MIDI stands for Musical Instrument Digital
Interface and is a standard protocol used for
communicating between equipment. MIDI is
normally applied using 5 Pin MIDI DIN connections
which in some cases (i.e. with Tracker Mini) are
interfaced via a MIDI 5 Pin to 3.5mm MIDI Dongle.
Mod File. Legacy tracker les such as .mod and .it
were used in classic trackers. Not compatible with
current Polyend Tracker OS versions.
Mute: Muting offers variations that can be created
by silencing the play out of tracks and patterns for
sound design purposes and especially when
playing live sets.
Note: A musical note assigned to a samples pitch
and assigned to track steps to create a melody or
percussive beat.
OS: Operating System is the core software that
makes Tracker Mini work. It handles how it
operates and periodic updates from Polyend bring
new features into use.
Parameter: The individual value of a specic
function or control element. A parameter can be
adjusted to affect a sound or a functions operation.
Pattern: This is the backbone and core of a
Tracker Mini sequence and contains all steps in a
sequence. Patterns control how steps are played.
Perform: A mode in Tracker Mini that provides an
environment with 12 selectable effects which can
be triggered live and during improvisations.
Power Bank. A portable rechargeable battery
devices used to power or recharge portable
equipment.
Project: The overall structural container for
patterns, samples, instruments etc. A project
should always be loaded to work with Tracker Mini.
RAM Memory: While Tracker Mini operates with
the Micro SD card, on board RAM memory is also
used for instruments and samples in the project.
Render: This is like internal sampling. To internally
capture patterns, tracks or songs into an
exportable audio sample. Sometimes render is
also called ‘bounce’ in the producer community.
Reset: The process of restarting Tracker Mini by
loading a random OS rmware.
Sample: The basic audio element recorded or
loaded into Tracker Mini and used to create an
instrument.
Sampling: The act (and art) of recording and
capturing audio to be edited and creatively
assembled into a new musical composition.
SD Card: A storage device that is used in Tracker
Mini for holding data, samples, project etc. Tracker
Mini is supplied with a 16GB Micro SD Card.
Solo: The ability to select an individual track to play
alone and effectively mutes other tracks.
Song: A combination of tracks and patterns
combined and structured into a full arrangement.
Step: In Tracker Mini a step is the building block for
creating melodies and beats. Each step contains a
note, instrument and 2 FX slots per track and is
displayed in the track rows.
Track: Tracker Mini contains 8 tracks each which
controls a voice. Tracks are used for structuring the
sequencing of steps. These can be congured with
steps to play a variety of instruments and develop
a complete melody and beat across the 8 tracks.
Tracker: Tracker is a digital audio workstation for
music production. Trackers use a linear top to
bottom sequencing environment where elements
are programmed into lines of Tracker code.
Update: The process of installing the newest
rmware. This brings new features and xes bugs
associated with previous versions.

2.2 Tracker Mini Audio Structure
Architecture
2
27
Polyend Tracker Mini Manual
26
Polyend Tracker Mini Manual
Architecture
2
Track 1
Bit-crusher
Limiter
Overdrive
Space
Filter
Bass Boost
EQ
Saturation
Delay Reverb
Reverb
Send & Return
Delay
Send & Return
Mix & Pan
MIDI Engine &
Parameters
Instrument
Instrument
Instrument
FX
FX
FX
Sample
+
Wavetable Granular
Out Right
MIDI Out
Line in
MIDI In
Mic In
Out Left
Step
Mix
Note Instrument FX1 FX2
Step
Step
Track 8
Track 8
1
128
Project
Firmware Instruments Mod TrackerLog
Micro SD Card
Tracker Mini
Games Manual Projects
Samples
Project
Project
Pattern
Song
Master
Instrument Audio Engine
FX Applications
Sampler
A correctly formatted SD Card must be installed to
operate Tracker Mini. Card default folders shown.
Loaded Project
Maximum 255 Patterns per Project
Maximum 48 Instrument slots are available per Project
A variety of effects are selectable from the list of 29 FX.
E.g. G
E.g. T
E.g. m
….. 8 Tracks / Voices per Project …..
….. Max 128 Steps per Track …..
.…. .….
100 Projects are visible and accessible from within Tracker Mini.
More than 100 could be stored on the SD Card.
Track 1
Pattern
Pattern
Pattern
Pattern
Pattern
Pattern
2.3 SD Card Structure.
The Micro SD Card is an integral part of Tracker Mini and must be inserted
to operate correctly. An alert message is displayed if Tracker Mini is
powered up without an SD Card installed. It is important that the correct
format is applied to the Micro SD Card. This should be FAT32 with Master
Boot Record (MBR) Partitioning.
The default le structure will expand as different functions are used. For
example a snapshots folder is created when capturing screen images, also
export and recording folders created once these les are rstly generated.
Files and folders can be accessed with a PC or Mac. A USB adapter is
supplied with Tracker Mini.
Micro SD Can be connected to a
PC / Mac with the USB adapter.
NOTES
Root

Architecture
2
29
Polyend Tracker Mini Manual
28
Polyend Tracker Mini Manual
Architecture
2
Sub Folders
SD Card
/Root Directory
/Firmware
Default SD Card Structure
/Drum Kits
/Quick Start
/ProjectName
/FactoryPacks
Tracker Mini comes with 50 factory genre-based packs installed onto the SD Card.
/Instruments
/Samples
/Patterns
/Progressions
/Instrument Kits
/Synths
/Games
/Instruments
/Manual
/Mod
/Projects
/Samples
/TrackerLog
Polyend Tracker Mini_1.0.0.ptf
New OS versions can be located here to update Tracker Mini Mini
Contains xxx.pti instrument les in the sub-folders
1.jpg, 2.jpg, 3.jpg, 4.jpg, 5.jpg, 6.jpg, 7.jpg, 8.jpg
Contains project les located in sub-folders
Legacy .mod or .it Tracker les. May not exist on newer SD Cards
Sample Packs located in sub-folders
Project.mt
2.4 Internal Help & Tips.
Tracker Mini has a series of built in tips and instructions to help get started
with the functions and features. These are automatically available as text
hints which appear at various stages of navigating and manoeuvring
through the options and menus.
This ofcial manual and Q&A is available on the Polyend website. A limited
version of quick start is also available as the onboard manual.
▌VIEWING THE ONBOARD QUICK START
1. Hold [Shift] + Function [4] to open the conguration settings. The
secondary function [4] button by default is assigned to ‘Cong’
2. Navigate with the 1
st
and 2
nd
Screen Buttons to select the ‘Manual’. Also
the D-Pad Navigator buttons can be used.
3. In the middle page pane, Press the 4
th
or 5
th
Screen Buttons to navigate
to ‘Quick Start’.
4. Press [Enter], 6
th
Screen Button to select the options. The pop-up
window will appear.
5. Navigate pages, Press (Left) or 1
st
Screen button or (Right) or 8
th
Screen button. The [+] / [-] buttons also turn pages.
6. Select any other function button page to exit.
NOTES NOTES
Lo1.ptl

Architecture
2
31
Polyend Tracker Mini Manual
30
Polyend Tracker Mini Manual
Architecture
2
[Song]
[Perform]
[Master]
1/3 2/3 3/3
[Reverb]
[Delay]
[Limiter]
[EQ]
[Master] [Master]
2.5 Menu Page Map
As a quick guide to the page hierarchy in Tracker Mini the following
diagram illustrates the main pages accessed under the [Menu] option.
NOTES NOTES
Master Volume
+
-
+
-
[File]
[Cong]
[Sample Playback]
[Sample Editor]
[Sample Recorder]
[Pattern]
The Pattern page is the place where most time will be spent in the Tracker Mini workow
Project Settings, General, MIDI,
Metronome, Firmware, Manual, Credits
[Sample Loader]
[Export]
[Games]
[Select Effect]
[More]
[1]
[3]
[4]
[Shift] + [1]
[Shift] + [2]
[Shift] + [4]
[Shift] + [3]
Default quick page button 1 - 4 assignments are also shown under the page name.
Master Volume
+
-
+
-
Pattern
Song
Perform
Sample
Playback
File
Sample
Recorder
Instrument
Parameters
Sample
Loader
Sample
Editor
Master
Config
Games
Audio
1/2 2/2
[Instrument Parameters]
[Effects]
[Instrument Parameters]
[2]

Projects are the highest order structural
element in Tracker Mini. A project contains all
the elements of a full track. Think of each
project as a fully arranged song for an album
or a song for live set. Tracker Mini auto saves
projects which are stored on the installed Micro
SD Card. Although the card itself can contain
more, Tracker Mini will have up to 100 projects
visible and accessible. A project should be
opened for playback and editing. New projects
can also be created from scratch. Each project
contains a maximum of 255 patterns across 8
tracks. While patterns are the musical
composition functions, some elements, such
as the 48 available instruments are managed
at project level, and hence accessible to all
patterns. Projects are structural and
organisational functions more so than part of
the creative environment but nevertheless
serve an important purpose in the Tracker Mini
workow. Tracker Mini has an extended project
memory for audio samples. This holds almost 12
minutes of mic recorded audio as standard
although this may vary depending on the audio
quality and format. Samples are stored on the
Micro SD Card but can be also are held in the
Tracker Mini on board sample pool where
samples effectively become instruments.
Projects have an instrument pool populated with
samples or instruments to be available when
creating steps. This is prerequisite to creating
sequences. This section covers the general
project management in Tracker Mini and it’s SD
card plus some key specic project level
functions such as tempo.
Projects
3
33
Polyend Tracker Mini Manual
32
Polyend Tracker Mini Manual
NOTES

35
Polyend Tracker Mini Manual
34
Polyend Tracker Mini Manual
3.1 Project Overview
A project is the highest order of Tracker Mini’s functions. It allows projects
to be managed, saved and loaded and also new projects to be created.
Think of a project as container for a complete song for an album or live set.
Access to project level features exists in various parts of Tracker Mini’s
functions and does not have a dedicated single point of access.
3.2 Opening & Saving a Project
Projects are auto saved but can also be manually saved and renamed.
Loading of a saved project is also possible, although on power up the
previously active project will be restored. The project management
functions are in the [Menu] ‘File’ function or accessed by default with [Shift]
+ [3]. Note that projects copied to the SD card must be in the main project
folder. Sub folders are not viewed directly from the ‘le’ menu.
▌ CREATING A NEW PROJECT
1. Hold [Shift] + [3] to open the le browser menu or access with [Menu].
2. Press [New Project] - 1
st
screen button. An option to save the current
project may be presented.
3. A blank project named ‘New Project’ is created.
▌ OPENING AN EXISTING PROJECT
1. Hold [Shift] + [3] to open the le browser menu or access with [Menu].
2. Press [Open] - 2
nd
screen button. The project list is displayed. SD Card
list in the left window and the recently loaded projects centre. Use (Left)
or (Right) to switch between windows and lists.
3. Press (Up) (Down) or [+] / [-] to navigate the list of projects to load. Also
press [Up] - 1
st
screen button or [Down] - 2
nd
screen button to scroll the
list. The highlighted option will show with a bounding box.
4. With the desired project highlighted, Press [Open] - 8
th
screen button.
5. If the currently active project has been edited a prompt ‘Do you want to
save the change to ‘xxxx’’ will be presented. Press [Save] - 8
th
/ last
screen button or Press [Don’t Save] - 7
th
screen button to save or exit.
6. If the current pattern is new, a ‘Save As’ command is activated.
7. If required, Press [1] to display pattern page.
▌ MANUALLY SAVING THE CURRENT / EXISTING PROJECT
1. Hold [Shift] + [3] to open the le browser menu or access with [Menu].
2. Press [Save] - 5
th
screen button from left.
3. The project will be saved and overwrite the previous version.
NOTESNOTES
Projects
3
Projects
3
Projects - Multiple projects with 100 visible per Project folder.
More projects can be available in the SD Card projects or user folders.
Tracks - 8 Per Project
Tracks are used to organise parts of a pattern such as bass, drums, etc
Patterns - 255 Patterns Per Project
Patterns are sequenced into tracks to create musical elements.
Steps - 128 Steps per pattern
These are the discrete building blocks each with a note, instrument and effects
Song - 255 Slots (Slots = Rows for the 8 Tracks)
A song is an arrangement of patterns to create a complete production

37
Polyend Tracker Mini Manual
36
Polyend Tracker Mini Manual
▌ SAVING THE CURRENT PROJECT - FIRST TIME
1. Hold [Shift] + [3] to open the le browser menu or access with [Menu].
2. Press [Save] - 5
th
screen button from left or Press [Save As] - 6
th
screen
button from left. If using ‘Save’ for the rst time the ‘Save As’ function is
triggered to request a name.
3. The naming function will appear to allow a new name to be created.
The D-Pad buttons will allow navigation and select within the alpha-
numeric keyboard. Project names can be a max of 32 characters.
4. Alternatively, press [Auto Name] - 6
th
screen button from left. This will
generate a random name for the project and present it in the editor.
5. With the desired name created, Press [Save] - 8
th
/ last screen button.
6. The project is saved and the keyboard editor function is closed.
The option to create a new folder also exists in the le menu under the ‘Open’
function. This will also require a name to be created.
Enter Auto name SaveCancel
QWERTY Keyboard is represented by the visual grid. The ‘f’ and ‘j’
keys are highlighted and lit on the pads to serve as a reference. The
Screen buttons offer the main commands in the context of the editor.
The following Tracker Mini buttons also operate in the naming editor
when the naming screen is presented:-
• (Up), (Down), (Left), (Right) will navigate the selection across
the keyboard. Will navigate left / right in the text of the name
when the name is highlighted .
• [Insert] will insert the currently highlighted character into the
name at the cursor position.
• [Shift] + [Insert] to delete characters and backspace in the name
from the text cursor position.
3.3 Deleting a Project.
The option to delete a project can be performed in the project browser. The
currently active project cannot be deleted. Change to another project to
delete. Note that deleting a project will also remove it from the SD Card.
▌ DELETING A PROJECT
1. Hold [Shift] + [3] to open the le browser menu or access with [Menu].
2. Press [Open] - 2
nd
screen button from left. The list of available (max
100) projects will be displayed on the left of the screen.
3. Press (Up) (Down) or [+] / [-] to navigate the list of projects to load. Also
press [Up]- 1
st
screen button or [Down] - 2
nd
screen button to scroll the
list. The highlighted option will show with a bounding box.
4. With the desired project highlighted, Press [Delete] - 3
rd
screen button
from the left.
5. A prompt ‘Do you want to delete project ‘xxxx’’ ?’ will be presented.
6. To conrm, Press [Delete] - 8
th
screen button to conrm deletion.
Alternatively, Press [Cancel] - 7
th
screen button from left to exit without
deleting the project.
7. Project will be deleted from the SD Card and no longer visible in the
project list on Tracker Mini *.
* Projects also manually deleted externally from the SD Card using a PC or Mac
will no longer be visible in Tracker Mini.
1
q
a
z
4
r
f
v
7
u
j
m
0
p - +
@
2
w
s
x
5
t
g
b
8
i
k
Backspace
Caps Lock
Space
3
e
d
c
6
y
h
n
9
o
l
NOTESNOTES
Projects
3
Projects
3

39
Polyend Tracker Mini Manual
38
Polyend Tracker Mini Manual
3.4 Project Tempo
The overall tempo of the project is set in the ‘Song’ section of Tracker Mini
and has a dened range of 40 - 800 BPM. Tempo can also be modulated
by using the FX slots in a step with the ‘T’ Tempo effect. Note that the MIDI
clock output is based on the project tempo.
Note: Pressing [Tempo] + [Delete] in the song page will reset to the default 130
BPM. This is generic behaviour, where the [Delete] button will reset any selected
parameter to it’s default value.
Tap tempo can be applied in Song Mode by tapping the Tempo
Screen key a minimum of 4 times at the BPM desired. Count
will be displayed when tapping.
Hold [Shift] + [1] to open the ‘Song’ page.
In Song Mode,
Hold [Tempo] + (Up) (Down) or [+] / [-]
To adjust in larger Increments use the upper
and lower [+] and [-] buttons
BPM Range
800 BPM
40 BPM
Tempo
130.0 BPM
▌ ADJUSTMENT OF THE PROJECT TEMPO
1. Hold [Shift] + [1] to open Song mode.
2. Hold [Tempo] + (Up) (Down) or [+] / [-] to change the tempo in small
iterations. Range is 40 - 800 BPM.
3. Use the upper or lower [+] and [-] buttons for larger increments.
▌ TAP TEMPO ADJUSTMENT
1. Hold [Shift] + [1] to open Song mode.
2. Tap [Tempo] - screen button, a minimum of four taps. The tap count will
be displayed during tapping.
3. The tempo recorded is based on the speed of the taps played.
Note that the FX option ‘T’ Tempo triggers a tempo change between 10% - 400%
which can therefore extend the project base tempo range.
NOTESNOTES
Projects
3
Projects
3
Play
Pattern
Play
Song
Undo Add
Slot
Delete
Slot
Pattern Tempo
130.0 BPM
Track 1 Track 5Track 3 Track 7Track 2 Track 6Track 4 Track 8 Slot
1
Pattern
1
Song 0m:00s P1.008

41
Polyend Tracker Mini Manual
40
Polyend Tracker Mini Manual
3.5 Metronome
Tracker Mini has a metronome which operates when live recording (not
normal playback). This is congurable and selectable on/off within the
‘Cong’ menu under the ‘Metronome’ options.
Option Parameters Description
State
On, Off
Default Off
Toggles the metronome on or off.
Pre Roll
On, Off
Default Off
Sets a count in before the sequencer starts to
help timing of punch in recording.
Ideal for live recording.
Time signature num
1 - 12
Default 4
Number of beats in a measure / bar. Upper
number in the normal time signature value.
Example 4/4 set to 4 beats per measure.
Time signature denum
1 - 12
Default 4
Beat value, division of note. Lower number in
the normal time signature value. Example 4/4
has a quarter note per beat.
Volume
1 - 100
Default 50
Volume of the metronome’s ‘tick’ sound
Press (Left) or (Right) to navigate between the option windows
and use (Up) or (Down) to navigate to the desired option. Also
the screen buttons can be used to navigate.
Press [Shift] + [4] or navigate in the [Menu] for the ‘Cong’ page
Metronome Settings.
▌ SETTING THE METRONOME
1. Hold [Shift] + [4] to open the ‘Cong’ Page. Also access in the [Menu].
2. Ensure the left window is highlighted red i.e. in focus. Navigate windows
by pressing (Left) or (Right). Menu windows will automatically be
selected when pressing the relevant screen keys below the window to
navigate [Up] or [Down].
3. Press (Up) or (Down) to highlight with the bounding box over the
‘Metronome’ option. Alternatively press the relevant screen keys below
the window to navigate [Up] or [Down].
4. Press the relevant screen keys below the window to navigate [Up] or
[Down] under the central options to highlight with the bounding box over
the required Metronome option.
5. To change the selected parameter / setting, Press [Change], 6
th
Screen
button. The parameter pop-up window listing the available options will
appear.
6. Press (Up) (Down) or [Up] [Down] Screen Buttons to highlight the
desired option.
7. Press [Apply], 6
th
Screen button to conrm selection or [Cancel], 3
rd
Screen button to exit without changing.
8. The metronome will operate at the chosen time signature and volume
when live recording is activated using [Rec] + [Play]. The Pre roll will
provide a count in of 4 and show the ‘Recording in 4. 3. 2. 1.’ message
before starting to record.
NOTESNOTES
Projects
3
Projects
3
Change
Project Settings State Off
General Pre Roll Off
MIDI Time signature num 4
Metronome Time signature denum 4
Firmware Volume 50
Fn buttons binding
Manual
Credits
Cong 0m:00s P1.008

43
Polyend Tracker Mini Manual
42
Polyend Tracker Mini Manual
3.6 Project Pool & Instrument List
A pre-requisite for creating patterns is to have a series of instruments
available to record or program into steps. Instruments are based on the
samples loaded into the project pool and parameters applied to create
instruments. Instruments can also be loaded from other projects but must
exist in the current project instrument list to be accessible to the pattern
steps. A maximum of 48 instruments are available per project depending on
the sample size and hence memory usage.
An instrument or sample from the SD Card libraries can be added into the
active project instrument list. The instrument list is used to congure steps.
Basics of setting up a project instrument list using the Sample Loader
function, accessed by default with [Shift] + [2] is shown here and further
details on the sample management is detailed later.
Press [Shift] + [2] or navigate in the [Menu] for the ‘Sample Loader’ page
Enter Rename Delete
Unused
PreviewAdd Next Import
Sample Loader 0m:00s P1.008
SD Card Instruments
/Firmware 1. Strange Sample Number 1
2. Deep Kick
4. Snare One
5. Closed Hat 1
6.
7.
8.
9.
10.
11.
12.
13.
3. Transient Kick
/Games
/Instruments
/Manual
/Mod
/Samples
/Projects
/trackerLog
Preview Vol
0.00 dB
Memory
17%
Press (Left) or (Right) to navigate between the option windows a
red bounding box will indicate the selected window. Press (Up) or
(Down) to navigate to the desired listed option.
Window display pains between SD Card
and Instrument List. Max 48 instruments
can be stored in a Tracker Mini project.
Window display pains between SD Card
and Instrument List. Max 48 instruments
can be stored in a Tracker Mini project.
Project memory available based on the
selected samples / instruments in the
instrument list.
The bar will show an additional red
element - if memory will increase and
green bar - if memory will decrease
when browsing a sample / instrument
indicating potential memory impact if
sample / instrument is added.
NOTES
Projects
3
Projects
3
NOTES
▌ CREATING A PROJECT INSTRUMENT LIST
1. Hold [Shift] + [2] to open the ‘Sample Loader’ Page. This is also
accessible within the [Menu].
2. Navigate to the central ‘Instruments’ window and highlight either an
empty slot or an existing instrument. If an existing instrument is
highlighted it will be replaced by the newly selected choice.
3. Navigate to the left ‘SD Card’ window and highlight either instruments or
samples. Use the (Up) or (Down) to navigate and Press [Enter] screen
button to select and open a folder. Use [Shift] + (Up) (Down) D-Pad
navigator to batch select multiple samples / instruments.
4. With a sample or instrument highlighted in the left window, press the
[Add], 1
st
Screen button. This will add or replace in the selected
instrument slot. Using [Add Next], 2
nd
Screen button will add a sample
and will automatically jump the cursor to the next slot.
5. The memory bar chart will indicate the available project memory in
Tracker Mini. This will depend on the type and size of samples selected
and may limit the amount of instruments available in the instrument list.
6. Additional samples / instruments can be added. The instruments in the
list will be available to add to a step.
Notes:
• A prompt will be offered if replacing an existing instrument.
• When navigating, the /.. symbol indicates folders and subfolder
with a name. Selecting /.. alone will navigate up a level of the SD
Card folder structure.
• Instruments have a .pti lename.
• Samples can be previewed and the preview volume adjusted.
• The memory bar will show an additional red band (increases
memory usage) or green band (decreases memory usage)
indicating the potential memory impact when highlighting a sample
/ instrument to add. Should this be added to the instrument pool it
will affect the memory usage as indicated by the red/green bar.

45
Polyend Tracker Mini Manual
44
Polyend Tracker Mini Manual
NOTES
Projects
3
Projects
3
NOTES
▌ IMPORTING TO THE PROJECT INSTRUMENT LIST
1. Hold [Shift] + [2] to open the ‘Sample Loader’ Page. This is also
accessible within the [Menu].
2. Navigate to the left ‘SD Card’ window and navigate to and highlight a
sample to import. Use (Up) or (Down) to navigate and Press [Enter]
screen button to select folder.
3. Navigate to the central ‘Instruments’ window and highlight either an
empty slot or an existing instrument. If an existing instrument is
highlighted it will be replaced by the newly selected choice.
4. Press [Import], 5
th
Screen button. The sample is displayed for editing.
Pressing [Cancel], 6
th
Screen button at any time to leave the import
menu without importing.
5. The sample can have its start [Start], 2
nd
Screen button and end [End],
3
rd
Screen button adjusted. Select Start or End and use [+] and [-] to
adjust. The inner [+] and [-] buttons adjust with in ner resolution. This is
a great feature when samples are too long or only a portion is needed.
6. Press [Preview], 1
st
Screen button to listen to the sample.
7. When editing is complete, select an import option to load the sample
into the instrument list:-
• Press [Import Low Quality], 7
th
Screen button. This will import a
lower quality sample. This will create a smaller le size and save
memory. The trade off is audio sound quality reduction.
• Press [Import Normal], 8
th
Screen button. This will import a sample
at the normal Tracker Mini quality specication. This will create a
larger le size and take up more memory. The trade off is optimum
audio sound quality.
Instruments can also be copied and pasted within the sample loader and
instrument list browser to duplicate and instrument. Use the [Copy] dedicated
button to Copy and [Shift] + [Copy] to Paste.
▌ DELETING AN INSTRUMENT FROM THE LIST
1. Hold [Shift] + [2] to open the ‘Sample Loader’ Page. This is also
accessible within the [Menu].
2. Navigate to the central ‘Instruments’ window and highlight an existing
instrument. If an existing instrument is highlighted it will be the one
deleted in this process. Use [Shift] + (Up) (Down) D-Pad navigator to
batch select multiple samples / instruments.
3. Press [Delete].
4. A prompt asking if you want to continue on to delete the highlighted
sample / instrument. Press [No], 7
th
Screen button to cancel without
deleting or conrm deletion by pressing [Yes], 8
th
Screen button.
5. The instrument is removed from the Tracker Mini list but is still present
on the SD Card.
6. The memory bar chart will indicate the available project memory in
Tracker Mini. This will depend on the type and size of samples selected
and may limit the amount of instruments available in the instrument list.
7. Additional samples / instruments can be deleted. The instruments in the
list will be available to use in the project.
▌ DELETING ALL UNUSED INSTRUMENTS FROM THE LIST
1. Hold [Shift] + [2] to open the ‘Sample Loader’ Page. This is also
accessible within the [Menu].
2. Navigate to the central ‘Instruments’ window.
3. Press [Delete Unused], 6
th
Screen button.
4. A prompt asking if you want to continue on to delete the highlighted
sample / instrument. Press [No], 7
th
Screen button to cancel without
deleting or conrm deletion by pressing [Yes], 8
th
Screen button.
5. Any instruments that are in the list but not used in the project are
removed from the list. SD Card les remain intact.
6. The memory bar chart will indicate the available project memory in
Tracker Mini. This will depend on the type and size of samples selected
and may limit the amount of instruments available in the instrument list.

47
Polyend Tracker Mini Manual
46
Polyend Tracker Mini Manual
3.7 Summary of Conguration Options
A number of options can be set in the ‘Cong’ menu. These defaults may
be good enough to get started but specic changes may suit certain
workows and situations better. The details of these will be covered in
relevant sections and only an overview of global settings is provided here.
Press [Shift] + [4] or navigate in the [Menu] for the ‘Cong’ page
Menu Option Description Book Section
Project Settings Performance Presets
Allows performance presets to be saved either as
a global conguration or local to each project.
Performance
Mode
Project Settings Pattern Divider
Sets the highlight level for the selected step
offering better pattern visualisation.
Pattern Format
Project Settings Anti-aliasing
Anti-aliasing set to ‘On’ gives a cleaner sound for
sample playback. Off is more lo- vintage feel.
Project Settings Limiter Mode
Sets the characteristics of the limiter attack and
release between subtle and extreme.
Master Effects
Project Settings Sends Mode
Sets the sends to pre-fader i.e. independent of
volume or post-fader.
Master Effects
Project Settings Extra Headroom
Avoid clipping by adding extra headroom in the
output audio.
Project Settings Snap to Zero
Snap audio crossings to zero points, Used as
green markers in the sample playback page.
Instruments
General Display Brightness
Adjusts the brightness level of the 5” display
between three settings: High, Medium, Low.
System
General Display Theme
The colour scheme of the screen. Original has the
dark background while monochrome is bright.
System
General Display Font
Text font option. Original has the classic consolas
look while ‘new’ is smaller, more standard.
System
General Recording Options
Sets the options for what is recorded i.e. notes,
quantization, micro-timing, velocity.
Sequencing
Steps
General Numbering Mode
Sets all numbers to the decimal starting at 0 or 1
or hexadecimal format. Classic look and feel.
System
General Pattern Arrangement
Sets the pattern display to the traditional vertical
view or alternative horizontal display.
Patterns
General Pattern Top Info
Allows the top part of the pattern screen to display
only the track name, additional info or off.
Patterns
General Line In Channel
Selects the audio input of the line in between
stereo, mono left or mono right.
Audio
Press (Left) or (Right) to navigate between the option windows a
red bounding box will indicate the selected window. Press (Up) or
(Down) to navigate to the desired listed option.
Also the [Up] and [Down] screen buttons will select the option and
automatically select the menu window.
NOTES
Projects
3
Projects
3
Change
Project Settings Performance presets Global
Pattern divider 4
Anti-aliasing On
Limiter Mode
Extra Headroom
Subtle
Off
Sends Mode Post-Fader
General
MIDI
Metronome
Firmware
Cong 0m:00s P1.008
Fn buttons binding
Manual
Credits
Cong Options

49
Polyend Tracker Mini Manual
48
Polyend Tracker Mini Manual
Menu Option Description Book Section
MIDI Clock In
Sets the source of the master clock, Internal
(default) or external USB or MIDI In jack.
MIDI
MIDI Clock Out
Sets the Tracker Mini clock output. Off, USB, MIDI
Out jack, USB + MIDI Out jack.
MIDI
MIDI Transport In
Sets the source of transport control commands,
Internal (default) or external USB or MIDI In jack.
MIDI
MIDI Transport Out
Sets the output of transport control commands, Off,
USB, MIDI Out jack or USB+MIDI jack options.
MIDI
MIDI Notes In
Sets the input routing of external notes in. Set to Off,
USB, MIDI In jack or USB+MIDI jack options.
MIDI
MIDI Notes Input Channel
Sets the MIDI channel for incoming notes from
external gear. Select All channels or Ch 1-16.
MIDI
MIDI MIDI Out
Sets the MIDI output routing between, Off, USB,
MIDI Out jack or USB+MIDI jack options.
MIDI
MIDI CC In
Sets CC (control change) input routing to Off, USB,
MIDI In jack, USB+MIDI In jack.
MIDI
MIDI CC In channel
Sets MIDI channel for CC (control change) incoming
messages. Select All channels or Ch 1-16.
MIDI
MIDI Middle C
Sets middle C as C-3, C-4, C-5, C-6. Calibrates
range in Tracker Mini with external gear.
MIDI
MIDI Clock Sync Correction
Latency compensation for incoming sync. -6 to +6.
Use with MIDI Jack or USB clock in.
MIDI
Metronome State Turns the metronome on or off for live recording. Projects
Metronome Pre Roll Provides a count in of 4 before starting to record. Projects
Metronome Time signature num Upper numerator of the time signature Projects
Metronome Time signature denum Lower denominator of the time signature Project
Metronome Volume Volume level of metronome Projects
Menu Option Description Book Section
Firmware Firmware Update
Activates a rmware update based on the OS
located on the SD card in the ‘rmware’ folder.
System
Firmware Current version
Displays current version of installed OS. Visual
indicator only.
System
Firmware Build Firmware build version display
Firmware Reset cong
Resets this conguration menu to the default
original settings.
System
Fn buttons binding Fn1 Sets the page associated with function button [1] System
Fn buttons binding Fn2 Sets the page associated with function button [2] System
Fn buttons binding Fn3 Sets the page associated with function button [3] System
Fn buttons binding Fn4 Sets the page associated with function button [4] System
Fn buttons binding Fn1+Shift
Sets the page associated with function button
combo [Shift] + [1]
System
Fn buttons binding Fn2+Shift
Sets the page associated with function button
combo [Shift] + [2]
System
Fn buttons binding Fn3+Shift
Sets the page associated with function button
combo [Shift] + [3]
System
Fn buttons binding Fn4+Shift
Sets the page associated with function button
combo [Shift] + [4]
System
Info - - General information and license details.
Projects
3
Projects
3

Each project contains a maximum of 255
patterns across 8 tracks. Each pattern can
hold up to 128 steps per track. Patterns are at
the heart of Tracker Mini and are built in the
pattern sequencer. The sequencer is what
makes Tracker Mini different from normal
digital audio workstations. Steps are the
building blocks when creating patterns and by
assembling these into audio arrangements it is
possible to create beats and melodies. Each
step consists of a note, instrument and two FX
slots. These are triggered as each row is
activated when playback is initiated. This can
trigger audio information, effect actions or MIDI
messages. Patterns are bite size elements of
a full song and can be created as individual
modules built using steps. Patterns are then
combined and arranged together in song mode
for chaining into a full length track. This section
will focus on patterns using in audio tracks
(although MIDI steps can be created together
with audio). This section will provide overall
guidance on creating basic patterns as well as
their structural elements generally. This is a
foundation to patterns and a deeper dive into
steps and sequencing comes next. All the basic
building blocks and the process needed to get
started in creating, editing and using a basic
pattern are covered in this section. More
advanced and in-depth elements of the
components of a step are covered later as well
as more advanced sequencing functions.
Pattern Format
4
51
Polyend Tracker Mini Manual
50
Polyend Tracker Mini Manual
NOTES

53
Polyend Tracker Mini Manual
52
Polyend Tracker Mini Manual
4.1 What’s a Pattern?
Patterns are a combination of 8 Tracks where each has a series of steps
mapped out. The steps form into a melody or beat. So for example Track 1
could be the Drums, Track 2 for Percussion, Track 3 as Bass etc. Patterns
can be created using steps manually ‘programmed’ into the Tracker Mini or
by recording in real time.
NOTESNOTES
Pattern Format
4
Pattern Format
4
Projects
MyProj
Patterns
Samples
Instruments
project.mt
Pattern_01.mtp
Pattern_02.mtp
Pattern_03.mtp
Pattern 1
Pattern 2
Pattern 3
Project
A default of 32 steps pre track is available in new patterns.
This can be changed between 1 - 128 Maximum.
Play Direction
Up to 255 Patterns per Project.
Step 1
Step 124
Step 2
Step 125
Step 3
Step 126
Step 4
Step 127
Step 5
Step 128
Track 1 Track 4Track 3 Track 7Track 2 Track 6Track 5 Track 8
Patterns will be stored on the SD Card under the project folder.
Step
Track 2, Step 126
Note
C4 01 P 27
Instrument FX1 FX2
4.2 Process of Creating a Pattern
Formatting and creating a pattern is a simple process but there are some
good practices that will speed up workow and help to move quickly to
making music. A pattern is the container for steps and establishes the step
timing and track format. The dynamic screen buttons are used heavily.
Tempo and Project
Instruments list is populated.
Press [1]
Pattern editing is mainly
performed in pattern mode.
Hold [Pattern] + (Up) or (Down)
Pattern is 1
st
Screen Button.
Example Pattern = 1
Hold [Length] + (Up) or (Down)
Length is 2
nd
Screen Button.
(Left) & (Right) for larger increments.
Example Length = 32
Manual or
Live Recording to record
steps into the pattern.
Optionally set screen
view, 8 tracks, vertical /
horizontal etc.
Press [Shrink]
Screen Button
Halves length by removing
every second step
Press [Duplicate]
Screen Button
Doubles pattern length
including steps
Press [Expand]
Screen Button
Doubles length by
inserting steps
Pre-Requisite Select Pattern Mode Page
Shrink DuplicateExpand
Select Pattern NumberLength
Add Steps
Display Options
E
S

55
Polyend Tracker Mini Manual
54
Polyend Tracker Mini Manual
NOTESNOTES
Pattern Format
4
Pattern Format
4
4.3 Conguring a Pattern.
Pattern and step editing is performed in ‘Pattern’ Mode. The rst
requirement is to create the pattern itself where steps can later be added to
create the melody or beat. Commands for the pattern are available from the
dynamic screen buttons located at the bottom of the page. These will
change depending on the mode or selection made.
The dynamic screen buttons labelled at the bottom of the page will control options for creating patterns.
Underscore colour represents mode i.e. Red means accessible in [Rec] mode only.
Pattern
1
-- --- ---- ---- -- --- ---- ---- -- --- ---- ---- -- --- ---- ----
15 15
Length
32
Step Jump
0
Fill Preview Undo Redo More
Render
Selection
-- --- ---- ---- -- --- ---- ---- -- --- ---- ---- -- --- ---- ----
15 15
Paste
Pattern
Expand
Pattern
Copy
Pattern
Duplicate
Pattern
Invert MoreShrink
Pattern
14.
Menu Option Function Description
Pattern Pattern Selection
Selects a pattern to edit. This will select a pattern number
between 1-255 in the project.
Length Pattern Length
Adjust the number of step rows in the pattern. Default is
32 but a maximum of 128 rows are available in a pattern.
Step Jump Programming Aid
Assists in recording steps with the pads. Will
automatically jump the selection cursor in dened steps.
Fill Programming Aid
Assists in programming steps. Will automatically ll steps
based on dened selection criteria
Preview Instrument Preview
Will play the instrument for the step to allow previewing of
the sound.
Undo
Undo Last
Command
If available, will reset the previous state prior to the last
action, effectively undoing the last (up to 20) commands.
Redo
Redo Last
Command
If available, will restore the previous state after to the last
action, effectively redoing the last (up to 20) commands.
More Next Page Selects the next page of commands - see below
Render
Selection
Bounce Audio
Renders the selection to a new audio sample. Useful to
use elsewhere or to reduce track consumption.
Invert Invert Steps Inverts all steps in the selection vertically
Duplicate
Pattern
Extends Pattern
Extends the entire pattern and its associated steps,
extending the pattern to double the length.
Expand
Pattern
Extends Pattern
Extends the pattern by adding blank steps in between
existing steps, extending the pattern to double the length.
Shrink
Pattern
Contracts Pattern
Contracts the pattern length by deleting every 2nd step,
reducing the pattern to half the length.
Copy
Pattern
Copy Copies the entire pattern to the virtual clipboard.
Paste
Pattern
Paste
Pastes the copied pattern from the virtual clipboard into
the location starting at the current position.
More Prior Page Selects the previous page of commands - see above
▌ SELECTING THE PATTERN MODE PAGE
1. Press [1] to open the ‘Pattern’ Page. Also accessible within the [Menu].
2. The options for the pattern page will show at the bottom of the page and
are represented by the 8 screen buttons.
3. To change the options page, Press [More], 8
th
Screen button. This
toggles between the two pages of pattern options.
▌ SELECTING A PATTERN
1. Press [1] to open the ‘Pattern’ Page. Also accessible within the [Menu].
2. Ensure the pattern is not playing.
3. Ensure options page 1 is displayed. Press [More] to toggle between the
two pages of pattern options.
4. Hold [Pattern] - 1
st
Screen button + (Up) or (Down). A pattern number
between 1-255 can be selected. Blank patterns selected have 32 steps
as default. The [+] and [-] buttons can also be used.
5. The currently active pattern number is displayed top left in the info bar.
▌ ADJUSTING THE PATTERN LENGTH
1. Press [1] to open the ‘Pattern’ Page. Also accessible within the [Menu].
2. Ensure options page 1 is displayed. Press [More] to toggle between the
two pages of pattern options.
3. Hold [Length] - 2
nd
screen button + (Up) or (Down). A pattern length
between 1-128 steps can be selected. Default is 32. The arrow buttons
(Left) or (Right) will set length in predened denominations i.e. 1, 2, 4,
8, 16 etc
Tip: It is good practice to build patterns starting with a small length. For example
start with 8 or 16 steps and create the beat or melody. This can then be duplicated
/ extended along with its steps and then edited to create longer passages.

57
Polyend Tracker Mini Manual
56
Polyend Tracker Mini Manual
NOTES
Pattern Format
4
Pattern Format
4
▌ EXTENDING PATTERN LENGTH
1. Press [1] to open the ‘Pattern’ Page. Also accessible within the [Menu].
2. Ensure options page 2 is displayed. Press [More] to toggle between the
two pages of pattern options.
3. Press [Rec] to select recording mode and allow editing. Screen buttons
will be unavailable, shown dim, otherwise.
4. The current pattern can be extended in severals ways. The options
available via the 8 screen buttons are:-
• Press [Duplicate Pattern]. The pattern will be extended by
duplicating the full pattern along with its steps. Effectively doubles
the pattern length.
• Press [Expand Pattern]. The pattern will be extended by inserting
additional step rows in-between existing steps. Effectively doubles
by stretching the pattern length.
• Adjusting [Length] will also increase the pattern length. New empty
step rows added at the end.
5. The [Undo] or [Redo] screen buttons can be used if required to restore
a previous state. These are on Page 1 of the page options.
▌ REDUCING PATTERN LENGTH
1. Press [1] to open the ‘Pattern’ Page. Also accessible within the [Menu].
2. Ensure options page 2 is displayed. Press [More] to toggle between the
two pages of pattern options.
3. Press [Rec] to select recording mode and allow editing. Screen buttons
will be unavailable, shown dim, otherwise.
4. The current pattern can be reduced in severals ways. The options
available via the 8 screen buttons are:-
• Press [Shrink Pattern]. The pattern will be reduced by deleting each
second step in the pattern. This will delete any step whether empty
or lled. Effectively halves the pattern length.
• Adjusting [Length] will also reduce the pattern length. Any steps will
be hidden but will be restored if the pattern length is extended.
5. The [Undo] or [Redo] screen buttons can be used if required to restore
a previous state.
Duplicate Pattern
Original Pattern Affected Pattern
Every 2nd Step Deleted Resulting, Halved Pattern
Shrunk Pattern
Double the pattern length
Expand Pattern
Blank steps added after each step
Step 1
Step 1 Step 1 Step 1
Step 1 Step 1
Step 4
Step 33
Step 6 Step 6
Step 32
Step 5 Step 5
Step 32
Step 64
Step 64
Step 2
Step 2 Step 2 Step 2
Step 3
Step 3 Step 3 Step 3
Step 2 Step 2
Step 5
Step 3 Step 3
Step 6
Step 34
Step 7 Step 7
Step 35
Step 8 Step 8
Step …
Step 4 Step 4 Step 4
Step …
Step 63
Step …
Step …
C5 40
----
P 25
C6 40
----
P 25 C6 40
----
P 25 C6 40
----
P 25
C5 40
----
P 25 C5 40
----
P 25
C5 40
----
P 25
C6 40
----
P 25 C6 40
----
P 25
E5 40
----
P 25
C5 40
----
P 25
C5 40
----
P 25 C5 40
----
P 25
C6 40
----
P 25
C5 40
----
P 25
C5 40
----
P 25
C5 40
----
P 25
C5 40
----
P 25
C5 40
----
P 25
B5 40
----
P 25 B5 40
----
P 25
E5 40
----
P 25 E5 40
----
P 25
+
NOTES

59
Polyend Tracker Mini Manual
58
Polyend Tracker Mini Manual
NOTES
Pattern Format
4
Pattern Format
4
4.4 Copying and Pasting a Pattern.
Patterns can be copied and pasted between different pattern slots. This will
copy the entire pattern and its steps as well as the length conguration.
▌ COPYING AND PASTING A PATTERN
1. Press [1] to open the ‘Pattern’ Page. Also accessible within the [Menu].
2. The options on pages 1 & 2 are required during this process. Press
[More] to toggle between the two pages of pattern options.
3. Press [Rec] to select recording mode and allow editing. Screen buttons
will be unavailable, shown dim, otherwise.
4. On pattern page 1, select the pattern to copy, Hold [Pattern] 1
st
Screen
button + (Up) or (Down). Example, select Pattern 1.
5. On pattern page 2, Press [Copy Pattern] Screen Button. The pattern is
copied to the clipboard.
6. On pattern page 1, select the pattern to paste into, Hold [Pattern] 1
st
Screen button, + (Up) or (Down). Example, select Pattern 2.
7. On pattern page 2, Press [Paste Pattern] Screen Button. The pattern is
pasted into the current pattern and will overwrite any existing data. It is
possible to continue to paste the pattern to other pattern slots.
8. The [Undo] or [Redo] screen buttons can be used if required to restore
a previous pattern state.
4.5 Inverting a Selection of Steps.
Patterns are created top to bottom and steps assigned in the step rows.
Steps once selected in a pattern can be inverted. This will reverse the order
in which the steps play. For example the rst step in the selection will play
last and vice versa.
▌ INVERTING A STEP RANGE IN A PATTERN
1. Press [1] to open the ‘Pattern’ Page. Also accessible within the [Menu].
2. Ensure options page 2 is displayed. Press [More] to toggle between the
two pages of pattern options.
3. Press [Rec] to select recording mode and allow editing. Screen buttons
will be unavailable, shown dim, otherwise.
4. Navigate to the rst step. Press [Shift] + (Up) or (Down) to select the
sequence of steps and / or Press [Shift] + (Left) + (Right) to select steps
across tracks.
5. Press [Invert] Screen Button to reverse the order of the range of steps
selected. This reverses the vertical order of the steps. The steps remain
in their respective tracks.
6. The [Undo] or [Redo] screen buttons can be used if required to restore
a previous state.
Original Range
Selected Range 2 - 4 Bounded in Red
Inverted Range
Inverted Range 2-4 Bounded in red
Track 1 Track 1Track 2 Track 2
Step 1 Step 1
Step 2 Step 2
Step 3 Step 3
Step 4 Step 4
C6 40
----
P 25 C6 40
----
P 25
C6 40
----
P 25
C6 40
----
P 25
E5 40
----
P 25
C6 40
----
P 25 C6 40
----
P 25
E5 40
----
P 25
NOTES

61
Polyend Tracker Mini Manual
60
Polyend Tracker Mini Manual
NOTESNOTES
Pattern Format
4
Pattern Format
4
4.6 Pattern Mode Page Layout Options.
Pattern and step editing is performed in ‘Pattern’ Mode, selected by
pressing the default assigned button [1] or using [Menu]. To edit steps,
select [Rec]. The pattern mode view can be changed in the cong options.
Track 1
– – – C5 – – – – – – – – – – – – – – – – – –
– – – C5 C4 D2 – – – – – – – – – – – –
– – – – – – C4 – – – – – – – – – – – – – – –
Track 5Track 3 Track 7Track 2 Track 6Track 4 Track 8
Track 1
– – – – – –
– – – – – –
C5 C5
1 2
– – – – – –
– – – – – –
C5 C5
– – – – – –
– – – – – –
Track 2
Track 1
– – – – – –
– – – – – –
C5 C5
– – – – – –
– – – – – –
C5 C5
– – – – – –
– – – – – –
Track 2
Press (Up) or (Down) to navigate vertically in
the Tracker Mini grid. Cursor will wrap past the
end to the start when using arrow keys
Press [Shift] + [Insert] to reset the
cursor position to the start, step 1
Step Row
Green Play or
Red Rec Mode
Change the pattern info for the top bar in the
Cong settings: General > Pattern top info.
Top bar: Off, Tracks Only or additional Info
Switch to 8 Track view.
Displays a single element across all 8 tracks
[1] + [Note] - Displays all 8 tracks, with only the note parameters
[1] + [Instrument] - Displays all 8 tracks, with only the instrument parameters
[1] + [FX1] - Displays all 8 tracks, with only FX1 parameters
[1] + [FX2] - Displays all 8 tracks, with only FX2 parameters
Hold [1] + A combo of max 2 parameter buttons: Note, Instrument, FX1, FX2 to display
2 parameters per track across 8 tracks.
Press [1] to return to 4 tracks, all step parameters
To select a step
Press (Left) or (Right) to navigate
horizontally in the Tracker Mini grid
C3 04 ---- P-20
D3 04 ---- P-10
D3 04 ---- P-10
D3 04 ---- P-10
C4 12 ---- A 4
C4 12 ---- A 4
Pattern
1
1 1
2
C5 40 ---- P-25
C5 40 ----
C5 40 ---- P-25
-- --- ---- ----
-- --- ---- ----
-- --- ---- ----
-- --- ---- ---- -- --- ---- ---- -- --- ---- ---- -- --- ---- ----
-- --- ---- ----
-- --- ---- ----
P 25
-- --- ---- ---- -- --- ---- ----
-- --- ---- ---- -- --- ---- ---- -- --- ---- ---- -- --- ---- ----
-- --- ---- ---- -- --- ---- ---- -- --- ---- ---- -- --- ---- ----
-- --- ---- ---- -- --- ---- ---- -- --- ---- ----
-- --- ---- ---- -- --- ---- ---- -- --- ---- ---- -- --- ---- ----
-- --- ---- ---- -- --- ---- ---- -- --- ---- ----
-- --- ---- ---- -- --- ---- ---- -- --- ---- ---- -- --- ---- ----
-- --- ---- ---- -- --- ---- ---- -- --- ---- ----
-- --- ---- ---- -- --- ---- ---- -- --- ---- ---- -- --- ---- ----
-- --- ---- ---- -- --- ---- ---- -- --- ---- ---- -- --- ---- ----
-- --- ---- ---- -- --- ---- ---- -- --- ---- ---- -- --- ---- ----
C5 02 ---- P-20
C5 40 ---- H-25 C5 40 ---- P-20
2
3 3
4 4
5 5
6 6
7 7
9 9
11 11
13 13
15 15
8 8
10 10
12 12
14 14
Length
32
Step Jump
0
Fill Preview Undo Redo More
Track 2 Track 3 Track 4Track 1
Pattern 1 0m:00s P1.008 1.Analog 3 18p
The ‘top down’ view can be changed
to ‘left right’ in the Cong settings;
General > Pattern Arrangement
▌ NAVIGATING THE PATTERN PAGE
1. Press [1] to open the ‘Pattern’ Page. Also accessible within the [Menu].
2. The step cursor will display a green border with the selected step
parameter highlighted green in normal playback mode. This indicates
the step in focus and current playhead position.
3. To move the position vertically, Press (Up) or (Down). The selection will
scroll and will wrap at the end of the pattern back to the top.
4. To move the position horizontally across tracks, Press (Left) or (Right).
The selection will scroll across the 1-4 visible tracks and switch across
tracks 5-8 at the right of the page. This view is default.
5. Press [Shift] + (Up), (Down), (Left) and (Right) to select rather than just
navigate a range of steps.
6. To return the playhead / step selector to the top step 1 of the pattern,
Press [Shift] + [Insert] when the sequencer is stopped.
▌ CHANGING FROM 4 TO 8 TRACK VIEW
1. By default the pattern page display 4 tracks. This can be changed to
display 8 tracks with a various step options:-
• 8 Tracks with only Note parameter: Press [1] + [Note].
• 8 Tracks with Instrument parameter: Press [1] + [Instrument].
• 8 Tracks with only FX1 parameter: Press [1] + [FX1].
• 8 Tracks with only FX2 parameter: Press [1] + [FX2].
• 8 Tracks with 2 selected parameters: Press [1] + [P1] + [P2], where
‘P1’ and ‘P2’ are 2 from; [Note], [Instrument], [FX1], FX2].
• Revert to 4 track mode, Press [1]
2. This relies on page [1] being assigned as ‘Pattern’. This is set as the
default but can be changed in the conguration.

63
Polyend Tracker Mini Manual
62
Polyend Tracker Mini Manual
NOTESNOTES
Pattern Format
4
Pattern Format
4
▌ CHANGING BETWEEN VERTICAL AND HORIZONTAL VIEW MODE
1. The default mode is for Tracker Mini to display patterns top to bottom in
a vertical arrangement. This is the traditional and expected view for
Tracker’s in general. This can be changed to an Horizontal left to right
view. This is less common but may suit people more accustomed to
more modern DAW arrangements.
2. Hold [Shift] + [4] to open the ‘Cong’ project conguration menu.
3. Ensure the left window is highlighted red i.e. in focus. Navigate windows
by pressing (Left) or (Right). Menu windows will automatically be
selected when pressing the relevant screen keys below the window to
navigate [Up] or [Down].
4. Press (Up) or (Down) to highlight with the bounding box over the
‘General’ option. Alternatively press the relevant screen keys below the
window to navigate [Up] or [Down].
5. Highlight red the General options window. Navigate windows by
pressing (Left) or (Right). Menu windows will automatically be selected
when pressing the relevant screen keys below the window to navigate
[Up] or [Down].
6. Press (Up) or (Down) to highlight with the bounding box over the
‘Pattern Arrangement’ option. Alternatively press the relevant screen
keys below the window to navigate [Up] or [Down].
7. To change the options between horizontal and vertical views, Press
[Change]. The parameter pop-up window listing the available options
will appear.
8. Press (Up) / (Down) or [Up] / [Down] Screen Buttons to highlight the
desired option.
• Vertical Revolver - Tracks scrolls wrap at the pattern end / start. The
page view will also show the pattern wrap.
• Vertical Original - Tracks scroll top to bottom and bottom to top.
View shows linear pattern.
• Horizontal - Track scrolls left to right and view is linear.
9. Press [Apply] - 6
th
from left screen button to conrm selection or
[Cancel] - 3
rd
from left screen button to exit without changing.
10. The display will reect the selected option.
▌ CHANGING PATTERN TOP INFO DETAILS
1. The default mode is for Tracker Mini to display an information bar plus
the tracks at the top of the pattern display. This can be changed to give
more clarity to the Tracker Mini pattern grid.
2. Hold [Shift] + [4] to open the ‘Cong’ project conguration menu.
3. Ensure the left window is highlighted red i.e. in focus. Navigate windows
by pressing (Left) or (Right). Menu windows will automatically be
selected when pressing the relevant screen keys below the window to
navigate [Up] or [Down].
4. Press (Up) or (Down) to highlight with the bounding box the ‘General’
option. Alternatively press the relevant screen keys below the window to
navigate [Up] or [Down].
5. Highlight red the General options window. Navigate windows by
pressing (Left) or (Right). Menu windows will automatically be selected
when pressing the relevant screen keys below the window to navigate
[Up] or [Down].
6. Press (Up) or (Down) to highlight with the bounding box over the
‘Pattern Top Info’ option. Alternatively press the relevant screen keys
below the window to navigate [Up] or [Down].
7. To change between horizontal and vertical views, Press [Change]. The
parameter pop-up window listing the available options will appear.
8. Press (Up) / (Down) or [Up] / [Down] Screen Buttons to highlight the
desired option.
• Off - No information is displayed at the top of the page.
• Track names - Only display the track name information.
• Additional Info: Display tracks, and upper bar expanded information,
such as time, transport, pattern, instrument etc. This is default.
9. Press [Apply] - 6
th
from left screen button to conrm selection or
[Cancel] - 3
rd
from left screen button to exit without changing.
10. The display will reect the selected option.

65
Polyend Tracker Mini Manual
64
Polyend Tracker Mini Manual
NOTESNOTES
Pattern Format
4
Pattern Format
4
▌ CHANGING THE PATTERN GRID VISUAL DIVIDERS
The pattern grid has a number of graphic guides as a visual aids when
sequencing steps into a pattern. This is by default set to divisions of 4
providing a visual on beat guide at rows 1, 5, 9 etc. These can be changed
in the ‘Cong’ menu settings.
1. Hold [Shift] + [4] to open the ‘Cong’ project conguration menu.
2. Navigate to ‘Project Settings’ option. Navigate windows by pressing
(Left) or (Right). Menu windows will also be automatically be selected
when pressing the relevant screen keys below the menu window to
navigate [Up] or [Down].
3. In the project setting options, central window, highlight ‘Pattern Divider’.
4. Press [Change] - 6
th
from Left Screen Button.
5. Press (Up) / (Down) or [Up] or [Down] Screen Buttons to highlight the
desired option between 1 - 16.
6. Press [Apply] - 6
th
from left screen button to conrm selection or
[Cancel] - 3
rd
from left screen button to exit without changing.
7. The display will reect the new visual indicator divider bars.
Visual Dividers to aid step positioning.
Default shown = 4.
Pattern Divider.
Example = 3.
Pattern Divider.
Example = 7.
Pattern Divider Setting in ‘Cong’ Menu under ‘Project Settings’
Pattern
1
1
2
C5 40 ---- P-25
C5 M02 ----
C5 40 ---- P-25
-- --- ---- ----
-- --- ---- ---- -- ---
P 25
-- ---
-- --- ---- ---- -- ---
-- --- ---- ---- -- ---
-- --- ---- ----
-- --- ---- ---- -- ---
-- --- ---- ----
-- --- ---- ---- -- ---
-- --- ---- ----
-- --- ---- ---- -- ---
-- --- ---- ---- -- ---
-- --- ---- ---- -- ---
C5 02
C3 04
D3 04
D3 04
D3 04
C5 40
3
4
5
6
7
9
11
13
15
8
10
12
14
Length
32
Step Jump
0
Pattern 1
▌ EDITING TRACK NAMES
Track names can be edited and changed to custom text. Track name length
is maximum 7 characters. The defaults are Track 1, Track 2, Track 3 etc but
can be set to more appropriate names such as drums, perc, bass etc.
1. Press [4] to select the Master. This consists of 3 pages and each is
cycled in turn by pressing [4] button. Page is displayed top bar, left side.
2. Navigate to page 2/3 - Track Mixer. All tracks are displayed in this view.
3. Press [Rec] and the editing mode will be toggled on or off. Set to on, as
indicated by the word ‘Edit’ in red at the bottom of each track and
representing the screen buttons per track.
4. Press the relevant screen button 1 - 8 for the track to edit. For example,
Press Screen Button for Track 1 - 1
st
Button on the left.
5. The Alpha numeric QWERTY keyboard will be displayed and enable the
default ‘Track 1’ name to be changed. Edit as per normal using the
QWERTY functions with the D-Pad navigation and screen button
commands. Maximum 7 characters available for track names.
6. Press [Save], 8
th
Screen button, to conrm and immediately save the
new name for the track.
7. Repeat step 4 - 6 for other tracks if required.
Play Rec
Insert Menu
Delete Copy
Press [Rec] to toggle the track name editor on or off on the Master Page
2/3. Press a screen button 1 - 8 to select the specic track to edit.
0.00 dB
Edit
0.00 dB
Edit
0.00 dB
Edit
0.00 dB
Edit
0.00 dB
Edit
0.00 dB
Edit
0.00 dB
Edit
0.00 dB
Edit
Drums PadPerc Track 7Bass Track 8Kick Lead
Track Mixer 2/3 0m:00s P1.008

67
Polyend Tracker Mini Manual
66
Polyend Tracker Mini Manual
NOTESNOTES
Pattern Format
4
Pattern Format
4
4.7 Quick Start Step Creation.
Patterns are just empty containers and will require steps to be added to
create a beat of melody. A step is essentially a note, instrument (based on a
sample) and two effect slots. This section gives a quick start on step
composition before moving to more in depth coverage in a future section.
▌ ADDING STEPS IN A PATTERN
1. Press [1] to open the ‘Pattern’ page. Also accessible from the [Menu].
2. To move the cursor position vertically, Press (Up) or (Down). And to
move the position horizontally across tracks Press (Left) or (Right).
Ranges can be selected using [Shift] + D-Pad navigation buttons.
3. Select recording mode, Press [Rec]. The steps selected will appear red
as opposed to green when in normal playback mode.
4. To add a step, Hold the dedicated step function note, instrument, FX1 or
FX2 button and set the step using the D-Pad navigation. Also the [+] / [-]
buttons can be used instead of the D-Pad.
• Hold [Note] + (Up), (Down), (Left), (Right) to navigate note selection.
Adds the highlighted note value to the step.
• Hold [Instrument] + (Up) or (Down). Adds the highlighted instrument
from the instrument list. This will require instruments to be available
in the instrument list. Default notes are also assigned.
• Hold [FX1] + (Up) or (Down). Adds the highlighted effect from the
effect list to the step.
• Hold [FX2] + (Up) or (Down). Adds the highlighted effect from the
effect list to the step. .
5. The centre (Enter) button on the D-Pad Navigator can then be used to
repeatedly apply the current step and settings in other step slots.
▌ EDITING EXISTING STEPS IN A PATTERN
1. Press [1] to open the ‘Pattern’ page. Also accessible from the [Menu].
2. To move the position vertically, Press (Up) or (Down). To move the
position horizontally across tracks Press (Left) or (Right). Ranges can
be selected using [Shift] + D-Pad Buttons.
3. Select recording mode, Press [Rec]. The steps selected will appear red
as opposed to green when normal playback mode is set.
4. To edit a step, press the dedicated step function button i.e. [Note],
[Instrument], [FX1], [FX2] and the selection will highlight the parameter
in the step selection bounding box.
5. Use the (Up), (Down), (Left), (Right) Buttons or [+] and [-] to change the
selected step setting for the held option i.e. Note, Instrument etc.
▌ DELETING STEPS IN A PATTERN
1. Press [1] to open the ‘Pattern’ page. Also accessible from the [Menu].
2. To move the position vertically, Press (Up) or (Down). To move the
position horizontally across tracks, Press (Left) or (Right).
3. Ensure a note or instrument parameter is selected. Deleting when the
FX1 or FX2 parameter is selected will only delete the FX parameter
setting and not the full step. To delete MIDI Instruments the parameter,
specically [Note] or [Instrument] should be deleted.
4. Press [Delete]. The selected step or the selected step range will be
deleted from the pattern.
▌ INSERTING STEPS IN A PATTERN
1. Hold [1] to open the ‘Pattern’ page. Also accessible from the [Menu].
2. To move the position vertically, Press (Up) or (Down). To move the
position horizontally across tracks, Press (Left) or (Right).
3. Press [Insert]. A new empty step row is added and the selected step
and steps below are moved down.

The process of sequencing steps is the core
process in Tracker Mini pattern design. Steps
and patterns go hand in hand. The pattern
format section covered earlier explained the
general pattern creation, structure and general
navigation of patterns. Also the process of
adding and editing steps at a fundamental
level. This laid out the foundations for patterns.
This section goes further into the workow and
process of sequencing steps and takes a
deeper dive and more advanced view. The four
components of a step; Note, Instrument, FX1
and FX2 are explained in more detail, giving an
insight into what’s behind each one. The
multiple options in the process of working with
steps as well as the detailed explanations such
as how to create an instrument or what each
effect does are included. Steps can be used for
beats or melodies and with multiple tracks
used together, can create chords. The focus
here will be on the audio elements of steps.
MIDI steps and patterns will be covered
specically in more detail in a later section,
although a similar process is applied to creating
both audio or MIDI steps. The section has a
heavy focus on the process and techniques
associated with working with steps in patterns.
The included workow tools and tips will speed
up the process of creating patterns and making
music and help to become more comfortable in
using Tracker Mini.
Sequencing Steps
5
69
Polyend Tracker Mini Manual
68
Polyend Tracker Mini Manual
NOTES

71
Polyend Tracker Mini Manual
70
Polyend Tracker Mini Manual
NOTESNOTES
Sequencing Steps
5
Sequencing Steps
5
5.1 Dedicated Step Parameter Buttons.
A step is a building block which triggers events such as playing a note or
beat or activating a MIDI action and is used for creating patterns. Steps are
programmed across pattern rows which represent each of the eight
available tracks in the pattern sequence.
A step is a combination of 4 main components each of which has a
dedicated selection button:-
Note. This sets the pitch of the step and is important for creating
melodies or beats based on sample mapped drum hits.
Instrument. This is a combination of a sample and the parameters and
settings assigned to it. Also for setting MIDI Channel.
FX1. The rst effect slot where the modulation and audio effects can be
applied for the step.
FX2. The second effect slot where the modulation and audio effects can
be applied for the step.
P 25- -- -C5 40
Step Dedicated Parameter Buttons
Pattern page is selected by pressing [1] or from the [Menu] while the Note,
Instrument, FX1 and FX2 have dedicated buttons for editing the selected step.
The step selection box will show solid
colour on the selected option part.
Example: Note is shown highlighted here.
Parameters are colour coded in line with
the dedicated step function buttons
Note
+ Octave
Effect Type
+ Value
Instrument
Number or
MIDI
Effect Type
+ Value
FX1
FX2
Note
Instr
C5 40 ---- P 25
5.2 Process of Creating a Step
Steps are sequenced in the Tracker Mini each of which contains a Note,
Instrument, and two FX slot options. It is good practice to structure these
into tracks of relevance. For example kick drum on track 1, especially at the
starting point.
Pattern Format Set,
Instrument Pool Populated
Navigate to the rst step to
create / edit. It may help to
develop individual tracks rst
Select [Rec] Recording Mode.
Step selection box red.
Use [Rec] + [Play]
Live Recording to capture real
time steps and parameters
using an external controller.
Press [Play]
To play. Also Press [Rec] to
exit record mode.
Hold [Note] + [+] / [-]
To select the step note
Hold [FX2] + [+] / [-]
To select the effect
The D-Pad Navigator Pad (Up), (Down), (Left), (Right) buttons also can be used.
Hold [Instrument] + [+] / [-]
To select Instrument
Hold [FX2] + [+] / [-]
To select the effect
Repeat Cycle to add
more steps manually.
Use ‘Fill’ and ‘Step
Jump’ to assist with
populating multiple steps
Pre-Requisite Select First Step
Note FX1
Edit & Add
Instrument
Fill & Jump
FX2
Recording Mode
Live Recording Mode
Create More Steps /
Develop Other Tracks
Play
E
S

73
Polyend Tracker Mini Manual
72
Polyend Tracker Mini Manual
NOTESNOTES
Sequencing Steps
5
Sequencing Steps
5
5.3 Recording Mode.
Steps are created by recording into the Pattern grid. There are two methods
of recording steps, rstly by manually programming steps at desired
intervals per track, some automated features will help in the workow. Also
real time live recording is possible using an external controller.
The selected step is navigated using the D-Pad navigation. An active step
will have at least one of the four; note, instrument, FX1, FX2 elements
shown. The currently selected step will have a green bounding box.
The selected step to edit in recording mode will be shown with a red
bounding selection box.
▌ TOGGLING RECORDING MODE ON/OFF
1. The default mode is for Tracker Mini to play patterns and the currently
selected step indicated by the green bounding box.
2. Press [Rec] to toggle between playback and recording mode. Recording
mode is required to create, edit and congure steps in a pattern. The
bounding box is indicated red when in recording mode.
3. The [+] and [-] buttons are essential edit functions in recording mode for
placing ‘work steps’. Any selected parameter, highlighted with a solid
colour, can be changed in recording mode using [+] & [-] Buttons. The
D-Pad navigation buttons will move the cursor within the pattern.
4. Hold the dedicated parameter button, Note, Instrument, FX1 or FX2 will
temporary select for choosing an option or quick tap to lock selection.
C5 40
----
P 25
C5 40
----
P 25
Rec
Press [Rec] to select recording mode, which allows editing of steps.
Pressing again reverts to normal play mode.
Green selection box: Normal playback mode.
Solid green box shows which parameter is selected using the dedicated
parameter selection buttons. Cant be edited in normal mode.
Red selection box: Recording mode, step editor.
Solid red box shows which parameter is selected using dedicated parameter
selection buttons and is therefore editable.
Quick Tap Dedicated Parameter Button to select specic parameter
On
Off
5.4 Manual Recording Steps.
Steps can be added manually in Pattern Mode by navigating to a location
and using one of several step entry button options. Pre-requisite is that the
project instrument list is pre-populated with sample / instrument options.
▌ QUICK START TO MANUALLY ENTER AND EDIT STEPS
1. Press [1] to select the Pattern Mode page.
2. Select the target step to edit. Use the D-Pad navigator (Up), (Down) to
scroll top to bottom i.e. step row 1. Press (Left), (Right) to select a track.
The step should be highlighted with the green bounding box.
3. Press [Rec] to switch to recording mode. Recording mode is red.
4. Press [Preview] - 5
th
Screen Button to listen to the step audio.
5. For Note Steps use the most appropriate option to t your workow.
Ensure the note element is selected, tap [Note] to select.
• To set the default note, Hold [Note] + [+] / [-] or the D-Pad Navigator
buttons. The Note matrix will appear for the note to be selected.
• Press centre D-Pad Navigator (Enter) button. The default note will
be placed in the current step and the cursor will jump to the next
‘Step Jump’ interval. Holding (Enter) will repeat step placement.
• Press any [+] button to place a dened ‘C5’ note into an empty step.
The cursor position will remain on the current step. On existing
notes, the outer [+] / [-] buttons will change in octave increments
and inner [+] / [-] buttons will change the note in semitone intervals.
• Press the outer [-] button on an empty step to place a dened ‘OFF’
Command into the note step.
• Press the inner [-] button on an empty step to place a dened ‘FAD’
Command into the step note. Press again to cycle to place ‘CUT’
and again to select ‘OFF’.
6. Hold [Instrument] + [+] / [-] to select from the instrument list. Also with
instrument already selected, [+] / [-] can be used to change the
instrument. Tap [Instrument] instead of holding to lock the mode.
7. Hold [FX1] + [+] / [-] to select the FX from the effect list. Also with [FX1]
already selected, [+] / [-] will change the effect. Same process is applied
for [FX2]. Tap [FX1] or [FX2] instead of holding to lock the mode.

75
Polyend Tracker Mini Manual
74
Polyend Tracker Mini Manual
Manual Step Entry
Rec
+
-
+
-
NOTESNOTES
Sequencing Steps
5
Sequencing Steps
5
Track 1 Track 4Track 3Track 2
Recording mode on to edit steps in the pattern
Step Jump only
with (Enter)
Steps can be added individually.
Example: Hold [Note] + Navigate with (Up), (Down),
(Left), (Right) to select a note from the note grid.
Subsequent steps are recorded in when pressing the
D-Pad navigator (Enter) button. This will record
iteratively the selected note parameter into rows
dened by the ‘Step jump’ intervals.
Pressing the (Enter) button in recording mode will record the note and instrument into subsequent steps.
This is applied when the note or instrument which is selected and not applied for FX parameters.
Note Selected, C5.
Instrument Selected, Instrument #3.
FX1 Selected, Effect not applied.
FX2 Selected, Volume = 50.
Quick Tap Dedicated Parameter Button to lock the selection e.g. [Instrument] for editing
(Enter)
(Right)
[+]
Empty Step: Place a ‘C5’ note
Existing Note: Increment an octave
Empty Step: Place a ‘C5’ note
Existing Note: Increment a semitone
Empty Step: Place a ‘FAD’ command
Existing Note: Decrement a semitone
Empty Step: Place an ‘OFF’ command
Existing Note: Decrement an octave
[-]
[+]
[-]
D-Pad Navigator for moving around the pattern. Master [+] / [-] for editing of step parameter values.
(Down)
(Up)
(Left)
Select multiple step rows with [Shift] + (Up) or (Down).
Also across multiple tracks [Shift] + (Left) + (Right)
On the top row [Shift] + (Up) will select all steps in the
track. Press [Shift] + (Up) + (Up) to select all steps.
Edits to any existing parameters can be made
simultaneously, but only If a parameter is already set.
These changes will be relative to the original value.
Unassigned elements of a step will remain empty.
Step Jump
1
Step Jump
2
C5 40
----
P 25
C5 03
----
V 50
C5 03
----
V 50
C5 03
----
V 50
C5 03
----
V 50
D6 03
----
V 10 D6 03
----
V 10
D6 03
----
D6 03
----
----
----
----
----
--- ---
--- ---
V 50
V 30
Steps can also be edited collectively. Select a range within a track and/or
across tracks to edit the selected range.
▌ MANUALLY EDITING A RANGE OF STEPS
1. Press [1] to select the Pattern Mode page.
2. Select the target step to edit. Use (Up), (Down) on the D-Pad Navigator
or [+] / [-] to scroll top to bottom. Press (Left), (Right) to select a track.
The step should be highlighted with the green bounding box.
3. Hold [Shift] + (Left) or (Right) to select a range across tracks and Hold
[Shift] + (Up) or (Down) to select rows and expand the selected range.
4. To select all steps for an individual track, select the top row step on the
track to select, then Press [Shift] + (Up).
5. To select all steps in the pattern, select the top row step on any track,
then Press [Shift] + (Up) & (Up).
6. Press [Rec] to switch to recording mode. The step bounding box will
turn red and allow editing of the collective step range.
7. Press [Preview], 5
th
Screen button, to play only the selected range.
8. The [+] / [-] buttons will now change all existing parameter values for the
selected steps when in recording mode.
9. Select a parameter to edit. Only existing parameters can be changed.
Any empty parameter slots will not change and remain open.
• To change Note: Hold [Note] + Use the D-Pad Navigator to select a
note. Tap (Enter), centre button to replace any existing note on all
selected steps. If required, Tap [Note] to lock to retain the mode.
• To change Instrument: Hold [Instrument] + (Up) (Down) or use the
[+] / [-] buttons to replace existing instruments to the new
instrument. If required, Tap [Instrument] to lock to retain the mode.
• FX1 and FX2 Cannot be changed when a range is selected.
8. Press [+] / [-] to adjust the value of the selected parameter within the
step range. The selected parameter will be indicated in solid coloured
red. When adjusting values simultaneously they will each change
relative to the original value including any FX Values.

77
Polyend Tracker Mini Manual
76
Polyend Tracker Mini Manual
NOTESNOTES
Sequencing Steps
5
Sequencing Steps
5
▌ COPYING AND PASTING STEPS AND STEP RANGES
1. Press [1] to select the Pattern Mode page.
2. Navigate to select a Step. If required Press [Shift] + (Left) or (Right) and
[Shift] + (Up) or (Down) to select a range of tracks and rows.
3. Press [Rec] to switch to recording mode. The step bounding box will
turn red and allow copying of the step or collective step range.
4. Press [Copy] button. The selected step or step range will be copied to
the clipboard.
5. Relocate the cursor to the rst step in which to paste by using (Up),
(Down), (Left) or (Right). The top left step is the anchor for a range.
6. Press [Shift] + [Copy] button to paste. The copied step or step range will
be pasted from the clipboard and into the selected step or the relative
range. Undo and Redo can be used if needed.
▌ DELETING STEPS AND STEP RANGES
1. Press [1] to select the Pattern Mode page.
2. Navigate to select a Step. If required, Press [Shift] + (Left) or (Right)
and [Shift] + (Up) or (Down) to select a range of tracks and rows.
3. Press [Rec] to switch to recording mode. The step bounding box will
turn red and allow copying of the step or collective step range.
4. Press [Delete] button. The selected step, if note or instrument is
selected, will be deleted. If only the FX1 or FX2 is selected then the
effect alone is deleted.
5. MIDI channel values are not deleted when deleting a note. This can be
deleted by selected the instrument parameter when deleting.
▌ COPY / PASTE AN ENTIRE PATTERN
1. Press [1] to select the Pattern Mode page.
2. Hold [1] + [Copy] to copy the current pattern to the clipboard.
3. Select a new pattern, Press [1] + (Up) or (Down)
4. Hold [1] + [Shift] + [Copy] to paste into the current pattern.
5.5 Step Jump Recording Multiple Steps
When steps are added using the D-Pad (Enter) button the active step is
automatically advanced to the next step when complete. The intervals for
this are based on the ‘Step Jump’ feature. This is useful for creating
patterns with dened intervals and speeding up workow. Step jump does
not operate when using the [+] / [-] step entry method.
Step Jump Examples
Track 1 Track 2
Recording mode on to edit steps in the pattern
[Enter]
[Enter]
[Enter]
Step Jump
0
1
1
1
3
5
2
2
2
4
6
Step Jump
1
Step Jump
4
The selected step will not
advance and will remain at the
same step position
The selected step will
advance automatically to
select the next step position
The selected step will
advance four steps forward. In
this example selecting the
next ‘on beat’ position.
The Step Jump setting is useful when populating specic intervals, for example each on beat step or
each off beat step or alternate steps for percussion. This speeds up the workow and helps with
creating interesting sequences.
=
C5 40
----
P 25
C5 40
----
P 25
C5 40
----
P 25
C5 40
----
P 25
C5 40
----
P 25
D5 40
----
P 25
D5 40
----
P 25
D5 40
----
P 25
D5 40
----
P 45
D5 40
----
P 45
D5 40
----
P 45
Rec

79
Polyend Tracker Mini Manual
78
Polyend Tracker Mini Manual
NOTESNOTES
Sequencing Steps
5
Sequencing Steps
5
5.6 Fill Recording Multiple Steps
The ‘Fill’ function allows a more elaborate and detailed population of step
ranges. This speeds up workow by helping to create batches of steps with
dened criteria automatically applied. Also Fill is a very creative tool for
generating melodies and beats and experimenting with patterns.
▌ ACCESSING THE FILL UTILITY
1. Press [1] to select the Pattern Mode page.
2. Press [Rec] to switch to recording mode. The step bounding box will
turn red and allow editing of steps.
3. Select a range of steps: Hold [Shift] + (Up), (Down), (Left) or (Right)
4. Ensure the step parameter to populate is selected: Press [Note],
[Instrument], [FX1] or [FX2]. The parameter will be highlighted solid red.
5. Press [Fill], 4
th
Screen button. This will open the Fill utility pop-up
window and be ready to select the criteria to apply to the selected step
range and its selected parameter.
Range To Fill
Fill will populate a selected range of steps
based on the ll criteria applied.
Example: Illustration shows 2 Tracks, 4 rows.
Fill Parameter
The selected parameter will be the
element to be lled.
Example: Illustration shows Note selected
It is possible to ll ranges that are already containing steps, contain empty steps or mix of both. The ll
operates in the range and ignores the Step Jump parameter.
Track 4Track 3
D6 03
----
V 10 D6 01
----
V 20
E6 03
----
D5 03
----
D6 01
----
V 10
C6 01
----
V 20
----
----
----
----
----
----
----
----
--- ---
--- ---
--- ---
--- ---
V 50
V 30
▌ ENTERING STEPS WITH STEP JUMP
1. Press [1] to select the Pattern Mode page.
2. Navigate to select a Step.
3. Press [Rec] to switch to recording mode. The step bounding box will
turn red and allow steps to be added.
4. Hold [Step Jump], 3
rd
Screen button + Press [+] / [-]. Set the value to the
step jump interval required. The Inner [+] / [-] buttons change in
increments of 1 and the outer buttons in increments of 10.
5. Pressing the (Enter) D-Pad button will enter a step and advance the
active step by the value set in the ‘Step Jump’ setting.
6. Continue to press (Enter) to add more steps and advance by the set
interval or edit the current step manually.

81
Polyend Tracker Mini Manual
80
Polyend Tracker Mini Manual
NOTESNOTES
Fill Utility Window
The window layout is similar for the step range and parameters selected.
However the content and features for ll will change depending on the
context of the selection and the options chosen. A typical Fill window is
shown below with a summary of common features. The Fill utility is mainly
controlled using the dynamic screen buttons under the Tracker Mini screen.
To access Fill:-
Press [Fill] - Screen Button, when in [Rec] Mode of the pattern page [1].
Sequencing Steps
5
Sequencing Steps
5
Example of using a basic Fill
As a quick start introduction to creating lls and example to populate an
empty range with notes followed by lling the FX1 for the series of notes
with a pan variation effect. This will play a percussion segment,
▌ CREATING A NOTE FILL
1. Press [1] to select the Pattern Mode page.
2. Press [Instrument] and select a percussive sound. The ‘606-ClosedHat’
sample, numbered instrument ‘6’, has been loaded into the project
instrument list and will be used for this example.
3. Press [Rec] to switch to recording mode. The step bounding box will
turn red and allow editing of steps.
4. Select a range of empty steps: Hold [Shift] + (Up), (Down), (Left) or
(Right). For this example select 8 step rows on a single track. The
option for selecting multiple rows and tracks is possible.
5. Ensure the notes step parameter is selected in the pattern range
selected: Press [Note], which will be highlighted solid red.
6. Press [Fill], 4
th
Screen button. This will open the Fill utility pop-up
window.
7. Press [Where?], 1
st
Screen button. Repeat presses will cycle through
the options. Also, with the ‘Where?’ section highlighted, (Up), (Down) or
[+] / [-] will scroll through and select options.
Dynamic area of 5 features containing the criteria specically required for 1) Parameter
selected, 2) Step range selected and 3) Options chosen in ‘Where’ & ‘Fill Type’.
Example Illustration shows a range of notes selected with the ‘note’ and ‘constant’ selections.
Ensure a range of steps is selected and the step parameter also selected before opening
the Fill utility. This range and parameter will be what determines the ll application.
Where?
Option of where to apply the ll
within the selected step range.
Example: Note would apply a note
ll to all steps containing a note.
Fill Type
Option of how to apply the parameter
within the selected step range.
Example: Constant would apply a
constant note value C2 into the range.
Fill
Activates the ll command.
Applies dened criteria into the
selected range.
Cancel
Exit without
applying.
Where? Scale Fill Type CancelNote
C5
Fill
Fill Notes
Note
Chromatic
Constant
No Note
Minor
From-To
FX
Major
Random
No FX
Dorian
Random
Lyd Major
Each
Lyd Minor
Where? Scale Fill Type CancelNote
C5
Fill
Fill Notes
Note
Chromatic
Constant
No Note
Minor
From-To
FX
Major
Random
No FX
Dorian
Random
Lyd Major
Each
Lyd Minor

83
Polyend Tracker Mini Manual
82
Polyend Tracker Mini Manual
NOTESNOTES
Sequencing Steps
5
Sequencing Steps
5
8. Select in the bounding box ‘No Note’. This option will select all steps
that do not have a note set. As the selected range is empty all 8 steps
will be lled with this option.
9. Press [Scale] - 3
rd
Screen Button. Repeat presses will cycle through the
options. Also the (Up), (Down) or [+] / [-] will scroll through and select
options. Select ‘Chromatic’. As this is a percussion instrument the scale
is less important.
10. Press [Fill Type] - 4
th
Screen Button. Repeat presses will cycle through
the options. Select ‘Constant’. As this is a percussion pattern the
instrument does not require scale or note ranges so constant will repeat
the note.
11. Press [Note] - 5
th
Screen Button. Repeat presses will cycle through the
options. Also the (Up), (Down) or [+] / [-] will scroll through and select
options. Set to C5, the root note for the sample.
12. Press [Fill], 8
th
Screen button. This will activate the ll command and
populate the selected range.
The default note value is C5 which plays a sample at its original pitch value. The rst slice of
a beat slice sample will be triggered using note C2.
Track 4 Track 4 Track 4Track 3
1
5
3
7
2
6
4
8
D6 03
----
V 10
D6 01
----
V 20
D6 01
----
V 20
D6 01
----
V 20
---- ------- ---
---- ------- ---
---- ------- ---
---- ------- ---
---- ------- ---
---- ------- ---
---- ------- ---
---- ------- ---
E6 03
----
D5 03
----
----
----
----
----
--- ---
--- ---
V 50
V 30
C5 06
---- ----
C5 06
---- P-50
C5 06
---- ----
C5 06
---- P-36
C5 06
---- ----
C5 06
---- P-22
C5 06
---- ----
C5 06
---- P -8
C5 06
---- ----
C5 06
---- P 7
C5 06
---- ----
C5 06
---- P 21
C5 06
---- ----
C5 06
---- P 50
C5 06
---- ----
C5 06
---- P 35
Note Fill FX Fill
▌ ADDING THE PAN VARIATION USING FILL
1. Following from the previous example; In Pattern Mode [1] with [Rec]
On, ensure the previous step range is still selected.
2. Press [FX2]. This selects the effect column FX2 which is highlighted
solid red.
3. Press [Fill] Screen Button. This will open the Fill utility pop-up window.
The display will now be different as the ll utility is now FX, not Note Fill.
4. Press [Where?] - First Screen button. Repeat presses will cycle through
the options. Also the (Up), (Down) or [+] / [-] will scroll through and
select options.
5. Select in the bounding box ‘Note’. This option will select all steps that
have a note set. This is effectively the range of notes recently created.
6. Press [Fx Type], 3
rd
Screen button. Repeat presses will cycle through
the options. Also the (Up), (Down) or [+] / [-] will scroll through and
select options. Select ‘Panning’, as the effect to ll into the selected
range.
7. Press [Fill Type], 4
th
Screen button. Repeat presses will cycle through
the options. Select ‘From-To’ to allow a range of pan values to be lled.
8. Press [From], 5
th
Screen button. Press (Up), (Down) or [+] / [-] to set the
value. Set this to -50.
9. Press [To], 6
th
Screen button. Press (Up), (Down) or [+] / [-] to set the
value. Set this to 50.
10. Press [Fill], 8
th
Screen Button. This will activate the ll command and
populate the selected range. This will create a percussive pattern which
will pan left to right in the stereo image. The values are automatically
assigned in equal intervals across the range.
Where? Fx Type
P
To
50
Fill Type CancelFrom
-50
Fill
Fill Fx 1
Note
Random FX
Constant
No Note
None
From-To
FX
Off
Random
No FX
Volume
Random
Panning
Each
Micro Tun

85
Polyend Tracker Mini Manual
84
Polyend Tracker Mini Manual
NOTESNOTES
Sequencing Steps
5
Sequencing Steps
5
Fill Utility Generic Page Parameter - Where.
The Fill utility will present options respective to the selected step parameter.
If for example an FX parameter is selected in a range, then the ll utility will
represent FX Fills. Some elements like ‘Where?’ and ‘Fill Type’ are generic.
The ‘Where?’ option determines where in the selected step range the ll steps and dened
parameters will be placed. This will ll new steps into the steps in the range which are empty,
already lled or both depending on the selected option.
Where?
Where? Step
1
Scale Fill Type CancelNote
C2
Fill
Fill Notes
Euclidean
Chromatic
Constant
No Note
Minor
From-To
FX
Major
Random
No FX
Dorian
Random
Lyd Major
Each
Lyd Minor
Option Sub-Option Description
Note -
Will populate only steps in the selected range where a
note already exists, overwriting the original value.
No Note -
Will populate only steps in the selected range where no
note exists, ie blank note steps
FX -
Will populate only steps in the selected range where an FX
parameter already exists, overwriting the original value.
No FX -
Will populate only steps in the selected range where no FX
parameter exists, ie blank FX steps
Random -
Will populate steps in the selected range randomly for both
existing and blank steps. Density is a related option.
Random Density
Density parameter controls, in percentage how much of
the range is lled when the ‘Random’ option is selected.
Each -
Populates steps in the range with a dened step interval
which ranges from 1-32. Step is a related option.
Each Step
Step parameter controls the intervals of evenly distributed
step lls when the ‘Each’ option is selected
Euclidean -
Generates rhythmic patterns within the range based on the
population of 1-32 events. Event is a related option.
Euclidean Event
Events determine how the steps and intervals are
generated with respect to the selected step length.
Euclidean Patterns
Euclidean patterns are a more creative ll function. While the other options
perform a population based on structure, Euclidean option aims to be more
creative in generating musical sequences. Euclidean patterns are
generated based on a mathematical model where the steps and intervals
determine a pattern beat. Tracker Mini uses ‘events’ and the step length to
calculate the steps and intervals.
Consider the following formula as rough guide for Euclidean lled patterns.
Steps will be ‘rounded’ to the nearest step location to spread as ‘evenly’ as
possible within the event and length constraints.
Examples:
Euclidean Formula = Step Length / Event
8 Steps in the Length,
Event = 4.
4 Steps in the Length,
Event = 3.
8 Steps in the Length,
Event = 5.
5 Steps in the Length,
Event = 2.
8 Steps in the Length,
Event = 7.
3 Steps in the Length,
Event = 2.
Track 4
Track 4
Track 4
Track 4
Track 4
Track 4
1
1
5
3
3
7
2
2
6
4
4
5
8
---- ------- ---
---- ------- ---
---- ------- ---
---- ------- ---
---- ------- ---
---- ------- ---
---- ------- ---
---- ------- ---
---- ------- ---
---- ------- ---
---- ------- ---
---- ------- ---
---- ------- ---
D6 03
----
V 10
D6 03
----
V 10
D6 03
----
V 10
D6 03
----
V 10
D6 03
----
V 10
D6 03
----
V 10
D6 03
----
V 10
D6 03
----
V 10
D6 03
----
V 10
D6 03
----
V 10
D6 03
----
V 10
D6 03
----
V 10
D6 03
----
V 10
D6 03
----
V 10
D6 03
----
V 10
D6 03
----
V 10
D6 03
----
V 10
D6 03
----
V 10
D6 03
----
V 10 D6 03
----
V 10 D6 03
----
V 10
D6 03
----
V 10
D6 03
----
V 10

87
Polyend Tracker Mini Manual
86
Polyend Tracker Mini Manual
NOTESNOTES
Sequencing Steps
5
Sequencing Steps
5
Fill Utility Generic Page Parameter - Fill Type.
The ‘Fill Type’ option is another generic parameter in the Fill Utility and
concentrates on range of ll values.
Option Sub-Option Description
Constant -
Populates the steps applied with a xed singular
parameter value as stated with Note, Instrument or FX
Constant
Note,
Instrument
or FX
Sets the parameter value to be applied when lling
steps. This will differ depending on Note, Instrument, FX
From-To
Populates the steps applied with multiple parameter
values distributed across the dened range
From-To From
Starting point for the parameter value range which will
be used to ll the steps range.
From-To To
End point for the parameter value range which will be
used to ll the steps range.
Random
Populates the steps applied with multiple random
parameter values distributed across the dened range
Random From
Starting point for the parameter value range which will
be used to randomly ll the steps range.
Random To
End point for the parameter value range which will be
used to randomly ll the steps range.
The ‘Fill Type’ option operates on the parameter value and determines how the ll parameter
is applied into the selected step range. This will ll the parameter as an individual repeated
element, will be based on a range of values or will randomise the step parameters.
Fill Type
Where? Step
1
Scale Fill Type CancelNote
C2
Fill
Fill Notes
Euclidean
Chromatic
Constant
No Note
Minor
From-To
FX
Major
Random
No FX
Dorian
Random
Lyd Major
Each
Lyd Minor
Scale Scale Label
Chromatic Chromatic
Minor Minor
Major Major
Dorian Dorian
Lydian Major Lyd Maj
Lydian Minor Lyd Min
Locrian Random
Phrygian Phrygian
Phrygian Dominant PhrygDom
Mixolydian Mixlydian
Melodic Minor Melo Min
Harmonic Minor Harm Min
BeBop Major BeBopMaj
BeBop Dorian BeBopDor
BeBop Mixolydian BeBopMix
Blues Minor Blues Min
Blues Major Blues Maj
Pentatonic Minor Penta Min
Pentatonic Major Penta Maj
Hungarian Minor Hung Min
Scale Scale Label
Ukranian Ukranian
Marva Marva
Todi Todi
Whole Tone Wholetone
Diminished Dim
Super Locrian SLocrian
Hirajoshi Hirajoshi
In Sen In Sen
Yo Yo
Iwato Iwato
Whole Half WholeHalf
Kumoi Kumoi
Overtone Overtone
Double Harmonic DoubleHarm
Indian Indian
Gypsy Minor GypsyMin
Neapolitan Major NeapoMaj
Neapolitan Minor NeapoMin
Enigmatic
Not used for Fill
Fill Notes
Filling a selected range will also be based on the parameter selected. When
the step range is selected the ll parameter options will reect the
parameter selected in the range.
Where? Scale Fill Type CancelNote
C5
Fill
Fill Notes
Note
Chromatic
Constant
No Note
Minor
From-To
FX
Major
Random
No FX
Dorian
Random
Lyd Major
Each
Lyd Minor
When Notes are selected the note scale will be available for the notes
that will be lled into the range. The notes will be constant, random or
between the from-to range.
Fill Notes
Track 4
---- ------- ---
C2 02
----
P-50
C2 02
----
P 50

89
Polyend Tracker Mini Manual
88
Polyend Tracker Mini Manual
NOTESNOTES
Sequencing Steps
5
Sequencing Steps
5
Fill Instruments
When the instrument parameter is selected in the range, the ll will apply
instrument lls. This is based on the project instrument pool.
Fill FX
When either of the 2 FX parameters is selected in the range, ll will apply
FX lls. This is based on the effects FX list available within Tracker Mini.
Where? Fill Type Cancel
Instrument
2
Fill
Fill Instruments
Note Constant 606 Kick
InstX
No Note
From-To 606 K2
InstY
FX
Random Sample1
InstZ
No FX
Random
Each
Where? Fx Type
P
To
50
Fill Type CancelFrom
-50
Fill
Fill Fx 1
Note
Random FX
Constant
No Note
None
From-To
FX
Off
Random
No FX
Volume
Random
Panning
Each
Micro Tun
When Instruments are selected the instrument pool for the project is
presented. It is also possible with From-To or Random Fill Type to
populate the steps with multiple instruments across a variety of steps.
When any of the two FX are selected the Tracker Mini effect list is
presented as ‘Fx Type’. The selected effect character is shown under the
name. It is also possible with From-To or Random ‘Fill Type’ to populate
the range of steps with variations for the FX value setting.
Fill Instruments
Fill Instruments
Track 4
---- ------- ---
C2 02
----
P-50
C2 02
----
P 50
Track 4
---- ------- ---
C2 02
----
P-50
C2 02
----
P 50
5.7 Live Recording Steps with an External Controller
Live recording offers an alternative to manual recording when programming
steps into a sequence and when using an external MIDI Controller. Manual
step recording is useful building complex and precise melodies and
arrangements. Live recording is good when integrating Tracker Midi into a
MIDI system for more natural sequences. As always this will be based on
individual taste and a t to personal workow preferences.
Live recording allows steps to be placed in real time using an external
controller while the sequencer loops to record multiple cycles of steps.
Live Recording Considerations:-
• An external MIDI keyboard controller should be connected to
Tracker Mini in order to to play and record live.
• It is often useful to set the metronome to on, found in the Cong
menu when live recording to aid the timing.
• Recordings can be edited afterwards using the editing tools and
process as described with manual recording. Live recording is
useful to grab quick sequences and edit for accuracy afterwards.
• The habit of arming tracks is helpful. Armed tracks can be recorded.
By default tracks will shift recording to the next right track step if the
active step being recorded coincides with an existing step.
• Quantization settings are in the cong menu under ‘Recording
options’. Micro moves, slightly nudge and offset the note timing and
can also be live recorded.
Tip: The technique of reducing the project tempo for live recording can be helpful
in capturing more precise musical and rhythmic patterns at a slower rate. Turn the
tempo back to it’s normal setting once the pattern has been recorded.

91
Polyend Tracker Mini Manual
90
Polyend Tracker Mini Manual
NOTESNOTES
Sequencing Steps
5
Sequencing Steps
5
▌ REAL TIME LIVE RECORDING A PATTERN
1. Press [1] to select the Pattern Mode page.
2. Hold [Instrument] + (Up), (Down) or [+] / [-] to scroll through and select
options. Select the instrument to record. The Notes will be live recorded
from the incoming MIDI keyboard.
3. Press [Rec] + [Play] to start live recording mode. The sequencer will
start immediately or after a count in of 4 if ‘Pre roll’ is set on.
4. Play the external MIDI keyboard controller. Notes are recorded along
with a ‘Note Off’ value.
5. Steps will be recorded into the current track. Notes will not be
overdubbed. Any recording that coincides with an existing note will by
default be recorded into the step row on the next track right. This
behaviour is dependant on arming of tracks.
6. Press [Rec] to leave recording mode but to continue playing.
7. Press [Play] to stop playback.
▌ PREPARING FOR LIVE RECORDING
A number of settings are available when recording live. These are optional
depending on circumstances.
• Set the Metronome: [Menu] > Cong > Metronome: State On.
• Set the Pre roll count in: [Menu] > Cong > Metronome: Pre roll On.
• Set Quantize: [Menu] > Cong > General > Recording Options
• Arm or Disarm a track to allow recording:-
Hold [Shift] + [Rec] + Screen Button to toggle arm/disarm per track.
Note that only arming the target track to record to will avoid steps
being recorded to adjacent tracks when steps are occupied.
• Ensure the Note parameter is highlighted which will allow recording
steps. If the Instrument or FX is highlighted by default, then these
will be recorded.
• Hold [Instrument] + [+] / [-] to set a default instrument to record.
▌ SETTING QUANTIZE RECORDING OPTIONS
1. Hold [Menu] and with D-Pad navigation buttons, select ‘Cong’ options.
2. In the left window, highlight ‘General’. Use the screen, D-Pad
navigation or [+] / [-] buttons to scroll menu.
3. Press (Right) to select the ‘General’ sub menu option window and scroll
to select ‘Recording Options’. Use the screen, D-Pad Navigator or the
[+] / [-] buttons to scroll menu. Press [Change] screen button to edit.
This will determine the quantize for recording:-
• Only Notes: Quantize notes only.
• Microtiming: Will record a nudge or offset as it is played by
recording as a ‘Micro-move’ FX value in the step. Delete these FX to
revert to quantized values.
• Velocity: Use an external MIDI Keyboard to record in real time
velocity values. Velocity is recorded as an FX value.
• Microtiming + Velocity. Record into both FX the xed velocity and
real time microtiming values.

93
Polyend Tracker Mini Manual
92
Polyend Tracker Mini Manual
5.8 Note Steps
One of the four components of a step event is a Note. This may be a
musically scaled note or a note assigned to a sample or slice. Essentially
note controls a single note pitch in the step event for the instrument. The
default note value C5 refers to the original sample pitch. C5 is therefore a
default note assigned from the ‘Note’ applied. When using a Beat Sliced
instrument, the rst slice played is assigned as C2.
Note Summary
NOTESNOTES
Sequencing Steps
5
Sequencing Steps
5
Note parameter has a dedicated
button when working in the pattern.
Note is the rst parameter in the step
event and is highlighted when selected
Note grid is used to select a note value for the step event. Hold
[Note] + D-Pad Buttons or [+] / [-] to choose a note. Press [+] / [-]
to adjust existing note when the step is selected.
Lowest Note
Chromatic
Scale shown - default
C
C#
B
A#
The notes value are mapped across the note grid. Starting at C3 bottom left, by
default and top right, at B6 to C6 top left. This therefore covers four octaves.
The Note selected from the note grid can then be placed, repeatedly into steps using
the D-Pad Navigator (Enter) button.
Note
C5 02 V 10 P 25
C6 E6 A6C#6 F#6F6 A#6D6 G6 B6D#6 G#6
C5 E5 A5C#5 F#5F5 A#5D5 G5 B5D#5 G#5
C4 E4 A4C#4 F#4F4 A#4D4 G4 B4D#4 G#4
C3 E3 A3C#3 F#3F3 A#3D3 G3 B3D#3 G#3
▌ DETAILED APPLICATION OF A NOTE VALUE TO A STEP EVENT
1. Press [1] to select the pattern mode page.
2. Select a blank or existing step event.
3. Press [Note] to ensure the note parameter is selected in the step event.
This is a short press. Holding [Note] will display the note grid.
4. Select recording mode, Press [Rec]. The steps selected will appear red
as opposed to green when in normal playback mode.
5. For placement of Note Steps several methods exist:-
• To set the default note, Hold [Note] + [+] / [-] or the D-Pad Navigator
buttons. The Note grid will appear for the note to be selected. The
highlighted note in the grid will be the chosen default.
• Press centre D-Pad (Enter) button. The default note will be placed in
the current step and the cursor will jump to the next step ‘Step
Jump’ interval. Holding (Enter) will repeat the step placement with
the same note until the (Enter) button is released.
• Press any [+] button to place a dened ‘C5’ note into an empty step.
The default note selected prior does not reect in this placement
method. The cursor position will remain on the current step.
• Press the outer [-] button on an empty step to place a dened ‘OFF’
Command into the note step.
• Press the inner [-] button on an empty step to place a dened ‘FAD’
Command into the step note. Press again to cycle to place ‘CUT’
and again to select ‘OFF’.
6. For editing notes within existing steps:-
• Press (Enter) to overwrite an existing note with the previously
selected note. Instrument is unaffected.
• On existing notes, the outer [+] / [-] buttons will change in octave
increments and inner [+] / [-] buttons will change the note in
semitone intervals.
7. Notes will be added, displayed with teal coloured text. New notes are
always added to an empty step along with the currently selected
instrument, coloured yellow. On existing steps, the note is changed and
existing instrument retained.

95
Polyend Tracker Mini Manual
94
Polyend Tracker Mini Manual
Polyphony & Chords
Each track in Tracker Mini can handle one voice which can play multiple
notes, but not simultaneously. To create chords, multiple tracks would be
used when each track represents a note. A triad would therefore need 3
tracks to play the chord.
Tracks can be rendered to a new audio sample and reduce the tracks used.
This re-sampling method can also be used to render into an audio le when
FX slots are full.
▌ RENDERING TRACKS TO AUDIO CHORDS
1. Press [1] to select the pattern mode page and Press [Rec] to select
record edit mode.
2. Hold [Shift] + (Up), (Down), (Left), (Right) to select the range to render.
For example, select across all the tracks making up the chord and
optionally select the pattern duration of 16 steps
3. Press [More]. The 8
th
Screen Button to select more pattern options.
4. Press [Render Selection], the 1
st
Screen Button.
5. The naming page appears. A name can be edited i.e. name of chord or
press [Auto Name], 5
th
Screen Button to automatically apply a name.
6. When the name is entered, Press [Render & Load], 7
th
Screen Button.
This option will not only render the audio but also automatically load the
sample into the instrument list. The pattern will halt playback if playing.
7. When the le has been ‘exported’, the instrument list will open ready to
preview or select the sample exported.
8. Press [1], to return to the pattern page. Now replace the instrument on a
track with the rendered chord sample. Ensure the note is set to the
same default for the sample playback, example C5.
9. Remove the other track samples to free them up.
NOTESNOTES
Sequencing Steps
5
Sequencing Steps
5
Track 1
1
…
Track 2 Track 3
C
E
G
C5 02
- -- -
P 25 E5 02
- -- -
P 25 G5 02
- -- -
P 25
Special Note Commands
Three special note commands can be applied instead of the actual note
value. These are not used for applying a note sound, but are used for
controlling how a note ends. These include CUT - Immediately silences the
audio, FAD - Fades out audio gradually and OFF - Triggers Note Off for the
envelope and starts the release phase.
To access these options, on an empty step, use the Inner and Outer [-]. The
Inner [-] will place a ‘FAD’ message and additional presses of [-] will then
change to ‘CUT’ and ‘OFF’. The Outer [-] will place an ‘OFF’ message. On
an existing step, the note can be edited further if required to create notes or
note messages using [+] / [-].
FAD - Fade.
Will gradually reduce the audio sound and fade it
out. Also will turn MIDI Notes off.
CUT - Cut.
Will immediately stop the audio sound. Also will
turn MIDI Notes off.
OFF - Off.
Will act as ‘Note-Off’ and trigger the release phase
of the envelope to reduce the sound.
FAD 02
- -- -
v 45
CUT 02
- -- -
v 45
OFF 02
- -- -
v 45

97
Polyend Tracker Mini Manual
96
Polyend Tracker Mini Manual
5.9 Instrument Step Parameters
Each step event has an instrument which is based on a sample, either raw
or edited or formed into a granular or wavetable instrument. Any instrument
added to the 48 instrument pool is available to be added to a step.
Instrument Summary
The default note value is C5 which plays a sample at its original pitch value. The rst slice of
a beat slice sample instrument with be triggered at C2.
Hold [Instrument] + D-Pad Navigator Buttons or [+] / [-] to
choose an instrument from the list. Also use [+] / [-] to scroll and
select, the outer buttons scrolling in larger increments.
NOTESNOTES
Sequencing Steps
5
Sequencing Steps
5
Instrument parameter has a dedicated
button when working in the pattern.
Instrument is the second parameter in the
step event and is highlighted when selected
While holding [Instrument], the pop-up window will
display the available instrument list where the
selection can be made to load to the step event.
While holding [Instrument], the pop-up window will
display the available instrument list where the
selection can be made to load to the step event.
Instr
C5 02 V 10 P 25
▌ DETAILED APPLICATION OF AN INSTRUMENT TO A STEP
1. Press [1] to select the pattern mode page.
2. Select an empty or existing step event.
3. Press [Instrument] to ensure the instrument parameter is selected in the
step event. This is a short press. Holding the button will display the
instrument list.
4. Select recording mode, Press [Rec]. The steps selected will appear red
as opposed to green when in normal playback mode.
5. For placement of instruments to empty steps several methods exist:-
• Press (Enter) to place a note which will also place the current
instrument at the same time.
• Hold [Instrument] till list appears then release. This will place the
current instrument into the step.
• Hold [Instrument] + (Up) or (Down) to select from the instrument list.
A default ‘C5’ note is also added to an empty step.
• Hold [Instrument] + [+] / [-] to scroll in small or large increments and
select an instrument from the list. A default ‘C5’ note is also added
to an empty step.
6. For editing an instrument within an existing step:-
• Hold [Instrument] until list appears then release. This will place the
current instrument into the step.
• Hold [Instrument] + (Up) or (Down) to select from the instrument list.
• Hold [Instrument] + [+] / [-] to scroll in small or large increments and
select an instrument from the list.
5. The instrument will be added, displayed with yellow coloured text.
Instruments are always added with a note. Instruments cannot be
added when a note message ‘OFF’, ‘FAD’ or ‘CUT’ exists.
Render
Selection
1 1
2
C5 40 ---- P-25
C5 40 ---- P-25
-- --- ---- ---- -- --- ---- ---- -- --- ---- ---- -- --- ---- ----
-- --- ---- ---- -- --- ---- ---- -- --- ---- ---- -- --- ---- ----
-- --- ---- ---- -- --- ---- ---- -- --- ---- ---- -- --- ---- ----
-- --- ---- ---- -- --- ---- ---- -- --- ---- ---- -- --- ---- ----
-- --- ---- ---- -- --- ---- ---- -- --- ---- ---- -- --- ---- ----
-- --- ---- ---- -- --- ---- ---- -- --- ---- ---- -- --- ---- ----
-- --- ---- ---- -- --- ---- ---- -- --- ---- ---- -- --- ---- ----
-- --- ---- ---- -- --- ---- ---- -- --- ---- ---- -- --- ---- ----
-- --- ---- ---- -- --- ---- ---- -- --- ---- ---- -- --- ---- ----
-- --- ---- ---- -- --- ---- ---- -- --- ---- ---- -- --- ---- ----
-- --- ---- ---- -- --- ---- ---- -- --- ---- ---- -- --- ---- ----
-- --- ---- ---- -- --- ---- ---- -- --- ---- ---- -- --- ---- ----
-- --- ---- ---- -- --- ---- ---- -- --- ---- ---- -- --- ---- ----
C5 02 ---- P-20
C5 40 ---- H-25
C4 12 ---- A 4
C5 40 ---- P-20
C5 40 ---- P-25
C5 40 ---- P-25
2
3 3
4 4
5 5
6 6
7 7
9 9
11 11
13 13
15 15
8 8
10 10
12 12
14 14
Paste
Pattern
Expand
Pattern
Copy
Pattern
Duplicate
Pattern
Invert MoreShrink
Pattern
Pattern 1 0m:00s P1.008
Instruments
1. Strange Sample Number 1
2. Deep Kick
4. Snare One
5. Closed Hat 15. Closed Hat 1
6. Deep Pad
7. Grainy Pluck
8. Grrrrr
9. DawgGawn
10.
11.
12.
13.
14.
3. Transient Kick

99
Polyend Tracker Mini Manual
98
Polyend Tracker Mini Manual
5.10 FX Step Parameters
Each step event has two FX slots which can be populated from a library of
effects. Each FX has two parts, rstly the effect type, represented by a
single character and secondly it’s value.
FX Summary
Tap to select [FX1] or [FX2]. To edit the value, Use [+] / [-] to
adjust the value. The outer [+] / [-] buttons change the value
in larger increments.
While holding [FX1] or [FX2], the pop-up window
will display the available effects list where the
selection can be made to load to the step event.
NOTESNOTES
Sequencing Steps
5
Sequencing Steps
5
FX1 & FX2 parameter each has a dedicated
button when working in the pattern.
FX1 FX2
FX are the third and fourth parameters in the
step event and are highlighted when selected.
FX Type
FX Value
FX1
FX2
C5 02 V 10
V 10
P 25
▌ DETAILED APPLICATION OF AN EFFECT TO AN EMPTY STEP
1. Press [1] to select the pattern mode page.
2. Select a blank or existing step event.
3. Press [FX1] or [FX2] to ensure the FX parameter is selected in the step
event. This is a short press. Holding [FX1] or [FX2] will display the effect
list pop-up.
4. Select recording mode, Press [Rec]. The steps selected will appear red
as opposed to green when in normal playback mode.
5. To assign the FX to an empty step, either:-
• Hold [FX1] or [FX2] till list appears then release. This will place the
current effect into the step. Press [+] / [-] to adjust the FX value. The
Outer buttons in larger increments.
• Hold [FX1] or [FX2] + (Up) or (Down) to select the type from the list.
Release the [FX1] or [FX2] button, the FX step remains selected.
Press [+] / [-] to adjust the FX value. The Outer buttons in larger
increments.
• Hold [FX1] or [FX2] + [+] or [-] to select the type from the list.
Release the [FX1] or [FX2] button, the FX step remains selected.
Press [+] / [-] to adjust the FX value. The Outer buttons in larger
increments.
6. To assign or change the FX to an existing step, either:-
• Hold [FX1] or [FX2] + (Up) or (Down) to select the type from the list.
Release the [FX1] or [FX2] button, the FX step remains selected.
Press [+] / [-] to adjust the FX value. The Outer buttons in larger
increments.
• Hold [FX1] or [FX2] + [+] or [-] to select the type from the list.
Release the [FX1] or [FX2] button, the FX step remains selected.
Press [+] / [-] to adjust the FX value. The Outer buttons in larger
increments.
7. Subsequent selection of FX slots allow adjustment of its value with the
[+] and [-] buttons when in [Rec] mode.
In the Effect list window, press the 7
th
and 8
th
screen button to toggle the
description of the highlighted effect on or off. This is an aid to using the FX.
Render
Selection
1 1
2
C5 40 ---- P-25
C5 40 ---- P-25
-- --- ---- ---- -- --- ---- ---- -- --- ---- ---- -- --- ---- ----
-- --- ---- ---- -- --- ---- ---- -- --- ---- ---- -- --- ---- ----
-- --- ---- ---- -- --- ---- ---- -- --- ---- ---- -- --- ---- ----
-- --- ---- ---- -- --- ---- ---- -- --- ---- ---- -- --- ---- ----
-- --- ---- ---- -- --- ---- ---- -- --- ---- ---- -- --- ---- ----
-- --- ---- ---- -- --- ---- ---- -- --- ---- ---- -- --- ---- ----
-- --- ---- ---- -- --- ---- ---- -- --- ---- ---- -- --- ---- ----
-- --- ---- ---- -- --- ---- ---- -- --- ---- ---- -- --- ---- ----
-- --- ---- ---- -- --- ---- ---- -- --- ---- ---- -- --- ---- ----
-- --- ---- ---- -- --- ---- ---- -- --- ---- ---- -- --- ---- ----
-- --- ---- ---- -- --- ---- ---- -- --- ---- ---- -- --- ---- ----
-- --- ---- ---- -- --- ---- ---- -- --- ---- ---- -- --- ---- ----
-- --- ---- ---- -- --- ---- ---- -- --- ---- ---- -- --- ---- ----
C5 02 ---- P-20
C5 40 ---- H-25
C4 12 ---- A 4
C5 40 ---- P-20
C5 40 ---- P-25
C5 40 ---- P-25
2
3 3
4 4
5 5
6 6
7 7
9 9
11 11
13 13
15 15
8 8
10 10
12 12
14 14
Paste
Pattern
Expand
Pattern
Copy
Pattern
Duplicate
Pattern
Invert MoreShrink
Pattern
Pattern 1 0m:00s P1.008
Fx
- - None
Sets the Volume of an
Instrument. For MIDI
instruments this sends
the NOTE ON velocity
parameter
From 0% - 100%
! - Off
P - Panning
M - Micro Tune
G - Glide
T - Tempo
I - Swing
m - Micro Move
q - Gate Length
C - Chance
R - Roll
A - Arp
n - Random Note
i - Random Instrument
V - Volume
Description

101
Polyend Tracker Mini Manual
100
Polyend Tracker Mini Manual
FX Types.
The two FX slots can be populated from a library of FX effects. Each FX
has an effect type plus the associated value.
FX Type Description
-
None. Empty FX1 or FX1 effect. No effect applied.
!
Off. Will toggle off the effect used on the prior effect step.
V
Volume or Velocity (NOTE OFF) for MIDI.
P
Positions the step sound left / right in the stereo plane.
M
Micro Tune. Fine pitch tuning of note and MIDI Out.
G
Glide time from previous to current note - based on the note pitch.
T
Tempo change. Changes the pattern tempo.
I
Swing. Applies a swing from any step track for the entire pattern.
m
Micro move nudges forward by a small amount the step position.
q
Gate length. Adjusts the step note gate length.
C
Chance is the probability of a note playing.
R
Roll, beat repeats the note also with options for volume or pitch inc/dec.
A
Arpeggiator, for creating pitch based melodies. (Also needs MIDI Chord)
n
Random note. Sets a range of notes for random playback.
i
Random instrument. Sets a range of instruments for random playback.
f Random FX. Sets a random FX to the step from a selected range.
v Random Volume. Sets a random velocity variation on each cycle
r
Reverses sample playback. Played end to start.
p
Sets the playback position for a sample start, wavetable or granular position
S
Plays the selected slice for the step - sliced samples
g Volume LFO Rate
h Panning LFO Rate
j Filter LFO Rate
k Position LFO Rate
I Finetune LFO Rate
FX Type Description
D
Overdrive amount for the step
L
Low Pass Filter Cutoff. Frequency represented by 0-100%
B
Low Pass Filter Cutoff. Frequency represented by 0-100%
H
Low Pass Filter Cutoff. Frequency represented by 0-100%
s
Delay. Amount of send effect 0-100%
t
Reverb. Amount of send effect 0-100%
E
Bit depth. 4 Bits to 16 Bits.
U
Tuning. -24 semitones to +24 Semitones. 4 Octave range.
F
Slide up amount. Range is 0-255 with 1/16
th
semitone increments.
J Slide down amount. Range is 0-255 with 1/16
th
semitone increments.
a MIDI Out (CC, PC, Chan & Poly Aftertouch). Needs a channel & Instrument
b MIDI Out (CC, PC, Chan & Poly Aftertouch). Needs a channel & Instrument
c MIDI Out (CC, PC, Chan & Poly Aftertouch). Needs a channel & Instrument
d MIDI Out (CC, PC, Chan & Poly Aftertouch). Needs a channel & Instrument
e MIDI Out (CC, PC, Chan & Poly Aftertouch). Needs a channel & Instrument
f MIDI Out (CC, PC, Chan & Poly Aftertouch). Needs a channel & Instrument
0 MIDI Chord, note output. (Used also with Arp).
NOTESNOTES
Sequencing Steps
5
Sequencing Steps
5

In the language of Tracker Mini, an instrument
is the part of a step that generates sound and
is essentially based on an audio sample.
Instruments are loaded into the instrument
pool to be accessible in a project (explained in
the project section). A maximum of 48
instruments can be loaded to a project. At its
core an instrument has a sample or part of a
sample along with a set of dened settings.
The sample parameters set the conguration
of the sample itself and also the integration
within the Tracker Mini instrument feature set.
A sample can be sliced for example to be used
as beats in a drum kit. It can form the central
audio source for the wavetable and granular
engines. These operate like synthesizers. It
can also simply be a pure stand alone sample.
Building of instruments and their application in
Tracker Mini is an essential foundation for
sound design. MIDI instruments also exist and
the application of these is covered in the MIDI
section. There are a variety of things that can be
done to create an instrument. Working with
instruments clearly has a cross over between
the practical, process orientated tasks and the
creative, inspirational parts. Both are equally
important and often it is worth dedicating time
purely to sound design and instrument creation.
Building a library of say, percussion, drums,
bass, leads, or pads and textures, and so forth is
good practice. This can make the track design
and full song production workow smooth and
simple, helping to switch the focus on the
assembly and creation of patterns. Instruments
are stored as ‘.pti’ les and can be used across
projects and can be distributed and shared with
others. Tracker Mini provides an all in one
solution for music making and having a
collection of instruments readily available makes
this music making process faster and more
effective.
Instruments
6
103
Polyend Tracker Mini Manual
102
Polyend Tracker Mini Manual
NOTES

105
Polyend Tracker Mini Manual
104
Polyend Tracker Mini Manual
NOTESNOTES
Instruments
6
Instruments
6
6.1 Instrument Overview
An audio instrument is the primary sound source in Tracker Mini and is
based on an audio sample. The instrument can be purely an audio sample
which can then be congured into a more elaborate instrument such as
wavetable synth. The Instrument parameters will congure settings. The
sound can be affected by effects and modulation but essentially an
instrument has a sample at its core and is triggered by the step on which it
is applied.
6.2 Instrument Parameter Pages
A series of instrument parameters are accessible for controlling, shaping
and modulating the sound. The two pages are accessible directly from
toggling the assigned button [2]. Page 1 is general parameters while Page
2 covers parameter automation. Pressing [Delete] on a selected parameter
will reset it to it’s default state.
21 3 4
Page 1 of 2: General Sample Based Parameters
Page 2 of 2: Automation Parameters
Press to select and cycle the instrument parameter pages
Screen buttons select the parameter options or use (Right) (Left) to
navigate each option. Press (Up) (Down) or [+] / [-] to adjust the value.
The outer [+] / [-] buttons adjust in larger increments.
Volume
10.00 dB
Panning
-25
Tune
0
Cutoff
100
Finetune
0
Resonance
0
Filter Type
Low-pass
More
Instrument Parameters 1/2 0m:00s P1.008
Disabled
Low-pass
High-pass
Band-pass
1.Analog 3 18p
Destination Type
Off
Sustain
100
Attack
0.020s
Release
0.050s
Decay
0.030s
Amount
100
Instrument Automation 2/2 0m:00s P1.008
OffVolume
EnvelopePanning
LFOCutoff
Wavetable Position
Granular Position
Finetune
1.Analog 3 18p
The instrument selection has a dedicated
button when working in the pattern.
Instruments can be created from samples, edited, sliced and saved as ‘.pti’ les
which can then be used in other projects or shared with others.
.pti
Up to 48 audio instrument slots are available in the instrument
list to populate and to choose from. Instruments or samples
can be loaded to the instrument list.
The two instrument parameter pages are specic to the
currently selected instrument. By default these are assigned to,
and selected by pressing button [2]. Also select in the [Menu].
C3 04 ---- P-20
D3 04 ---- P-10
D3 04 ---- P-10
D3 04 ---- P-10
C4 12 ---- A 4
C4 12 ---- A 4
Pattern
1
1 1
2
C5 40 ---- P-25
C5 40 ----
C5 40 ---- P-25
-- --- ---- ----
-- --- ---- ----
-- --- ---- ----
-- --- ---- ---- -- --- ---- ---- -- --- ---- ---- -- --- ---- ----
-- --- ---- ----
-- --- ---- ----
P 25
-- --- ---- ---- -- --- ---- ----
-- --- ---- ---- -- --- ---- ---- -- --- ---- ---- -- --- ---- ----
-- --- ---- ---- -- --- ---- ---- -- --- ---- ---- -- --- ---- ----
-- --- ---- ---- -- --- ---- ---- -- --- ---- ----
-- --- ---- ---- -- --- ---- ---- -- --- ---- ---- -- --- ---- ----
-- --- ---- ---- -- --- ---- ---- -- --- ---- ----
-- --- ---- ---- -- --- ---- ---- -- --- ---- ---- -- --- ---- ----
-- --- ---- ---- -- --- ---- ---- -- --- ---- ----
-- --- ---- ---- -- --- ---- ---- -- --- ---- ---- -- --- ---- ----
-- --- ---- ---- -- --- ---- ---- -- --- ---- ---- -- --- ---- ----
-- --- ---- ---- -- --- ---- ---- -- --- ---- ---- -- --- ---- ----
C5 02 ---- P-20
C5 40 ---- H-25 C5 40 ---- P-20
2
3 3
4 4
5 5
6 6
7 7
9 9
11 11
13 13
15 15
8 8
10 10
12 12
14 14
Length
32
Step Jump
0
Fill Preview Undo Redo More
Track 2 Track 3 Track 4Track 1
Pattern 1 0m:00s P1.008 1.Analog 3 18p
21 3 4
C5 01 V 10
01
P 25
Instr

107
Polyend Tracker Mini Manual
106
Polyend Tracker Mini Manual
NOTESNOTES
Instruments
6
Instruments
6
6.3 General Instrument Parameters - Page 1
The general settings page covers sample based parameters that affect
general audio functions.
0 Frequency Band 100
High Pass Filter
Level
2
3
1
0 Frequency Band 100
Low Pass Filter
Level
2
3
1
0 Frequency Band 100
Band Pass Filter
Level
2
3
1
Volume
Adjusts the audio level of the instrument.
Range is -inf dB to 24.00 dB
Volume / Pan
Tuning
Volume Level
Stereo Field
-50 Left Right 50
24dB
-Inf dB
Tune
Adjusts the audio pitch tuning of the sample.
Range is -24 Semitones to +24 Semitones
Filter Type
Selects the type of lter to apply.
Options; Disabled, Low-pass, High-pass, Band-pass
Filter Types & Functions
A lter attenuates and cuts areas of the frequency range in an audio signal.
A low pass lter allows the frequencies through which
are below the cutoff frequency and attenuates the
audio signal frequencies above the cutoff. Resonance
boosts the audio at the selected frequency.
A high pass lter allows the frequencies through which
are above the cutoff frequency and attenuates the
audio signal frequencies below the cutoff. Resonance
boosts the audio at the selected frequency.
A band pass lter allows frequencies through within a
band of the cutoff frequency and attenuates the rest of
the audio signal frequencies. Resonance boosts the
audio at the selected frequency. Band width (Q) is not
adjustable in the Tracker Mini band-pass lter.
Panning
Adjusts the audio position left to right
balance in the stereo eld.
Range is -50L (fully left) to +50R (fully right)
Finetune
Adjusts the sample audio pitch ne tuning.
Range is -100 Cents to +100 Cents
Cutoff
Filter cutoff frequency. Point of attenuation.
Range is 0% to 100%
Resonance
Boosted frequency point to create resonance.
Range is 0% to 100%
Volume
10.00 dB
Panning
-25
Instrument Parameters 1/2
Tune
0
Finetune
0
Instrument Parameters 1/2 0m:00s
Cutoff
100
Finetune Resonance
0
Filter Type
Low-pass
P1.008
Disabled
Low-pass
High-pass
Band-pass
1.Analog 3 18p
2
3
1
C CA
+4
F B B
1 Semitone Steps
(Half steps)
100
Cents per Semitone
1 Octave
(12 Semitones)
Filter

109
Polyend Tracker Mini Manual
108
Polyend Tracker Mini Manual
NOTESNOTES
Instruments
6
Instruments
6
Access to control the general parameters is simple and quick. The process
described applies when accessing all instrument parameters and effects.
▌ ADJUSTING INSTRUMENT PARAMETERS
1. Ensure the desired instrument is selected. This will be shown top right
of the screen.
2. Press [2] to open the ‘Instrument parameter’ page. This is also
accessible from the [Menu].
3. Pressing [2] again will toggle between the general parameter page and
the automation parameters.
4. Within the instrument page 1 of 2 (page number top left), the instrument
effects are accessible. Press [More], 8
th
Screen button to open the
effects page, and press [Back] to return to the main page.
5. Press the screen button below the desired option to select. Pressing
(Left) or (Right) will navigate the options. The selected parameter will
show a red bounding box.
6. Within a selected option, Press [+] or [-] to manually adjust the
parameter value e.g. Volume. The outer [+] / [-] buttons make changes
in larger increments.
7. Alternatively, Press (Up) or (Down) to incrementally adjust the
parameter value. Holding a button will continuously adjust the value.
8. With a parameter selected, Press [Delete] to reset it’s value to the
default setting. For example Panning will reset to 0.
9. Parameters are presented in columns. The bar style value is shown in
the the upper main page and also the exact value is shown below the
parameter name under the screen button labels.
10. To exit the instrument parameters, select another page e.g. [1].
6.4 Instrument Effect Parameters - Page 1
The general settings page 1 also gives access to a series of instrument
effect parameters. There are 2 instrument specic effects, overdrive and bit
depth and also 2 send controls which use the common delay and reverb.
Bit-depth
Overdrive
Filter
Reverb
Send
Delay
Send
Mix & Pan
Reverb
Delay
Instrument
Sample
+
Page 1 of 2: General Sample Based Parameters
Instrument Parameter Effects
Screen buttons select the parameter options or (Right) (Left) to
navigate option. Press (Up) or (Down) to adjust / select
Volume
10.00 dB
Panning
-25
Tune
0
Cutoff
100
Finetune
0
Resonance
0
Filter Type
Low-pass
More
1.Analog 3 18p
Overdrive
0
Bit depth
16
Reverb send
-inf dB
Delay send
-inf dB
Instrument
Synthesizer
Back
Instrument Effects
0m:00s P1.008
2
2
3
3
4
4
1
1

111
Polyend Tracker Mini Manual
110
Polyend Tracker Mini Manual
NOTESNOTES
Instruments
6
Instruments
6
The effect settings page covers sample based parameters that affect the
specic instrument. Note that the generic delay and reverb settings are in
the master section of Tracker Mini.
Overdrive
Overdrive introduces a gritty aggressive tone to the audio
sound. Based on traditional practices of pushing the limits
of an amplier and creating distortion in the signal.
Range 0-100%
Bit Depth
Analog signal are smooth evolving shapes. Digital audio
samples represent this by sampling and registering the
audio information into number of bits. The higher the
number the better a signal is represented. Tracker Mini
uses 16 Bit audio which is CD standard, but can be
reduced to give a more LoFi sound effect.
Range 4-16
Reverb Send
The reverb send is not a dedicated instrument effect in
itself but controls the amount of instrument audio that is
sent to the master reverb. This is mixed to the signal and
combined with other sends. Reverb adds space and
represents room reections simulating spacial depth,
distance or proximity.
Range 0-100%
Delay Send
The delay send is not a dedicated instrument effect in
itself but controls the amount of instrument audio that is
sent to the master delay. This is mixed to the signal and
combined with other sends. Delay adds an echo and
repetition into a sound and is a creative effect and lls
space to keep interest.
Range 0-100%
Overdrive
Bit Depth
Delay Send
Reverb Send
Overdrive
0
Bit depth
16
Reverb send
-inf dB
Delay send
-inf dB
Overdrive
0
Bit depth
16
Reverb send
-inf dB
Delay send
-inf dB
Overdrive
0
Bit depth
16
Reverb send
-inf dB
Delay send
-inf dB
Overdrive
0
Bit depth
16
Reverb send
-inf dB
Delay send
-inf dB
6.5 Instrument Automation Parameters - Page 2
Automation also called modulation, creates movement and interest in an
instrument sound. The instrument automation settings page covers the
settings which control modulation over the instrument sound audio sample.
These parameters are located in the second page of the instrument
parameters.
The modulator can be an LFO or an Envelope. Both shape audio over a
time period for one of the several selectable destinations.
LFO
Envelope
Modulation
Source or Off
Volume
Panning
Finetune
Cutoff
Wavetable Position
Granular Position
Each destination has the
option of an LFO, Envelope
or No Automation.
Type Destination
Screen buttons select the parameter options or (Right) (Left) to
navigate option. Press (Up) or (Down) to adjust / select
Available parameters will depend on the destination and the automation type selected.
Destination Type
LFO
Amount
100
Shape
Triangle
Speed
24 steps
Instrument Automation 2/2 0m:00s P1.008
OffVolume Rev Saw 24 steps
4 steps
EnvelopePanning Saw 16 steps
3 steps
LFOCutoff Triangle 12 steps
2 steps
3/4 step
Wavetable Position Square 8 steps
3/2 step
1/2 step
Granular Position Random 6 steps
1 step
3/8 step
1/3 step
Finetune
1.Analog 3 18p
SpeedA D
S RShape
Amount
Amount
2
2
3
3
3
1
1

113
Polyend Tracker Mini Manual
112
Polyend Tracker Mini Manual
NOTESNOTES
Instruments
6
Instruments
6
Automation can add some highly creative and interesting features to a
sound. This is applied by modulating parameters in the instrument sample.
This can transition from a simple, static audio sound (when type is off) to
add some subtle movement to generative and evolving sound designs. Try
combining and experimenting with automation.
LFO - Low Frequency Oscillator
A low frequency oscillator (LFO) operates at a lower frequency than a
normal audio oscillator which is typically used as an audio generator. The
purpose of an LFO is to act as a modulator for parameters of other devices,
to add interest and create movement. A common use of an LFO is to add a
vibrato effect to control the pitch of a sound.
As well as the shape, the second key parameter is speed. LFO Speeds in
Tracker Mini are hard synchronised to the project tempo and are therefore
assigned based on the number or intervals of steps. Despite Tracker Mini
having a de-clicking audio algorithm, some settings may still cause audio
clicks due to the LFO cycle with respect the samples zero crossing points.
Steps
Speed Setting Illustrations
Speed 24
Speed 16
Speed 4
Speed 3/2
Speed 1
Speed 1/4
1 2 3 4 5 6 7 8 9 10 11 12 13 14 15 16
Time
Amplitude
Time
Amplitude
Time
Amplitude
Time
Amplitude
Time
Amplitude
LFO Shapes
Examples show 2 Cycles of the LFO shape. Speed inuences cycles across pattern.
LFO Speed
Speed is based on pattern step intervals.
* 128 to 32 Step Speed options are not available with Volume as the destination.
Triangle
Good for vibrato style sounds
Reverse Saw
Ideal for ramp down sounds
Square
Great for steppy, pulses
Saw
Ideal for ramp up sounds.
Random
Steppy random sounds
Speed
In Steps
24
16
12
8
6
Speed *
In Steps
128
96
65
48
32
Speed
In Steps
3/4
1/2
3/8
1/3
1/4
Speed
In Steps
4
3
2
3/2
1
Speed
In Steps
3/16
1/6
1/8
1/12
1/16
Speed
In Steps
1/24
1/32
1/48
1/64

115
Polyend Tracker Mini Manual
114
Polyend Tracker Mini Manual
NOTESNOTES
Instruments
6
Instruments
6
Steps
LFO
Speed 16
Triangle
Dest: Cutoff
Sample
Drone
With the destination of cutoff, speed of 16 (and with 16 step pattern), the LFO
cycle will span all the steps. The lter cutoff long evolving changes will create a
long drone pulse to the sound, adding movement and interest.
1 2 3 4 5 6 7 8 9 10 11 12 13 14 15 16
Steps
LFO
Speed 2
Rev Saw
Sample
Natural Decay
With a speed of 2, the LFO cycle will span 2 steps. With a natural decay of a long
sample triggered on step 1 will give a delay style effect as the sample plays. Try
speed of 1 for a faster delay effect.
1 2 3 4 5 6 7 8 9 10 11 12 13 14 15 16
Example Speed & Shape Options
With respect to steps
Steps
LFO
Speed 2
Rev Saw
Dest: Volume
Sample
Natural Decay
With the destination of volume, speed of 2, the LFO cycle will span 2 steps. With
a natural decay of a long sample triggered on step 1 will give a delay style effect
as the sample plays. Try speed of 1 for a faster delay effect.
1 2 3 4 5 6 7 8 9 10 11 12 13 14 15 16
Envelope
An envelope shapes the audio over time. While an LFO will cycle, an
envelope is considered more of a one-shot function and typically operates
across a note length. This is normally used to shape the sound of a note
and how the sound develops from note on to note off (and beyond). It can
also be used as a modulation effect. Tracker Mini uses an ADSR envelope
which has 3 time ranges, Attack, Decay and Release plus Sustain level.
The OFF Command can be triggered on an individual step using the Note ‘OFF’ special
command, accessible by the [-] buttons when inputing notes.
ADSR Envelope
Time
Note On
‘OFF’
Note Off
Attack
Time
A SD R
Sustain
Level
Decay
Time
Release
Time
Amplitude
Amount
Destination Type
Envelope
Sustain
100
Attack
1.000s
Release
1.000s
Decay
0.500s
Amount
100
Instrument Automation 2/2 0m:00s P1.008
OffVolume
EnvelopePanning
LFOCutoff
Wavetable Position
Granular Position
Finetune
1.Analog 3 18p

117
Polyend Tracker Mini Manual
116
Polyend Tracker Mini Manual
NOTESNOTES
Instruments
6
Instruments
6
The envelope page covers sample based parameters that affect the shape
of the instrument sound over time. The selection of each parameter may
not be linear to allow for a better resolution to choose the value in the more
relevant range areas. The amount will set how much of the envelope is
applied 0-100%.
Attack Time
Attack is the initial time period of the envelope. This
affects the transient of the sample. Shorter times for more
percussive ‘hits’ and longer for more evolving ramps.
Range 0-10 Seconds.
0-1 Sec has a better resolution of control.
Sustain Level
This is the nominal level at which the note / sound will
sustain after the initial ‘note on’ request. This will be the
level continuously played while holding a note.
Range 0-100%.
Decay Time
A decay time period which is applied after the attack
phase and applying a note. The period before settling the
sound level to a steady state.
Range 0-10 Seconds.
0-1 Sec has a better resolution of control.
Release Time
This is the nal envelope stage and is activated after the
note is released - Tracker Mini ‘OFF’ special note
command. This is the time period where the sound
dissipates from the sustain level to silence.
Range 0-10 Seconds.
0-1 Sec has a better resolution of control.
Attack
Sustain
Decay
Release
6.6 Sample Playback Overview
An instrument can be a sample, edited or raw. A raw ‘.wav’ sample can be
added to the instrument list. When a sample is edited and developed further
as an instrument it can be saved as a ‘.pti’ instrument, for example
‘drumkit1.pti’. This can be used across all projects or distributed to other
Tracker producers.
This section covers the basics of using .pti instruments. The end-to-end
capturing, editing and use of audio sampling is covered elsewhere.
How a sample is applied as an instrument is handled in the ‘Sample
Playback’ page, accessed by default to [3] button or from the [Menu].
Type Play Mode Description
Play 1-Shot Basic sample playback. Plays start to end once.
Loop Forward Loop Sample playback. Plays start to end and cycles on loop.
Loop Backward Loop Sample playback. Plays end to start and cycles on loop.
Loop Pingpong Loop Sample playback. Plays start to end to start on loop.
Slice Slice Sample is sliced. Used for pitch base melodies.
Slice Beat Slice Sample is sliced. Used for beat based instruments.
Synthesizer Wavetable Sample is used as the wavetable, like a synth.
Synthesizer Granular Sample grains are used and played, like a granular synth
Preview
0.000s
Start
0.000s
Zoom
1.00
End
6.000s
Play Mode
Sample Playback 0m:00s P3.002
1-Shot
Slice
Forward loop
Beat Slice
Backward loop
Wavetable
Pingpong loop
Granular
16.hh3
Current Instrument
Selected
Sample Waveform
Display matches play mode.
Play Mode List.
How the sample will be
played in the instrument
Playback Parameters
Settings are based on play
mode for sample playback
Note: Playback is not visually animated in the waveform display when playing but the
playhead is displayed when previewed.
21 3 4
Envelope
Sustain
100
Attack
1.000s
Release
1.000s
Decay
0.500s
Amount
100
Envelope
Envelope
Sustain
100
Attack
1.000s
Release
1.000s
Decay
0.500s
Amount
100
Envelope
Envelope
Sustain
100
Attack
1.000s
Release
1.000s
Decay
0.500s
Amount
100
Envelope
Envelope
Sustain
100
Attack
1.000s
Release
1.000s
Decay
0.500s
Amount
100
Envelope

119
Polyend Tracker Mini Manual
118
Polyend Tracker Mini Manual
NOTESNOTES
1-Shot Parameters
The available parameters are simple for the 1-shot option with only two
editing parameters and one visual aid. Navigate and select using the
Screen Buttons. Also navigate using the (Left) (Right) buttons to select the
parameter and (Up) (Down) or [+] / [-] to adjust the value.
Zero Crossing option can be set in the Cong > Project settings.
Instruments
6
Instruments
6
6.7 1-Shot Play Mode
The most basic play mode is 1-shot which simply plays a sample through
once, start to end. This is the normal operation when using samples without
too audio much editing and where the general duration of the sample is to
be retained.
The note value, tempo and pattern length will also affect how the sample
plays. A higher note value will play the sample faster. A lower note value will
play the sample slower. Triggering the instrument step will trigger the 1-shot
sample which will play for its duration or until another trigger is initiated.
Steps
Time
1-Shot
Sample
1-Shot
Sample
G5
Original
G6
Faster
G4
Slower
Step Note Trigger
Sample plays once, when triggered. Note value affects pitch. Sample will play
until complete or until another trigger is activated in which case it is restarted.
Higher note values will shorten i.e. speed up the sample while lower values will
elongate i.e. slow the sample. The sample and pattern length should be
considered as well as tempo to achieve desired results. Sample tempo and pitch
are not automatically analysed in Tracker Mini and therefore not normally known
unless manually noted when sampling and recording the original audio.
1 2 3 4 5 6 7 8 9 10 11 12 13 14 15 16
Start EndZoom
1-Shot
Preview
0.000s
Start
0.000s
Zoom
1.00
End
6.000s
Play Mode
Sample Playback 0m:00s P3.002
1-Shot
Slice
Forward loop
Beat Slice
Backward loop
Wavetable
Pingpong loop
Granular
16.hh3
Function Parameter
Screen
Button
Range Description
Edit Play Mode 7th & 8th
Modes
Selects the play mode to apply. Includes 1-Shot
plus loop modes and wavetable / granular synth.
Aid Zoom 6th
Variable
Zooms in horizontally to the visual display for more
precise editing. Does not affect playback. Zoom
reference point is based on the previously adjusted
parameter i.e. Start.
Aid Preview 1st
Variable
Hold to play the sample. The number below the
screen button label indicates current play position
in seconds. Preview playback will run for approx 1
sec after releasing the preview button.
Edit Start 2nd
Variable
Adjusts and edits the sample start point. This is the
starting position used when a 1-shot sample is
triggered in a pattern or when previewed. Marker is
red but will change to green if a zero crossing point
is detected at the current position.
Edit End 5th
Variable
Adjusts and edits the sample end point. This is the
ending position used when a 1-shot sample is
triggered in a pattern or when previewed. Marker is
red but will change to green if a zero crossing point
is detected at the current position.

121
Polyend Tracker Mini Manual
120
Polyend Tracker Mini Manual
NOTESNOTES
Loop Parameters
The parameters for the forward loop, reverse loop and pingpong loop play
are identical across these play modes. Options are start / loop start, end /
loop end plus the zoom visual aid. Navigate and select using the Screen
Buttons. Also navigate using the (Left) (Right) buttons to select the
parameter and (Up) (Down) or [+] / [-] to adjust the value.
Forward Pingpong Backward
Instruments
6
Instruments
6
6.8 Loop Play Modes
Three loop playback modes exist, forward loop, backward loop and
pingpong loop. All of these three play modes have similar functions and
only differ in their playback direction.
The note value, tempo and pattern length will also affect how the sample
plays. A higher note value will play the sample faster. A lower note value will
play the sample slower. Triggering the instrument step will trigger the sample
once and it will continue to play for its duration in loop until another trigger is
initiated or the pattern ends.
Steps
S LS ELE
Sample
Forward
Loop
Backward
Loop
Pingpong
Loop
Sample plays forwards from start to the end, then restarts back to the start.
Playback continuously loops start to end until another trigger or the pattern ends
Sample plays from the start position to the loop end, then restarts from the loop
end, playing in reverse. Playback continuously loops in reverse within the loop
start / end points until another trigger or the pattern ends
Sample plays from the start position to the loop end, then plays in reverse to the
the loop start, then plays forwards to the loop end. Playback continuously loops
forward and backwards through this cycle until another trigger or the pattern ends
Sample playback is initially triggered and while ever the pattern plays it will continue to loop.
1 2 3 4 5 6 7 8 9 10 11 12 13 14 15 16
Start
* Start / End, Loop Start / End Positions cannot cross over. Start is always before end.
Loop Start Loop End End
Zoom
Preview
0.000s
Start
0.000s
Loop Start
1.400s
Loop End
4.700s
Zoom
1.00
End
6.000s
Play Mode
Sample Playback 0m:00s P3.002
1-Shot
Slice
Forward loop
Beat Slice
Backward loop
Wavetable
Pingpong loop
Granular
16.hh3
Function Parameter
Screen
Button
Range Description
Edit Play Mode 7th & 8th
Modes
Selects the play mode to apply. Includes forward
loop, backward loop, pingpong loop as well as 1-
Shot and wavetable / granular synths.
Aid Zoom 6th
Variable
Zooms in horizontally to the visual display for more
precise editing. Does not affect playback. Zoom
reference point is based on the previously adjusted
parameter i.e. Start.
Aid Preview 1st
Variable
Hold to play the sample. The number below the
screen button label indicates current play position
in seconds. Preview playback will run for approx 1
sec after releasing the preview button.
Edit Start 2nd
* Lower
than End
Adjusts and edits the sample start point. This is the
starting position when the sample is rst triggered
in a pattern or when previewed. Red marker turns
green if a zero crossing point is detected.
Edit Loop Start 3rd
* Higher
than Start
Adjusts the sample loop start point. This is the start
position used on the 2
nd
and subsequent playback
cycles, playing from loop start to loop end. Value
will always be same or higher than start position.
Red marker turns green at a zero crossing point.
Edit Loop End 4th
* Lower
than start
Adjusts the sample loop end point. This is the end
position used for playing a loop. Value will always
be same or lower than end position. Red marker
turns green at a zero crossing point.
Edit End 5th
* Higher
than Start
Adjusts and edits the sample end point. The
ending position, outside of a loop when a sample is
triggered in a pattern or when previewed. Red
marker turns green at a zero crossing point.
Time
1
st
Cycle & Loop
1
st
Cycle
1
st
Cycle
Loop
Loop

123
Polyend Tracker Mini Manual
122
Polyend Tracker Mini Manual
NOTESNOTES
Slice Parameters
The parameters for slice and beat slice are identical across the play modes
but may have different behaviours in use. Navigate and select using the
Screen Buttons. Also navigate using the (Left) (Right) buttons to select the
parameter and (Up) (Down) or [+] / [-] to adjust the value.
Instruments
6
Instruments
6
6.9 Slice Play Modes
Two similar slice playback modes exist, slice and beat slice.
Slice mode is typically used to slice an audio sample in order to create pitch
based kits. The pads in Slice mode represent current scale.
Beat Slice mode is typically used to slice percussive and atonal samples.
Notes in Beat Slice mode represent individual slices, for example hits of a
drum kit and are useful for playing and recording live beats.
Individual slices per step can also trigger from the FX, ‘S’ step function.
C6 E6 A6C#6 F#6F6 A#6D6 G6 B6D#6 G#6
C5 E5 A5C#5 F#5F5 A#5D5 G5 B5D#5 G#5
C4 E4 A4C#4 F#4F4 A#4D4 G4 B4D#4 G#4
C3 E3 A3C#3 F#3F3 A#3D3 G3 B3D#3 G#3
1
3
5
5 9
3
1
7
7 11
2
2
C#2 D#2D2 E2 G2 A#2F2 G#2 B2F#2 A2 C3C2
6
6 10
4
4
8
8 12
Slices
Selected Slice 1 of 8
Slices
Slice Start Points Adjust
Add - To add a new slice after the currently selected slice
Remove - To delete the currently selected slice
Zoom
Slice
Examples: Synth Note, Piano, String Pad
Slice selected for the instrument will play at the note pitch, default note for original sample pitch is
C5. This will play notes melodically based on the step note and current pitch scale.
Slices can also be played individually. Beat slices can
be played from notes in the pattern. Slice 1 Starts on
Note C2. FX ‘S’ Slice effect can also be used to
select the specic slice within a pattern step.
Beat Slice
Examples: Combo of Kick, Snare, Hat, Effects on Instrument 1.
Function Parameter
Screen
Button
Range Description
Edit Play Mode 7th & 8th
Modes
Selects the play mode to apply. Includes Slice and
Beat Slice as well as 1-Shot and wavetable /
granular synths and loop modes.
Aid Zoom 6th
Variable
Zooms in horizontally to the visual display for more
precise editing. Does not affect playback. Zoom
reference point is based on the previously adjusted
parameter i.e. Slice number.
Edit Slice 1st
Variable
Selects the slice number for editing from the
available number of slices. Also will select the slice
to playback in scale when in Slice Play Mode. Use
(Enter) to preview playback and also to select the
slice in Beat Slice Play Mode.
Edit Adjust 2nd
Variable
Adjusts the start position for the selected slice.
Cannot exceed the previous or next slice position.
Use zoom to assist with precise editing. Red
marker turns green at a zero crossing point.
Edit Add 3rd
Adds a new slice after the currently selected slice
start marker. Slice will be added centrally between
the currently selected slice start and next slice start
or end position.
Edit Remove 4th
Removes and deletes the currently selected slice
start marker. No prompt - immediate deletion.
Edit Auto Slice 5th
Automatic
Automatically removes any existing slice markers
and adds a series of new markers at each
transient point. Prompt to conrm is given.
Edit Number Shift + 1st
1 - 48
Sets the number of slices to create when using the
‘equal’ slice option. This applies the number of
equally spaced slices across the sample.
Edit Equal Slice Shift + 2nd
Initiates slicing of the sample into the equal spaced
slices, set by ‘number’. Prompt to conrm.
C5 01 V 10 P 25
D2
01
S 3
C3
01
S 12
V 10
V 10

125
Polyend Tracker Mini Manual
124
Polyend Tracker Mini Manual
NOTESNOTES
Instruments
6
Instruments
6
▌ REMOVING A SLICE
1. Press [3] to open the ‘Sample Playback’ page. Also from the [Menu].
2. Press the 7
th
or 8
th
Screen Button to navigate to ‘Slice’ or ‘Beat Slice’
Play mode depending on the function required.
3. Select a slice, Press [Slice], 1
st
Screen button. X of Y, Where X is the
selected slice and Y the total number of slices available.
4. Press (Up) or (Down) to select the slice number to delete.
5. Press [Remove], 4
th
Screen Button. The selected slice is deleted
immediately and the currently active slice reverts to the previous slice.
▌ ADJUSTING A SLICE START POSITION
1. Press [3] to open the ‘Sample Playback’ page. Also from the [Menu].
2. Press the 7
th
or 8
th
Screen Button to navigate to ‘Slice’ or ‘Beat Slice’
Play mode depending on the function required.
3. Select a slice, Press [Slice], 1
st
Screen button. X of Y, Where X is the
selected slice and Y the total number of slices available.
4. Press (Up) or (Down) to select the slice number to edit.
5. Press [Adjust], 2
nd
Screen Button. Zoom may help create precise edits.
6. Press (Up) or (Down) to adjust the slice start position.
Shift
Slice
11 of 15
Adjust
4.000 s
Add Remove
Zoom
1.00
Auto Slice
Play Mode
Sample Playback 0m:00s P3.002
1-Shot
Slice
Forward loop
Beat Slice
Backward loop
Wavetable
Pingpong loop
Granular
16.hh3
Number
8
Equal Slice
Play Mode
Sample Playback 0m:00s P3.002
1-Shot
Slice
Forward loop
Beat Slice
Backward loop
Wavetable
Pingpong loop
Granular
16.hh3
▌ SLICING A SAMPLE
1. Ensure the desired instrument is selected with the sample to edit. This
will be shown top right of the screen.
2. Press [3] to open the ‘Sample Playback’ page. This is also accessible
from the [Menu].
3. Press the 7
th
or 8
th
Screen Button to navigate to ‘Slice’ or ‘Beat Slice’
Play mode depending on the function required.
4. To slice the sample, follow one or a combination of the slicing
techniques. Up to 48 slices are possible:
a. Transient Slicing. Will automatically slice the sample into a number
of slices located at the points where a dynamic amplitude change is
detected. The number of slices is based on the number of transients
detected.
• Press [Auto Slice], 5
th
Screen Button and acknowledge when
prompted. Existing slices are cleared and new ones created.
b. Equal Slicing. This will slice the sample in a set number of equally
spaced positions. Amount of slices set by the ‘Number’ value. Hold
[Shift] to access this feature.
• Hold [Shift] + [Number], 1
st
Screen Button and Press (Up) or
(Down) to set number of slices to create.
• Hold [Shift] + [Equal Slice], 2
nd
Screen Button while still holding
[Shift]. Acknowledge on prompt. Existing slices are cleared and
new equidistant slices are created.
c. Manual Slicing. This will add 1 slice at the central point between the
currently selected slice start marker and the following slice start.
• Select a slice, Press [Slice], X of Y, Where X is the selected slice
and Y the total number of slices available. The [Slice] option is
the 1
st
Screen button.
• Press (Up) or (Down) to select the number of the slice.
• Press [Add], 3
rd
Screen Button. The new slice is added. If no
slices are present, one is added at the sample start position.
• Any new slice added automatically becomes the currently
selected slice.
Hold

127
Polyend Tracker Mini Manual
126
Polyend Tracker Mini Manual
NOTESNOTES
Wavetable Parameters
The wavetable play mode is a simplied application of wavetable synthesis
and consists of two core parameters. The Window is the wavetable length
(samples per frame) and has a maximum value based on the original le.
The position parameter is what enables the creative sound design and
audio manipulation. This can be manually adjusted to nd a sweet spot or
modulated with the envelope or LFO.
Instruments
6
Instruments
6
6.10 Wavetable Play Modes
Wavetable instruments can be created in Tracker Mini. This emulates
classic wavetable synthesizers by using a sample as the wavetable source.
Standard Tracker Mini samples can be used ‘out of the box’ or samples
prepared specically to suit the application in a wavetable synth and give
better performance. The Tracker Mini wavetable synthesis brings a simple
yet different creative option into the instrument library.
What is Wavetable Synthesis?
The most common synth model is subtractive synthesis. This is based on a
sound source, typically using one or more oscillators, tuned in various
ways. The sound is then shaped and carved by ltering out (subtracting)
frequencies, applying envelopes and adding effects. Wavetable synths
typically follow these same principles but the ‘oscillator’ is formed from a
series of wave-shapes called wavetables. In reality, a wavetable consists of
a set of stacked samples called frames, the standard being 256 frames.
Navigating or modulating through the almost endless wave positions and
selecting ‘single cycles’ in the wavetable is a fundamental element in
wavetable sound design. In Tracker Mini the wavetable size (samples per
frame) is set by the ‘Window’ parameter. Think of this as the length of the
available table, the default maximum being dened by the original audio
sample format. The ‘Position’ within the wavetable is also selectable and
important in the sound design process. Position can also be modulated.
Current Instrument
Selected
Sample
Waveform Cycle.
Play Mode List.
How the sample will be
played in the instrument
Window
Frame size, range dictated
by wavetable format
Position
Wave position selection,
also can be modulated.
Preview Position
4
Window
2048
Play Mode
Sample Playback 0m:00s P3.002
1-Shot
Slice
Forward loop
Beat Slice
Backward loop
Wavetable
Pingpong loop
Granular
16.hh3
Position
Size of window will affect resolution
Window
Function Parameter
Screen
Button
Range Description
Edit Play Mode 7th & 8th
Modes
Selects the play mode to apply. Includes
Wavetable and Granular as well as 1-Shot and the
three loop modes.
Aid Preview 1st
Hold to play the wave from the current position
selected in the window. Also hold while adjusting
position to ‘scan’ for the desired sound.
Aid Window 3rd
Variable
The width of the wavetable can be adjusted down
from the default maximum. The parameters are
normally divisions of 2 down from the maximum
(Typically 2048)
Edit Position 2nd
Variable
Selects the playback position within the wavetable
window. This can be manually adjusted to nd the
desired ‘sweet spot’ or modulated with an LFO or
Envelope for movement and interest.

129
Polyend Tracker Mini Manual
128
Polyend Tracker Mini Manual
NOTESNOTES
Instruments
6
Instruments
6
Optimising Wavetables
The best approach to operating with wavetable synthesis is to use WAV
les that have been created for wavetable use. This will adhere to the frame
and sample conventions stated. Also the audio samples will be created with
smooth rather than stepped transitions between waves. There are many
pre-prepared wavetables available for download but also check out the
online sheets of sound creator and Modbap Modular OsirisEdit to learn
more about wave creation.
Tracker Mini’s factory wavetable les are located in the samples folders on
the SD Card.
There are many freely available wavetable samples online. Standard
samples can be used but wavetable formatted WAV les provide better and
smoother performance. The most common standard is 2048 Samples /
Frame (256 Frames). This applies to XFer Serum, U-He Hive, Dune, but
others may also exist. Ableton Live Wavetable uses 1024 samples and
down samples when a 2048 format is applied.
Standard audio les may sound ‘stepped’ when navigating the position.
Tracker Mini has an on-board optimisation tool, WT Smoother which will
process a standard sample and helps to smooth the sound and give better
performance. This effectively converts the le to a more suitable format for
Tracker Mini’s Wavetable Synth. Navigating a processed audio wave will
sound smoother in the transition across positions.
▌ USING WT SMOOTHER TO OPTIMISE SAMPLES
1. Ensure the sample is loaded to the instrument list and selected as
currently active. Note that samples in the instrument list are copied into
the onboard memory from the SD Card.
2. Press [Menu] and navigate to select ‘Sample Editor’. Operations in the
‘Sample Editor’ are performed destructively to the sample in memory.
However the original le is retained intact on the SD Card.
3. Edit the audio le [Start], 1
st
Screen button and [End], 2
nd
Screen Button
selects the marker. Press (Up) or (Down) or [+] / [-] to adjust the
positions to select part of the sample to process.
4. Press the 7
th
or 8
th
Screen button to navigate to ‘WT Smoother’.
5. Press [Select effect], 6
th
Screen button to select WT Smoother.
6. Press [Window Num], 1
st
Screen button in the WT Smoother application.
This selects frames. The 256 default is a typical setting to use. Press
(Up) or (Down) or [+] / [-] to adjust.
7. Press [Window Len], 2
nd
Screen button in the WT Smoother application.
This selects sample length. The 2048 default is a typical setting to use.
Press (Up) or (Down) or [+] / [-] to adjust.
8. Press [Preview], 7
th
Screen button to audition the audio while editing.
This will need to process the audio before playing. Press [Stop], 7
th
Screen Button again to stop preview.
9. Press [Apply], 8
th
Screen button to apply and render the new audio le.
This converts to a wavetable which can be used in the wavetable play
mode as a smoother more rened option.
10. Save the project to also save the edited instruments in the project
folder. Hold [Shift] + [3] then Press [Save], 5
th
Screen Button. Saving the
project also automatically saves the instruments in the instrument
subfolder. These can be accessed from other projects.
Root
Wavetable_2048
/Samples

131
Polyend Tracker Mini Manual
130
Polyend Tracker Mini Manual
NOTESNOTES
Preview
0.000 s
Position
4.520 s
Length
500.0 ms
Shape
Triangle
Loop
Forward
Play Mode
Sample Playback 0m:00s P3.002
1-Shot
Slice
Forward loop
Beat Slice
Backward loop
Wavetable
Pingpong loop
Granular
16.hh3
Instruments
6
Instruments
6
Modulating Wavetables
The wavetable position is the key parameter to adjust and edit to search for
a desired sound. This parameter can also be modulated from within the
instrument automation page using an envelope or LFO. This adds
movement and interest.
Hold [Preview] in the wavetable page while the LFO is running will display
the animated position dynamically in real time.
Fast LFO Speeds can create glitchy and noisy sound designs. Use slower
LFO speed or envelope and reduce the wavetable window for developing
sound textures and ambience especially with added effects such as reverb.
Try synchronised speeds to tempo / steps to create rhythmic patterns. The
LFO amount will also effect how strong the LFO is applied.
Try manually adjusting the window and position while playing and with an
LFO to experiment with the sound.
LFO
Sample
Wavetable
Select the ‘Sample playback’ page to view the wavetable.
Select ‘Instrument Parameter’ page 2 to
edit the LFO and instrument automation
Position
6.11 Granular Play Modes
Granular instruments can be created in Tracker Mini. As with all Tracker
Mini instruments, Granular synth uses a sample as its core sound source.
Granular synthesis is ideal for glitchy soundscapes and textural sounds.
What is Granular Synthesis?
Granular synthesis breaks a sample down into tiny slices, lets describe this
as microscopic level. These narrow slices are generally less than 1 second
but often much shorter in duration and are called grains. Sound is
generated in a granular synthesizer by looping playback around a grain. It
is common practice to use modulation to bring a granular synth to life
especially using grain position. Granular synths can still use the same
features as in subtractive synthesis including lter and envelopes.
Modulating grain position is at the heart of the Tracker Mini’s
implementation of granular synthesis where an LFO or envelope can be
used. Parameters exist to set the position and length with a range up to
1000ms. Also shape and loop direction of playback parameters can also be
adjusted manually in the Granular synth playback mode.
Current Instrument
Selected
Sample
Waveform Cycle.
Preview
Audition Grain.
Play Mode List.
How the sample will be
played in the instrument
Length
Grain length
Loop
Playback direction
Shape
Grain Envelope
Position
Grain position within sample,
also can be modulated.

133
Polyend Tracker Mini Manual
132
Polyend Tracker Mini Manual
NOTESNOTES
Granular Parameters
The granular play mode is a simplied application of granular synthesis and
consists of four core parameters. The grain length is duration of the small
slice of audio, while loop denes the direction of playback across the grain.
Shape is the envelope shape applied to the grain playback, recognised in
the attack phase. The position parameter is what brings out the its sonic
character. This can be manually adjusted to nd a sweet spot or modulated
with the envelope or LFO to introduce movement and interest. Tracker Mini
operates with a single grain.
Instruments
6
Instruments
6
Position
(Blue Bar)
Length
Play Head
(Red Bar)
Shape will determine the
envelope of the playback
Grain
Direction will determine the
playback of the grain
Forward Reverse Pingpong
Square Triangle Gauss
Function Parameter
Screen
Button
Range Description
Edit Play Mode 7th & 8th
Modes
Selects the play mode to apply. Includes
Wavetable and Granular as well as 1-Shot and the
three loop modes.
Aid Preview 1st
Hold to play the grain from the current position
selected. Also hold while adjusting position to
‘scan’ for the desired sound.
Edit Position 2nd
Variable
Selects the grain playback position within the
sample. This can be manually adjusted to nd the
desired ‘sweet spot’ or modulated with an LFO or
Envelope for movement and interest.
Edit Length 3rd
1-1000ms
Sets the width in ms of the grain. This will be the
small slice of the sample that is played.
Edit Shape 4th
Square,
Triangle,
Gauss
Sets the envelope shape for the grain playback.
Particularly pertinent in the attack phase.
Edit Loop 5th
Forward,
Reverse,
Pingpong
Selects the grain playback direction.
Modulating Granular Position
The granular position can be modulated from within the instrument
automation page using an envelope or LFO. This adds movement and
interest and creates glitchy or textural sounds
Hold [Preview] in the granular page while the LFO is running will display the
animated position dynamically in real time.
The LFO Speed and granular parameters can have an affect on the sound
developed. Also the LFO amount will determine how much of the sample is
navigated with varying the position. Small amounts will be more predictable
textures and pad like sounds. Larger amount settings will move the position
wider in the sample creating more glitchy, less predictable sounds.
LFO
Sample
+ Grain
Select the ‘Sample playback’ page to view granular play mode.
Select ‘Instrument Parameter’ page 2 to
edit the LFO and instrument automation
Position

135
Polyend Tracker Mini Manual
134
Polyend Tracker Mini Manual
NOTESNOTES
Instruments
6
Instruments
6
6.12 Sharing Instruments
Instruments can be shared either with other projects on the same device or
by transferring to another Tracker Mini. This is useful when developing new
instruments or to create instruments which will be reused, for example to a
develop a signature sound across multiple tracks of an album.
Instruments are saved with a project using a ‘.pti’ le format and are stored
in the project ‘instruments’ subfolder. The project and instrument folders are
accessible from all projects. This is ok if you know where to look and what
to look for. Remembering all projects and their instruments is not an easy
task. A few tips will help manage a library of instruments. Tracker Mini does
not have in depth le management functions on board so using a PC or
Mac to access the SD card is required.
• Create instruments as normal. Save a project which will also save
the instruments into the current project folder. Instruments created
or loaded from other projects will be saved with the current project.
• Consider creating a ‘user’ subfolder within the instruments folder.
This can be used to build a library of user instruments.
• A different folder cannot be selected in Tracker Mini when saving
Instruments. Periodically instruments can be manually copied using
a PC / Mac into the ‘user’ instrument folder on the SD card. This
would be a housekeeping task, maybe combined with backing up
the SD Card fully.
• Do not cut or delete the the original instrument from the project as
this is where the project recognises the original le to be stored.
• The user folder can easily be shared with collaborators or between
devices simply by copying between SD Cards with the PC / Mac.
Instrument.pti
Sample
Instrument Parameters and Settings.
PCM Sample 44.1kHz, 16 Bit
Header
Micro SD Can be connected to a
PC / Mac with the USB adapter.
Files can be copied (Do not Cut /
Paste or Delete) between SD Cards.
Periodically copy from the SD Card Project Instrument
Folder to a user created folder. This makes it easy to
use in other projects and share with other collaborators.
Consider a naming convention for user instruments. This is less important
when using project contained instruments, but this technique can be helpful
when managing a user library. Instruments can be renamed in the ‘sample
loader’ page. It is advised to always keep a discipline of naming
instruments in Tracker Mini rather than on the PC/Mac to protect the .pti le
integrity and to make future access easier.
Root
Synthdawg
Kits
A .pti le contains a header ~400 bytes
which handles the parameter settings.
In addition a sample is included which
can vary in size and which is packed
into the instrument le.
/Drum Kits
/ProjectName
/Instruments
/Samples
/Patterns
/Progressions
/Instrument Kits
/Synths
/Synthdawg Kits
/Instruments
/Projects

It is important to get a good understanding of
all four elements of a step. This will help to get
the most from step sequencing. This section
provides a deeper dive into the two FX slots.
FX slots have access to a library of 37 effects
that are applied in a somewhat different way to
the normal expectation. These can apply both
audio and MIDI applications to modulate and
control as well as traditional effects such as
delay. These can be applied step by step
giving intimate control over each step and
when built together with other steps offers a
very creative option in Tracker Mini. These are
very powerful and without doubt are worth the
time and learning investment to get to know
the range and application of effects available.
It is important to recognise that step effects are
different to the general instrument and master
effects provided. The normal effect convention
is to operate inline or as a send conguration
for the audio pathway. The Tracker Mini FX are
polarised to the step itself or to the pattern in
which it is operating. This offers a extremely
wide range of creative options at a per step
level. Some step FX are even applied to all
tracks for example Tempo. The FX browser
provides a quick reference for each effect.
These descriptions are found in the Tracker Mini
FX selection page and can be selected for each
component. The help guide is useful when
working in the box, offering a basic reference.
This section aims to take a FX focussed view
and gives a more detailed and in depth
reference along with some practical and simple
examples of applying FX into a pattern.
FX Steps
7
137
Polyend Tracker Mini Manual
136
Polyend Tracker Mini Manual
NOTES

139
Polyend Tracker Mini Manual
138
Polyend Tracker Mini Manual
NOTESNOTES
FX Steps
7
FX Steps
7
7.1 Step FX Descriptions
Step FX are a collection of 37 effect types that can be applied into one of
two step locations using the dedicated Step FX buttons. Creative step
patterns can be generated by applying and also combining. FX do not
always need a note and instrument in the same step event. For example,
lter cutoff can adjust the cutoff value, applied to previous triggered note.
The FX list also provides some brief information on each effect.
▌ ACCESSING THE EFFECT DESCRIPTIONS
1. Press [1] to select the ‘Pattern’ page. Also accessible from the [Menu].
2. Select a blank or existing step event.
3. Hold [FX1] or [FX2] + Press (Up) or (Down) to highlight an effect. The
[+] / [-] buttons can also be used to navigate in the list.
4. While still Holding [FX1] or [FX2] and the FX browser window open,
Press Screen Button 7 or 8. This toggles the description window open
or closed and shows the description for the highlighted effect.
5. If in [REC] mode the FX will also be selected for the step when
browsing within this menu list. Rec mode will show the step as red.
Use the [+] & [-] buttons in recording mode when editing FX parameter values. When
adjusting the value for an FX slot with an instrument loaded to the step, the audio
applied through the effect will be automatically previewed.
Render
Selection
1 1
2
C5 40 ---- P-25
C5 40 ---- P-25
-- --- ---- ---- -- --- ---- ---- -- --- ---- ---- -- --- ---- ----
-- --- ---- ---- -- --- ---- ---- -- --- ---- ---- -- --- ---- ----
-- --- ---- ---- -- --- ---- ---- -- --- ---- ---- -- --- ---- ----
-- --- ---- ---- -- --- ---- ---- -- --- ---- ---- -- --- ---- ----
-- --- ---- ---- -- --- ---- ---- -- --- ---- ---- -- --- ---- ----
-- --- ---- ---- -- --- ---- ---- -- --- ---- ---- -- --- ---- ----
-- --- ---- ---- -- --- ---- ---- -- --- ---- ---- -- --- ---- ----
-- --- ---- ---- -- --- ---- ---- -- --- ---- ---- -- --- ---- ----
-- --- ---- ---- -- --- ---- ---- -- --- ---- ---- -- --- ---- ----
-- --- ---- ---- -- --- ---- ---- -- --- ---- ---- -- --- ---- ----
-- --- ---- ---- -- --- ---- ---- -- --- ---- ---- -- --- ---- ----
-- --- ---- ---- -- --- ---- ---- -- --- ---- ---- -- --- ---- ----
-- --- ---- ---- -- --- ---- ---- -- --- ---- ---- -- --- ---- ----
C5 02 ---- P-20
C5 40 ---- H-25
C4 12 ---- A 4
C5 40 ---- P-20
C5 40 ---- P-25
C5 40 ---- P-25
2
3 3
4 4
5 5
6 6
7 7
9 9
11 11
13 13
15 15
8 8
10 10
12 12
14 14
Paste
Pattern
Expand
Pattern
Copy
Pattern
Duplicate
Pattern
Invert MoreShrink
Pattern
Pattern 1 0m:00s P1.008
Fx
- - None
Sets the Volume of an
Instrument. For MIDI
instruments this sends
the NOTE ON velocity
parameter
From 0% - 100%
! - Off
P - Panning
M - Micro Tune
G - Glide
T - Tempo
I - Swing
m - Micro Move
q - Gate Length
C - Chance
R - Roll
A - Arp
n - Random Note
i - Random Instrument
V - Volume
Description
FX1
FX2
7.2 Step FX Reference
The effects are contained into a library of 37 FX types which can be
selected into the step. The details for each effect varies depending on its
function. Also the interaction with other steps or the note or instrument may
be relevant for some effects. The descriptions are built into the FX menu,
but these are limited in the descriptions. A deeper understanding of the FX
is benecial and brings more clarity to what at rst glance can be confusing.
One effect can be loaded into a step FX slot. Each step has 2 FX slots so a
total of two FX are possible. While this may seem limiting it is worth
remembering that some traditional effects also exist in the audio signal chain.
For example delay. The FX should be considered more like mini applications
that not only affect the audio but also affect the behaviour of the step and
sometimes the pattern itself.
This section and following parts will hopefully demystify their use, especially
within pragmatic use case examples.
- None
! Off
C Chance
R Roll
f Random FX
S Slice Playback of Sample
T Tempo
I Swing
m Micro Timing
G Glide
q Gate Length
A Arpeggiator
a - f MIDI Out
F Slide Up
J Slide Down
0 MIDI Chord
V Volume
P Panning
M Micro Tuning
n Random Note
i Random Instrument
v Random Volume
r Reverse Sample
P Position in sample / wave
g Volume LFO Rate
h Panning LFO Rate
j Filter LFO Rate
k Position LFO Rate
I Finetune LFO Rate
D Overdrive amount
L Low Pass Filter
B Band Pass Filter
H High Pass Filter
s Delay Send
t Reverb Send
E Bit Depth
U Tuning
Affects Audio Sound.
Affects Step Behaviour. Affects Structure / Timing

141
Polyend Tracker Mini Manual
140
Polyend Tracker Mini Manual
NOTESNOTES
7.3 None
1
9
5
13
16
D6 03
---- ----
----
----
----
----
D6 03
----
D6 03
----
D6 03
----
D6 03
----
FX Type Tag
Value Ranges
FX Description
Example
Effect
-
N/A
No effect is applied and hence the sound for the step will purely be based on
the instrument and note. This is basically an empty effect.
Default state for any step is that the FX1 and FX2 are empty. This effect can
be applied to remove an existing FX and reset to the normal empty state.
None - No FX Applied
FX1 FX2
The last two slots are for FX. They will be
indicated with dashed lines when empty. This is
the default empty state of a step.
Selected step will be bounded green or red in
recording edit mode. The part of the step to be
edited is solid lled when selected as per
illustration where FX1, Step 1 is shown selected.
FX Steps
7
FX Steps
7
7.4 Off
FX Type Tag
Value Ranges
FX Description
Example
Effect
!
On
Will deactivate an effect that has been triggered on a prior step.
A roll triggered on step 1 will be audible over the subsequent following steps.
Applying an !OFF step command afterwards will curtail the effect for the track.
Off
1 1
3 3
2 2
4 4
5 5
D6 03
----
RR 6 D6 03
----
RR 6
D6 03
----
!OFF D6 03
----
D6 03
----
D6 03
----
D6 03
----
D6 03
----
D6 03
----
D6 03
----
Effect Applied
Effect Curtailed
Effect in Play
(!OFF Pending)
Effect in Play
(No !OFF)
---- ----
---- ----
----
---- ----

143
Polyend Tracker Mini Manual
142
Polyend Tracker Mini Manual
NOTESNOTES
7.5 Volume
FX Type Tag
Value Ranges
FX Description
Example
Effect
V
0 - 100%
Will apply a volume level for this individual instrument step.
For MIDI this will send a NOTE ON Velocity parameter.
To illustrate an example, 16 Steps with volume ramped up through the pattern
steps. This will be a stepped ramp. To create a smoother ramp try using the ll
function to populate all steps using ‘From-To’ or Live Rec. This will still be
triggered per step but will be audibly smoother.
Volume / Velocity
FX Steps
7
FX Steps
7
7.6 Panning
FX Type Tag
Value Ranges
FX Description
Example
Effect
P
L -50 - R +50
Positions the audio within the stereo eld, panning the signal in the left / right
position. This is applied per step.
An example of 16 Steps panned left to right and then back to left. Triggered for
the stereo position per step. To create a smoother, less stepped transition use
ll to populate all steps using ‘From-To’.
Panning
1
1
9
3
5
2
13
15
16
16
D6 03
----
V 0
D6 03
----
V 0
D6 03
----
V 80
D6 03
----
V 94
D6 03
----
V100
D6 03
----
V100
D6 03
----
V 30
D6 03
----
V 6
D6 03
----
V 55
D6 03
----
V 13
Volume Level
100%
0%
1 5 9 132 6 10 143 7 11 154 8 12 16
1 1
9 3
5 2
13 15
16 16
D6 03
----
P-50 D6 03
----
P-50
D6 03
----
P 0 D6 03
----
P-38
D6 03
----
P-50 D6 03
----
P-50
D6 03
----
P 0 D6 03
----
P-42
D6 03
----
P 50 D6 03
----
P-31
Panning
Left Right
-50 0 50
1
9
13
16
5

145
Polyend Tracker Mini Manual
144
Polyend Tracker Mini Manual
7.8 Glide
NOTESNOTES
7.7 Micro-Tune
C CB B
FX Type Tag
Value Ranges
FX Description
Example
Effect
M
-99 to +99 Cents
Applies a ne tuning pitch adjustment for the step note or MIDI output.
Operates in cents, where 100 cents is one semitone
A semitone is 100 cents but as the tuning is so ne, the maximum range of
micro tuning is almost a full semitone. This can be used to add variation
especially with percussive sounds while still maintaining musicality.
Micro Tuning
1 Semitone Steps
(Half steps)
-100 to +100
Cents per Semitone
[Micro Tune]
1 Octave
(12 Semitones)
FX Steps
7
FX Steps
7
FX Type Tag
Value Ranges
FX Description
Example
Effect
G
0 - 100%
Creates a smooth transition when the step is activated, from the pitch of a
previous note value to the current step note value over a time period based on
the glide time setting. Glide time is in percentage which represents time.
A short or long glide time transition can bring a creative effect using the pitch of
a step note. Try experimenting by using glides in combination with other steps.
Glide
1
9
5
13
16
D6 03
---- M-99
----
M-50
----
M 99
D6 03
----
D6 03
----
D6 03
----
D6 03
----
Pitch Tune
-1 Semitone +1 Semitone
-50 Cents
0
50 Cents
1
9
13
16
5
1 1
3 3
2 2
4 4
5 5
D6 03
----
D6 03
----
D5 03
----
G 48 D5 03
----
---- -------- --
D6 03
----
D6 03
----
D6 03
----
D6 03
----
----
----
----
----
---- ----
G 74
---- ----
---- --
Step Trigger
Step Trigger
Step Trigger
Glide from prior note D6 to Note D5 across the glide time duration.
Step Trigger
D6 > D5
D6 > D5
Glide Time
~1sec
Glide Time
~8sec
D6
D6
D5 D5
D5
D5
Glide Time Converter (Estimated)
% 0 13 25 36 50 55 60 65 70 75 80 85 90 95 100
Sec 0 0.25 0.5 0.75 1.0 2.4 3.8 5.2 6.6 8.0 9.4 10.8 12.2 13.6 15

147
Polyend Tracker Mini Manual
146
Polyend Tracker Mini Manual
7.10 Swing
1 1
9 9
5 5
13 13
16 16
D6 03
----
I 55 D6 03
----
I 45
D6 03
----
P 0 D6 03
----
D6 03
----
P-50 D6 03
----
D6 03
----
P 0 D6 03
---- ----
----
----
D6 03
----
P 50 D6 03
----
I 35
Swing
25%
On Grid 50%
Late
All Tracks
75%
Early
NOTESNOTES
7.9 Tempo
1 1
9 9
5 5
13 13
16 16
D6 03
---- ----
D6 03
---- ----
D6 03
---- ----
D6 03
----
----
D6 03
---- ----
D6 03
----
TSTP
D6 03
---- ----
D6 03 T 50
----
D6 03
----
T200 D6 03
---- ----
Tempo
120
240
Stop
Example 1.
Pattern will play rst cycle and trigger the
tempo change on step 9. The entire
pattern tempo will change and continue
through subsequent pattern cycles until a
new tempo is triggered or set.
Example 1. Example 2.
Example 2.
Pattern will play at the dened tempo,
change when triggered then the pattern
will stop when the TSTP event is activated.
1 5 9 132 6 10 143 7 11 154 8 12 16
FX Type Tag
Value Ranges
FX Description
Example
Effect
T
10 - 400%
Applies a % tempo change triggered on the step. TSTP Tempo Stop - Stops
the sequencer running. Given that MIDI is synchronised to the project tempo,
this will also affect MIDI Out clock.
Tempo change is applied to the entire pattern from the step onwards. A TSTP
command will add a full stop step which will halt the sequencer. TSTP is an
available option when setting the value. Default tempo of 120 for this example.
Tempo Change
FX Steps
7
FX Steps
7
FX Type Tag
Value Ranges
FX Description
Example
Effect
I
25 - 75%
Introduces a groove or shufe into the pattern timing. 50% is no swing. Range
is 25% to 75% of pattern swing. Also applied to MIDI Out.
Swing on a step track will apply across the pattern. These can create a groove.
Maybe experiment with variations. Adjust by ear rather than numbers.
Swing

149
Polyend Tracker Mini Manual
148
Polyend Tracker Mini Manual
7.12 Gate Length
1
9
5
13
16
D6 03
----
q 80
D6 03
---- ----
D6 03
---- ----
D6 03
---- ----
D6 03
---- ----
Gate Full Range
100%0%
Gate Length
Note On
Envelope
The gate operates in
conjunction with the ADSR
instrument envelope.
NOTESNOTES
7.11 Micro Move
1
9
5
13
16
D6 03
----
m 0
D6 03
----
m 25
D6 03
---- ----
D6 03
----
m 50
D6 03
---- ----
0%
Nudge
Forward
(Later)
100%
1 5 9 132 6 10 143 7 11 154 8 12 16
Per Step
While the range is 0-100%, the actual shift of notes is only in small amounts.
The 0% setting is ‘On Grid’ while any nudge is forward in the pattern.
FX Type Tag
Value Ranges
FX Description
Example
Effect
m
0 - 100%
Will apply a small offset to the note step. This will move the note forward by an
amount based on the setting.
Can be used to offset one part of a track step or provide minor step variations.
Think of this similar to swing, but applied to a step rather than pattern.
Micro Move
FX Steps
7
FX Steps
7
FX Type Tag
Value Ranges
FX Description
Example
Effect
q
0 - 100%
Adjusts the length of the note gate and helps shape the sound. Operates in
conjunction with the instruments Envelope settings which are found in the
‘Instrument’s Parameters’.
Increases or reduces the gate for the note. This works with the envelope and
will determine length of note helping to shape the sound over time.
Gate Length

151
Polyend Tracker Mini Manual
150
Polyend Tracker Mini Manual
7.14 Roll
R - Regular Roll.
Rv - Decrease Volume.
RV - Increase Volume
Rn - Decrease Note*
RN - Increase Note*
RR - Random Note*
* Note Pitch
R - Regular Roll.
Rv - Decrease Volume.
RV - Increase Volume
Rn - Decrease Note*
RN - Increase Note*
RR - Random Note*
* Note Pitch
1
1
9
9
5
5
13
13
16
16
D6 03
----
RR 2
D6 03
----
RR 2
---- ----
---- ----
---- ----
---- ----
---- ----
---- ----
--- --
--- --
--- --
--- --
--- --
--- --
D6 03
----
Rv 1
D6 03
----
Rn 1
Volume LevelNote Pitch
100%
100%
0%
0%
1
1
5
5
9
9
13
13
2
2
6
6
10
10
14
14
3
3
7
7
11
11
15
15
4
4
8
8
12
12
16
16
NOTESNOTES
7.13 Chance
1 1
9 3
5 2
13 15
16 16
D6 03
----
V 0 D6 03
----
C 25
D6 03 C 50 V 80 D6 03
---- ----
D6 03
----
V100 D6 03
----
C 55
D6 03 C 50 V 30 D6 03
---- ----
D6 03
----
V 55 D6 03
----
C 85
Chance
100%
0%
1 5 9 132 6 10 143 7 11 154 8 12 16
FX Type Tag
Value Ranges
FX Description
Example
Effect
C
0 - 100%
Sets the chance condition for the step. This will apply a probability of whether
the step will play or not. Higher percentages means a higher chance of
playing. 100% will always play, 0% will never play.
Can add variation to a pattern. For example a percussive note sequence could
have some steps with a chance setting to dictate whether it will sound or not.
This can create interest and variety in melodies or beats.
Chance
FX Steps
7
FX Steps
7
FX Type Tag
Value Ranges
FX Description
Example
Effect
R
0 - 16 per Type
Repeat of the note applied using a step division. This can be straight repeats
or evolving repeats depending on the roll type selected. The option for types
are R, Rv, RV, Rn, RN, RR with a step divider range of 0 - 16.
Rolls are extremely versatile and can be applied as volume or note pitch ramp
up / down or just to randomise notes.
Roll

153
Polyend Tracker Mini Manual
152
Polyend Tracker Mini Manual
7.15 Arpeggiator
FX Type Tag
Value Range
FX Description
Example
Effect
A
See Below
Example Tracker Mini Chords
Arpeggiator. This needs a note value and works in conjunction with the MIDI
chord which must also be assigned to the other FX slot
Set the FX1 slot to the Arp type. This can operate with a note melody:
Up / Rising ‘/’ or Down / Falling ‘\’ or Random ‘R’. The value is based on the
tempo divider as a number e.g. 6 or multiplier e.g. .6 (dot 6).
Set the FX2 slot to MIDI Chord. This is an effect used with MIDI but also
provides scale details for the Arp.
Arp
C4 03 A/ 4 047A
NOTESNOTES
Arp Type & Direction
A/ - Rising / Up.
A\ - Falling / Down.
AR - Random
Root Note
Based on the hexadecimal
code representing chord
notes / scale.
MIDI Chord Scale
Hex code represents
+ Semitones from root
Hex code represents
+ Semitones from root
Hex code represents
+ Semitones from root
Hex code represents
+ Semitones from root
Hex code represents
+ Semitones from root
Tracker Mini gives a series of scales in the MIDI Chord description. While these are useful
examples they do not fully cover all chords. Other chords are also available, represented by the
hexadecimal number in the MIDI Chord FX. Translating a chord to the hexadecimal code for the
MIDI Chord assignment will allow a wider range to be used. Alternatively, and a more practical
approach is trial and error and listening by ear of what sounds ‘right’ when selecting scales.
The Arp uses the Note as the root and the Arp effect sets the direction and
timing. This needs a MIDI Chord also in the other FX slot to create the chord
which will be arpeggiated. Setting the MIDI Chord to a value at ‘0’ will play notes
through a chromatic scale and is useful when setting up the Arp to get the
direction and timing right before applying a specic scale.
Arp direction plus intervals can range through the dividers of 1, 2, 3, 4, 6, 8 and
also the .1, .2, .3, .4, .6, .8 where a dot value indicates a multiplier.
Other Examples
Hexadecimal to Decimal Converter
A/ would play C - D# - G Rising arpeggio
A\ would play G - D# - C Falling arpeggio
AR would play C - D# - G in Random order
Hex code represents
+ Semitones from root
A/ 4
Root + Arp Notes
A\ 4
e.g. 0 27 Sus2
e.g. 0 5A
e.g. 027A
e.g. 0 67 sus
e.g. 057B
0 5A
e.g. 0 37A Min7
A - Arp 0 - MIDI Chord
MIDI Chord
Hex Code
Scale
A/ Rising Chord
Example Root C
A\ Falling Chord
Example Root C
AR Random Chord
Example Root C
0 27 Sus2 C - D - G G - D - C Random order
0 57 Sus4 C - F - G G - F - C Random order
0 37 Min C - D# - G G - D# - C Random order
0 47 Maj C - E - G G - E - C Random order
0 5C Open4 C - F - C C - F - C Random order
0 7C Open5 C - G - C C - G - C Random order
0379 Min6 C - D# - G - A A - G - D# - C Random order
037A Min7 C - D# - G - A# A# - G - D# - C Random order
0479 Maj6 C - E - G - A A - G - E - C Random order
047B Maj7 C - E - G - B B - G - E- C Random order
C
C
C D G
C
C F
G
G B
C
0
0
0
0
0
0
0
D
F
D# A#
+2
+5
+2
+7
+7 +11
+5
Semitones from the root
+3 +10
G
A#
A#
F#
G
+7
+10
+7 +10
+6
+5
+10
+7
Hex 1 2 3 4 5 6 7 8 9 A B C D E F
Dec 1 2 3 4 5 6 7 8 9 10 11 12 13 14 15
Semitones
Root
-12
+12
1 5 9 132 6 10 143 7 11 154 8 12 16
FX Steps
7
FX Steps
7

155
Polyend Tracker Mini Manual
154
Polyend Tracker Mini Manual
NOTESNOTES
7.16 Random Note 7.17 Random Instrument
1
3
2
4
5
D6 04
----
i 2
D6 04
----
i 2
D6 04
----
i 2
D6 04
----
i 2
D6 04
----
i 2
1 2 3 4 5
+2
-2
Current Instrument
1. HooverBass
2. ClosedHat2
3. LightHat
4. ClosedHat
5. Hat Rim
6. Hat3
7. StringPad
8. lead
Instrument List
1
9
5
13
16
D6 03
---- ----
D6 03
----
n 8
D6 03
---- ----
D6 03
----
n 3
D6 03
---- ----
Intervals
Root
+8
+8
1 5 9 132 6 10 143 7 11 154 8 12 16
Notes ‘n’ will play randomly, through each pattern cycle. The selected range is set
by the +/- value in the FX. This is applied with reference to the root note (Example
D6) and determines the +/- offset from which the random note is selected.
Instrument ‘i’ will play randomly, through each pattern cycle. The selected range is set
by the +/- value in the FX. This is applied with reference to the current instrument
(Example 4) and determines the +/- offset from which the random note is selected. +2
is the Hat3 and -2 is ClosedHat2. LightHat and Hat Rim are included in this range.
Range is -3 to +3 deviation from root
Range is -2 to +2 deviation from current instrument
Range is -2 to +2 deviation from current instrument
Range is -2 to +2 deviation from current instrument
Range is -2 to +2 deviation from current instrument
Range is -2 to +2 deviation from current instrument
Range is -8 to +8 deviation from root
FX Type Tag FX Type Tag
Value Ranges Value Ranges
FX Description FX Description
Example Example
Effect Effect
n i
0 to +/-100 0 to +/-47
Sets a range of notes from which a random selection will be made, for each
play cycle of the pattern. Interval are based on the selected scale for the pads
Sets a range of instruments from which a random selection will be made, for
each play cycle of the pattern. Intervals are based on the selected instrument
and the range before and after in the project instrument list.
The randomisation is applied within a range set by the value. By default this is
a +/- semitone range across a chromatic scale. However this is based on the
cong settings and can therefore be changed to another scale. Start with a
small range setting to keep things musical and then apply a different setting to
experiment with variations.
Try loading a cluster of samples into the instrument list. This will form the
range to select from. The step instrument being the central instrument for the
randomisation range. For example a variation of percussive hats or vocal
stabs. The random pick will select from these.
Random Note Random Instrument
FX Steps
7
FX Steps
7

157
Polyend Tracker Mini Manual
156
Polyend Tracker Mini Manual
NOTESNOTES
7.18 Random FX
1
9
5
13
16
D6 03
----
V 0
D6 03 C 50 V 80
D6 03
----
V100
D6 03f 20 q 70
f 20 q 70
D6 03
----
V 55
90%50% 70%
0%
q - gate length
randomisation
Note On
Gate Length
Gate length value is randomised by +/-20 applied by FX1 to the default of 70 in
FX2. Therefore gate length value variation will be a value selected between 50 -
90 over each pattern cycle.
7.19 Random Volume
Default Level
+/- Range of variation
1
9
5
13
16
D6 03
----
v 10
---- ----
---- ----
---- ----
--- --
--- --
--- --
D6 03
----
v 20
Volume Level
100%
0%
1 5 9 132 6 10 143 7 11 154 8 12 16
Playback will be at the default volume until a random volume step is triggered. A value
somewhere in the range will then be applied.
FX1 Randomises the value for FX2 (q - gate Length)
Range is -10 to +10 deviation from current default
Range is -20 to +20 deviation from current default
FX Type Tag FX Type Tag
Value Ranges Value Ranges
FX Description FX Description
Example Example
Effect Effect
f v
0 to +/-255 0 to +/-100
Selects a random FX value (not type) for the FX located in the other slot, same
step. Plays a random selection each pattern cycle based on the set range.
Creates a volume variation in each cycle of the pattern through randomisation
of velocity. This is a value which is randomly selected from within a +/- range
from the default volume level.
This feature can add a variation to a pattern. For example FX1 Random 20
applies to FX2 Gate length, which will be the value randomised. Gate length
full range is 0-100%. FX2 Functions other than Gate Length can also be used.
This is useful for creating accents and audible variations in volume level.
Random FX Value Random Volume
FX Steps
7
FX Steps
7

159
Polyend Tracker Mini Manual
158
Polyend Tracker Mini Manual
NOTESNOTES
7.20 Reverse Sample 7.21 Position
Start position for sample used in instrument 22 only for this step
Start position for sample used in instrument 22 only for this step
Start position for sample used in instrument 22 only for this step
Start position for sample used in instrument 22 only for this step
Position for steps in-between ‘p’ will operate at the normal start
FX Type Tag FX Type Tag
Value Ranges Value Ranges
FX Description FX Description
Example Example
Effect Effect
r p
<<< Or >>> 0 - 100%
Reverses the sample playback. Simply plays the sample forwards as normal
or reverses its playback.
Sample start position for playback is set. This is based on the playback type
selected and better applied with one-shot samples, wavetables and granular.
When using sliced samples the ‘slice’ FX is an alternative option.
Reversing the sample playback is a simple application. The reverse will take
place only on the step activated. It is also important in practical applications to
know the sample length. If the ‘tail’ of a sample is long then reversing it may
mean no sound is heard. Adjusting the ‘end’ parameter of the sample playback
may also need to be changed.
Try experimenting with different samples and start points. Use full samples
(one-shots), wavetables and granular types for the full more pronounced
effect. Happy accidents to nd a ‘sweet spot’ in a sample are possible.
Automate the variation using individual steps to create movement and interest.
Reverses Sample Playback Position
FX Steps
7
FX Steps
7
<<<
1 1
9 9
5 5
13 13
16 16
D6 03
---- ----
F5 22
----
D6 03
----
r<<< F5 22
----
p 65
p 85
D6 03
---- ----
F5 22
---- ----
D6 03
----
r>>> F5 22
----
p 47
p 5
D6 03
---- ----
F5 22
----
1
1 5 9 13
5 9 132 6 10 143 7 11 154 8 12 16
Start
Start
(Default)
Normal Sample Direction.
Playback from ‘Start’ to ‘End’
parameters as set in the sample
playback settings.
Instrument Sample Type.
Will be dependant on sample
playback type. Use One-Shots,
Wavetable and Granular.
Steps with Dened Start Pos
Start in %
Reversed Sample Direction.
Playback from ‘End’ to ‘Start’ parameters
as set in the sample playback settings.
End may need to be adjusted to hear
audio within the step duration.
End
Playback Length
Position ‘p’ Range 0-100%
End
End
Start

161
Polyend Tracker Mini Manual
160
Polyend Tracker Mini Manual
NOTESNOTES
7.22 Slice
Slice 2 (Wrapped 16+2) from beat sliced instrument 16.
Slice 5 from beat sliced instrument 16 only for this step
Slice 12 from beat sliced instrument 16 only for this step
Slice 8 from beat sliced instrument 16 only for this step
The last slice eg 16 is default if a slice selection is not dened.
1
9
5
13
16
F5 16
----
F5 16
----
S 12
S 8
F5 16
---- ----
F5 16
----
S 18
S 5
F5 16
----
1
2
5
18*
*18 = 16 Max Range + 2
3 4 5 6
1
5
8
13
8
10 11 12
9
12
15 15 16
Beat Sliced Sample.
For example 16 beat sliced ‘hits’
across a drum kit. The Steps ‘S’ FX
will trigger the dened slice.
Beat Slices
Slices Triggered
Step
Slice Selected
Slice ‘S’ Range 0-48
‘S’ is aligned for slices e.g. 0-16
‘S’ Exceeds available slices e.g. S 17-32 = Slice 1-16
7.23 Volume LFO
Speed 8
Instrument Vol
Cycle reset with a
new note step
Volume
Step g Rate
Speed 4
Rate 24
Rate 48
Step will trigger the LFO Rate change
Speed set in the Instrument Parameter Volume LFO will apply
Previous Step LFO Rate continues
g Rates
FX Type Tag FX Type Tag
Value Ranges Value Ranges
FX Description FX Description
Example Example
Effect Effect
S g
0 - 48 Various
Plays a selected slice on the triggered step. While the FX range of steps is 1-
48 it is typical to apply slices smaller groups e.g. 16 Steps. If so the selected
step will wrap in the range.
Selects the rate for the instrument volume LFO. This setting is in increments
with respect to project tempo. LFO is found in the instrument parameters P2/2.
The LFO is triggered by each step either using the rate from the step LFO pan
or the default instrument parameter speed of no LFO FX is set. The LFO cycle
is reset each trigger..
The LFO is triggered by each step either using the rate from the step volume
LFO or the default instrument parameter speed if no LFO FX is set. The LFO
cycle is reset each trigger.
Slice Playback Volume LFO Rate
FX Steps
7
FX Steps
7
1
9
5
13
F5 16
---- ----
------- -- ----
------- -- ----
F5 16
----
g 48
1 5 9 132 6 10 143 7 11 154 8 12 16
128 96 64 48 32 24 16 12 8 6 4 3
2 3/2 1 3/4 1/2 3/8 1/3 1/4
316
(3/16)
1/6 1/8
/12
(1/12)
Speed Default
Step Rate Trigger
or
Instrument Volume
Instrument
16
LFO

163
Polyend Tracker Mini Manual
162
Polyend Tracker Mini Manual
NOTESNOTES
7.24 Panning LFO
Cycle reset with a
new note step
Instrument Pan
Instrument
22
Speed 16
Instrument Pan
Panning
L R L R
Step h Rate
Speed 8
Rate 16
Rate 8
1 5 9 132 6 10 143 7 11 154 8 12 16
Step will trigger the LFO Rate change
Speed set in the Instrument Parameter Panning LFO will apply
Previous Step LFO Rate continues
h Rates
1
9
5
13
F5 22
---- ----
------- -- ----
------- -- ----
F5 22
----
h 16
Speed Default
Step Rate Trigger
or
LFO
128 96 64 48 32 24 16 12 8 6 4 3 2 3/2 1
3/4 1/2 3/8 1/3 1/4
316
(3/16)
1/6 1/8
/12
(1/12)
/16
(1/16)
/24
(1/24)
/32
(1/32)
/48
(1/48)
/64
(1/64)
7.25 Filter LFO
j Rates
128 96 64 48 32 24 16 12 8 6 4 3 2 3/2 1
3/4 1/2 3/8 1/3 1/4
316
(3/16)
1/6 1/8
/12
(1/12)
/16
(1/16)
/24
(1/24)
/32
(1/32)
/48
(1/48)
/64
(1/64)
Rate 2
Step j Rate
The impact of the LFO will depend on the type of lter selected and the
settings in the lter LFO and settings in the instrument parameters.
Default
Off
LFO will be applied to
the lter cutoff frequency.
OFF may be used to avoid lter state cutting out all audio
Speed set in the Instrument Parameter LFO will apply
Plays at default lter setting
FX Type Tag FX Type Tag
Value Ranges Value Ranges
FX Description FX Description
Example Example
Effect Effect
h j
Various Various
Selects the rate for the instrument panning LFO. This setting is in increments
with respect to project tempo. LFO is found in the instrument parameters P2/2.
Selects the rate for the instrument lter cutoff LFO. This setting in increments
with respect to project tempo. LFO is found in the instrument parameters P2/2.
A lter type will need to be set which will effect the behaviour of the LFO.
The LFO is triggered by each step either using the rate from the step pan LFO
or the default instrument parameter speed if no LFO FX is set. The LFO cycle
is reset each trigger.
The LFO is triggered by each step either using the rate for the lter step LFO
or the default instrument parameter speed of no LFO FX is set. The LFO cycle
is reset each trigger. Higher rates 128-32 good for sweeps and mid range 4-
1/3 good for dubstep style wobble.
Panning LFO Rate Filter Cutoff LFO Rate
FX Steps
7
FX Steps
7
1
9
5
13
------- -- ----
F5 24
----
!OFF
F5 24
----
j 2
F5 24
---- ----
Speed Default
Step Rate Trigger
or
Instrument Cutoff
Instrument
24
LFO
1 5 9 132 6 10 143 7 11 154 8 12 16

165
Polyend Tracker Mini Manual
164
Polyend Tracker Mini Manual
NOTESNOTES
7.26 Position LFO
5
Start
(Default)
Sample in Wavetable of
Granular play mode.
Start in %
End
Sample Position
Instrument
22
Step will trigger the LFO Rate change
Speed set in the Instrument Parameter Panning LFO will apply
Previous Step LFO Rate continues
h Rates
1
9
5
13
F5 22
---- ----
------- -- ----
------- -- ----
F5 22
----
k 12
Speed Default
Step Rate Trigger
or
LFO
128 96 64 48 32 24 16 12 8 6 4 3 2 3/2 1
3/4 1/2 3/8 1/3 1/4
316
(3/16)
1/6 1/8
/12
(1/12)
/16
(1/16)
/24
(1/24)
/32
(1/32)
/48
(1/48)
/64
(1/64)
7.27 Finetune LFO
Pitch Tune
-1 Semitone +1 Semitone
-50 Cents
0
50 Cents
1
9
13
16
5
l Rates
128 96 64 48 32 24 16 12 8 6 4 3 2 3/2 1
3/4 1/2 3/8 1/3 1/4
316
(3/16)
1/6 1/8
/12
(1/12)
/16
(1/16)
/24
(1/24)
/32
(1/32)
/48
(1/48)
/64
(1/64)
Speed of LFO for the step.
Triggers note at correct pitch
FX Type Tag FX Type Tag
Value Ranges Value Ranges
FX Description FX Description
Example Example
Effect Effect
k
l
Various Various
Selects the rate for the instrument wavetable / granular sample position LFO.
This setting is in increments with respect to project tempo. LFO is found in the
instrument parameters P2/2.
Selects the rate for the instrument netuning LFO. This setting in increments
with respect to project tempo. LFO is found in the instrument parameters P2/2.
The LFO will adjust the position in the wavetable or granular sample. One of
these play modes must be set to apply a position modulation from the LFO.
The step then can vary the speed of the LFO per step.
The LFO is triggered by each step applied. Slower rates are good to introduce
an evolving slight pitch variation.
Position LFO Rate Finetune LFO Rate
FX Steps
7
FX Steps
7
1
9
5
13
------- -- ----
------- -- ----
F5 24
----
l 48
F5 24
---- ----
Speed Default
Step Rate Trigger
or
Instrument
Finetune
Instrument
24
LFO

167
Polyend Tracker Mini Manual
166
Polyend Tracker Mini Manual
NOTESNOTES
7.28 Overdrive
Variation of overdrive instrument effect
Take care when working with overdrive, especially with headphones. This
can become loud. Start with smaller settings and expand as required.
1
9
5
13
16
F5 16
----
F5 16
----
D 10
D 5
F5 16
---- ----
F5 16
----
D 17
D 20
F5 16
----
7.29 Low Pass Cutoff
Note and Instrument triggered with no ltering
Sample triggered at step 1 will be fully ltered
1
9
5
13
16
F5 16
---- ----
----
----
----
---
---
---
---
--
--
--
--
L 60
L 40
L 0
----
L 80
FX Type Tag FX Type Tag
Value Ranges Value Ranges
FX Description FX Description
Example Example
Effect Effect
D
L
0-100% 0-100%
Selects the amount of overdrive applied for the duration of the specic step.
Overdrive is found in the instrument parameters P1/2 - Effects.
Adjust the instrument cutoff frequency of the low pass lter. The instrument
lter is found in the instrument parameters P2/2 but can be disabled and this
effect will still operate.
Can be used simply to add overdrive for the specic instrument and create
variety across a pattern.
The cutoff frequency can be triggered by each step applied. This allows
sweeps using only FX steps with multiple steps ramping the value or glitchy
sequenced lter effects. 100% plays the sound as normal, all frequencies
present, while 0% will totally cutoff all frequencies.
Overdrive amount Low Pass Filter
FX Steps
7
FX Steps
7
0%
Overdrive
100%
1 5 9 132 6 10 143 7 11 154 8 12 16
Per Step
< 20Hz > 20KHz
0%
Frequency in %
100%
15913 26 37 4
8
16
Low Pass
Cutoff
Filter Sweep
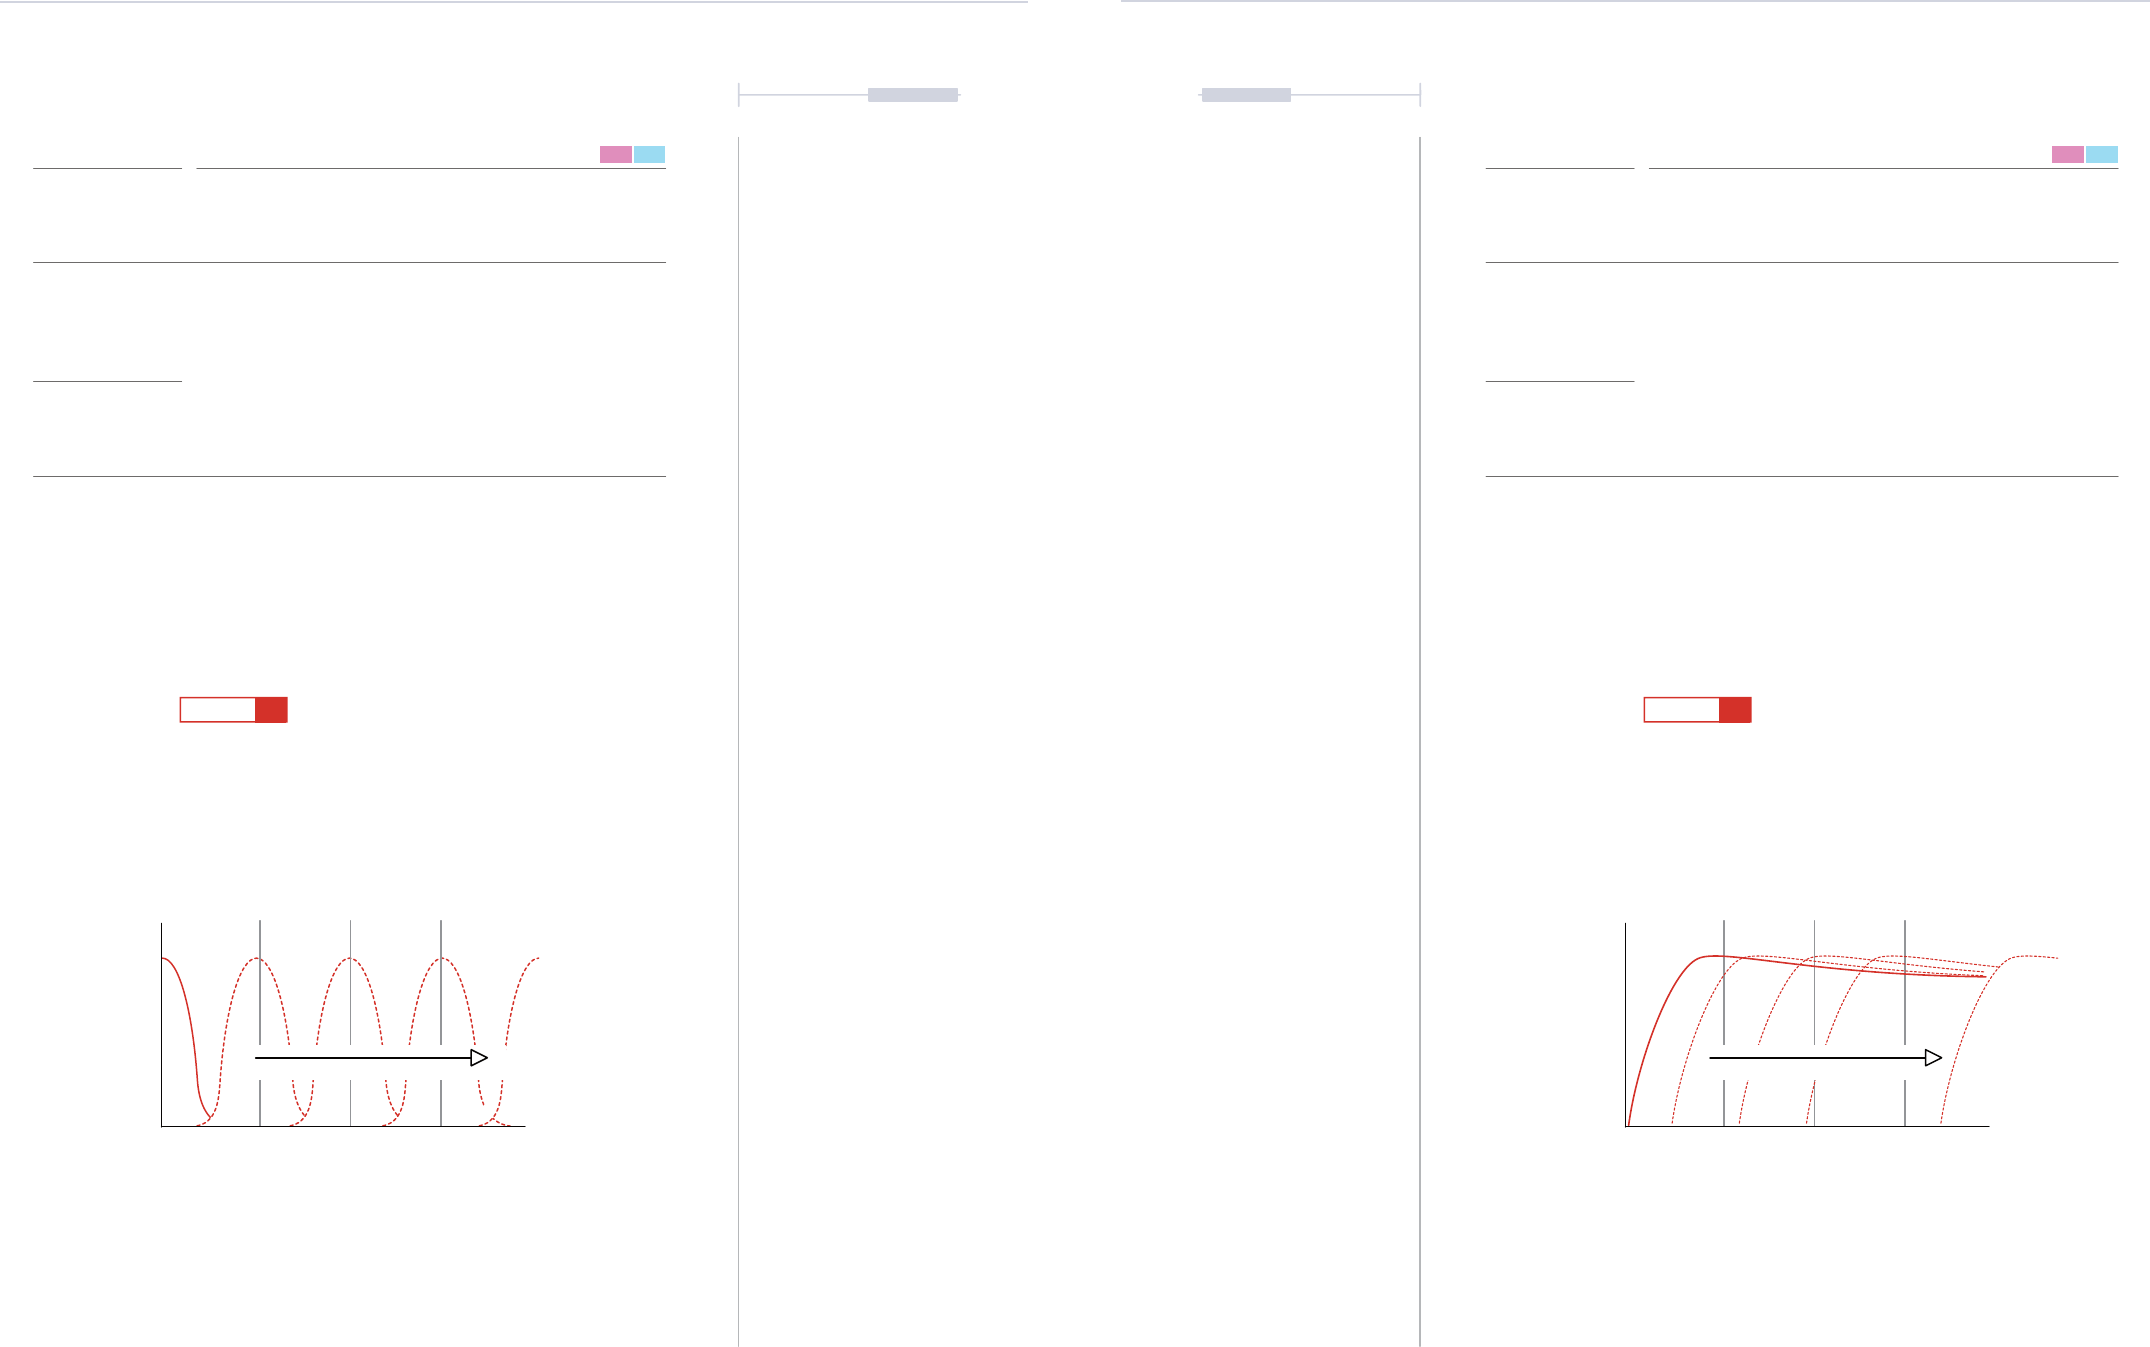
169
Polyend Tracker Mini Manual
168
Polyend Tracker Mini Manual
NOTESNOTES
7.30 Band Pass Cutoff 7.31 High Pass Cutoff
Note and Instrument triggered with no lteringNote and Instrument triggered
Sample triggered at step 1 will be fully ltered
Band sweeps through the frequencies
11
99
55
1313
1616
F5 16
---- ----
F5 16
----
----
----
----
---
---
---
---
--
--
--
--
H 50
H 75
H100
----
----
----
---
---
---
--
--
--
B 50
B 0
B 75
B100
----
H 25
---------
B 25
< 20Hz< 20Hz > 20KHz> 20KHz
0%0%
Frequency in %Frequency in %
100%100%
11 55 99 1313 22 66 1010 1414 33 77 1111 1515 44 88 1212 1616
High Pass
Cutoff
Band Pass
Cutoff
FX Type Tag FX Type Tag
Value Ranges Value Ranges
FX Description FX Description
Example Example
Effect Effect
B
H
0-100% 0-100%
Adjust the instrument cutoff frequency of the band pass lter. The instrument
lter is found in the instrument parameters P2/2 but can be disabled and this
effect will still operate.
Adjust the instrument cutoff frequency of the high pass lter. The instrument
lter is found in the instrument parameters P2/2 but can be disabled and this
effect will still operate.
The cutoff frequency can be triggered by each step applied. This allows
sweeps using only FX steps with multiple steps ramping the value or glitchy
sequenced lter effects.
The cutoff frequency can be triggered by each step applied. This allows
sweeps using only FX steps with multiple steps ramping the value or glitchy
sequenced lter effects. 0% plays the sound as normal, all frequencies
present, while 100% will almost cutoff all frequencies.
Band Pass Filter High Pass Filter
FX Steps
7
FX Steps
7
Filter SweepFilter Sweep

171
Polyend Tracker Mini Manual
170
Polyend Tracker Mini Manual
NOTESNOTES
7.32 Delay
75
Step Delay Send
Instrument
18
Master Delay
FX2
Time
Feedback
Sync / Rate
Type
7.33 Reverb
Delay send amount initiated with the note
Delay will have an audio tail beyond its step
1
9
5
13
16
F5 18
----
F5 18
----
F5 18
----
---- ----
----
---- ----
----
---
---
--
--
B 0
s 75
FX Type Tag FX Type Tag
Value Ranges Value Ranges
FX Description FX Description
Example Example
Effect Effect
s
t
0-100% 0-100%
Sets the amount of the audio signal to send to the delay effect. The delay
effect settings are found in the Master section. Type of delay, feedback etc are
adjusted generically, for the project in master settings.
Sets the amount of the audio signal to send to the reverb effect. The reverb
effect settings are found in the Master section. Reverb size, damping, pre-
delay etc are adjusted generically, for the project in the master settings.
The effect is applied on the step triggered and the delay will be heard and
extended through the pattern. The sound will depend on the master effect
settings too. This step effect only controls the audio amount sent to the delay.
The effect is applied on the step triggered and the reverb will be heard and
extended through the pattern. The sound will depend on the master effect
settings too. This step effect only controls the audio amount sent to the reverb.
Delay Effect Send Reverb Effect Send
FX Steps
7
FX Steps
7
50
Step Reverb Send
Instrument
16
Master Reverb
FX2
Size
Damping
Predelay
Diffusion
Reverb send amount initiated with the note
Reverb will have an audio tail beyond its step
1
9
5
13
16
F5 16
---- ----
F5 16
----
F5 16
----
---- ----
----
---- ----
----
---
---
--
--
t 50
173
Polyend Tracker Mini Manual
172
Polyend Tracker Mini Manual
NOTESNOTES
7.34 Bit Depth 7.35 Tune
Root Note
Semitones
Note C4
-12
+12
1 5 9 132 6 10 143 7 11 154 8 12 16
C C
C4
C4
C6C3 C5C2
CC CB
1 Octave
(-12 Semitones)
2 Octaves
(-24 Semitones)
1 Octave
(+12 Semitones)
2 Octaves
(+24 Semitones)
Set to 4 Bit reduction to create a noisy texture.
1
9
5
13
16
F5 18
----
F5 18
----
F5 18
----
---- ----
----
----
---- ----
---
---
--
--
E 4
E 12
FX Type Tag FX Type Tag
Value Ranges Value Ranges
FX Description FX Description
Example Example
Effect Effect
E
U
4-16 Bits -24 to +24
Semitones
Sets the bit depth for the step. This can range from 4 Bits to 16 Bits Normal
maximum setting). Lower rates create a more LoFi grainy sound texture.
Adjusts the step tuning across a 4 Octave range. Introduce a variation from
the step note between -24 Semitones to +24 Semitones.
The effect is applied on the step triggered and will apply a LoFi sound. This is
great to create chip tune and classic video game like sounds and LoFi and
glitchy emulations.
The tuning parameter transposes the current step from it’s actual ‘note’ setting.
Bit Depth Tuning Adjustments
FX Steps
7
FX Steps
7
Note C4 Transposed up 12 Semitones
Note C4 Transposed up 5 Semitones
Note C4 played with no transposition
Note C4 played with no transposition
1
9
5
13
16
C4 09
---- ----
C4 09
----
C4 09
----
C4 09
----
----
---- ------- --
U 12
U 0
U 5

175
Polyend Tracker Mini Manual
174
Polyend Tracker Mini Manual
NOTESNOTES
7.36 Slide Up
7.37 Slide Down
Step 5 Trigger
Step 5 Trigger
Step 13 Trigger
Step 13 Trigger
Step 1 Trigger
Step 1 Trigger
Slides the pitch from the current note up in 1/16
th
of a
semitone iterations. A value of 16 will slide 1 Semitone.
Slides the pitch from the current note up in 1/16
th
of a
semitone iterations. A value of 16 will slide 1 Semitone.
Value 16 = 1 Semitone
Value 80 = 5 Semitone
Value 32 = 2 Semitones
Value 112 = 7 Semitones
C5
C5
C6
C6
C6
C6
C#6
G5
D6
F5
Slide Range Converter (Estimated)
Slide Range Converter (Estimated)
Value 0 16 32 64 80 112 128 192 224 255
Semitones 0 1 2 4 5 7 8 12 14 16
Triggers a C5 Note
Triggers a C5 Note
Triggers a C6 Note which slides up 1 Semitone i.e. 16/16
Triggers a C6 Note which slides down 5 Semitones i.e. 80/16
Triggers a C6 Note which slides up 2 Semitones i.e. 32/16
Triggers a C6 Note which slides down 7 Semitones i.e. 112/16
1
1
9
9
5
5
13
13
16
16
C5 18
----
C5 18
----
C6 18
----
C6 18
----
C6 18
----
C6 18
----
---- ----
----
----
---- ----
---
---
--
--
F 16
F 32
---- ----
----
----
---- ----
---
---
--
--
J 80
F112
FX Type Tag
FX Type Tag
Value Ranges
Value Ranges
FX Description
FX Description
Example
Example
Effect
Effect
F
J
0-255
0-255
Creates a pitch slide up from the current note as the starting reference. The
intervals are in 1/16
th
Semitone mapped across the 0-255 range.
Creates a pitch slide down from the current note as the starting reference. The
intervals are in 1/16
th
Semitone mapped across the 0-255 range.
While the glide effect operates on a time based pitch change and is referenced
from the previous step, the slide function operates using semitone increments
to control pitch from the current step note value. Values in denominations of 16
represent semitones.
While the glide effect operates on a time based pitch change and is referenced
from the previous step, the slide function operates using semitone increments
to control pitch from the current step note value. Values in denominations of 16
represent semitones.
Slide Up - Pitch
Slide Down - Pitch
FX Steps
7
FX Steps
7
Value 0 16 32 64 80 112 128 192 224 255
Semitones 0 1 2 4 5 7 8 12 14 16

177
Polyend Tracker Mini Manual
176
Polyend Tracker Mini Manual
NOTESNOTES
7.38 MIDI Messages
7.39 MIDI Chords
Hexadecimal to Decimal Converter
Hex 1 2 3 4 5 6 7 8 9 A B C D E F
Dec 1 2 3 4 5 6 7 8 9 10 11 12 13 14 15
Mod Wheel.
The destination parameter is dened in the instrument
parameter settings when a MIDI Instrument is used.
MIDI Message to control external device.
0 Bank
1 ModWh
2 Brth
3
4 Foot
5 Glide
6 Data
7 ChVol
8 Balnc
9
10 Pan
11 Exp
12
13
CC A
1
MIDI Channel 1
Instrument
Max 16 MIDI Instruments, each
can host up to 6 CC Values
Range 0 - 127
FX1 or FX2 + Value
CC Value to send
M01
a 24
Triggers a Major Chord: C5 + 4 Semitones + 7 Semitones.
Sends a CC Value of 24 to MIDI Channel 1.
Parameter to control is set in ‘Instrument Parameters’
Triggers a C6 Note.
1
1
9
9
5
5
13
13
16
16
C5 18
----
C5 18
----
C6 18
----
C6 18
----
C6 M01
----
C6 18
----
---- ----
----
----
---- ----
---
---
--
--
a 24
F 32
---- ----
----
----
---- ----
---
---
--
--
0 47
F112
FX Type Tag
FX Type Tag
Value Ranges
Value Ranges
FX Description
FX Description
Example
Example
Effect
Effect
a - f
0
0-127
Various
Issues MIDI output messages. These can be CC (Control Change), PC
(Program Change), Polyphonic Aftertouch or Channel Aftertouch selectable in
the Instrument Parameters. Requires a MIDI instrument set with the channel.
Sends MIDI Chords out which are a combination of notes based on the
numerical (Hex) value of the step FX. MID Chord is also used in conjunction
with Arp step FX.
While the glide effect operates on a time based pitch change and is referenced
from the previous step, the slide function operates using semitone increments
to control pitch from the current step note value. Values in denominations of 16
represent semitones.
The chord is derived from the hexadecimal value applied in the MIDI Chord
step and selected from a dened library of chords. The rst ‘0’ represents the
MIDI Chord effect other digits the chord notes, offset from the root note.
MIDI CC A-F Messages
MIDI Chords Out
FX Steps
7
FX Steps
7
Hex code represents
+ Semitones from root
e.g. 0 47 Maj
C
0
E
+4
G
+7
Tracker Mini Chords (Root C Examples)
MIDI Chord
Hex Code
Scale
Chord
Example from Root C
0 27 Sus2 C - D - G
0 28 Sus2 #5 C - D - G#
0 36 DimTriad C - D# - F#
0 37 Min C - D# - G
0 47 Maj C - E - G
0 48 AugTriad C - E - G#
0 57 Sus4 C - F - G
0 5A Stack4 C - F - A#
0 5C Open4 C - F - C
0 67 Sus #4 C - F# - G
0 7C Open5 C - G - C
0 7E Stack5 C - G - D
0279 Sus2Add6 C - D - G - A
027A Sus2 b7 C - D - G - A#
027B Sus2Maj7 C - E - G - B
MIDI Chord
Hex Code
Scale
Chord
Example from Root C
0368 Dim7 C - D# - F# - G#
036A Half Dim C - D# - F# - A#
0378 Min b6 C - D# - G - G#
0379 Min6 C - D# - G - A
037A Min7 C - D# - G - A#
037B MinMaj7 C - D# - G - B
0479 Maj6 C - E - G - A
047A Dom7 C - E - G - A#
047B Maj7 C - E - G - B
0489 Aug Add6 C - E - G# - A
048A Aug b7 C - E - G# - A#
048B Aug Maj7 C - E - G# - B
057A Sus b7 C - F - G - A#
057B Su4Maj7 C - F - G - B

Audio is the central element in Tracker Mini
and at the heart of almost everything. The end
to end process of Sampling - Editing -
Performing carries many sub topics that
involve audio. Patterns are made with
instruments and notes that trigger sounds. The
process starts with the procuring, capturing or
recording of audio. Multiple audio sources are
available from which to sample. It is possible to
connect external line level gear or the internal
microphone. In addition the ability to render
internal audio is also a useful feature. Tracker
Mini works with PCM WAV les and converts
automatically to use 44.1kHz, 16bit. Samples
in the pool are interpolated. Anti-aliasing option
is available in the ‘Cong’ menu. Many options
exist to render and export either parts of
patterns, full songs or track stems. Be aware
rendering may take some time as it
sequentially renders to audio almost real time.
A toolkit of destructive editing features helps to
prepare audio for use in instruments and
patterns and for further integration with other
features such as the play modes and routing
through effects. Each Project can hold almost 12
minutes of mono or almost 6 minutes of stereo
audio samples although the available memory
may be reduced by using higher quality audio.
Tracker Mini already is supplied out of the box
with a number of samples and instruments pre-
loaded to the supplied SD Card. These are great
to get things started and additional user samples
or third party sample packs can be added and
imported. It is important to state that adherence
to copyright laws and original material
ownership should be respected when recording
and sampling audio. Take care to operate within
any relevant laws especially if considering to
commercially release a track.
Audio
8
179
Polyend Tracker Mini Manual
178
Polyend Tracker Mini Manual
NOTES

181
Polyend Tracker Mini Manual
180
Polyend Tracker Mini Manual
NOTESNOTES
Audio
8
Audio
8
8.1 Master Pages - Audio Control
Audio is controlled in the Master pages of which 3 are available and
selected by default with button [4]. This is where the Tracker Mini mixer is
found to control the audio levels and also the master effects. This section
will concentrate on the audio level and routing controls. The Master effects
are covered in another section.
Master - Page 1
The Master mix is the rst page in the master pages and contains the main
output level as well as a series of effects and gives access to the master
reverb and delay effects. Rendered audio exports of the ‘master’ i.e. all
tracks, uses the volume level and functions in Master page 1.
Master Page
Page 1 of 3
Master Effect Pages
Access to the master delay,
reverb, limiter & EQ
parameter pages.
Master Output Effects
Bass boost, Space and
Saturation single parameter
effect settings.
Volume
Master output level
applied to the main
‘Out’ connection
Volume
-33.08 dB
Reverb Delay EQ Saturation
Soft Clip
Hard Clip
Soft Clip
Saturate
Overdrive
Drive+
Bass Boost
5
Limiter Space
1
Master 1/3 0m:00s P1.008
0.00 dB
Mute
0.00 dB
Mute
0.00 dB
Unmute
0.00 dB
Unmute
0.00 dB
Mute
0.00 dB
Unmute
0.00 dB
Mute
0.00 dB
Mute
Track 2 Track 6Track 3 Track 7Track 4 Track 8Track 1 Track 5
Track Mixer 2/3 0m:00s P1.008
Track Mixer - Page 2
This Master page controls the track volume levels. Press [4] to cycle
through each page. Each of the 8 tracks is displayed with a real time bar
meter with the current setting in the bar and the specic value shown in the
track label. Tracks rendered as individual stems will use the levels set for
tracks. Note that track names can be edited in this page by pressing [Rec].
Function
Command
Adjust Track Level Hold Track Screen Button 1-8 + Press (Up) or (Down) or [+] / [-]
Mute Track Press Track Screen Button 1-8 to toggle Mute / Unmute
Unmute Track Press Track Screen Button 1-8 to toggle Mute / Unmute
Solo Track Hold [Shift] + Press Track Screen Button 1-8 to toggle Solo on/off
Edit Track Names Press [Rec], Edit Mode. Press Track Screen Button 1-8 for track to rename.
Function
Command
Navigate Options Press (Left) or (Right)
Edit Parameter With option selected, Press (Up) or (Down) or [+] / [-]
Select Effect Page Press the Screen Buttons 2 [Reverb], 3 [Delay], 4 [Limiter] or 5 [EQ].
Quick Level Adjust Hold [4] + [+] or [-]. Button [4] is by default, assigned to Master Page.
Tracks & Track
Names
Muted tracks are dimmed
Track Mixer
Page 2 of 3
Mute State
Screen button sets mute /
unmute state. Also sets solo
/ un-soloed with shift.
Mute Button Behaviour.
In the master section mute is applied when the button is released after being pressed. This is different to muting
in the Pattern section where mutes are applied immediately when the button is pressed.
Level Adjustment
Adjustable level setting for
track. Bar graph and value
displayed. Also controllable
by MIDI CC71-CC82
Actual Level
Actual audio level for track. High
levels indicate red, medium
yellow, lower levels green.

183
Polyend Tracker Mini Manual
182
Polyend Tracker Mini Manual
NOTESNOTES
Audio
8
Audio
8
Global Mixer - Page 3
The Global Mixer is the third page in the master pages and contains the line
in level and line in delay / reverb send levels for the pass through. Also the
overall master delay, reverb level and dry / wet mix are available. These
can all be muted and all soloed, with the exception of the line delay and
reverb which can only be muted / unmuted. Press button [4] to cycle pages.
Mute Button Behaviour.
In the master section mute is applied when the button is released after being pressed. This is different to muting
in the Pattern section where mutes are applied immediately when the button is pressed.
Actual stereo level.
Centre + Right bars
Global Mixer
Page 3 of 3
Line Input Passthrough
Line In level, Delay and
Reverb Send amounts.
Level
Left bar is the level setting
also displayed in the label
area. Also controllable by
MIDI CC79-82
-4.50 dB
Mute
0.00 dB
Mute
1.80 dB
Mute
0.00 dB
Unmute
0.00 dB
Unmute
0.00 dB
Unmute
Reverb Line RvbDry Mix Line InDelay Line Dly
Global Mixer 3/3 0m:00s P1.008
Function
Command
Adjust Level Hold Option Screen Button 1-6 + Press (Up) or (Down) or [+] / [-]
Mute Option Press Option Screen Button 1-6 to toggle Mute / Unmute
Unmute Track Press Option Screen Button 1-6 to toggle Mute / Unmute
Solo Option Hold [Shift] + Press Option Screen Button 1-4 to toggle Solo on/off
Delay
Displays and adjusts amount of
master (all tracks) delay amount.
Reverb
Displays and adjusts amount of
master (all tracks) reverb amount.
Dry / Wet
Displays and adjusts mix level of
the delay and reverb and the
unaffected dry signal.
8.2 Audio Sources
There are a number of sources where Tracker Mini can access audio.
Some of which are ‘live’ sources and can easily be sampled. Others are
manually managed or rendered within the device.
SD Card Samples
Audio samples
Line Input
External audio gear connection.
Line Input
3.5mm Input jack which allows Stereo (TRS) and Mono (TS) audio inputs. Stereo
signals are converted to mono when recorded and the L & R channels can also
be selected individually.
Render
A feature which is available with the internal functions is render. This bounces or
exports an audio le based on the selected pattern / tracks which can then be
made immediately available as a sample or to use from the instrument list.
Microphone
The Tracker Mini has an internal microphone located on the front panel. This
allows direct recording of vocals, environmental sounds and general audio.
SD Card
Audio samples are stored on the SD Card. These can be sampled and stored
from within Tracker Mini but also can be manually transferred onto the SD card
from and external source using a PC or Mac.
Tracker Mini is supplied with a 3.5mm Stereo Male Jack to 2 x 6.3mm Mono Female Socket
adapter to allow interfacing with external gear and using the more common 6.3mm mono cables.
Microphone
Internal Microphone.
Render
Bounce Internal Audio.
1
1
4
4
2
2
3
3
Folder

185
Polyend Tracker Mini Manual
184
Polyend Tracker Mini Manual
NOTESNOTES
Audio
8
Audio
8
8.3 Audio Inputs
Tracker Mini has two audio inputs that provide a source to sampling and
recording from external sources. Internal microphone is on the front plate.
The physical audio inputs are located on the bottom of the device and
provide access for line in either using TRS Stereo or TS Mono jacks by
using the supplied 3.5mm to 2 x 6.3mm adapter.
Line Input
The input can be selected between Left, Right or Stereo. While these are
selectable options Tracker Mini records in mono. Tracker Mini can record
audio or play a pattern audio but not both at the same time. Patterns when
playing will output MIDI but not audio if sample recording is in progress.
Left
Line In Out
Internal Mic
Right
Stereo
Stereo Stereo
[Sample Recorder]
All Samples are Recorded in Mono
[Master]
Global Mixer - Page 3 of 3
Line In
Mute On / Off
Send FX
Gain
R
M
Delay Reverb
Monitor On / Off
SD Card Instrument List
Master Output
Page 1 of 3
Line In Pass Through
Recording
Audio saved to SD Card and / or
directly to the instrument list
OP Z
P
The sample recorder page can select sampling input, but the general input
is dened in the ‘Cong’ parameter settings. The Mixer passthrough audio
operates in stereo.
▌ SETTING THE SAMPLER LINE IN STEREO / MONO OPTION
1. Press [Shift] + [4] or use [Menu] to open the conguration settings.
2. Navigate with the 1
st
and 2
nd
Screen buttons to select ‘General’.
3. In the central window pane, Press the 4
th
or 5
th
Screen buttons to
navigate to ‘Line in channel’.
4. Press [Change], 6
th
Screen button to select the options. The pop-up
window will appear.
5. In the middle page pane, Press the 4
th
or 5
th
Screen buttons to navigate
to select ‘Stereo’, ‘Mono Left’ or ‘Mono Right’.
6. Press [Apply], 6
th
Screen Button or [Cancel], 3
rd
Screen button to exit
without changing.
▌ SETTING THE MIXER LINE IN PASS THROUGH PARAMETERS
1. Open the Master pages, Press [4]. Navigate to the Global Mixer, Page 3
of 3. Press [4] to cycle through pages.
2. Line In by default is muted. Press [Unmute] 4
th
Screen button for the
Line In channel to mute or unmute. If unmuted this will state [Mute].
3. Line In can be soloed. Press [Shift] + [Solo] 4
th
Screen button for the
Line In channel to toggle solo on or off.
4. Hold [Mute], 4
th
Screen button + Press [+] / [-] or (Up) or (Down) to
adjust the level. This will adjust the ‘Line In’ setting.
5. The Line in signal can also be sent to the master Delay and Reverb
effect. These channels may also be muted. Press [Mute] / [Unmute] to
toggle the Mute / Unmute State of the respective screen button.
6. To adjust the Delay and Reverb send amount, Hold [Mute] for the
respective effect screen button + Press [+] / [-] or (Up) or (Down).
7. The Mixer bar graphs will show the audio in real time for the level,
dimmed if muted and bright if audible / unmuted. The level and send
amount settings are also shown on the bar and in the label.

187
Polyend Tracker Mini Manual
186
Polyend Tracker Mini Manual
NOTESNOTES
Audio
8
Audio
8
Microphone
Tracker Mini has an internal microphone which allows capturing of live
vocals or sounds directly into the device. The mic is located on the lower
front panel of Tracker Mini and is a stereo input. A microphone can also be
connected via the audio input and the 3.5mm jack but this performance will
depend on the microphone, pre-amp and associated signal path. A few
things should be considered when using a mic.
• Tracker Mini does not supply 48V Phantom power normally used for
condenser microphones. Dynamic mics are therefore advised.
• The Mic selection input in the sample recorder refers to the internal
microphone audio.
• A microphone can be connected on the line input, however
recording from a microphone will always be in mono. The actual
audio chain and performance will depend on the external
conguration (Pre-amp, mic type etc)
• Recording with a microphone follows similar principles to line-in. The
gain may need more pre-adjustment before recording due to the
nature or microphones and recording.
8.4 Sample Formats
The general principle when using Tracker Minis is to use short samples.
Creativity often is inspired by limitations. While SD Card size is large and
can hold a lot of high quality samples, Internal memory in Tracker Mini is at
a premium. The balance between quality and le size is an important one.
Project Sample Time
Up to 12 Minutes per Project (Mono) or almost 6 Minutes per Project (Stereo) at
standard quality audio imports.
Individual Sample Recording Time
Maximum sample length is approx 45 seconds per sample
Sample Format
The internal sampler engine operates at 44.1kHz, 16, 24, oat 32 Bit, Mono or
Stereo, WAV audio les
Instrument List
Samples can be loaded from the SD Card and into Tracker Mini memory. A
sample loaded to the internal list becomes an instrument.
Browser Import Format
Uncompressed Wav les. Imported audio operates at 44.1kHz, 16, 24 oat 32
Bit, Mono or Stereo, WAV audio les.
Browser Import File Size
Large les can be trimmed to import. Low quality import mode also possible to
reduce the le size.
Rendered Output Files
Stems created are PCM Wav les. The exported audio le is 44.1kHz, 16 bit.

189
Polyend Tracker Mini Manual
188
Polyend Tracker Mini Manual
NOTESNOTES
Audio
8
Audio
8
8.6 Sampling
Everyone will develop a personal workow for sampling and the process
may differ due to the source to be recorded. Polyend Tracker Mini allows
approx 45 seconds of recorded audio time per sample and each project has
a total of over 700 Seconds, almost 12 Mins of mono sample time or 6 mins
of stereo sampling time. The internal sampler engine operates at 44.1kHz,
16, 24, oat 32 Bit, Mono or Stereo, WAV audio les
The main page used at the sampling stage is the ‘Sample Recorder’
accessed via the [Menu]. Here the parameter settings can be adjusted pre
sampling. The selected source will determine the available options.
Controlling the start and stop recording process is triggered from this page.
Source
Line In
Gain
5
Monitor
On
RecordLevel
Metronome
Cong
On
Off
Line In
Mic
Sample Recorder 0m:00s P1.008
Monitor.
Will allow the audio source to
be previewed at the output.
Source
Select the input to record
in the sampler.
Gain
Boosts the signal
level
Recording
Starts Recording [Record].
Also button becomes [Stop] while recording in is in progress.
Metronome Cong
The metronome cong screen button gives direct access to the metronome settings. This page can also be
accessed from the [Menu] option > Cong > Metronome.
Level
Visual indicator of source
volume level.
8.5 Recording Audio Workow
Sampling in Tracker Mini takes place in the ‘Sample Recorder’ page. This is
the rst step in the process and is followed by editing the audio captured.
Sampling in this page can be from the Line In or Mic audio sources.
Connect an external synth,
audio source or microphone.
Open the [Sample Recorder]
page to set up for sampling.
Select the source to record from.
Options are; Line In or Mic.
Save Only to the SD
Card.
Save to the SD Card
and also load into the
instrument list.
Program using the
instrument into a pattern.
Adjust gain to set to a
suitable level.
Play the connected
audio source.
Press [Record] to capture
the audio sample.
[Stop] sampling.
Max 45 sec audio sample.
Save the sample. Trim the start and end
of the sample to select
the area to save.
Connect Gear Sample Recorder
Gain
Play
Save
Record
Crop
Stop
Select Source
Save to SD
Save & Load
Pattern
E
S

191
Polyend Tracker Mini Manual
190
Polyend Tracker Mini Manual
NOTESNOTES
Audio
8
Audio
8
Sampling Process
Starting by selecting the ‘Sample Recorder’ page within the [Menu].
As pre-recording optional actions, select the
audio [Source], set [Monitor] to on and adjust
the [Gain] to establish a suitable recording
level. External devices should be auditioned
while adjusting the gain to hear the impact.
Press [Record]. 8th Screen Button, to start
sampling the incoming audio.
Play the external device.
Trim the [Start] and [End] points of the
recorded sample while previewing the audio
to get the positions correct. Also [Zoom] in or
out as a visual aid for precise editing.
If required use [Crop] to edit to the start and
end points selected.
The [Undo] option can reset previous state.
Press [Save] when editing is complete.
Alternatively Press [Cancel] to exit without
saving. Conrm cancel with [Yes].
The sampler will capture the audio into the
Tracker Mini memory buffer and display the
recording time. Recording will automatically
stop if the memory is full at ~45 Secs.
Press [Stop]. 8th Screen Button, to manually
stop the sampling process.
Type in a name for the sample or use [Auto
Name] to generate a system name. Pads act
as the qwerty keyboard, [Enter] will enter a
highlighted character.
Press [Save], 8th Screen Button, to save the
le into the SD Card ‘Recordings’ folder.
Press [Save & Load], 7th Screen Button, to
save the le into the SD Card ‘Recordings’
folder and also load the sample into the
instrument list. The instrument list will open
with this option.
1
78 8 109
5
12
1
7
5
12
3
3
10
9
2
2
8
4
11
6
14 13
4
11
6
13
14
Source
Line In
Gain
5
Monitor
On
RecordLevel
Metronome
Cong
On
Off
Line In
Mic
Sample Recorder 0m:00s P1.008
Start Point
0.428s
Preview UndoCrop Cancel Save
End Point
5.038s
Zoom
1.00
Sample Recorder 0m:00s P1.008
2.038s
Stop
Sample Recorder 0m:00s P1.008
Enter CancelAuto Name
Save & Load
Save
Sample Recorder 0m:00s P1.008
recording001
1
q
a
z
4
r
f
v
7
u
j
m
0
p - +
@
2
w
s
x
5
t
g
b
8
i
k
Backspace
Caps Lock
Space
3
e
d
c
6
y
h
n
9
o
l
▌ SAMPLING IN THE SAMPLE RECORDER
1. Press [Menu] then select ‘Sample Recorder’ to open the sampler page.
2. Setup the input and levels.
• Ensure the correct input to record is selected, Press [Source], 1
st
Screen button to toggle selections.
• Select monitoring ON, Press [Monitor], 7
th
Screen button to toggle.
• It may be useful to play the device to make it audible to record
before starting to record to allow the setting up of the level.
• Adjust gain to suit input level. Press [Gain] and Press (Up), (Down)
or [+] / [-] buttons. The Level meter should not be lit red but green /
amber, approx 70%.
3. Press [Record], 8
th
Screen button to start sampling. The recording time
that has lapsed will be displayed.
4. Press [Stop], 8
th
Screen button to stop sampling. It may be useful to
also stop playing the recorded device. If stop is not initiated, sampling
will continue until the memory is full.
5. The sample can be cropped before saving. This allows removal of any
gaps or unwanted audio at the start end. The [Zoom], 4
th
Screen Button
+ [+] / [-] may help to get close up to areas to trim.
6. Press [Start], 2
nd
Screen button, then Press [+] / [-] to set the start point.
Press [End], 3
rd
Screen Button, then Press [+] / [-] to set the end point. It
may be an iterative process to set both as desired.
7. Press [Crop], 5
th
Screen button to trim the sample to the selected start
and end points. The sample is cropped.
8. Save the sample, Press [Save], 8
th
Screen button.
9. The sample can be manually named in the text editor window.
Alternatively, Press [Auto Name], 5
th
Screen Button to set a system
generated name.
10. Press [Save & Load], 7
th
Screen button. This saves to the SD Card
‘recordings’ folder, selects the instrument and opens the instrument list.
11. Alternatively, Press [Save], 8
th
Screen button. This saves directly to the
SD Card ‘recordings’ folder only.

193
Polyend Tracker Mini Manual
192
Polyend Tracker Mini Manual
NOTESNOTES
Audio
8
Audio
8
▌ RENDERING SELECTION IN A PATTERN
1. Press [1] to select the pattern mode page.
2. Press [Rec] to select record edit mode.
3. Hold [Shift] + (Up), (Down), (Left), (Right) to select the range to render.
For example, select across 3 tracks, 8 steps, of a percussion sequence.
4. Press [More]. The 8
th
Screen Button to select more pattern options.
5. Press [Render Selection], the 1
st
Screen Button. This will be dimmed
and unavailable if [Rec] is off.
6. The naming page appears. A name can be edited or press [Auto Name],
5
th
Screen Button to automatically apply a name. Manually editing the
name offers an opportunity to make the name relevant, although a
longer process. Auto name may be less relevant in terms of the name,
but is a faster process.
7. When the name is entered, Press [Render & Load], 7
th
Screen Button.
This option will not only render the audio but also automatically load the
sample into the instrument list. The pattern will halt playback if playing.
When the le has been ‘exported’, the instrument list will open ready to
preview and the sample selected.
8. Alternatively, Press [Render Selection], 7
th
Screen Button. This option
will render the audio. The pattern will halt playback if playing. This will
render and save onto the SD Card.
9. The SD Card save location is in the ‘Export/ ProjectName/ Selection’
folder for both render options. Rendered les are 44.1kHz, 16 bit. Files
are accessible from sample loader.
8.7 Rendering and Exporting Internal Audio
Sampling is the process of recording and capturing audio, typically from
external sources in the ‘Sample Recording’ page. Sampling of internal
audio is performed through a different process where the audio is rendered.
Rendering is available in two levels:-
• Pattern Level. The render function is available from within the ‘Pattern’
pages and is performed on selected parts of a pattern. This is useful to
lock in FX1 / FX2 and send effects into an audio sample or to combine
multiple note tracks, rendered together as a chord sample.
• Project Level. The export function is accessible in the ‘File’ pages. This
will allow rendering of complete patterns, individual tracks, samples or
entire songs, saving directly to an SD Card. This is useful to create full
stems and to later mix / remix in a DAW or for use in another package
or to simply distribute to others.
Quick Rendering a Pattern Selection
1
3
7
2
6
4
8
5
9
10
D6 D603 03
---- -------- ----
D6 D403 05
---- -------- ----
E6 D603 03
---- -------- ----
E6 D602 03
---- -------- ----
D6 D403 04
---- -------- ----
D6 D403 04
---- -------- ----
F6 D602 03
---- ----
m 5 ----
D6 D602 03
---- ----
---- ----
D6 D403 05
---- -------- C 75
D6 D603 03
---- -------- ----
E6 D602 03
---- ----
F 4 TSTP
D6 D603 03
---- ----
TSTP TSTP
D6 D403 04
---- -------- ----
D6 D403 05
---- -------- C 75
E6 D602 03F 4 T 50
---- ----
F6 D602 03m -5 T 50
---- ----
D6 D403 04
---- ----
V80 C 50
D6 D403 04
---- ----
V 60 C 50
F6 D602 03
---- -------- ----
F6 D602 03
---- -------- ----
Track 1 Track 3Track 2 Track 4
Step Selection
A number of steps in a pattern, across various tracks can be rendered into
one single sample. The pattern page is used with [Rec] mode on.
Folder location when using the render option in the pattern page.
/Export/ ProjectName/ Selection - Will save to current project name
Sub Folders
Represents the Project
Rendered Audio le for the selected part of the pattern
Folder for selected partial pattern renders
SD Card
/Root Directory
/Export
/ProjectName
Selection0001.wav
/Selection
Pattern Selections Project

195
Polyend Tracker Mini Manual
194
Polyend Tracker Mini Manual
NOTESNOTES
Audio
8
Audio
8
▌ RENDER AND EXPORT A FULL PATTERN
1. Press [Shift] + [3] or Press [Menu] to select the le options page.
2. Press [Export], 7
th
Screen button to select the export specic options.
3. Press [Export Pattern], 3
rd
Screen button to render and export.
4. The currently active pattern will be rendered and exported. Any muted
tracks are not rendered and will remain silent in the exported audio le.
5. A folder is created on the SD Card that represents the render. This is
located in the /Export sub folder. The le itself will be called ‘master.
wav’. Each time the pattern is exported a new folder is created. The
folder naming convention is:-
Project name_P Pattern number_Sequential render number
▌ RENDER AND EXPORT ALL PATTERN STEMS
1. Press [Shift] + [3] or Press [Menu] to select the le options page.
2. Press [Export], 7
th
Screen button to select the export specic options.
3. Press [Export Patt Stems], 3
rd
Screen button to render and export.
4. All tracks plus the delay and reverb audio will be rendered in mono and
exported. Also a stereo master le is rendered of all tracks. Any muted
tracks are not rendered and will remain silent in the exported audio le.
5. A folder is created on the SD Card that represents the render. This is
located in the /Export sub folder. The 11 les will be called ‘track 1.wav’
etc, ‘delay.wav’, ‘reverb.wav’ and ‘master.wav’. Each time the pattern is
exported a new folder is created. The folder naming convention is:-
Project name_P Pattern number_S for Stems + Sequential number
Rendering and Exporting Stems
The function to render and export full stems for tracks or full songs and
patterns is found in the ‘File’ options. MIDI Clock IN must be set to Internal
in the Cong settings in order to render stems.
Hold [Shift] + [3] or Access ‘File’ in the [Menu]
Function
Screen
Button
Description
Export Song 1st
Renders an individual audio les for the selected song. Muted tracks
are not rendered. The stem will cover the entire song length and are
44.1kHz, 16 Bit PCM Wav les.
Export Song Stems 2nd
Renders individual audio les for each of the 8 unmuted tracks and 2
effects, delay and reverb, all in stereo. Muted tracks are not
rendered. In addition a stereo mix of the complete song is created as
an audio le. The stems will cover the entire song length and are
44.1kHz, 16 Bit PCM Wav les.
Export Pattern 3rd
Renders an individual audio le for the selected project pattern.
Muted tracks are not rendered. The stem will cover the entire pattern
length and are 44.1kHz, 16 Bit PCM Wav les. A unique folder is
created to represent the render.
Export Patt Stems 4th
Renders individual and complete audio les for the project patterns.
Muted tracks are not rendered. The stems will cover the entire
pattern length and are 44.1kHz, 16 Bit PCM Wav les. This will
render 11 stems (Tracks, Delay, Reverb and Master). A unique folder
is created to represent the render.
Export Samples 6th
Exports the project .pti instrument les as .wav les. This captures
instruments to audio. Exported to the SD Card within the folder,
Projects/ProjectName/samples, named by the instrument name.
New
Project
Open Save AsSave Export Games
Export
Song
Export
Song Stems
Export
Pattern
Export
Patt Stems
Export
Samples
Cancel
Folder location when using the render option in the le page.
/Export/ ProjectName/ Selection - Exports to the folder named for the current project
The rendering process is almost real-time based on the project duration (in fact song stems render approx
20% faster of the time duration of the playback) and operates by rendering stems one by one. This means
when exporting stems the render time can be 2-3 times, maybe even longer than the original song
duration. The render progress is displayed when in operation.

197
Polyend Tracker Mini Manual
196
Polyend Tracker Mini Manual
NOTESNOTES
Audio
8
Audio
8
Rendered Pattern Locations
Rendered les are exported to the /export folder and new sub-folders are
created for patterns and pattern stems. These are accessible from the
sample loader function pages.
Full Pattern ExportsPattern Stem Exports
Sub Folders
Represents the Project
Project, Pattern number, Sequential render number
Rendered Audio le for the selected project, pattern
Stems Render 11 Audio Files.
Rendered Audio stems for each track in stereo,
also the delay and reverb send audio in stereo.
Additionally a stereo master track is rendered.
Rendered les are 44.1kHz, 16 bit.
Project, Pattern number, Sequential render number
Project, Pattern number, S = Stems + Sequential number
SD Card
/Root Directory
/Export
/ProjectName
/ProjectName_P3_0001
Master.wav
delay.wav
track 1.wav
track 4.wav
master.wav
track 2.wav
track 5.wav
track 7.wav
reverb.wav
track 3.wav
track 6.wav
track 8.wav
/ProjectName_P3_0002
/ProjectName_P3_S0001
▌ RENDER AND EXPORT A FULL SONG
1. Press [Shift] + [3] or Press [Menu] to select the le options page.
2. Press [Export], 7
th
Screen button to select the export specic options.
3. Press [Export Song], 1
st
Screen button to render and export.
4. The current song will be rendered and exported. Any muted tracks are
not rendered and therefore remain silent in the exported audio le.
5. A folder is created on the SD Card that represents the render. This is
located in the /Export sub folder. The le itself will be called ‘master.
wav’. Each time the song is exported a new folder is created. The folder
naming convention is:-
Project name_Song_Sequential render number
▌ RENDER AND EXPORT ALL SONG STEMS
1. Press [Shift] + [3] or Press [Menu] to select the le options page.
2. Press [Export], 7
th
Screen button to select the export specic options.
3. Press [Export Song Stems], 2
nd
Screen button to render and export.
4. All tracks plus the delay and reverb audio will be rendered in stereo and
exported. Also a stereo master le is rendered of all tracks. Any muted
tracks are not rendered and will remain silent in the exported audio le.
5. A folder is created on the SD Card that represents the render. This is
located in the /Export sub folder. The 11 les will be called ‘track 1.wav’
etc, ‘delay.wav’, ‘reverb.wav’ and ‘master.wav’. Each time the pattern is
exported a new folder is created. The folder naming convention is:-
Project name_Song_S for Stems + Sequential number
Project

199
Polyend Tracker Mini Manual
198
Polyend Tracker Mini Manual
NOTESNOTES
Audio
8
Audio
8
Rendered Song Locations
Rendered les are exported to the /export folder and new sub-folders are
created for songs and song stems. These are accessible from the sample
loader function pages.
Song ExportsSong Stem Exports
Sub Folders
Represents the Project
Project, song, Sequential render number
Rendered Audio le for the selected song
Stems Render 11 Audio Files.
Rendered Audio stems for each track in stereo,
also the delay and reverb send audio in stereo.
Additionally a stereo master track is rendered.
Rendered les are 44.1kHz, 16 bit.
Project, Song, Sequential render number
Project, Song, S = Stems + Sequential number
SD Card
/Root Directory
/Export
/ProjectName
/ProjectName_Song_0001
Master.wav
delay.wav
track 1.wav
track 4.wav
master.wav
track 2.wav
track 5.wav
track 7.wav
reverb.wav
track 3.wav
track 6.wav
track 8.wav
/ProjectName_Song_0002
/ProjectName_Song_S0001
Project
8.8 Advanced Audio Editing
Sampling captures audio using the ‘Sample Recorder’ and provides basic
editing features for quick and easy use of the sample in the project. An
instrument can be selected from within the sample editor by holding
[Instrument] to open the browser. A more advanced set of editing features
exists in the ‘Sample Editor’ which focuses on the currently selected
sample. Press the D-Pad (Enter) button to preview the audio.
Select
Effect
Start
0.000s
Zoom
1.00
UndoEnd
32.000s
Effect
Sample Editor
Normalizer
Overdrive
Limiter
Crop
Delay
Compressor
Reverse
Flanger
Bitcrusher
WT Smoother
Amplier
Equalizer
Chorus
Timestretch Beat
8.beats
Effect
List of effect options to select ready
to apply to the current sample
Start
Adjusts the starting point
marker in the sample.
Start
Adjusts the starting point
marker in the sample.
End
Adjusts the ending point
marker in the sample.
End
Adjusts the ending point
marker in the sample.
The start and end points determine the region of the sample which will
be affected by the applied effect. The sample can be cropped to the
desired positions and save memory by discarding unwanted audio.
Select / Apply
Applies or selects options for
application of the highlighted effect.
Sample
Current Sample
Undo
Restore last command
Zoom
Zoom closer up to aid
precise editing.

201
Polyend Tracker Mini Manual
200
Polyend Tracker Mini Manual
NOTESNOTES
Audio
8
Audio
8
Audio Effects Overview
These effects are applied destructively and baked into the selected audio
sample in project memory. The undo command can restore a prior state
unless saved. The original SD Card le remains intact and is unaffected.
Effect
Description
Normalizer
Adjusts the gain on the selected sample or part of the sample between the start / end
point. Gain will be based on the normalizer 0-100% level and will boost or attenuate the
selected audio consistently across the selection.
Crop
Trims the audio at the start and end points and discards any audio outside of these
settings. Useful to manage sample size and create samples with precise duration.
Reverse
Reverses the audio between the selected start and end point settings.
Amplier
Amplies the audio within the start and end points by the selected ‘amplier’ level 0-5 in
the effect. Effectively multiples the sample or selection.
Overdrive
Adds distortion into the audio sample for the selected audio between start and end.
Three model types 0,1,2 are selectable as well as a gain adjustment.
Delay
Introduces delay into the audio sample or selected audio between start and end.
Feedback and time parameters are adjustable before applying.
Bitcrusher
Bitcrushes the audio sample or selected audio between start and end. The number of
bits can be adjusted between 1-16. Also sample rate can be adjusted.
Chorus
Chorus effect giving a classic multi layered instrument sound can be applied to the
audio sample or selection. Number of chorus voices 1-8 and length between 2-92ms
can be adjusted before applying the effect into the audio.
Flanger
Flanger effect giving a classic out of phase layered sound can be applied to the audio
sample or selection. Several parameter settings can be adjusted before applying the
effect into the audio. These include Length, Offset, Depth and Rate.
Equalizer
Equalizer also called EQ affects the frequency bands in an audio signal by boosting or
attenuating. The 3-Band EQ can be adjusted before applying into the sample or
selected part of the sample.
Limiter
A limiter is used to control or tame dynamic peaks by reducing or limiting the transients.
Normally used as a corrective or control function and associated with loudness rather
than a creative effect. Includes Threshold, Attack and Release parameters.
Compressor
A compressor is used to manage and reduce dynamic range. In this application it is
used as a control function. The typical parameters of Threshold, Ratio, Attack and
Release are adjustable before applying to the audio sample or selection.
WT Smoother
This is a tool used to optimise and convert audio into a sample more compatible with
the wavetable play mode function. The wavetable window settings are adjustable
before applying to the audio sample or selection.
Timestretch Beat
Creative manipulation tool to stretch the sample time which in turn affects the sound.
Used more for beat based material. The tempo, steps, micro-step and granule are
adjustable before applying to the audio sample or selection.
Timestretch Note
Creative manipulation tool to stretch the sample time which in turn affects the sound.
Used more for melody based material. The length and granule are adjustable before
applying to the audio sample or selection.
Fade In
Quick and easy application of a fade in to the audio sample or a selected part. This
operates at a xed setting across the start / end selected part of the sample.
Fade Out
Quick and easy application of a fade out to the audio sample or a selected part. This
operates at a xed setting across the start / end selected part of the sample.
8.9 Sample Editor Effects
The Sample Editor pages have more advanced destructive editing options.
A comprehensive range of effects can also be applied to affect the audio
either to correct or adjust or to create new sounds. Some effects are
applied directly, while others have parameters and settings
The preview option found in the selected effect sub-page will render the
effect and audition the sample with the effect applied. In the main ‘Sample
Editor’ Page, Pressing the D-Pad (Enter) button will preview the audio.
The effect is applied to the audio sample or the audio selected between the
start and end points.
▌ APPLYING AN AUDIO EFFECT
1. Press [Menu] and select ‘Sample Editor’ options page.
2. Press [Start] or [End] and Press [+] / [-] or (Up) (Down) to adjust the
sample selection area or simply leave the start and end points at the
edges to cover the complete sample.
3. Press [Effect], 7
th
or 8
th
Screen Button to navigate to the effect to apply.
4. With the desired effect highlighted, ie bounding box selection, press
[Select Effect] or [Apply], 6
th
Screen Button.
5. The effect will either be immediately applied by pressing ‘Apply’ or will
open the effect page options if pressing ‘Select Effect’.
6. If an effect page and its parameters are available, adjust as desired
using the Screen and [+] / [-] Buttons. Press [Back] to return to page.
• Press [Preview] 7
th
Screen Button to hear the newly affected audio
• Press [Apply], 8
th
Screen Button, to conrm and render.
Select
Effect
Start
0.000s
Zoom
1.00
UndoEnd
32.000s
Effect
Sample Editor
Normalizer
Overdrive
Limiter
Crop
Delay
Compressor
Reverse
Flanger
Bitcrusher
WT Smoother
Amplier
Equalizer
Chorus
Timestretch Beat
8.beats
Back
ApplyPreview
Select Effect
Opens the parameter options
for the effect before
presenting the option to apply
Apply
Immediately applies the
selected effect. No parameter
settings are provided.

203
Polyend Tracker Mini Manual
202
Polyend Tracker Mini Manual
NOTESNOTES
Normalizer and Amplier
Both the Normalizer and Amplier apply similar effects in that they adjust
the gain across the audio sample or region. Normalizer gain will be based
on the level setting where 100% will maximize the audio level across an
entire sample by using the highest peak point as reference. This is a typical
normalised application. Think of the Amplier as a multiplier of the audio
gain where 1 would be the current state and numbers below 1 will attenuate
and above 1 will boost. Amplied audio can exceed the normal range
Crop and Reverse
Both the crop and reverse functions apply an immediate edit to the selected
or the entire audio sample. Reverse simply reverses the audio playback
direction while crop will trim and discard the audio outside of the start / end
markers. Zoom may help focus on more precise marker setting locations.
Audio
8
Audio
8
Original audio sample and
start / end selection.
Original audio sample cropped to
start / end selection and auto
zoomed to view in the full window.
Original audio sample reversed
based on the approximate start /
end selection and aligned for
smooth transition.
BackLevel
100%
ApplyPreview
Sample Editor Normalizer
8.beats
BackAmplier
1.000
ApplyPreview
Sample Editor Amplier
8.beats
Normalizer
Gain adjustment based on the 0-100% Level
Amplier
Gain is based on the 0.01 - 5 amplication range
Overdrive and Bitcrusher
Overdrive is a classic distortion effect based on driving the analog audio
signal into an amplier hard. This gives a grungy, edge to the sound or full
on distortion. Given the aggressive nature of overdrive the gain adjustment
is a welcome feature. Bit crushing is a process which also gives a distortion
like effect and is based on lowering the digital quality down from a standard
16bit, 44.1kHz and introduces a LoFi style sound.
Delay and Chorus
The classic time based effects include delay and chorus. Delay creates an
echo by delaying the audio signal and feeding back into the input. Chorus is
similar to delay in that instead of feeding back it layers slightly delayed
versions of the signal creating a thicker, wider sound.
BackGain
3.000
Type
1
ApplyPreview
Sample Editor Overdrive
8.beats
BackFeedback
95 %
Time
50 ms
ApplyPreview
Sample Editor Delay
8.beats
BackBits
4
Rate
44100 Hz
ApplyPreview
Sample Editor Bitcrusher
8.beats
BackLength
20 ms
Voices
4
ApplyPreview
Sample Editor Chorus
8.beats
Overdrive
Three overdrive types are available.
Gain control from 0.01 to 5.000.
Delay
Delay time 50ms to 5000 ms.
Feedback from 1% - 95%.
Bitcrusher
Bit reduction from 16 bit down to 1, sample rate also
can be adjusted from 44100 Hz down to 500 Hz.
Chorus
Length has a range of 2 ms - 92 ms.
Voices refer to the layers of audio 1 - 8.

205
Polyend Tracker Mini Manual
204
Polyend Tracker Mini Manual
NOTESNOTES
Flanger
Flanger follows similar principles to delay by doubling the audio and
introducing a slight phase shift and delay between the audio signals when
playing back. Flangers offer an evolving sweeping sound.
Equalizer, Compressor and Limiter.
The three effects, Equalizer, Compressor and Limiter are used for mixing
and nalising a sample rather than creative variations. In music production
they often nd themselves towards the end of a signal chain and are used
to polish and nish off a track, gluing tracks together, developing a
combined tonal balance, managing loudness and mastering a nal release.
In the context of Tracker Mini sample editing, the process operates at an
individual sample level. However the same principles can be applied as
those in general music production, to nish off and generate a nal output
sample. While these effects are applied individually they can also optionally
be performed sequentially in order depending on what the objective is. An
example shown below.
Balances tonal elements in
a sound.
Provides harmonic
emphasis to elements and
makes space for others.
Can x stray frequencies
that affect the sound
Reduces dynamic range between
high peaks and low troughs,
allows overall level adjustment.
Can help sounds sit into a mix
better. Layered compressed /
uncompressed adds punch.
Create headroom.
Restricts and tames excessive
audio peaks in a sound.
Maximises output levels and
introduces a perceived loudness.
Protects digital integrity of a
sample by avoiding clipping.
Equalizer Compressor Limiter
Example of Effect Chain / Order
Audio
8
Audio
8
BackLength
2 ms
Depth
3
Rate
1.000 Hz
Offset
50 %
ApplyPreview
Sample Editor Flanger
8.beats
Depth
Amount of anger effect applied.
Tweak by Ear
While the anger and perhaps other effects have labelled functions, it is much more useful to tune these
parameters by ear rather than by numerical positioning. The application of each parameter will give a different
output depending on the source audio material. Sounds ranging from subtle tremolo to glitchy rhythms can be
found by tweaking the anger parameters by ear. The same applies to all of the creative audio effects.
Rate
Speed of effect modulation.
Length
Length of delay line between signals.
Offset
Offset percentage of delay in signal
Tweaking and trying different settings is encouraged on creative audio
effects. While this is also possible on the process orientated tools, it is also
recommended to get to know these parameters functions and purposes and
have a basic understanding of their operation.
Equalizer
The purpose of an equalizer, also called EQ, is to boost or attenuate
frequencies in an audio signal to either adjust the tonal characteristics or to
x unwanted frequency elements. Equalizers are typically used to shape a
sounds character but also to allow a sound to sit comfortably alongside
another. The sample editor EQ effect has 3 frequency bands. More
coverage of general EQ functions is provided in the Master Effects section.
Low
High
MID
BackLow
-3.000 dB
Low Width
1.00
Mid
0.00 dB
More
1 of 3
Low freq
80 Hz
ApplyPreview
Sample Editor Equalizer
8.beats
BackMid freq
800 Hz
High
0.00 db
High freq
12000 Hz
More
2 of 3
Mid Width
1.00
ApplyPreview
Sample Editor Equalizer
8.beats
Back
High Width
1.00
More
3 of 3
ApplyPreview
Sample Editor Equalizer
8.beats
Frequency bands 1,2 (adjustable) & 3 (xed) positioned across the spectrum.
Normal human hearing is in the range of 20Hz - 20KHz
Width
Freq
Page 1 of 3 Page 2 of 3
Page 3 of 3
20Hz
-12dB
0dB
+12dB
20KHz
BoostAttenuate
12KHz200Hz 500Hz 800Hz 1KHz 5KHz 8KHz
EQ Function
Description
Low Low attenuation or boost amount, -12 dB to + 12dB.
Low Freq Low Frequency range, 10Hz - 200Hz
Low Width Width of EQ, also called Q. Range 0.5 to 5.
Mid Mid attenuation or boost amount, -12 dB to + 12dB.
Mid Freq Low Frequency range, 100Hz - 8KHz
Mid Width Width of EQ, also called Q. Range 0.5 to 5.
High High attenuation or boost amount, -12 dB to + 12dB.
High Freq High Frequency range, 8KHz -20KHz
High Width Width of EQ, also called Q. Range 0.5 to 5.

207
Polyend Tracker Mini Manual
206
Polyend Tracker Mini Manual
NOTESNOTES
Compressor
A compressor essentially works on a signals dynamic range (difference
between audio peaks and lows). Often a compressor is used to reduce the
dynamic range and then allow an increase of the overall signal gain to give
more punch and impact. It can also sound dull if overdone as the nuances
of the dynamics are reduced. Compression techniques can extend further
when layering a compressed sound (to give the impact) with an
uncompressed sound (to give the dynamic subtly). This technique is
sometimes called Parallel or New York Style Compression. In Tracker Mini
this can be created with two tracks one with compressed and other
uncompressed then rendering to a single stem or sample.
How does a compressor work?
In basic terms a compressor reduces the level of any audio that exceeds a
threshold. Think of this as an automatic volume control. The amount of gain
reduction is determined by the ratio parameter. A ratio of 1:1 has no gain
reduction while a gentle 2:1 will reduce by 1dB for every 2dB above the
threshold. Higher ratios are more aggressive. The speed and reaction of
the compressor is also governed by an envelope, in Tracker Mini this is an
Attack and Release envelope.
Audio
8
Audio
8
Tracker Mini has ratio
settings between 1 - 8
Threshold
Audio over Time
Dynamic Range
Gain Reduction
(Ratio)
Make Up
Gain
Signal is attenuated when
crossing the threshold.
Tracker Mini threshold
range is 0% - 100%
1:1
2:1
4:1
8:1
∞
Limiting
Threshold
Output (dB)
Input (dB)
Equalizer Frequency Ranges
An equalizer can boost or attenuate frequencies across a range. The range
of normal human hearing considered in music production is 20Hz to 20kHz.
The character and tonal shape of a sound can be affected by the
adjustment either boosting or attenuating at points on the frequency range.
This is possible within Tracker Mini using the EQ function.
SUB BASS
High levels of energy, often a low cut removes some ‘unheard’ energy and helps create
headroom.Typically frequencies would be cut in this area to create clarity. Emphasis for Sub
Bass, Bass and Kick Drums. Sub bass is considered the low frequencies up to 80Hz.
BASS
Typically an area which contains melodic and rhythmic elements. The mix can be changed to
be fat or thin by adjustments around this area. Muddiness occurs around 300Hz so a small
cut can help clarity of the mix. The mix can be warmed up around 120Hz.
MIDS
Low Mids can be overloaded with frequencies as many instruments cover this range and
muddiness is a common outcome. Honkyness can creep in around 500-1K and tinniness 1-
2K. Cuts can help. Vocal frequencies appear in the high mid range around normal words. 3K
boost on vocals can help push through the mix. Ensure the balance between instruments
and vocals is correct.
HIGH
Sibilance occurs between 5-10K and letters such as S, T can stand out. De-essing can help.
Typically a high shelf can add air and presence to the mix around 6K+. EQ’ing around 4-6K
will affect the denition and bring the sound closer or push them further back.
Low
High
MID
Frequency bands 1,2 (adjustable) & 3 (xed) positioned across the spectrum.
Normal human hearing is in the range of 20Hz - 20KHz
Width
Freq
20Hz
-12dB
0dB
+12dB
20KHz
BoostAttenuate
12KHz200Hz 500Hz 800Hz 1KHz 5KHz 8KHz

209
Polyend Tracker Mini Manual
208
Polyend Tracker Mini Manual
NOTESNOTES
Tracker Mini’s limiter has the basic features of threshold which is where
limiting will kick in and also an attack / release envelope which shapes the
behaviour of the limiter function.
WT Smoother
The WT Smoother is a utility for converting normal audio samples into a
format more compatible with the wavetable play mode synth. Essentially
this optimises the interpolation between waves in a sample giving a
smoother transition across the sample. More details of the Wavetable synth
is provided in the instrument section.
While compression is normally seen as a master effect on many devices
and in DAW’s, Tracker Mini does not have a compressor in the master
chain and relies on the master limiter. A compressor does however exist in
the audio effects which can be rendered into the sample.
Limiter
A limiter is a similar utility to a compressor. In fact when high ratios are used
in a compressor, say 20:1, it is considered to be limiting. A limiter essentially
protects audio integrity and avoids excessive peaks by attenuating any
peaks above a dened threshold.
How does a limiter work?
Audio
8
Audio
8
BackThreshold
-12 dB
Attack
10.00 ms
Release
50 ms
Ratio
4.00
ApplyPreview
Sample Editor Compressor
8.beats
BackThreshold
-6 dB
Release
300 ms
Attack
3.00 ms
ApplyPreview
Sample Editor Limiter
8.beats
Threshold
Point in the audio level at
which the compressor is
activated
Threshold
Point in the audio level at
which limiting is applied
Ratio
Controls the amount of gain
reduction above the threshold
Release
Release time when
compression drops out
Release
Release time when limiter
drops out
Attack
Attack time when
compression kicks in.
Attack
Attack time when the limiter
kicks in.
Threshold
Audio over Time
Dynamic Range
Gain Reduction
Peak Limiting
Signal is attenuated when
crossing the threshold.
Tracker Mini threshold
range is 0% - 100%

211
Polyend Tracker Mini Manual
210
Polyend Tracker Mini Manual
NOTESNOTES
Fade In and Fade Out
The fade in and fade out utilities create a ramp up of audio level or a ramp
down of audio level. The effect is applied to the audio selected between the
start and end markers. Typically this would be applied at the start or end of
an audio sample but equally can be applied anywhere based on the
selected part of the audio sample. The effect is applied immediately with no
adjustable parameters.
Examples
Original audio sample
Fade Out applied at the end of the
audio to create a smooth volume
transition to conclude.
Fade In applied at the start of the
audio to create a smooth volume
transition to begin.
Fades can be applied at any part
of a sample that the start and end
marker is covering eg Fade Out.
Timestretch Beat and Note.
Two timestretch functions are available in the sample editor toolkit.
Timestretch is a feature that adjusts the time of an audio sample, extending
or reducing its duration without affecting pitch. Timestretch beat has
parameters that are better applied to rhythmic material such as drums and
percussion. Timestretch note is more aligned with melodic material.
Examples
1 2 3 4 5 6 7 8 9 10 11 12 13 14 16 17 18 19 20 21 22 23 24 25 26 27
0.1s 0.5s 1s 1.5s 2s 2.5s 3s 3.5s 4s 4.5s 5s 5.5s 6s 6.5s
Steps
Max 64
Longer / Slower
Shorter / Faster
Max 8s
Length
Original Sample
Original Sample
Original Sample
Stretched Sample
BackTempo
150 BPM
Micro-step
0.000
Granule
1.000
Steps
32
ApplyPreview
Sample Editor Timestretch Beat
8.beats
BackLength
3.198 s
Granule
100 ms
ApplyPreview
Sample Editor Timestretch Note
7.Tune
Timestretch Beat
Tempo and Steps are used to dene the duration of
the affected sample. Granule will affect audio quality.
Timestretch Note
Length is used to dene the duration of the affected
sample. Granule will affect audio quality.
Audio
8
Audio
8

213
Polyend Tracker Mini Manual
212
Polyend Tracker Mini Manual
NOTES
Audio
8
Audio
8
8.10 Audio Output Over USB
The Tracker Mini can send audio out over a connected USB connection.
This will send 12 stereo channels out to the connected device. The
conguration is automatic within the Tracker Mini and any compatible
device connected to the USB connection will be able to access the audio
channels from Tracker Mini.
Aggregate Device
To ensure compatibility with the USB Audio features of Tracker Mini it is
highly recommended to use a Mac or PC set up with an aggregate device.
An aggregate device is a virtual interface created on the PC or Mac to
integrate several audio in and out elements together. This overcomes any
issues with multiple / separate devices used for inputs and outputs to a PC
or Mac and allows audio software such as a DAW to connect seamlessly.
The process of setting up an aggregate device may differ depending on the
OS of the PC or Mac and also the connected devices. A general guide is
provided here as reference only.
Channel Outputs
Command
1 1 & 2 Master Output
2 3 & 4
Track 1 Stereo Audio Output
3 5 & 6
Track 2 Stereo Audio Output
4 7 & 8
Track 3 Stereo Audio Output
5 9 & 10
Track 4 Stereo Audio Output
6 11 & 12
Track 5 Stereo Audio Output
7 13 & 14
Track 6 Stereo Audio Output
8 15 & 16
Track 7 Stereo Audio Output
9 17 & 18
Track 8 Stereo Audio Output
10 19 & 20
Reverb Stereo Audio Output
11 21 & 22
Delay Stereo Audio Output
12 23 & 24
Reserved
▌ CREATING AN AGGREGATE DEVICE - MAC
1. Ensure Tracker Mini is connected to the Mac via the USB connection.
2. Select and open the ‘Finder’ function on the Mac.
3. With the nder page open and selected, choose from the main header
menu ‘Go’ > ‘Utilities’.
4. Double click on the ‘Audio MIDI Setup’ icon from within the presented
utility options page.
5. The audio device page will open. This should show all connected
devices in the left window pane and will include the Tracker Mini as well
as the Mac’s integrated speakers and microphone.
6. Click ‘+’ in the lower left corner and choose ‘create aggregate device’.
7. A new device is created and the selection boxes will be presented.
Check the boxes of the devices to add to the aggregated device. For
example Tracker Mini and Speakers.
8. Click the name in the left window to rename the device if required.
9. Once the device has been created this will appear in a DAW’s audio
interface options, for example ‘Audio input’ and ‘Audio output’ options in
Ableton Live Audio settings.
10. This aggregated device should be the chosen option to interface the
Tracker Mini to the Mac Audio. This will handle all the available inputs
from Tracker Mini as well as the audio outputs on the Mac for example
output audio to the internal speakers.
NOTES

215
Polyend Tracker Mini Manual
214
Polyend Tracker Mini Manual
NOTES
Audio
8
Audio
8
▌ CREATING AN AGGREGATE DEVICE - PC
1. A PC has no native options to aggregate devices. It is recommended to
use an up to date audio compatible driver on the PC. The ASIO4ALL
driver is a commonly used 3
rd
party option with PC’s for audio
applications. The guide below assumes using ASIO4ALL.
2. Ensure Tracker Mini is connected to the PC via the USB connection.
3. Ensure the ASIO4ALL driver is selected in your chosen DAW as the
audio interface and open the driver to set up the options.
4. In the ASIO4ALL window the left window pane should show all the
available input and output devices.
5. Check the devices to integrate together. There may also be options to
aggregate only specic inputs rather than an entire device. This is
usually available when ASIO4ALL is not in ‘simple view’ mode.
6. Once the devices have been selected the associated inputs will appear
in a DAW’s audio interface options, for example ‘Audio input’ and ‘Audio
output’ options in Ableton Live Audio settings. Remember that the
ASIO4ALL must be the driver selected.
7. This aggregated device should be the chosen option to interface the
Tracker Mini to the Mac Audio. This will handle all the available inputs
from Tracker Mini as well as the aggregated audio I/O functions.
The ability to connect audio via USB is possible. An example is when using
a PC or Mac via USB which hosts a compatible application, for example
Ableton Live DAW. It is recommended to connected directly between
devices and not through a USB hub for best results.
Note Instr
FX1
FX2
Play Rec
Master Volume
Insert Menu
Delete Copy
Shift
Line In MIDI InLine Out MIDI Out
21 3 4
+
-
+
-
Master Volume
1 Audio
Audio From
Ext In
Master
1 & 2
In
1
s
Auto
Monitor
Audio To
A
Sends
B
1.53
0
12
24
36
48
60
USB Audio
PC/Mac Ableton Live preferences / settings for the ‘Audio Input Device’
and ‘Audio Output Device’ set to the created aggregate device.
Audio from Tracker Mini over a
USB connection.
Example Conguration: Tracker Mini out to Ableton Live.
USB
Off
NOTES

Steps are the most rudimental part of Tracker
Mini, bringing together an instrument, effects
and a note. Steps are combined with others to
create beats and melodies within a pattern.
Patterns are the snippets that form a small
tune or riff. A song is the highest level of
structure in Tracker Mini and allows the
combination of patterns to play a full ‘song’ and
all of its components. Each project can have 1
song, which can hold a maximum of 255
pattern slots. Song mode is the environment in
which to therefore arrange patterns to form the
end to end song as well as re-arranging tracks.
It allows, for example the positioning of
patterns to create an introduction, build ups,
breaks, drops, bridge, and outro also to
introduce new elements through an ambient
track. Song mode can be selected from within
the [Menu] or by pressing [Shift] + [1] which is
the default function button conguration. Song
mode is the last part of arranging a full track. In
summary song mode operates in partnership
with patterns to create a full song. It also
operates in conjunction with Perform mode for
live improvisation. Song stems can also be fully
rendered out as audio to be used in another
application to nalise a mix or for mastering or to
be used to create remixes. This can be used to
develop a sample library. The entire song, all
tracks can also be rendered out as the nal
version too. These can also be nalised or
developed further in other applications. As a
reminder, as well as having the features for
building song arrangements, song mode is also
where the master tempo of the entire track is
located.
Song Mode
9
217
Polyend Tracker Mini Manual
216
Polyend Tracker Mini Manual
NOTES
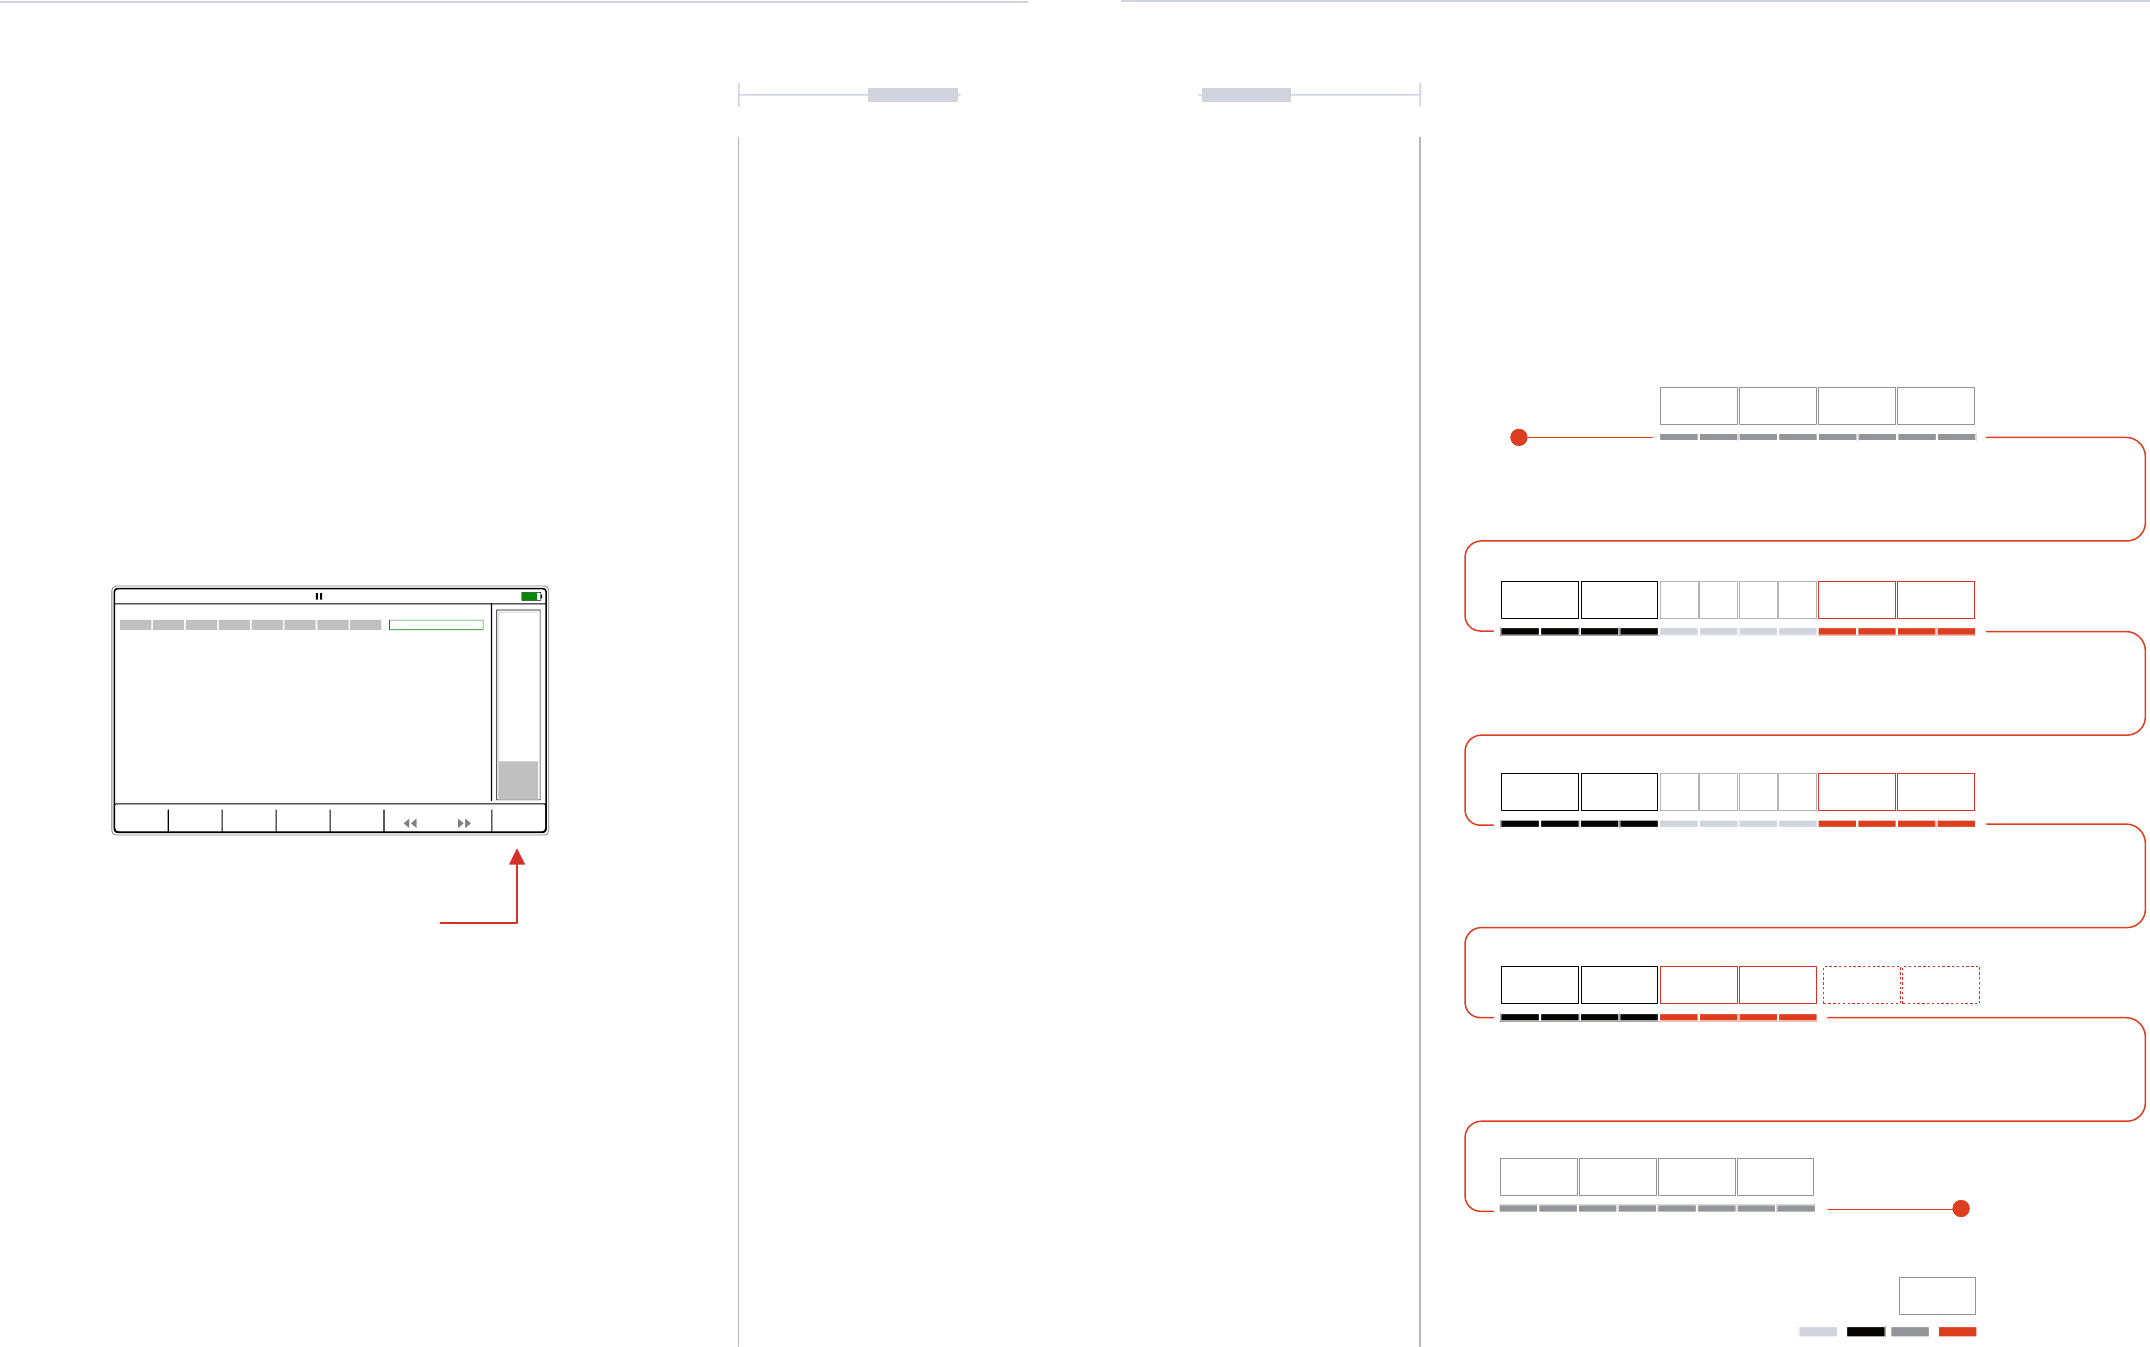
219
Polyend Tracker Mini Manual
218
Polyend Tracker Mini Manual
NOTESNOTES
9.2 Arrangement Overview
An entire song track consists of a number of variations that maintain the
listeners interest and dene its style and even its genre. Patterns are where
the variation in sound, tone, key etc are made and the song mode is where
variations in the structure are created. There is no xed model and
creativity comes from how songs are arranged as much as the instruments
and melody applied. The example is used for illustration purposes.
Example: A typical EDM song structure + Example Patterns
Song Mode
9
Song Mode
9
9.1 Tempo
While tempo has been covered earlier, it is a good reminder that the tempo
setting also resides in the song mode pages.
▌ SETTING THE TEMPO
1. Hold [Shift] + Press [1].
2. Hold [Tempo] + Press [+] / [-].
3. The Inner [+] / [-] buttons adjust the tempo in small increments, also
applied with (Up) (Down). The outer [+] / [-] adjust in larger steps.
4. Note that tempo changes can be applied also at step level using the
step effects.
Play
Pattern
Play
Song
Undo Add
Slot
Delete
Slot
Pattern Tempo
130.0 BPM
Track 1 Track 5Track 3 Track 7Track 2 Track 6Track 4 Track 8 Slot
1
Pattern
1
Song 0m:00s P1.008
Tempo
Adjusts the project Tempo
Start
Intro 1
Starts sparse, maybe kick, snare only. Other elements added ie
bass as intro progresses. Length allows initial DJ ‘Mix In’ time.
Main ‘verse’ with melody hints or vocal clues to
the full production. Leaves space and elements
to build up the anticipation or tension.
Breakdown pause and chance to reset on
energy. Thins some elements out to take a time
out breather until the tension starts to rebuild.
Bridge will give one
section for something
different.
Full on main track. All elements kick in and the
tension built up is released during this section.
First drop doesn't overdo things time wise.
Full on main track maybe octave change. All
elements kick in and the tension is released again.
Possibly repeated after a bridge for continuity.
Final full on section which can
optionally repeat.
Track breaks-down gradually to the end. Elements
are removed and a section to allow DJ transition to
‘Mix out’ is considered, possibly kick only.
Breakdown 1
Breakdown 2
Bridge
Outro 1
4 Bars per ‘block’
Tracker Mini Slot Row
Outro 2
End
Build Up 1
Build Up 2
Drop 1
Drop 2
Drop 3
P1
16 Steps
P3
16 Steps
P3
16 Steps
P3
16 Steps
P16
16 Steps
P16
16 Steps
P8
16 Steps
P13
16 Steps
P13
16 Steps
P13
16 Steps
P2
16 Steps
P4
8
P4
8
P6
8
P11
8
P5
8
P5
8
P7
8
P12
8
P1
16 Steps
P3
16 Steps
P10
16 Steps
P15
16 Steps
P17
16 Steps
P1
16 Steps
P2
16 Steps
P9
16 Steps
P14
16 Steps
P14
16 Steps
P14
16 Steps
P2
16 Steps

221
Polyend Tracker Mini Manual
220
Polyend Tracker Mini Manual
NOTESNOTES
9.3 Song Mode Interface
Select the song page by pressing [Shift] + [1] or hold [Shift] + [1] to
temporarily display the page from within another page, reverting back to
when buttons are released. The interface for song mode is by default empty
other than a single slot 1 with pattern 1. Up to 255 Song slots are available.
Pressing [Play] in song mode will play the song not just individual pattern.
Tracks in a pattern for the slot are represented as cell clips.
Song Mode
9
Song Mode
9
The song mode utility will help construct the patterns into a full song
arrangement, recognising muted and empty tracks.
In order to use song mode a collection of patterns will be required to select
from. Typically this may be newly created patterns or patterns edited as a
variation from a base pattern. For example the same pattern can be copied
then transposed and parts muted then saved as an alternative version.
Patterns cannot be named in Tracker Mini and are managed in the pattern
page as Pattern 1, Pattern 2 etc, loaded into the song utility as 1,2 etc and
stored on the SD Card as pattern_01.mtp, pattern_02.mtp etc. It is advised
to adopt some form of noting each pattern and it’s function and features.
P1
16 Steps
P3
16 Steps
P8
16 Steps
P2
16 Steps
P4
8
P6
8
P5
8
P7
8
P1
16 Steps
P3
16 Steps
P2
16 Steps
Rec
Play
Pattern
Play
Song
Undo Add
Slot
Delete
Slot
Pattern Tempo
130.0 BPM
Kick BassOHat PadSnare LeadCHat Accent Slot
1
2
3
4
5
6
7
8
9
10
11
12
13
Pattern
1
1
2
2
3
3
4
5
6
7
8
9
3
Song 0m:00s P1.001
Play
Pattern
Play
Song
Undo Add
Slot
Delete
Slot
Pattern Tempo
130.0 BPM
Kick BassOHat PadSnare LeadCHat Accent Slot
1
2
3
4
5
6
7
8
9
10
11
12
13
Pattern
1
1
2
2
3
3
4
5
6
7
8
9
3
Song 0m:00s P1.001
Play
Pattern
Play
Song
Undo Add
Slot
Delete
Slot
Pattern Tempo
130.0 BPM
Track 1 Track 5Track 3 Track 7Track 2 Track 6Track 4 Track 8 Slot
1
2
3
4
5
6
7
Pattern
1
2
3
3
4
5
6
Song 0m:04s P2.004
Song slots represented by the rows, with the
pattern assigned to the slot.
Each project can have 1 song, which can contain a maximum of 255 slots.
Play Direction
Pattern
Pattern number assigned
to the song slot
Slot
Each slot row hosts a pattern
and plays top to bottom
‘Green’ Mode - [Rec] Off.
Only playback options are available
‘Red’ Mode - [Rec] On.
Playback and edit options are available
Dark Tracks
Track has no steps in the selected pattern.
There are no steps to play in a song.
White Tracks
Track is unmuted and has active steps in the pattern.
These will be audible in the song.
Muting Tracks
Muting is not performed in song mode. Use the Pattern page or the Track Mixer - Master Page 2/3 to mute / unmute.
Dimmed Tracks
Track is muted and has active steps in the pattern.
These will not be audible in the song.
Play
Pattern
Play
Pattern
Play
Song
Off
On
Play
Song
Undo Add
Slot
Delete
Slot
Pattern
<< >>
Tracks
Columns represent each of
the tracks in a pattern
Track Cell Clips

223
Polyend Tracker Mini Manual
222
Polyend Tracker Mini Manual
NOTESNOTES
Song Mode
9
Song Mode
9
9.4 Song v Pattern Relationship
Patterns can be arranged into a song in the song mode utility. Patterns
selected in a song will also be available in the pattern mode and will appear
in song mode as muted / unmuted inline with the status in pattern mode.
Editing tracks in song mode will reect in pattern mode. Tracks and patterns
can be copied and pasted within song mode which will also edit or copy /
paste the pattern.
Pattern
Unmuted
Pattern
Unmuted
Pattern
Muted
Empty
Unmuted
Play
Pattern
Play
Song
Undo Add
Slot
Delete
Slot
Pattern Tempo
130.0 BPM
Track 1 Track 5Track 3 Track 7Track 2 Track 6Track 4 Track 8 Slot
1
2
3
4
5
6
7
Pattern
1
2
3
3
4
5
6
Song 0m:04s P2.004
C3 04 ---- P-20
D3 04 ---- P-10
D3 04 ---- P-10
D3 04 ---- P-10
C4 12 ---- A 4
C4 12 ---- A 4
Pattern
1
1 1
2
C5 40 ---- P-25
C5 40 ----
C5 40 ---- P-25
-- --- ---- ----
-- --- ---- ----
-- --- ---- ----
-- --- ---- ---- -- --- ---- ---- -- --- ---- ---- -- --- ---- ----
-- --- ---- ----
-- --- ---- ----
P 25
-- --- ---- ---- -- --- ---- ----
-- --- ---- ---- -- --- ---- ---- -- --- ---- ---- -- --- ---- ----
-- --- ---- ---- -- --- ---- ---- -- --- ---- ---- -- --- ---- ----
-- --- ---- ---- -- --- ---- ---- -- --- ---- ----
-- --- ---- ---- -- --- ---- ---- -- --- ---- ---- -- --- ---- ----
-- --- ---- ---- -- --- ---- ---- -- --- ---- ----
-- --- ---- ---- -- --- ---- ---- -- --- ---- ---- -- --- ---- ----
-- --- ---- ---- -- --- ---- ---- -- --- ---- ----
-- --- ---- ---- -- --- ---- ---- -- --- ---- ---- -- --- ---- ----
-- --- ---- ---- -- --- ---- ---- -- --- ---- ---- -- --- ---- ----
-- --- ---- ---- -- --- ---- ---- -- --- ---- ---- -- --- ---- ----
C5 02 ---- P-20
C5 40 ---- H-25 C5 40 ---- P-20
2
3 3
4 4
5 5
6 6
7 7
9 9
11 11
13 13
15 15
8 8
10 10
12 12
14 14
Length
32
Step Jump
0
Fill Preview Undo Redo More
Track 2 Track 3 Track 4Track 1
Pattern 1 0m:00s P1.008 1.Analog 3 18p
Patterns in Song Mode will reect the track condition from the pattern view including mute
states, step position etc. This is shown by the shade of the track slot and the header position.
Tracks can be re-ordered by copy / paste in Song Mode. This in turn will edit the actual pattern
and as such also be reected in the pattern view.
When pressing [Play] in Song mode, switching to pattern mode will show each pattern as it is
being played in the song structure.
Patterns are muted in pattern or master pages and are reected in the song mode clip shade
as ar empty clips.Tracks edited in Song Mode will in turn edit and reect in the actual pattern.
When pressing [Play] in Pattern mode, switching to Song Mode will only show the selected
pattern being played.
Pattern - Press [1]
Song - Hold [Shift] + Press [1]
Also available from the [Menu]
Song Mode and Pattern Mode can
be in the same or different ‘Red’ -
Edit On or ‘Green’ - Edit Off States.
While in the another page, Hold [Shift] + Hold [1] with
a long press will temporarily display song mode.
9.5 Creating and Editing a Song
The pre-requisite to creating a song is to have a series of patterns
available, although technically blank patterns can also be added to a song
slot. Editing and creating a song is performed in ‘Red’ recording mode i.e.
when the [Rec] mode is selected as on. Otherwise the song mode page just
presents the playback of patterns and the song as options. Track muting is
not applied in Song Mode, but is set in the Pattern or Track Mixer Pages.
▌ CREATING A BASIC SONG FROM SCRATCH
1. Hold [Shift] + Press [1] or access the [Menu] to select song mode. The
step / pattern cursor will be displayed by a green bounding box. Also
only 1
st
and 2
nd
screen buttons to control play are available in ‘green’
mode, i.e. [Rec] off.
2. Press [Rec] to toggle editing on, ‘red’ mode. The step / pattern cursor
will be displayed by a red bounding box. Also all of the screen button
options are shown as available in recording, ‘red’ mode - [Rec] on.
3. Navigate to the location desired:-
• The location selected is shown with the green or red bounding box
over the slot & pattern number.
• Press (Up) and (Down) or [+] / [-] to navigate slots.
• Press (Left) and (Right) to select tracks.
• Press [Shift] + [Insert] to jump to the top slot row.
4. To add a new song slot, Press [Add Slot], 4
th
Screen button. Song slots
represent a pattern and are displayed as a row on the song mode page.
5. When adding a new slot row, it will;
• Be added directly below the currently selected row.
• The newly added slot replicates the previously selected row.
• The new slot row is also automatically selected.
6. To change the pattern on the selected row, Press the (Left), 6
th
Screen
button or (Right), 7
th
Screen button. All 255 patterns that are available in
a project will be selectable in a song, even if no steps or data has been
created in the chosen pattern.
7. More slots can be added to develop the song further and expand its
length and duration.

225
Polyend Tracker Mini Manual
224
Polyend Tracker Mini Manual
NOTESNOTES
Song Mode
9
Song Mode
9
Creating a basic song is a starting point, but a number of additional editing
features are also available within Song Mode. Individual tracks can also be
re-positioned. Be careful when editing patterns as the song structure and
patterns are directly linked and edits can affect each other.
▌ BASIC EDITING OF AN EXISTING SONG
1. Press [Shift] + [1] or [Menu] to select song mode. The slot and pattern
selection bounding box may be green. Only the 1
st
and 2
nd
Screen
buttons are available in ‘green’ mode i.e. [Rec] off to control play.
2. Press [Rec] to toggle to editing ‘red’ mode. The slot and pattern
bounding box will be displayed red. Also all of the screen button options
are shown as available in ‘red’ mode - [Rec] on.
3. Navigate to the slot location desired using the (Up), (Down) or [+] / [-]
buttons. The location selected is shown with the red bounding box over
the slot number and pattern number when editing.
4. To delete the currently selected song slot, Press [Delete Slot], 5
th
Screen button. The selected song slot is deleted and the other slots will
move up the order.
5. Press [Add Slot], 4
th
Screen button to add a new song slot row.
6. The undo command does not restore deleted slots so be careful when
editing songs.
Track 1
Adding a slot replicates the current
slot on a row below. Also selects
the new slot.
Deleting a slot removes the current
slot and moves the below slots up
in the order.
Track 4Track 2 Track 5 Track 7Track 3 Track 6 Track 8 Step Pattern
1 3
2 4
3 8
4 8
5 2
▌ EDITING TRACK CLIPS IN A SONG
1. Press [Shift] + [1] or [Menu] to select song mode. The step and pattern
cursor will be displayed by a green bounding box. Also, only 1
st
and 2
nd
screen buttons to control play are available in ‘green’ mode - [Rec] off.
2. Press [Rec] to toggle editing to ‘red’ mode. The step and pattern cursor
will be displayed by a red bounding box. Also, all of the screen button
options are shown as available in ‘red’ mode - [Rec] on.
3. Navigate to the desired track clip. Navigate to the Track by pressing
(Left) or (Right). The selection is shown with the red bounding box over
the pattern for the track.
4. To select multiple track clips, Hold [Shift] + (Left), (Right), (Up) or
(Down). A red bounding box will show the selected range of tracks
5. To delete selected track clip(s), Press [Delete].
6. Press [Copy] to copy the highlighted and selected track(s). To Navigate
to the target track clip location, Press (Up) (Down) or [+] / [-]. Navigate
to the Track by pressing (Left) or (Right). The selection is shown with
the red bounding box over the pattern for the track.
7. Press [Shift] + [Copy] to paste the previously copied selection into the
location selected. When pasting multiple tracks the highlighted track
location will anchor at the top left corner of the copied selection of tracks
and as such will paste into the adjacent track locations.
8. The copy / paste edits in song mode will also be performed
automatically in the pattern itself and reected back into the same
pattern in other slots. Switching to pattern mode will view any edits
made. Care must be taken to remember that the song mode and pattern
mode are directly linked. Previous edits can be restored by pressing
[Undo], 3
rd
Screen button.
Track 1
Copy one or more slot tracks
Paste the previously copied
tracks to another location.
Track 4Track 2 Track 5 Track 7Track 3 Track 6 Track 8 Step Pattern
1 3
2 4
3 8
4 8

227
Polyend Tracker Mini Manual
226
Polyend Tracker Mini Manual
NOTESNOTES
Song Mode
9
Song Mode
9
9.6 Playing Songs and Patterns
Playing songs within song mode performs differently to playing patterns in
the pattern view. It is however also possible to play only patterns from
within Song mode. The dedicated, physical [Play] button will play a song in
song mode and will play the pattern only when in pattern mode.
Song Mode Playback Options
Play
Pattern
Play
Song
Undo Add
Slot
Delete
Slot
Pattern Tempo
130.0 BPM
Track 1 Track 5Track 3 Track 7Track 2 Track 6Track 4 Track 8 Slot
1
2
3
4
5
6
7
Pattern
1
2
3
3
4
5
6
Song 0m:04s P2.004
Time
Total play time in
Minutes : Seconds
Progress Bar
Progress indicator of
steps within pattern slot
Playback Loop
Songs will play on loop.
Playback will restart when the
last slot row is completed.
Progress Marker
Progress indicator of
current pattern slot
Screen Buttons
Dedicated Buttons
Pattern
Currently played pattern
number it’s step
Transport
Playback status symbol. Also
shown in pattern slot and
across various pages.
Mode Symbol Screen Button State Button Description
Song [Play Song] Play Song
Will play the song. Changing to pattern
mode will play and display patterns in sync
with song. Same as pressing [Play]
Song [Stop] Pause
When playing, button will toggle pause.
Press again to commence from the start of
the paused pattern. Same as pressing [Play]
Song to
Pattern
[Play Pattern] Play Pattern
Play the currently selected pattern in a loop.
Same as pressing [Shift] + [Play]
Pattern
to Song
[Continue Song] Play Song
Switches from playing pattern to play song
from current position. Same as pressing
[Shift] + [Play]
Song to
Pattern
[Loop Pattern] Loop Pattern
Switches from playing song to play and loop
pattern from current position. Same as
pressing [Shift] + [Play]
[Play Song]
[Loop Pattern]
[Play Pattern]
[Play]
PLAY
SONG
PLAY
PATTERN
[Play] [Stop]
[Continue Song]
Playback Behaviour.
Playing a song in song mode can be performed from the dedicated play
button or the screen buttons. Songs will play in loop meaning the song will
continue to play from the start after the last slot row is completed. Patterns
can also be played and looped from song mode. Switching between pattern
and song playback is possible using the screen buttons, which change
function to reect the current status.
PlayShift + Play

229
Polyend Tracker Mini Manual
228
Polyend Tracker Mini Manual
NOTESNOTES
Song Mode
9
Song Mode
9
Previewing Tracks in Song Mode
While songs and patterns can be played from within song mode, the ability
to preview only individual track clips is possible. This can only be performed
in ‘Red’ [Rec] Mode and with an individual track clip selected.
▌ PREVIEWING A SONG TRACK CLIP
1. Press [Shift] + [1] or use [Menu] to select song mode.
2. Press [Rec] to toggle to editing in ‘red’ mode. The slot and pattern
bounding box will be displayed red. Also all of the screen button options
are shown as available in ‘red’ mode - [Rec] on.
3. Navigate to the track clip location desired, Press (Left), (Right), (Up)
and (Down) to also navigate through the slots. Select a single track clip.
Multiple selections cannot be previewed.
4. With the track clip selected and highlighted red, Press [Shift] + [Play].
The clip will play once fully.
5. Alternatively, with the track clip selected and highlighted red, Press
[Shift] + [Preview Track], 1
st
Screen button. The clip will play once fully.
6. To stop playback immediately while playing from either option, Press
[Play] or Press [Stop], 1
st
Screen button to stop playback.
Track 1
Selected Track Clip.
Example Pattern 8, Track 2
[Shift] + [Play] or [Shift] + [Preview Track].
Previews the individual track clip
Clip will play through fully once, unless the
[Play] or [Stop], 1
st
Screen button is
pressed which then will immediately stop.
Track 4Track 2 Track 5 Track 7Track 3 Track 6 Track 8 Step Pattern
1 3
2 4
3 8
4 8
9.7 Link between Song and Performance Mode
Songs and patterns are integrated and linked to work together. In addition
songs work in conjunction with ‘Perform’ - Performance Mode which allows
live punch in effects and improvisations. Perform is covered in detail in a
later section of the notebook.
Song - Hold [Shift] + Press [1]
Perform - Hold [Menu] + ‘Perform’
Play
Pattern
Play
Song
Undo Add
Slot
Delete
Slot
Pattern Tempo
130.0 BPM
Track 1 Track 5Track 3 Track 7Track 2 Track 6Track 4 Track 8 Slot
1
2
3
4
5
6
7
Pattern
1
2
3
3
4
5
6
Song 0m:04s P2.004
Track 1
Patt: 1
---
---
-1
-1
-1
---
---
-1
-1
-1
---
---
-1
-1
-1
---
---
-1
-1
-1
---
---
-1
-1
-1
---
---
-1
-1
-1
---
---
-1
-1
-1
---
---
-1
-1
-1
---
---
-1
-1
-1
---
---
-1
-1
-1
>>>
>>>
/16
/16
/16
---
---
-1
-1
-1
Track 2
Patt: 1
Track 3
Patt: 1
Track 4
Patt: 1
Track 6
Patt: 1
Track 5
Patt: 1
Track 7
Patt: 1
Track 8
Patt: 1
Performance FX
Volume
High-pass cutoff
Sample end
Tune
Delay send
Sample Playback
Panning
Band-pass cutoff
Low-pass cutoff
Sample position
Reverb send
Volume LFO
0m:00s P1.028
The ‘Random’ symbol in the header of a page will demonstrate that tracks from various
patterns can be selected for mixing in performance mode.
Press [Play] in Performance Mode to play the current pattern as set in the pattern page or set
in song mode, whichever is the most recent pattern played. Press [Shift] + [Play] in
Performance Mode to play the full song.
Songs can be played in Song Mode which will play through all slots and the patterns assigned.
When switching to performance mode the song will continue playing.
While in the another page, Hold [Shift] + Hold [1] with
a long press will temporarily display song mode.

A number of effects are available in Tracker
Mini. Some can be set in the FX1 and FX2
slots and some used in Performance Mode.
Also the instrument parameters give access to
instrument level effects. This section covers
the Master Effects. These are the common
effects that are available in the main audio
chain and are located in the master pages.
Effects in the primary audio chain are called
insert effects. Effects are not available on an
individual track basis so all tracks are routed
through the master section. The track mixer is
also a page in the master section. An example
of an insert effect is the EQ effect which
operates in series to the main audio. Send
effects allow variable amounts of audio to be
channelled in parallel to the main audio and
then the affected audio is mixed back in to the
main output. Essentially these are the reverb
and delay effects. The main reverb and delay
effect settings are accessible from the master
page and the send amounts in the global mixer.
The three pages including the main mix page,
track mixer page and global mixer functions are
available by pressing button [4], by default
assigned to Master pages and also accessible
via the [Menu]. Sub pages are also contained
within these pages. Parameters are also
available in the sub pages or directly from the
master page depending on the effect. The pages
can be cycled through using [4]. The master
effects have a number of parameters and
dened functions. It is always worth
remembering that adjustment by ear is usually a
more appropriate method when adjusting effect
settings. While theoretical numbers and
applications are good starting points, there is no
better method than to hear how the sound is
affected by the changes made as they are
applied.
Master Effects
10
231
Polyend Tracker Mini Manual
230
Polyend Tracker Mini Manual
NOTES

233
Polyend Tracker Mini Manual
232
Polyend Tracker Mini Manual
NOTESNOTES
Master Effects
10
Master Effects
10
10.1 Effects Overview
Tracker Mini has 8 voices. Each voice is represented by each of the 8
tracks when playing. The common processing of the voices comes together
at the master stage where the voices are mixed and the master effects
applied. Also any Delay and Reverb ‘send’ audio is mixed into the main out.
The diagram shown is for illustration purposes and does not constitute an
exact or ofcial schematic of Polyend’s Tracker Mini circuitry. It does
however serve to give an insight into the signal path and identify the seven
master effects covered in this section.
The reverb and delay send effects can be sent pre-fader or post-fader in the
global mixer. This is set in the ‘Cong’ settings accessed with the [Menu].
This means the effect audio is sent before being adjusted by the the volume
fader or after the volume fader adjustment.
10.2 Master Pages
The 7 master effects are located in the master section of Tracker Mini. This
is accessible with the assigned button [4] which opens to 3 mixer / master
pages. The [Menu] can also be used to access the Master section. The
main effects settings are contained within this pages.
To adjust the effect parameters, select the page then use the screen
buttons or use (Left) or (Right) to select the parameter. Screen buttons
select some pages such as delay, reverb etc. Press [+] / [-] or (Up), (Down)
to change the selected parameter value. Multiple track mixer levels can be
adjusted when holding the screen buttons simultaneously.
Volume
-33.08 dB
Reverb Delay EQ Saturation
Soft Clip
Hard Clip
Soft Clip
Saturate
Overdrive
Drive+
Bass Boost
5
Limiter Space
1
Master 1/3 0m:00s P1.008
0.00 dB
Mute
0.00 dB
Mute
0.00 dB
Unmute
0.00 dB
Unmute
0.00 dB
Mute
0.00 dB
Unmute
0.00 dB
Mute
0.00 dB
Mute
Track 2 Track 6Track 3 Track 7Track 4 Track 8Track 1 Track 5
Track Mixer 2/3 0m:00s P1.008
-4.50 dB
Mute
0.00 dB
Mute
1.80 dB
Mute
0.00 dB
Unmute
0.00 dB
Unmute
0.00 dB
Unmute
Reverb Line RvbDry Mix Line InDelay Line Dly
Global Mixer 3/3 0m:00s P1.008
Press [4] to select the Master section.
Each Press of [Master] will cycle through 3 master pages:
Page 1 is Master; Page 2 is Track Mixer and Page 3 is Global Mixer.
Master - Page 1/3
Direct access to the master output Volume level,
Saturation, Bass Boost and Space effects. Each
of which is directly adjustable when selected
using the [+] / [-] or the (Up) or (Down) Buttons.
The Delay and Reverb send effect, Limiter and
EQ parameter pages are accessible when using
the respective screen buttons.
Track Mixer - Page 2/3
Access to all of the individual track levels to allow
mixing of the entire song. Hold one or more
screen buttons and us [+] / [-] or (Up) (Down)
buttons to adjust the setting.
Mute and Solo can be set here. Editing the track
names when [Rec] is active is also possible.
Global Mixer - Page 3/3
The main output delay and reverb levels are
visible and can be adjusted. The main dry and
wet mix between the main audio and effect audio
is also provided.
Control for pass through of line inputs. Reverb
and Delay can be applied to this audio signal.
Pre-fader or post-fader options are congurable.
All settings accessible with the screen buttons
Limiter
Saturation
Space
Bass Boost
EQ
Sends
Inserts
Sends
Out
Voice
Left Right
Master
Delay
Reverb
Panning
21 3 4

235
Polyend Tracker Mini Manual
234
Polyend Tracker Mini Manual
NOTESNOTES
10.3 Master Delay
Delay is one of the two send effects. A send effect basically routes an
adjustable amount of audio in parallel to its main signal path and is sent to
a common audio effect. In this case delay. This delay affected audio is then
returned back to the main audio path. The effect itself is a common
function, managing several send / return signals. Any common delay
parameter adjustments will therefore also affect other send signals. The
‘Send / Return’ conguration is a common application for delay effects.
What is a delay effect?
A delay is a common production effect used to delay an incoming signal to
the output. While this is a simple principle there are many effects that use
delay as a foundation. Some examples are echo (creating dened repeats)
and chorus (short delay taps to give a thicker rather than echo style feel) as
well as specic delay types such as ping-pong delay, spreading the delay
points across the stereo eld left to right and slap-back delay emulating old
tape delays which are used successfully to thicken vocals.
Delay is a time based effect and synchronisation (or not) with the track
tempo should also be considered depending on the output required.
▌ ACCESSING MASTER DELAY PARAMETERS
1. Press [4] or use [Menu] to select master section. Press again if needed,
until the ‘Master’ Page 1/3 is displayed.
2. Press [Delay], 3
rd
Screen button.
3. The six delay parameters are presented on the master delay page.
4. Press [Back], 8
th
Screen button to return to the master page.
Master Delay Page
Accessed via the Master page 1/3 and selected from the screen buttons.
Rate Options
8 6 4 3 2 3/2 1 3/4 1/2 3/8
1/3 1/4 3/16 1/6 1/8 1/12 1/16 1/24 1/32
Option Range Description
Pingpong On, Off
Toggles the pingpong mode on or off. This will
set the delays to be generated across the
stereo eld left to right
Sync On, Off
Toggles synchronisation to the project tempo
on or off. When on, the rate with respect to
tempo is used for the delay. When off, the time
parameter is used.
Rate See Rate Table
The rate divider / multiplier, synchronised to
project tempo, used for the delay time.
Available when sync is set to on.
Time 1 - 3500ms
The time used for the delay. Only available
when sync is set to off.
Feedback 0-99
Amount of delay output signal that is fed back
into the delay input. This parameter is what
increases the number of delays in the audio.
Filter 100Hz - 20000Hz
Applies a lter to the delay and helps shape
the sound tone more appropriately.
Master Delay Settings.
PingPong
Off
Rate
8
Time
500 ms
Feedback
47
Filter
20000Hz
Sync
Off
Back
Master Delay 0m:00s P3.002
On On 8
3
3/4
1/4
Off Off
6
2
1/2
3/16
4
1
1/3
3/2
3/8
1/6
Pingpong
Selects a pingpong (left / right
stereo effect) or standard
when off, delay.
Filter
Filter applied to the
delay effect
Sync
Synchronisation to project tempo.
If on rate is used to sync to
tempo. Specic time is used if off.
Feedback
Amount of delay output fed
back into the delay line input
Rate
Synchronisation to tempo,
used when sync is on.
Time
Stand alone delay time, used
when sync is off.
Input Output
Delay Time
Time delay between input and output.
Connecting the output to the input creates feedback
and increases the delay ‘events’.
Delay Line
Master Effects
10
Master Effects
10

237
Polyend Tracker Mini Manual
236
Polyend Tracker Mini Manual
NOTESNOTES
10.4 Master Reverb
Reverb is the second of the send effects. As stated a send effect routes an
adjustable amount of audio in parallel to its main signal path and is sent to
a common audio effect. In this case reverb. This reverb affected audio is
then returned back to the main audio path. The effect itself is a common
function, managing several send / return signals. Any common reverb
parameter adjustments will therefore also affect other send signals. The
‘Send / Return’ conguration is a common application for reverb effects.
What is a reverb effect?
A reverb is a common production effect used to replicate the audio
behaviour of spaces. A normal space such as a small or large room will
reect audio differently. Think of how the sound reects in a large cathedral
compared to a small bathroom. The sound will bounce and reect between
the walls and other elements in the room. These reections arrive at the
human ear at different times and different levels. Reverb is an effect that
replicates this behaviour.
Reverb parameters mainly focuses on the space / room characteristics.
▌ ACCESSING MASTER REVERB PARAMETERS
1. Press [4] or use [Menu] to select master section. Press again if needed
until the ‘Master’ Page 1/3 is displayed.
2. Press [Reverb], 2
nd
Screen button.
3. The four reverb parameters are presented on the master reverb page.
4. Press [Back], 8
th
Screen button to return to the master page.
Master Reverb Page
Accessed via the Master page 1/3 and selected from the screen buttons.
Option Range Description
Size 0-100 Replicates a physical room size.
Damping 0-100
Sound is reected with walls, furniture and
ttings etc. However it is also absorbed into
walls and materials. This emulates the
absorbent part of sound in a space.
Predelay 0-100
The time from the initial original sound being
triggered to the rst reections being heard.
Diffusion 0-100
Diffusion emulates how much sound is
dissipated. Essentially this is based on the
time period between the early reections. The
wider, the thinner the reverb effect.
Master Reverb Settings.
Size
50
Predelay
50
Diffusion
80
Damping
50
Back
Master Reverb 0m:00s P3.002
Size
Emulates the size of a room and
how it behaves.
Diffusion
Amount that the sound
dissipates in the early reections
Damping
Represents how sound is
absorbed rather than reected.
Predelay
Represents the time between the
initial sound and rst reections.
Size
Emulates the physical room size
Predelay
Time from initial sound to early reections
Diffusion
Time between early reections.
Closer together thickens the sound.
Damping
This replicates ‘softer’ environments where
sound is absorbed rather than reected.
Initial Sound Early Reections Subsequent Reections Reverb Tail
Master Effects
10
Master Effects
10

239
Polyend Tracker Mini Manual
238
Polyend Tracker Mini Manual
NOTESNOTES
10.5 Limiter
Tracker Mini’s limiter operates as the second insert effect in the master
effect chain. This is not a typical conguration as most applications have a
limiter as the last effect in a chain. Insert effects in Tracker Mini route the
entire, main audio signal prior to the output.
What is a limiter?
A limiter is normally used at the end of an audio chain and is used to protect
the digital integrity by taming signals beyond a threshold, keeping levels
within a dened limit and usually avoid digital clipping. Limiters are useful to
develop a sounds level and increase the perceived loudness.
Tracker Mini’s limiter also has a sidechain function. The Limiter threshold is
based on the main audio (sidechain off). Sidechain options will route an
alternative audio signal to trigger the gain reduction instead of the main
audio. This can be used creatively and triggered by a track or an external
audio signal
▌ ACCESSING MASTER LIMITER PARAMETERS
1. Press [Master] to select master section. Press again if needed until the
‘Master’ Page 1/3 is displayed.
2. Press [Limiter], 5
th
Screen button.
3. The ve limiter parameters are presented on the master limiter page.
4. Press [Back], 8
th
Screen button to return to the master page.
Master Limiter Page
Accessed via the Master page 1/3 and selected from the screen buttons.
The behaviour of the limiter as extreme or subtle can be set in the ‘Cong’
[Menu] options.
Setting a limiter is an iterative process. Set up the source and fast attack
and release then make small incremental adjustments while playing the
song, starting with threshold. Once an appropriate gain reduction is
reached tweak the attack and gain to further shape the sound.
Option Range Description
Limiter Att 0.001 - 1.000s
Envelope attack time which controls the limiter
behaviour as the limiter kicks in.
Limiter Rls 0.001 - 1.000s
Envelope release time which controls the
limiter behaviour as the limiter drops out.
Limiter Thr -Inf dB to 0dB
The threshold level at which gain reduction
and hence limiting is applied. Source is based
on the audio source - Main or Sidechain.
Gain Reduce
Visual, real time indicator of gain reduction
being applied. Does not offer any parameter
settings - indication only.
Sidechain
Disable, Track
1-8, Line In L R
Selects the alternate audio signal used as the
trigger. The normal state is disabled and uses
the main audio. Alternatively individual tracks
or line in L or R can be selected.
Master Limiter Settings.
LimiterAtt
0.369s
LimiterThr
0.00 dB
Gain Reduce Sidechain
Disable
LimiterRls
0.001s
Back
Master Limiter 0m:00s P3.002
Disable
Track 1
Track 4
Track 8
Track 2
Track 5
Line in L
Track 3
Track 7
Track 6
Line in R
Attack
Envelope attack time as the
limiter kicks in.
Gain Reduction
Visible indicator which shows the
gain reduction applied in real time
Sidechain
Sets the alternate audio source
used for triggering gain reduction.
Release
Envelope release time as the
limiter is released
Threshold
Audio level at which the limiter will
kick in and apply gain reduction
Gain ReductionThreshold
Sidechain
Peak Limiting
Signal is attenuated when
main or sidechain audio
crosses the threshold.
Tracker Mini threshold
range is 0% - 100%
Audio over Time
Main Audio
Master Effects
10
Master Effects
10

241
Polyend Tracker Mini Manual
240
Polyend Tracker Mini Manual
NOTESNOTES
10.6 Saturation, Space & Bass Boost
Saturation, Space and Bass Boost are simple effects each carrying one
parameter that adjusts the amount of effect applied into the main audio out
or in the case of saturation, sets the dened preset.
Saturation is the rst effect in the entire master chain. This is selects from 5
preset options for subtle distortion. The space option, ranges 0-8 and is a
widener enhancing the stereo image. Bass boost has a 0-100% range with
represents approx 0-5 dB. This enhances the bass frequencies around 80
Hz, which can be subtle on some material. Both will be applied based on
taste so try tweaking and adjusting on different songs to nd the sweet spot
for the material and track.
▌ ADJUSTING SATURATION, BASS BOOST & SPACE VALUES
1. Press [4] or use [Menu] to select master section. Press again if needed
until the ‘Master’ Page 1/3 is displayed.
2. To select the effect:-
• Press [Saturation], 6
th
Screen button
• Press [Bass Boost], 7
th
Screen button
• Press [Space], 8
th
Screen button
• The (Left) or (Right) buttons also navigate and select.
3. Press [+] / [+] or (Up), (Down) to adjust the setting value.
Volume
-33.08 dB
Reverb Delay EQ Saturation
Soft Clip
Hard Clip
Soft Clip
Saturate
Overdrive
Drive+
Bass Boost
5
Limiter Space
1
Master 1/3 0m:00s P1.008
Saturation
Distortion Preset
Bass Boost
Bass Enhancer
Space
Stereo Enhancer
10.7 EQ
Equalization, also called EQ, is an effect which allows the adjustment of
specic frequency bands to shape the sound spectrum. This can adjust the
tone and have an audible creative effect for sound design.
What is a EQ?
An EQ is set up with a number of frequency bands. Many models have
adjustable frequency, width of band and the ability to boost or attenuate at
the given frequency. Tracker Mini’s EQ is the last master effect in the chain
and has 5 xed frequency bands.
The adjustment is based on a dB Boost or Attenuation with a range of -
12dB to +12dB. A setting of 0.00dB across the range mans no EQ is
applied and the audio will be unaffected.
A normal human hearing range is 20Hz to 20kHz. This is the range an EQ
therefore operates with specic ranges affecting sound elements. Some
examples are:-
• Vocal sibilance occurs around 3-7kHz. Try cutting at 3kHz or 9.9kHz
to de-ess and remove any stand out ‘S’ elements.
• Mic rumble can be removed around 70-150Hz.
• Boost around 9kHz to give a sound more ‘air’ and brilliance.
• A cut at 1kHz can help vocals by removing ‘honkiness’
• Cut at 300Hz to remove muddiness
• Boost at 115Hz to add warmth.
Band 1
115 Hz
Band 3
990 Hz
Band 5
9900 Hz
Band 2
330 Hz
Band 4
3000 Hz
Fixed frequency bands, adjustable +/-12dB
Normal human hearing is in the range of 20Hz - 20KHz
20Hz
-12dB
0dB
+12dB
20KHz
BoostAttenuate
12KHz200Hz 500Hz 800Hz 1KHz 5KHz 8KHz
Master Effects
10
Master Effects
10

243
Polyend Tracker Mini Manual
242
Polyend Tracker Mini Manual
NOTESNOTES
▌ ACCESSING MASTER EQ PARAMETERS
1. Press [4] or use [Menu] to select master section. Press [4] again until
the ‘Master’ Page 1/3 is displayed.
2. Press [EQ], 6
th
Screen button.
3. The ve EQ parameters are presented on the master EQ page.
4. Press [Back], 8
th
Screen button to return to the master page.
115 Hz
0.00 dB
990 Hz
0.00 dB
3000 Hz
0.0dB
9900 Hz
0.0dB
330 Hz
0.00 dB
Back
Master EQ 0m:00s P3.002
10.8 Effect Cong Options
Several options can be set in the ‘Cong’ [Menu] for master effects. The
behaviour of the limiter can be changed between extreme and subtle. Also
the master mix reverb and delay can be congured to send before / pre the
volume level fader of after / post fader.
▌ SETTING THE CONFIG OPTIONS FOR MASTER EFFECTS
1. Press [Menu] the select ‘Cong’ to open the conguration menu.
2. In the rst column, select ‘Project Settings’. Use the 1
st
and 2
nd
Screen
button to navigate. Alternatively use (Left) or (Right) to navigate menus
and Press (Up) or (Down) to select a function.
3. In the ‘Project Settings’ Sub menu the ‘Limiter mode’ and the ‘Sends
mode’ can be adjusted. Select the option from the central sub-menu
with the 4
th
or 5
th
Screen button.
4. The Limiter options are:
• Subtle: Will affect how aggressive the envelope attack and release
operates. Subtle will give a gentle, transparent style and will be slow
in catching fast transients.
• Extreme: Will provide a more aggressive model. Will catch all of the
transients but will also affect the sound adding colour.
5. The Send effects:
• Pre-fader: Will send the audio to the effect irrespective of the
instrument volume. The effected signal may be louder as it is
independent of the volume control.
• Post-fader: Will send the audio after it has been adjusted by the
instrument volume and therefore ensures the effect is more
proportionally consistent with the level, especially when modulated
6. Press [Change], 6
th
Screen button to change the option.
7. Navigate with the 4
th
or 5
th
Screen button and press [Apply], 6
th
Screen
button to accept the option.
Master Effects
10
Master Effects
10

While working with audio has been covered
extensively, Tracker Mini also has a set of
comprehensive MIDI features. MIDI is the
protocol which allows devices to communicate
together, for example where one device
controls sequencing to send to another synth.
A lot of the processes and instructions for
audio also apply to MIDI, for example, steps in
a pattern can be set to send MIDI rather than
trigger an audio sample instrument. MIDI
conguration of steps is handled just like an
instrument. Tracker Mini therefore can control
external gear from its sequencer. In addition
external gear can also be set up to control
Tracker Mini. A few fundamental things should
be considered when working with MIDI. The
clock in a multi gear setup will control timing
between devices. As such it is recommended
to only set one main clock as the primary lead.
Also consider the transport control of which
device will stop and start the sequencing.
These of course are design choices taken when
organising a collection of equipment to work
together with MIDI and should be considered at
the outset. MIDI into Tracker Mini can be set up
through the USB connection or the MIDI
interface which uses an adapter cable to convert
the 3.5mm connection to standard 5-Pin DIN
style MIDI connections. Audio, controlled by
Tracker Mini from external devices can also be
sampled back into Tracker Mini, making it a
perfect t for the centre piece of a setup. MIDI
expands the landscape of sound design when
using Tracker Mini in a multi device setup and
enables a collection of instruments to operate
together in sync.
MIDI
11
245
Polyend Tracker Mini Manual
244
Polyend Tracker Mini Manual
NOTES

247
Polyend Tracker Mini Manual
246
Polyend Tracker Mini Manual
NOTESNOTES
MIDI
11
MIDI
11
11.1 MIDI Denitions
To clarify some of the terminology and technology around MIDI with respect
to Tracker Mini a summary of key denitions is provided. Tracker Mini uses
a TRS to Type B MIDI Adapter. Also MIDI over USB is possible.
5 PIN MIDI 5 PIN to TRS MIDI
MIDI DIN 24
This is often found for MIDI
Out and Thru and enables
syncing of classic devices.
This uses 0v & 5v messages
as sync signals at 24 pulses
per quarter note (PPQN).
Tracker Mini uses 192 PPQN
Internally and can also
transmit and receive via USB.
MIDI CC
MIDI Control and Note
change messages are used
to communicate messages
across MIDI with values of 0-
127. Control Changes (CC)
affect parameter values while
note data triggers notes.
Tracker Mini has some
dened CC Assignments.
SYSEX
System Exclusive. This is an
expansion of the normal MIDI
communications set up and is
typically used for transferring
data such as back ups,
patches, presets and
rmware updates to and from
devices.
MIDI
Musical Instrument Digital
Interface. A protocol for
communicating between
electronic musical gear.
Never connect MIDI gear to
incompatible DIN signals.
Tracker Mini has USB MIDI
but also an interface for 5 Pin
DIN In and out.
MIDI STANDARDS
While there are MIDI
standards dened, many
synth developers interpret
this in slightly different ways.
Its always worth reviewing
the documentation with each
to fully understand each
device level implementation.
SDS
Sample Dump Standard. This
is an older transfer protocol
used for transferring data to
and from devices. This is
rarely seen nowadays.
MIDI DIN 48
This is often found for MIDI
Out and Thru and enables
syncing of classic devices.
This uses 0v & 5v messages
as sync signals at 48 pulses
per quarter note (PPQN).
Tracker Mini uses 192 PPQN
Internally and can also
transmit and receive via USB.
MSB & LSB
Most Signicant Byte and
Least Signicant Byte. MSB
provides the 128 data
resolution which is ok for
most MIDI applications. More
advanced devices use MSB
and LSB values increasing
resolution to 16,384 steps.
NRPN
Non-Registered Parameter
Number is part of the MIDI
standard. CC and NRPN are
technically very similar but
NRPN is less well dened in
the standards. NRPN uses
more data and can give
better control.
The term ‘primary lead’ will refer, in this guide to a device that has the main control responsibility.
For example controls the clock and transport and is the central lead. A device which will be
controlled by, and follow the primary lead device and which will be subservient by responding to
the main control messages will be called a ‘secondary follower’.
11.2 MIDI Conguration
A pre-requisite when working with MIDI is to ensure that the conguration
settings in the ‘Cong’ options accessed by [Menu] are applied for the
desired MIDI gear setup. These will dictate if Tracker Mini leads on
functions like clock and transport or if it acts as a secondary follower,
responding to control and synchronisation from another primary device
control. Also Note and CC behaviour can be set.
Velocity can be recorded from an external MIDI controller, but this must be
set in the recording options.
Menu Option Description
MIDI Clock In
Sets the Tracker Mini clock between the internal
generated clock (default) or an external clock
received through the USB or MIDI In jack.
MIDI Clock Out
Sends the Tracker Mini clock output to other
devices. Off, USB, MIDI Out jack or USB+MIDI
jack options.
MIDI Transport In
Sets the source of transport control commands,
Internal (default), or control from an external
device received through the USB or MIDI In jack.
MIDI Transport Out
Sends Tracker Mini transport control commands to
other devices. Set to Off, USB, MIDI Out jack or
USB+MIDI jack options.
MIDI Notes In
Sets the input of how notes are received from an
external device. Set to Off, USB, MIDI In jack or
USB+MIDI jack options.
MIDI Notes Input Channel
Sets the MIDI channel for external note inputs.
Select All channels or Ch 1-16.
MIDI MIDI Out
Sets the output routing of MIDI to communicate to
other devices. Set to Off, USB, MIDI Out jack or
USB+MIDI jack options.
MIDI CC In
Denes how the CC (control change) input from
external devices is handled. Set to Off, USB, MIDI
In jack, USB+MIDI In jack.
MIDI CC In channel
Sets the MIDI channel that is used to receive CC
(control change) messages. Select All channels or
Ch 1-16.
MIDI Middle C
Sets Tracker Mini’s middle C as C-3, C-4, C-5, C-6.
This will calibrate the note ranges to external gear
if this does not naturally match.
MIDI Clock Sync Delay
Latency compensation for incoming clock
synchronisation. Options range from -50 to +50
with each unit = 1/250 of pattern step. Leave at the
default 0.0 unless there are synchronisation errors.
Menu Option Description
Project Recording Options
This option sets the recording options for the
project. To record velocity from an external
controller one of the velocity inclusive options
should be selected.

249
Polyend Tracker Mini Manual
248
Polyend Tracker Mini Manual
NOTESNOTES
MIDI
11
MIDI
11
11.3 Typical MIDI Congurations
There are many congurations that can be set up with MIDI gear. Some are
complex and involve multiple devices while a simple set up can have two
devices communicating. Some typical examples are shown.
Tracker Mini: Cong > MIDI
Tracker Mini: Steps Set for MIDI
Output
USB MIDI
Instrument; M01 = MIDI Channel 1
FX1; a 50 = MIDI CC A, Value of 50
Clock In
Clock out
Transport in
Transport out
Notes In
Notes in channel
MIDI out
CC in
CC in channel
Middle C
Clock sync delay
Internal
MIDI Out jack
Internal
MIDI Out jack
Off
ALL
MIDI Out jack
Off
ALL
C-5
0.0
Example Conguration 1: Tracker Mini as the primary lead.
MIDI OUT
Note Instr
FX1
FX2
Play Rec
Master Volume
Insert Menu
Delete Copy
Shift
Line In MIDI InLine Out MIDI Out
21 3 4
+
-
+
-
Master Volume
C5 M01 a 50 - - - -
The settings in the cong menu will depend on:-
• How the devices are connected together? Are the devices
connected by USB? Which will transmit and receive MIDI with the
MIDI 5 Pin connection using the MIDI Jack adapter?
• Which device will be a primary leader (main controller e.g. main
clock) or a secondary follower (will respond to other gear as the lead
control e.g. synchronised to another clock)?
• Will MIDI note data (melodies, chords, etc) be communicated?
• Will MIDI CC continuous control change data be communicated (to
change parameters like delay level or trigger performance effects)?
▌ ACCESSING THE MIDI CONFIG OPTIONS
1. Press [Shift] + [4] or [Menu] to select ‘Cong’ conguration menu.
2. In the rst column, select ‘MIDI’. Use the 1
st
and 2
nd
Screen button to
navigate. Alternatively use (Left) or (Right) to navigate across menus
and Press [+] / [-] or (Up), (Down) to select a function.
3. The ‘MIDI’ Options will be available in the central menu window. Use the
4
th
and 5
th
Screen button to navigate. Alternatively use (Left) or (Right)
to navigate across menus and Press [+] / [-] or (Up), (Down) to select a
function.
4. Press [Change], 6
th
Screen button to edit the option that is highlighted.
5. Use the 4
th
and 5
th
Screen button to navigate to the desired parameter
setting. Alternatively use (Left) or (Right) to navigate across menus and
Press [+] / [-] or (Up), (Down) to choose a setting.
6. Press [Apply], 6
th
Screen button to conrm the option that is highlighted.
CC D
11
Velocity
127
CC A
40
CC B
5
CC C
7
Offset
0
CC F
117
CC E
64
Prg Chg
Chan AT
64 Sust
65 Port
12
13
12
13
12
13
51
52
CC A can be set in the instrument
parameter page. CC A set to 40 for
control change in this example,
transmitted with the value in the step
HY B R I D S Y N T H E S I Z E R
OSCILLATO RS PLAY MOD E
FILTER
ENVELOPE
MIXER
VOLUME
LFO
Transport control e.g. Play, Stop and
Clock is dictated by Tracker Mini
and its current Tempo.
Polyend Medusa will follow the lead
of Tracker Mini as will other devices.
Devices should be congured to receive clock and transport and the MIDI Channel which Tracker
Mini communicates, for example, Channel 1. CC 40 In Medusa represents the Filter Cutoff
frequency in this example each step in Tracker will set the lter cutoff.
A 2
nd
device as an extended part of
the MIDI Network.
Drum Machine
MIDI IN
MIDI THRU MIDI IN

251
Polyend Tracker Mini Manual
250
Polyend Tracker Mini Manual
NOTES
The ability to connect to a PC or Mac via a MIDI connection is possible, which can allow software
synths and plug-ins to be controlled by Tracker Mini. Tracker Mini will need a hub or will need to be
powered by the PC / Mac as the USB connection is the source of power for Tracker Mini.
Note Instr
FX1
FX2
Play Rec
Master Volume
Insert Menu
Delete Copy
Shift
Line In MIDI InLine Out MIDI Out
21 3 4
+
-
+
-
Master Volume
An external device, keyboard or drum pads can be connected to control
Tracker Mini by MIDI either by USB or via the 5 Pin MIDI dongle. Notes can
be played or recorded and CC messages controlling assigned parameters.
MIDI
11
MIDI
11
Link EXT TAP
102.00
1 Plugin A 2 MIDI
MIDI From MIDI From
Tracker Mini
Master Tracker Mini
Ch. 2
In In
2
1
s
s
Auto Auto
Monitor Monitor
Audio To MIDI To
A
Sends
B
1.53
0
12
24
36
48
60
Tracker Mini: Cong > MIDI
Tracker Mini: Steps Set for MIDI Output.
Instrument; M02 = MIDI Channel 2
Notes out melody to the PC or Mac.
USB MIDI
Tracker Mini can also record MIDI Incoming ie from a DAW using in live recording
mode, [Rec] + [Play]. Tracker Mini Middle C adjusted from C-5 to C-3 to match
Ableton Live and Channel 5 set for Notes In
Clock In
Clock out
Transport in
Transport out
Notes In
Notes in channel
MIDI out
CC in
CC in channel
Middle C
Clock sync delay
Internal
USB
USB
USB
USB
CH5
USB
Off
ALL
C-3
0.0
Transport control e.g. Play, Stop can be set
by DAW or Tracker Mini. It is advised to
dened which device controls the clock.
MIDI settings in the Live preferences page will need to be
set ‘On’ for MIDI Ports, Input & Output. When controlling to/
from Tracker Mini. External function, in Live should be on to
use external sync settings and tempo is synchronised from
Tracker Mini.
MIDI on Channel 2 from Tracker
Mini’s steps, controls the plugin
synth in the Live track.
MIDI on Channel 5 from Lives
track notes, controls the
instrument in Tracker Mini.
Example Conguration 2: Tracker Mini in / out with Ableton Live.
USB
MIDI OUT
C5 M02 - - - - - - - -
E5 M02 - - - - - - - -
G5 M02 - - - - - - - -
Ch. 5
Off
Off
Tracker Mini: Cong > MIDI
The keyboard will control the current
instrument in Channel 1.
USB MIDI
Notes can be recorded in live
recording mode. The note and note off
messages are captured in the steps.
Control change (CC) assignments
Clock In
Clock out
Transport in
Transport out
Notes In
Notes in channel
MIDI out
CC in
CC in channel
Middle C
Clock sync delay
MIDI In jack
Off
MIDI In jack
Off
MIDI In jack
CH1
Off
MIDI In jack
CH2
C-5
0.0
Transport control e.g. Play, Stop and
Clock is dictated by an external
devices as is current Tempo.
Optional controller used for control
change (CC) messages on channel 2
Keyboard or Pad controller used for MIDI note information on
channel 1. To record variable velocity into Tracker Mini make sure
the [Menu] >Cong > General > ‘Recording Options’ have a Velocity
option enabled. Otherwise velocity is recorded at xed value.
Example Conguration 1: Tracker Mini as the secondary follower.
MIDI OUT MIDI OUT
Function CC #
Performance Mode Tracks CC41 - CC48
Performance Mode Effects CC51 - CC62
Master Mixer Levels CC71 - CC78
Delay & Reverb Mix CC79 & CC80
Dry Mix CC81
Line In Level CC82
A#3 16 - - - - - - - -
OFF -- - - - - - - - -
ARTURIA
YOUR EXPERIENCE - Y OUR SOUND
PITCH MOD
RESET
Transpose
Append Clear Last Restart
Keyboard MIDI CH
1 2 3 4 5 6 7 8 9 10 11 12 13 14 15 16
10% 25% 50% 75% 90% Off 53% 55% 57% 59% 61% 64% 67% 70% 73% 75%
Gate Swing
Rest / TieSeq / Arp Mode Time Div Rate
1/4
1/Up
1/8
2/Dwn
1/16
3/Inc
1/32
4/Exc
1/4T
5/Rand
1/8T
6/Order
1/16T
7/Up x2
1/32T
8/Dwn x2
Chord
KEYSTEP
CONTROLLER & SEQUENCER
Seq
Arp
Kbd Play
(C)
HOLD SHIFT
-
+
Tap
Note Instr
FX1
FX2
Play Rec
Master Volume
Insert Menu
Delete Copy
Shift
Line In MIDI InLine Out MIDI Out
21 3 4
+
-
+
-
Master Volume
MIDI IN
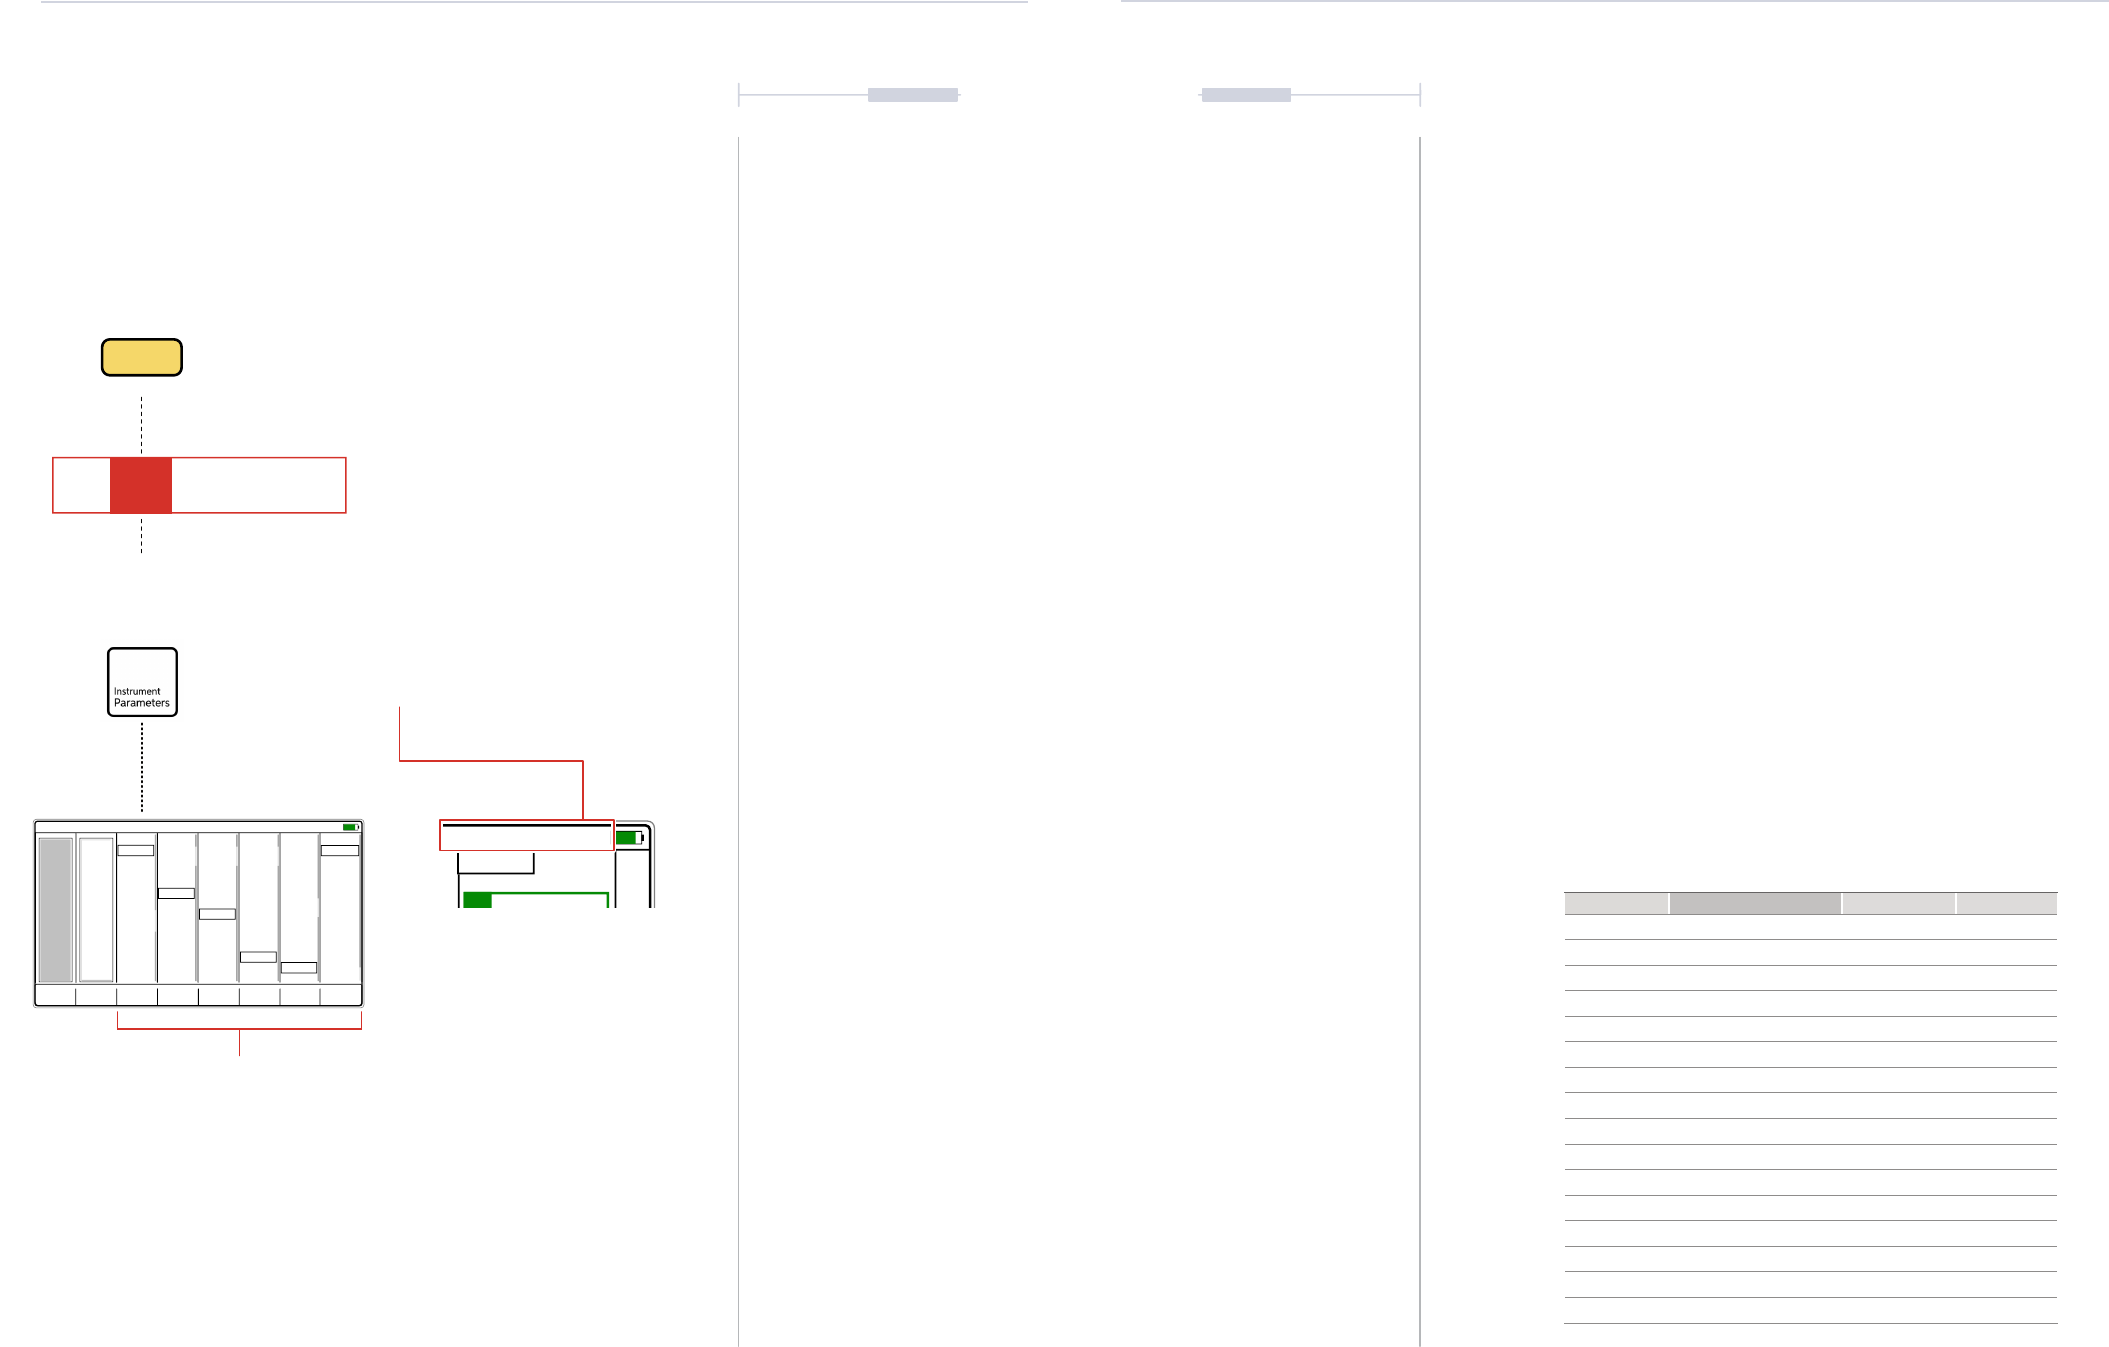
253
Polyend Tracker Mini Manual
252
Polyend Tracker Mini Manual
NOTESNOTES
MIDI
11
MIDI
11
11.4 MIDI Instrument Overview
Tracker Mini has a series of MIDI Instruments that can be assigned to steps
in a pattern. MIDI is dened per step, not per track, so MIDI and Audio
instruments can reside on the same track in the same pattern. A MIDI
instrument essentially denes the MIDI channel on which to transmit data
out and also gives access to the instruments MIDI parameters.
The Instrument parameters will reect the MIDI output options available
when selecting a step with a MIDI instrument congured. The Note is set in
the step and will be sent on the channel dened in the MIDI instrument. The
default velocity can also be set for MIDI out.
The same general process is followed when working with MIDI steps as
with audio steps. More details are covered in a prior section.
▌ CREATING A MIDI NOTE OUTPUT STEP
1. Press [1] to select the Pattern Mode page.
2. Select the target step to edit. Use (Up), (Down) to scroll top to bottom.
Press (Left), (Right) to select a track. Example Row 1 of Track 1. The
step should be highlighted with the green bounding box.
3. Press [Rec] to switch to recording mode. The step bounding box will
turn red and allow editing of the step.
4. Note: Hold [Note] + [+] / [-] to set a note for the step.
Also with the note already selected, use [+] / [-] to change it’s value.
5. Instrument: Hold [Instrument] + [+] / [-] or (Up) (Down) to change to an
instrument from the 51 to 61 list. Each one will represent a MIDI
channel where the step messages will be transmitted. The Instrument
will be indicated with an ‘M’ in the instrument slot for the step.
CC D
11
Velocity
127
CC A
74
CC B
5
CC C
7
Offset
0
CC F
117
CC E
64
MIDI Instrument Parameters 51. MIDI Channel 1
116
117
120 SOff
124
127
118
121 Rst
125
Prg Chg
119
123 NOff
122 Locl
126
Chan AT
52
53
56
60
63
54
57
61
64 Sust
55
59
58
62
65 Port
0 Bank
1 ModWh
4 Foot
8 Balnc
11 Exp
2 Brth
5 Glide
9
12
3
7 ChVol
6 Data
10 Pan
13
0 Bank
1 ModWh
4 Foot
8 Balnc
11 Exp
2 Brth
5 Glide
9
12
3
7 ChVol
6 Data
10 Pan
13
0 Bank
1 ModWh
4 Foot
8 Balnc
11 Exp
2 Brth
5 Glide
9
12
3
7 ChVol
6 Data
10 Pan
13
73
74
77
81
84 Porta
75
78
82
85
76
80
79
83
86
CC Outputs
Congure the 6 CC Outputs A-F,
used from a step FX1 or FX2
The instrument selection has a dedicated
button when working in the pattern.
Instruments 51-66 constitute the preset MIDI Instruments. Each of
these represents a MIDI channel 1-16. A MIDI instrument is tagged
with an ‘M’ in the step conguration.
The default velocity to send out can be applied as well as MIDI Latency compensation in the Offset parameter
This illustration shows several MIDI instruments set for MIDI Channel 2. The notes values will be sent on the
dened channel to a connected device such as another synth or DAW. MIDI Out would need to be set correctly
in the Cong > MIDI parameters to transmit the note values over MIDI.
The MIDI transmitted will be based on the project tempo. Also remember that tempo FX can be applied to steps
which would also affect the MIDI output timing.
The instrument parameters are accessible directly and are specic
to the currently selected instrument and it’s MIDI Channel.
1
C5 M02
----
----
-- --- ---- ----
-- --- ---- ----
----
-- --- ---- ----
A 4
A 4
P-20
2
3
4
Track 4
52. MIDI Channel 2
Instr
C5 M02 - - - -- - - -
M02
Instrument # Name Step Tag MIDI Channel
51 MIDI Channel 1 M01 1
52 MIDI Channel 2 M02 2
53 MIDI Channel 3 M03 3
54 MIDI Channel 4 M04 4
55 MIDI Channel 5 M05 5
56 MIDI Channel 6 M06 6
57 MIDI Channel 7 M07 7
58 MIDI Channel 8 M08 8
59 MIDI Channel 9 M09 9
60 MIDI Channel 10 M10 10
61 MIDI Channel 11 M11 11
62 MIDI Channel 12 M12 12
63 MIDI Channel 13 M13 13
64 MIDI Channel 14 M14 14
65 MIDI Channel 15 M15 15
66 MIDI Channel 16 M16 16

255
Polyend Tracker Mini Manual
254
Polyend Tracker Mini Manual
NOTESNOTES
MIDI
11
MIDI
11
11.6 MIDI CC Out
Continuous Control Change messages, also called CC, can be sent from
Tracker Mini on a step by step basis. While note message will trigger the
notes on other gear, CC initiates a parameter change, for example to adjust
Pan or Filter Cutoff on another device. These would need to be matched at
Tracker Mini end to align to the parameter on the external device. Six CC
parameter slots A-F exist in Tracker Mini that can be allocated a CC and
then used in FX1 or FX2 of a step.
CC D
11
Velocity
127
CC A
74
CC B
5
CC C
7
Offset
0
CC F
117
CC E
64
MIDI Instrument Parameters 51. MIDI Channel 1
116
117
120 SOff
124
127
118
121 Rst
125
Prg Chg
119
123 NOff
122 Locl
126
Chan AT
52
53
56
60
63
54
57
61
64 Sust
55
59
58
62
65 Port
0 Bank
1 ModWh
4 Foot
8 Balnc
11 Exp
2 Brth
5 Glide
9
12
3
7 ChVol
6 Data
10 Pan
13
0 Bank
1 ModWh
4 Foot
8 Balnc
11 Exp
2 Brth
5 Glide
9
12
3
7 ChVol
6 Data
10 Pan
13
0 Bank
1 ModWh
4 Foot
8 Balnc
11 Exp
2 Brth
5 Glide
9
12
3
7 ChVol
6 Data
10 Pan
13
73
74
77
81
84 Porta
75
78
82
85
76
80
79
83
86
11.5 Handling MIDI Velocity
The velocity of notes triggered by steps is set by default in the MIDI
instrument parameter page. This ranges from 0-127. An FX1 or FX2, ‘V’
Step effect can also be applied which will dene the velocity specically for
the step. External gear will receive the note message with the dened
velocity transmitted.
Recording of note data can be performed from external gear into Tracker
Mini in Live Recording mode using [Rec] + [Play]. To be able to record
velocity, the Cong > General > ‘Recording Options’ would need a velocity
option to be set i.e. 3 or 4 from the lost below. The options are:-
1. Only Notes: Records only quantized notes into a pattern.
2. Microtiming: Records notes with microtiming into a pattern.
3. Velocity: Records quantized notes and velocity into a pattern.
4. Microtiming + Velocity: Records notes with microtiming and velocity
into a pattern.
Note D2 recorded for instrument 8 at a recorded
velocity of 47. Note Step FX Velocity range is 0-100.
Recording options set to ‘Velocity’
Note E1 recorded for instrument 8 at a recorded
velocity of 100. Note Step FX Velocity range is 0-100.
Recording options set to ‘Velocity’
D2 08
- - - - V 47
E1 08
- - - - V100
The instrument will assign the MIDI Channel on
which to communicate Note and CC messages.
For example MIDI Channel 2
FX1 or FX2 can be assigned by a CC command a-f
representing the 6 CC slots setup in the instrument
parameters A-F. Also a value to send is applied.
CC Numbers are assigned to a CC slot A-F in the
instrument parameter page.
Sends Note C5 across MIDI Channel 2 at the
default velocity in the MIDI Instrument parameters
Sends Note C5 across MIDI Channel 2 at the
velocity value of 23.
The FX value in Tracker Mini is based on a range of 0-100, however most devices and DAWs use a
velocity range of 0-127. Bear this in mind when applying and recording FX velocity
a - MIDI CC A
b - MIDI CC B
c - MIDI CC C
d - MIDI CC D
e - MIDI CC E
f - MIDI CC F
This illustration shows that Control Change 74 is assigned to CC A, which in turn is assigned as FX2
with a value of 23. If, for example, Elektron Digitakt is the receiving device, this step will send a
message to control the lter cutoff.
MIDI Note Data MIDI Comms Channel MIDI CC Number MIDI CC Value
Step NOTE Step Instrument Instrument Parameters Step FX Value
C5 M02 - - a 23- -
C5 M02
- - - - - - - -
C5 M02
- - - -
V 23
Instr
FX1
FX2

257
Polyend Tracker Mini Manual
256
Polyend Tracker Mini Manual
NOTES
MIDI
11
MIDI
11
▌ CREATING A MIDI CC OUTPUT STEP
1. Ensure the Cong > MIDI settings are set to send MIDI. Use [Shift] + [4]
or [Menu] to select the conguration options.
2. Press [1] or select from [Menu] the Pattern Mode page.
3. Select the target step to edit. Use (Up), (Down) to scroll top to bottom.
Press (Left), (Right) to select a track. Example Row 1 of Track 1. The
step should be highlighted with the green bounding box.
4. Press [Rec] to switch to recording mode. The step bounding box will
turn red and allow editing of the step.
5. Hold [Instrument] + Press [+] / [-] or (Up) (Down) to select a MIDI
instrument from listed options 51 to 66. Each will represent a MIDI
channel to transmit the step messages. The Instrument will be indicated
with an ‘M’ in the instrument slot for the step. Example M01.
6. Hold [FX1] or [FX2] + Press [+] / [-] or (Up) (Down) to set a CC for the
step. This will be one of the 6 options a-f. The selected option will show
as a lower case letter in the step FX slot. Example: ‘a’ is MIDI CC A.
7. With the FX selected, Press [+] / [-] to set it’s CC value. A series of steps
could for example be lled with a ramp up of values. This can be
changed later. Example: Set to 50.
8. Press [2] to select the ‘Instrument Parameter’ page. MIDI message
options are presented given the instrument is a MIDI Channel.
9. Press a screen button to select a CC Slot that matches the FX
selection. Example, Press [CC A], 3
rd
Screen button to match the MIDI
CC A selected in step 6 above.
10. Press [+] / [-] or (Up) (Down) to scroll the CC parameter lists. Highlight
with the bounding box the CC number to assign. This would typically be
based on the MIDI CC conguration on a receiving device. Example:
CC 74 is Filter Cutoff on Elektron’s Digitakt.
11. In this example, CC Number 74 (set in step 10 above) will transmit a CC
value of 50 (set in step 7 above) over MIDI Channel 1 (set in step 5
above) when the selected step is triggered.
The MIDI CC outputs in the Instrument Parameters list follows MIDI standards. Many of the CC’s
are undened. Check the MIDI conguration for any connected devices to know what CC will affect
which parameter. This list is available for each of the 6 CC Assignments A - F. Also the Program
Change 128, Channel Aftertouch 129 and Polyphonic Aftertouch 130 can also be congured here.
CC # Function CC # Function CC # Function CC # Function
0
Bank (MSB)
32
Bank (LSB)
64
Sustain
96
Data Increment +
1
Mod Wheel (MSB)
33
Mod Wheel (LSB)
65
Portamento
97
Data decrement -
2
Breath Control (MSB)
34
Breath Control (LSB)
66
Sostenuto
98
NRPN LSB
3 35 67
Soft Pedal
99
NRPN MSB
4
Foot Pedal (MSB)
36
Foot Pedal (LSB)
68
Legato
100
RPN LSB
5
Glide (MSB)
Portamento Rate
37
Glide (LSB)
Portamento Rate
69
Hold 2
101
RPN MSB
6
Data Entry (MSB)
38
Data Entry (LSB)
70 102
7
Channel Volume (MSB)
39
Channel Volume (LSB)
71 103
8
L/R Balance (MSB)
40
L/R Balance (LSB)
72 104
9 41 73 105
10
Pan (MSB)
42
Pan (LSB)
74 106
11
Expression Pedal (MSB)
43
Expression Pedal (LSB)
75 107
12 44 76 108
13 45 77 109
14 46 78 110
15 47 79 111
16 48 80 112
17 49 81 113
18 50 82 114
19 51 83 115
20 52 84
Portamento Amount
116
21 53 85 117
22 54 86 118
23 55 87 119
24 56 88
High Denition Velocity
120
All sound off
25 57 89 121
Reset all
26 58 90 122
Local On / Off
27 59 91 123
All notes off
28 60 92 124
29 61 93 125
30 62 94 126
31 63 95 127

259
Polyend Tracker Mini Manual
258
Polyend Tracker Mini Manual
MIDI
11
MIDI
11
11.7 MIDI CC In
Control change messages can be received by Tracker Mini. The CC In
would need to be set in the [Menu] > Cong > MIDI menu along with the CC
In channel for the MIDI channel. The MIDI CC Mapping within Tracker Mini
has a set of pre-dened destinations for CC messages.
CC # Function CC # Function
41
Performance Effect Track 1 Pattern Select
71
Master - Track Mixer Track 1 Volume Level
42
Performance Effect Track 2 Pattern Select
72
Master - Track Mixer Track 2 Volume Level
43
Performance Effect Track 3 Pattern Select
73
Master - Track Mixer Track 3 Volume Level
44
Performance Effect Track 4 Pattern Select
74
Master - Track Mixer Track 4 Volume Level
45
Performance Effect Track 5 Pattern Select
75
Master - Track Mixer Track 5 Volume Level
46
Performance Effect Track 6 Pattern Select
76
Master - Track Mixer Track 6 Volume Level
47
Performance Effect Track 7 Pattern Select
77
Master - Track Mixer Track 7 Volume Level
48
Performance Effect Track 8 Pattern Select
78
Master - Track Mixer Track 8 Volume Level
51
Performance Effect Slot 1 Value - Top Row
79
Master - Global Mixer Delay Mix
52
Performance Effect Slot 2 Value - Top Row
80
Master - Global Mixer Reverb Mix
53
Performance Effect Slot 3 Value - Top Row
81
Master - Global Mixer Dry Mix
54
Performance Effect Slot 4 Value - Top Row
82
Master - Global Mixer Line Input
55
Performance Effect Slot 5 Value - Top Row
56
Performance Effect Slot 6 Value - Top Row
57
Performance Effect Slot 7 Value - Top Row
58
Performance Effect Slot 8 Value - Top Row
59
Performance Effect Slot 9 - Top Row
60
Performance Effect Slot 10 Value - Top Row
61
Performance Effect Slot 11 Value - Top Row
62
Performance Effect Slot 12 Value - Top Row
11.8 Program Change
Tracker Mini has the ability to send program change messages. These are
MIDI standard messages which trigger a change to the current ‘program’ of
an external device by switching presets or congurations. This of course
will be dependant on the program / bank / preset structure and operation of
the receiving device. Often synths use banks and presets so the behaviour
of the device from a program change may vary.
Program change is congured as a CC parameter using number 129.
NOTESNOTES
D6
D6
D6
03
03
03
----
----
----
----
----
----
D6
D6
D6
03
M01
03
----
----
----
----
----
----
D4
D4
D4
04
04
04
----
----
----
----
----
----
D6
D6
03
03
----
----
V 65
V 65
D4
D4
D4
04
04
04
----
----
----
----
----
----
D6
E6
M01
03
M01
M01
a 01
V 50
a 02
a 03
m 50
----
----
------
--
D4
D4
D4
04
04
04
----
----
----
C 50
C 50
C 50
D6
G6
D6
03
M01
03
----
----
----
----
----
----
Track 3
Track 3
Pattern 1
Pattern 2
Example
Track 4
Track 4
MIDI Channel 1, with a Program Change, 129
assigned to CC A. The value will trigger the
program selection, in this example 01.
A Program Change is activated slightly ahead of
the note. However it may be better to trigger the
program change on a step prior to the note step
or at the end of a previous pattern sequence and
use micro move ‘m’ to adjust the timing.
The receiving device may have a conguration
that is not an exact match. For example a
program may start at 1 rather than 0. The offset
may need to be taken into account in the Tracker
Mini step program change message.
MIDI Channel 1, with a Program Change, 129
assigned to CC A. The value will trigger the
program selection, in this example 02.

261
Polyend Tracker Mini Manual
260
Polyend Tracker Mini Manual
NOTESNOTES
MIDI
11
MIDI
11
While integration with Polyend Play is a build in feature for mapping Play’s
controls, other MIDI controllers can also be used with an Instrument
Synthesiser accessed through the Instrument Parameter page.
Instrument Synthesizer Mode
Notes on using MIDI Synthesiser Mode:-
• The external device must be congured to match the MIDI
Synthesizer CC controls and general Tracker Mini MIDI
conguration, i.e. Channel etc.
• Tracker Mini’s sequencer must be stopped to use as a MIDI
synthesizer.
• The Instrument Synthesizer mode page does not have to be
displayed to operate. The last selected instrument will be the one
used for the synthesizer control from an external controller.
InstrumentsCC List
Note: To use Tracker as a synthesizer, the sequence must be stopped.
Instrument Synthesizer 2. Guitar0m:00s P1.008
1. Strange Sample Number 1Tune = 5
2. GuitarFineTune = 3
4. Snare OnePanning = 10
5. Closed Hat 1Filter type = 9
6. Selection0001Cutoff = 1
7.Resonance = 11
8.Overdrive = 12
9.Bit Depth = 13
10.Reverb Send = 14
11.Delay Send = 15
12.Volume Automation Type = 20
13.Volume Attack - Shape LFO = 21
3. Transient KickVolume = 7
Volume
10.00 dB
Panning
-25
Tune
0
Cutoff
100
Finetune
0
Resonance
0
Filter Type
Low-pass
More
Instrument Parameters 1/2 0m:00s P1.008
Disabled
Low-pass
High-pass
Band-pass
1.Analog 3 18p
1.Analog 3 18p
Overdrive
0
Bit depth
16
Reverb send
-inf dB
Delay send
-inf dB
Instrument
Synthesizer
Back
Instrument Effects
0m:00s P1.008
11.9 MIDI Synthesizer
The MIDI synthesizer mode is a feature that allows integration when
controlling Tracker Mini from an external MIDI device and by controlling up
to 8 voices across MIDI. Tracker Mini will operate as a secondary follower
to an external controller which will be able to play and control Tracker Mini’s
instruments. This also brings a tight integration between Tracker, Tracker
Mini and Polyend Play, where the MIDI CC is pre-mapped.
Select the Instrument Parameter page using [2] or from the [Menu]. The
Instrument Synthesizer, accessed with [More] then [Instrument Synthesizer].
The right window will allow selection of
the instrument to control. The instrument
selected will be shown in the top bar.
The left window will display, as a
reference, the Tracker Mini parameter
MIDI CC numbers.
Instrument Parameters 1/2
Instrument Effects
Other MIDI Devices can be used with Tracker Mini’s
MIDI Synthesizer mode to control the instruments.
The rotary controls in play will be automatically
mapped to have full integrated over MIDI CC with
Tracker Minis selected instruments. Play can
control Tracker Mini with the pads.
MIDI IN MIDI OUT
MIDI OUT
Beatstep Pro
Tracker Mini:
[Menu] > Cong > MIDI
Play:
Menu > MIDI > CC Mapping > Jack Channel 1
Choose: Set Values for Polyend Tracker Mini
Clock In
Clock out
Transport in
Transport out
Notes In
Notes in channel
MIDI out
CC in
CC in channel
Middle C
Clock sync delay
MIDI In jack
Off
MIDI In jack
Off
MIDI In jack
CH1
Off
MIDI In jack
CH1
C-5
0.0
Note Instr
FX1
FX2
Play Rec
Master Volume
Insert Menu
Delete Copy
Shift
Line In MIDI InLine Out MIDI Out
21 3 4
+
-
+
-
Master Volume
21 3 4

263
Polyend Tracker Mini Manual
262
Polyend Tracker Mini Manual
NOTESNOTES
MIDI
11
MIDI
11
Synthesizer Mode - MIDI CC Congurations
CC # Function CC # Function
5 Tune 83 Cutoff Automation Type
3 Finetune 84 Cutoff - Attack - Shape LFO
7 Volume 85 Cutoff - Decay - Speed LFO
9 Filter Type 86 Cutoff Sustain
1 Cutoff 87 Cutoff Release
11 Resonance 88 Cutoff Amount
12 Overdrive 102 Wavetable Position Automation Type
13 Bit Depth 103 Wavetable Position - Attack - Shape LFO
14 Reverb Send 104 Wavetable Position - Decay - Speed LFO
15 Delay Send 105 Wavetable Position Sustain
20 Volume Automation Type 106 Wavetable Position Release
21 Volume - Attack - Shape LFO 107 Wavetable Position Amount
22 Volume - Decay - Speed LFO 108 Granular Position Automation Type
23 Volume Sustain 109 Granular Position - Attack - Shape LFO
24 Volume Release 110 Granular Position - Decay - Speed LFO
25 Volume Amount 111 Granular Position Sustain
26 Panning Automation Type 112 Granular Position Release
27 Panning - Attack - Shape LFO 113 Granular Position Amount
28 Panning - Decay - Speed LFO 114 Finetune Automation Type
29 Panning Sustain 115 Finetune - Attack - Shape LFO
30 Panning Release 116 Finetune - Decay - Speed LFO
31 Panning Amount 117 Finetune Sustain
118 Finetune Release
▌ SETTING UP A MIDI SYNTHESIZER
1. Ensure the external device is congured to set MIDI CC as per the
Tracker Mini CC assignments in the MIDI Synthesizer page. Also that
the MIDI conguration is matched, for example same MIDI channel.
2. Connect the external controller to Tracker Mini, for example using the
MIDI In connection and a MIDI cable between devices. Tracker Mini
uses a MIDI dongle to convert between MIDI 5 Pin DIN and Mini Jack.
3. To get the reference of CC congurations set up as default for Tracker
Mini, Press [2] for the Instrument Parameter page 1 or use the [Menu].
4. Press [More] which is the 8
th
Screen button to display the Instrument
effects page.
5. Press [Instrument Synthesizer] Screen Button.
6. The CC’s are displayed in the left window as a reference. There is no
selection in this page window as this is shown only as a guide.
7. To select an instrument as the destination target from the MIDI
controller and as the synthesizer instrument, scroll the right window to
select the desired instrument. This is also displayed in the top row.
8. The lists can be scrolled with the screen buttons. If the window is
selected, highlighted red, the (Up) and (Down) or the [+] / [-] buttons.
9. The instrument parameters will adjust when controlled by the external
MIDI controller. The changes are animated real time on the instrument
parameter displays.

Performance mode is a special Tracker Mini
feature which creates an environment aimed at
live and real-time performances. Ideal when
playing a live gig or improvising and showing
off skills of live remixing, performing and on-
the-y creativity. These variations and punch-
in effects bring fun and challenge in a live
performance environment and expand the
creativity in using Tracker Mini. Perform mode
can be accessed from the [Menu] options. The
perform page has 12 effect slots. Think of the
performance effects as presets where a
dened offset from the default parameter value
can be applied either momentarily or as a xed
change. Up to 21 effects are available for
loading into the 12 available slots. The effect
slot is selected with (Right) (Left) buttons to
select from the 12 effects, giving 4 value
options per effect. The four effect values are
then triggered by using the four [+] / [-] buttons.
These can be applied when playing patterns or
a complete song. Muting can also be managed
for tracks in perform mode. Track patterns can
be remixed and combined together with the
performance effects and with instrument
adjustments. This can create a comprehensive
basis for live performance. A dedicated ‘top row’
of values can also be controlled externally using
MIDI. This MIDI option can also be used to
control the effect values and the track pattern
selection. The performance template by default
is saved globally. However this can be set in the
‘Cong’ menu to be saved on a per project basis.
Perform brings a different dimension to Tracker
Mini, taking the handheld ‘programming’ of
songs or patterns into a more live performance
and improvisation environment.
Performance Mode
12
265
Polyend Tracker Mini Manual
264
Polyend Tracker Mini Manual
NOTES

267
Polyend Tracker Mini Manual
266
Polyend Tracker Mini Manual
Performance Mode
12
Performance Mode
12
12.1 Performance Mode Overview
Performance mode allows real time improvisation control over tracks,
patterns and songs adding variation and interest when playing live. This is
normally handled in the [Menu] ‘Perform’ page although MIDI Input can also
be set to control the performance parameters.
Rec
Track 1
Patt: 1
---
---
-1
-1
-1
---
---
-1
-1
-1
---
---
-1
-1
-1
---
---
-1
-1
-1
---
---
-1
-1
-1
---
---
-1
-1
-1
---
---
-1
-1
-1
---
---
-1
-1
-1
---
---
-1
-1
-1
---
---
-1
-1
-1
>>>
>>>
/16
/16
/16
---
---
-1
-1
-1
Track 2
Patt: 1
Track 3
Patt: 1
Track 4
Patt: 1
Track 6
Patt: 1
Track 5
Patt: 1
Track 7
Patt: 1
Track 8
Patt: 1
Performance FX
Volume
High-pass cutoff
Sample end
Tune
Delay send
Sample Playback
Panning
Band-pass cutoff
Low-pass cutoff
Sample position
Reverb send
Volume LFO
0m:00s P1.028
Punch In Effects
12 Congurable
performance effect slots
MIDI CC
Indicates the top row, MIDI
CC controllable values.
Track Selection
Selects which tracks will be
affected by the performance
effects applied, indicated red.
Punch In Parameters
4 Effect parameter values.
Triggered by [+], [+], [-], [-]
Perform Slot Trigger
Each [+] / [-] buttons trigger the respective effect value row.
The effect values are congurable with row 1, by default set to off (- - -).
Performance Mode
Press [Menu] to access and navigate the options. Select the ‘Perform’ option and display the performance mode
screen. Editing parameters and conguring the effects is handled in [Rec] record mode]. It is possible to cycle
between pattern and song pages while performance mode is active.
REC Mode
Press [Rec] to edit the perform conguration. The selections will be
indicated red as will the effect selection bounding box. Effects can
be congured and the values edited when in Rec mode of Perform.
Track 1
Patt: 1
---
---
-100
+100
-50
---
---
-1
-1
-1
---
---
-5
+5
-7
---
---
-1
-1
-1
---
---
-1
-1
-1
---
---
-1
-1
-1
---
---
-1
-1
-1
---
---
-1
-1
-1
---
---
-1
-1
-1
---
---
-1
-1
-1
>>>
>>>
/16
/16
/16
---
---
-1
-1
-1
Track 2
Patt: 1
Track 3
Patt: 1
Track 4
Patt: 1
Track 6
Patt: 1
Track 5
Patt: 1
Track 7
Patt: 1
Track 8
Patt: 1
Performance FX
Volume
High-pass cutoff
Sample end
Tune
Delay send
Sample Playback
Panning
Band-pass cutoff
Low-pass cutoff
Sample position
Reverb send
Volume LFO
0m:00s P1.028
Selected effects are indicated green or red (if editing) on the Tracker Mini screen
Playback Status
Shows pattern loop playback
or full song playback
Perform Status
Shows Performance Mode
is active.
+
-
+
-
12.2 Perform - Quick Start
Assuming the effects are set up, values in place then real-time
improvisations can be performed. Think of performance effects as applying
parameter value variations as an offset from the current setting.
▌ WORKING LIVE WITH THE PERFORM
1. Press [Menu] and open the ‘Perform’ Page for Performance Mode.
2. Press [Track 1] - [Track 8], screen buttons to select the tracks for
applying effects On (red) or Off. Only the selected, red lit tracks will be
affected by the triggered performance effects.
3. Press [Play] to play a pattern or [Shift] + [Play] to play a song, also
toggles between song and pattern play. The display header will show
the pattern or song playback symbol and the perform mode symbol.
4. To punch in an effect:-
• Select an effect slot to punch in, Press (Left] (Right) to navigate to
the target effect column.
• Press one of the four [+] [+] [-] [-] buttons to apply the effect value
change. The buttons represent top to bottom, the effect row values.
The top [+] represents top row 1 and the lower [-] represents bottom
row 4.
• Multiple effect values can be applied at the same time by selecting
the column slot and and value for triggering using [+] / [-]
5. The effect is retained once pressed. To clear the effect, Press the upper
[+] button for the effect, row 1. Top row 1 is reserved for restoring the
default, i.e. effect off. The top row value cannot be changed.
6. To temporarily play and adjust a value on the y ensure [Rec] mode is
off. Hold [+] / [-] for any of the 4 values to change then (Up) or (Down).
The value is reset to its original state when the buttons are released.
7. The effect will apply an offset to the current value of the parameter
affected. The value to apply will be as stated in the parameter row. For
example, set pitch offsets for lead or bass tracks.
8. Hold [Shift] + Press [Track x], Screen buttons to Mute / Unmute.
0m:00s P1.028
0m:00s P1.028
Pattern Play
Song Play
NOTESNOTES
- - -
-5
+5
-7
Row 1 Value
Row 2 Value
Row 3 Value
Row 4 Value

269
Polyend Tracker Mini Manual
268
Polyend Tracker Mini Manual
Performance Mode
12
Performance Mode
12
12.3 Selecting Tracks
Effects triggered in performance mode will only affect selected tracks.
These are selected using the screen buttons and will be indicated in red.
Tracks can also be muted from within the perform page.
▌ SELECTING TRACKS TO APPLY PERFORMANCE EFFECTS
1. Press [Menu] and open the ‘Perform’ Page for Performance Mode.
2. Press [Track 1] to [Track 8], these are buttons that are represented by
the 8 screen buttons. This will toggle selection on or off.
3. A selected track will be lit red in the screen button label. Any
performance effect triggered will apply to only the selected tracks.
Tracks showing unlit will be audible but the effect will not be applied.
▌ MUTING TRACKS IN THE PERFORM PAGE
1. Press [Menu] and open the ‘Perform’ Page for Performance Mode.
2. Press [Shift] + [Track 1] to [Track 8], represented by the 8 screen
buttons. This will toggle mute on or off.
3. A muted track will be labelled to reect the state when pressing [Shift].
In the normal display a muted track screen button text label is shown in
black, while text for an unmuted, audible track is displayed in white.
-1
-1
-1
-1
-1
-1
-1
-1
-1
-1
/16
/16
-1
-1
Track 4
Patt: 1
Track 6
Patt: 1
Track 5
Patt: 1
Track 7
Patt: 1
Track 8
Patt: 1
NOTESNOTES
Track 7
Red = Effect will be applied
White Text = Unmuted
Track 5
Red = Effect will be applied
Black Text = Muted
Track 8
Unlit = Effect not applied
White Text = Unmuted
Track 6
Unlit = Effect not applied
Black Text = Muted
12.4 Perform Effect Values
Each of the congured effects has four slots which hold the value for the
effect. These are triggered by the four [+] / [-] buttons. The top row is
reserved as a default ‘off’ and the other three values are set relative to the
current effect parameter value. In addition a ‘top row’ of values are available
to be controlled by MIDI CC inputs from external gear if desired.
---
---
-100
+100
-50
Volume
Value 2 - Pad Row 2
Triggers the chosen effect
value for the selected tracks
---
-5
+5
-40
Value
Value is referenced as an offset applied to the current setting for the effect. The rst row,
value offset is off by default to allow a quick revert to the default state.
For example, with volume set at -10dB, the values are offset by each value, when triggered.
To temporarily edit and play an effect
With [Rec] Mode OFF, Hold [+] / [-] for the desired row and press (UP) or (Down). The value
will change and effect applied temporarily. The value is reset to its original value when the
buttons are released.
Current Volume = -10dB
-15dB
-5dB
-50dB
Value 1 - Pad Row 1
Sets the chosen effect to ‘off’.
MIDI CC Option
Controlled by external gear.
Triggered Effect Value. Actual Value.
Value 3 - Pad Row 3
Triggers the chosen effect
value for the selected tracks
Value 4 - Pad Row 4
Triggers the chosen effect
value for the selected tracks
[+] / [-] are used to trigger the effect value
+
+
-
-
+
+
-
-
+
+
-
-
+
+
-
-
+
+
-
-

271
Polyend Tracker Mini Manual
270
Polyend Tracker Mini Manual
Performance Mode
12
Performance Mode
12
▌ SETTING A TRACK PATTERN
1. Playback stopped.
2. Press [Menu] and open the ‘Perform’ Page for Performance Mode.
3. Hold [Track 1] to [Track 8] Screen button + Press (Up) or (Down). This
selects the pattern assigned to the chosen track. These can also be
changed during playback as a real-time performance and remix
technique.
▌ CHANGING PERFORM TEMPLATE SAVE BEHAVIOUR
1. Hold [Shift] + [4] or use [Menu] to select the ‘Cong’ Menu.
2. Ensure the left window is highlighted red i.e. in focus. Navigate windows
by pressing (Left) or (Right). Menu windows will automatically be
selected when pressing the relevant screen keys below the window to
navigate (Up) or (Down).
3. Press (Up) (Down) highlight with the bounding box over the ‘Project
Settings’ option. Alternatively press the relevant screen keys below the
left window to navigate (Up) or (Down).
4. Press (Up) (Down) to highlight with the bounding box over the
‘Performance presets’ option in the central window. Alternatively press
the relevant screen keys below the central window to navigate (Up) or
(Down).
5. To change the selected parameter / setting, Press [Change]. The
parameter pop-up window listing the available options will appear.
6. Press (Up) / (Down) or (Up) / (Down) Screen buttons to highlight the
desired option. The ‘Global’ setting will save the perform template for all
projects while ‘Per Project’ will save on an individual project basis.
Global is default.
7. Press [Apply] - 6
th
Screen button to conrm selection or [Cancel] - 3
rd
Screen button to exit without changing.
NOTESNOTES
12.5 Conguring Effects
Effects can be setup in record mode with up to 12 effects being congured
from a library of 21 performance effects. By default the performance preset
is saved on a global basis, but can be changed to be saved ‘per-project’ in
the ‘Cong’ settings.
▌ CREATING AN EFFECT TEMPLATE
1. Press [Menu] and open the ‘Perform’ Page for Performance Mode.
2. Press [Rec] to select record mode. Values and bounding box are red.
3. Navigate between effect slots, Press (Left) or (Right).
4. To cycle the effect selected for the chosen column slot, Press (Up) or
(Down) while in Rec mode. A total of 21 effect options available.
5. To swap effects, Hold [Shift] + (Right) or (Left). This will swap the
currently selected effect along with the values with the slot chosen. This
can be used as a creative option.
6. Hold [+] / [-] for one of the 4 slot rows to edit then Press (Up) or (Down)
incrementally change the value of the selected effect row. Press [+] / [-]
+ Hold (Up) (Down) to continuously increase or decrease. Top row 1 is
reserved to reset the default value and cannot be permanently changed
for many effects.
7. Repeat steps 3 - 5 for other effect slots. 12 slots are available.
8. Press [Rec] to turn record mode off.
Swap Effects
Hold [Shift] + (Right) / (Left)
Select Slot
Press (Right) / (Left)
Pad Row 1
MIDI CC Row
Pad Row 2
Pad Row 3
Pad Row 4
Change Effects
Press (Up) / (Down)
Track 1
Patt: 1
---
---
-100
+100
-50
---
---
-1
-1
-1
---
---
-5
+5
-7
---
---
-1
-1
-1
---
---
-1
-1
-1
---
---
-1
-1
-1
---
---
-1
-1
-1
---
---
-1
-1
-1
---
---
-1
-1
-1
---
---
-1
-1
-1
>>>
>>>
/16
/16
/16
---
---
-1
-1
-1
Track 2
Patt: 1
Track 3
Patt: 1
Track 4
Patt: 1
Track 6
Patt: 1
Track 5
Patt: 1
Track 7
Patt: 1
Track 8
Patt: 1
Performance FX
Volume
High-pass cutoff
Sample end
Tune
Delay send
Sample Playback
Panning
Band-pass cutoff
Low-pass cutoff
Sample position
Reverb send
Volume LFO
0m:00s P1.028
Rec

273
Polyend Tracker Mini Manual
272
Polyend Tracker Mini Manual
Performance Mode
12
Performance Mode
12
NOTESNOTES
12.6 Perform Effects List
Tracker Mini has 21 performance effects that can be selected and loaded
into each of the 12 effect slots. The same effect can be applied to multiple
slots. While these are called effects, they in fact control parameters that
apply variations to the parameter values.
12.7 Remixing
Tracker Mini can remix tracks on the y. There are two techniques worth
noting when applying track mixing. Firstly the ‘Pattern Play Mode’ effect has
20 custom algorithms C1-C20 that allow pattern mixing based on
predened shufing of existing patterns. This is called ‘Custom Play Mode’.
Secondly tracks can manually be remixed live when playing a song. Both
techniques operate in performance mode.
Custom Play Mode
▌ USING A CUSTOM PATTERN PLAY EFFECT
1. Press [Menu] and open the ‘Perform’ Page for Performance Mode.
2. Press [Rec] to select record mode. Current value rows and bounding
box are displayed red.
3. Navigate between effect slots, Press (Left) or (Right).
4. To load the effect for the selected slot, Press (Up) or (Down). Select the
‘Pattern Play Mode’ effect.
5. Hold [+] / [-] for the row to edit then Press (Up) or (Down) to change the
value of the specic effect row. Fwd = Forward, Rev = Reverse and Rnd
= Random options as well as ‘C’ options. Set the following example as a
starting point. Any C1-C20 value can be selected:-
• Pad row 2 is the 2
nd
row of effect values Set to C18.
• Pad row 3, is 3
rd
row of effect parameters. Set to C19.
• Pad row 4, is the 4
th
row of effect parameters. Set to C20.
6. It is possible to set up, other ‘Pattern Play Mode’ effects into other slots
to cover more of the other C1-C17 custom presets.
7. Press [Rec] to turn record mode off.
8. Trigger the rows is now possible for the selected tracks using [+] / [-] to
activate the ‘C’ Algorithms set in perform slot. Also it is possible to make
dynamic and temporary changes by holding [+] / [-] for selecting the
Row 1 and Pressing (Up) (Down) when NOT in Rec mode. This will
clear when releasing the [+] / [-] button.
Effect # Name Range / Comments
1 Volume
-100 to +100.
Volume level adjustment
2 Panning
-100 to +100
Stereo Position
3 Tune
-48 to +48
Semitones. Also applies to MIDI.
4 Low-Pass Cutoff
-100 to +100.
Filter frequency adjustment
5 High-Pass Cutoff
-100 to +100.
Filter frequency adjustment
6 Band-Pass Cutoff
-100 to +100.
Filter frequency adjustment
7 Reverb Send
-100 to +100.
FX Send level
8 Delay Send
-100 to +100.
FX Send level
9 Sample Position
-100 to +100.
Audio sample start position
10 Sample End
-100 to +100.
Audio sample end position
11 Sample Playback
<<< >>>
Backward, Forward direction.
12 Volume LFO Speed
-28 to +28.
LFO Speed
13 Panning LFO Speed
-28 to +28.
LFO Speed
14 Finetune LFO Speed
-28 to +28.
LFO Speed
15 Filter LFO Speed
-28 to +28.
LFO Speed
16 Grain/WT LFO Speed
-28 to +28.
LFO Speed
17 Step Repeater
Off, 16, 12, 8, 6, 4, 3, 2, 1, 1/2, 1/3, 1/4, 1/6,
1/8, 1/12, 1/16.
18 Pattern Play Mode
Fwd, Back, Rnd, C1-C20
Fixed or Predened algorithm ‘C’ play modes
19 Pattern Length
1-128
Total length (all tracks - selected or not)
20 Bit Depth
-12 to +12
Bit depth adjustment
21 Overdrive
-100 to +100
Overdrive adjustment

275
Polyend Tracker Mini Manual
274
Polyend Tracker Mini Manual
Performance Mode
12
Performance Mode
12
NOTESNOTES
Manual Play Mode
▌ MANUALLY REMIXING PATTERNS ON THE FLY
1. Press [Menu] and open the ‘Perform’ Page for Performance Mode.
2. Ensure [Rec] mode is off.
3. Press [Shift] + [Play] to play the Song. The patterns can be remixed
across tracks while a song is playing so ensure that multiple patterns
are available in the song. The perform icon indicates remix is possible.
4. Remix track playback:-
• Hold [Track x], Screen button + Press (Left) or (Right). This will play
the newly selected pattern when the current one completes. The
pattern will ash red to show this is cued ready for the change.
• Hold [Track x], Screen button + Press (Up) or (Down). This will play
the newly selected pattern immediately upon selection.
• It is possible to hold one or more [Track x], Screen buttons at the
same time to select patterns for multiple tracks simultaneously.
4. The patterns will play, led by the longest ones which loop play while
shorter ones are cut.
5. Exit the performance mode. The changes made in performance mode
are disabled upon exit.
Patt: 3 Patt: 1
Change pending current
pattern completion
Flash Red
Change is implemented
immediately
Change Pattern
[Shift] + (Left) / (Right)
Change Pattern
[Shift] + (Up) / (Down)
Track 1
Patt: 1
---
---
-100
+100
-50
---
---
-1
-1
-1
---
---
-5
+5
-7
---
---
-1
-1
-1
---
---
-1
-1
-1
---
---
-1
-1
-1
---
---
-1
-1
-1
---
---
-1
-1
-1
---
---
-1
-1
-1
---
---
-1
-1
-1
>>>
>>>
/16
/16
/16
---
---
-1
-1
-1
Track 2
Patt: 1
Track 3
Patt: 1
Track 4
Patt: 1
Track 6
Patt: 1
Track 5
Patt: 1
Track 7
Patt: 1
Track 8
Patt: 1
Performance FX
Volume
High-pass cutoff
Sample end
Tune
Delay send
Sample Playback
Panning
Band-pass cutoff
Low-pass cutoff
Sample position
Reverb send
Volume LFO
0m:00s P1.028
Patt: 3
12.8 Controlling Performances with MIDI
An external MIDI controller can easily be assigned to control performance
effects in perform mode. The MIDI Incoming CC’s are predened for the 12
effect slots and the 8 track selections. The top row of the performance
effects are representative of the MIDI incoming values.
Ensure the MIDI settings for communication and the dened connection type are set correctly in the Cong
settings to ensure incoming MIDI control, clock, channel, transport etc are received correctly especially for
the incoming CC data.
Track 1
Patt: 1
---
---
-1
-1
-1
---
---
-1
-1
-1
---
---
-1
-1
-1
---
---
-1
-1
-1
---
---
-1
-1
-1
---
---
-1
-1
-1
---
---
-1
-1
-1
---
---
-1
-1
-1
---
---
-1
-1
-1
---
---
-1
-1
-1
>>>
>>>
/16
/16
/16
---
---
-1
-1
-1
Track 2
Patt: 1
Track 3
Patt: 1
Track 4
Patt: 1
Track 6
Patt: 1
Track 5
Patt: 1
Track 7
Patt: 1
Track 8
Patt: 1
Performance FX
Volume
High-pass cutoff
Sample end
Tune
Delay send
Sample Playback
Panning
Band-pass cutoff
Low-pass cutoff
Sample position
Reverb send
Volume LFO
0m:00s P1.028
MIDI
CC51 - CC62
Effect Value
MIDI
CC41 - CC48
Track Pattern Selection
Example: Beatstep
Congured with rotaries to control the CC51-CC62 which sets the effect value. These can also
have preset CC values triggered from the pads. The CC range on the controller is 0-127 which
will be reected across the range of the effect, which may be different. For example -100 to
+100 Panning range will be controlled by a 0 to 127 CC Value.
Rotaries can also be set to select a track and a pattern using CC41-CC48. The value will
represent the pattern which can also be assigned to a pad so that this triggers a specic pattern.

277
Polyend Tracker Mini Manual
276
Polyend Tracker Mini Manual
Performance Mode
12
Performance Mode
12
NOTESNOTES
12.9 Advanced Pattern Playback
The simple option is to press [Play] to start and stop pattern playback.
During playback a number of ‘on-the-y’ pattern changes can be performed.
This is more useful when improvising and performing.
▌ PLAYING PATTERNS - REFRESHER
1. Press [1] or use the [Menu] to select the Pattern page.
2. Press [Play] to play the current pattern.
3. Press [Play] to pause / stop a currently playing pattern.
4. Press [Shift] + [1] Then [Play] to play a song.
5. Hold [Shift] + [Track x] Screen button to mute or unmute a track when in
pattern page view..
▌ PLAYING PATTERNS - ADVANCED PLAYBACK
1. Press [1] to select the Pattern page.
2. Press [Play] to play the current pattern.
3. To sequentially change the pattern on the y:
• Hold [Pattern], 1
st
Screen button + (Left) or (Right) buttons to select
a new pattern. This will initiate a sequential pattern change which
awaits the end of the current pattern before switching to the new
pattern selection. Pattern text for the screen button ashes red
when cued.
• Hold [1] Default assigned pattern + (Left) or (Right) buttons to select
a new pattern. This will initiate a sequential pattern change which
awaits the end of the current pattern before switching to the new
pattern selection. Pattern text for the screen button ashes red
when cued.
4. To immediately change the pattern on the y:
• Press [1] + (Up) or (Down) buttons to select a new pattern. This will
initiate a pattern change immediately.
• Press [Pattern], 1
st
Screen button + (Up) or (Down) buttons to select
a new pattern. This will initiate a pattern change immediately.
• Press [Pattern], 1
st
Screen button + [+] or [-], for the new pattern.
This will initiate a pattern change immediately.

While on face value this section may appear
like the boring bit (I guess in many ways that
could be true), but don’t overlook the content.
While things like rmware updates are
considered infrequent or one off activities,
there are also some elements that at least are
useful to be aware of. There are some helpful
tips and advise that may guide if you are in a
sticky situation. Also there are some topics that
might be useful around housekeeping and
good disciplines in working with Tracker Mini.
But there are also some tips that may be
helpful beyond the administrative duties. For
example capturing screen images is an often
overlooked feature and can be an aid to storing
settings that you might want to refer to later or
share with others. The visual style and fonts for
the screen and pad brightness can be adjusted
and options on how these can be changed
based on personal taste are provided. Of
course the general rmware update options
are also covered in this section, although it is
recommended to always follow Polyend’s
guidelines and instructions with each rmware
release as it is possible these may change per
update. The current rmware version can be
checked in the startup screen and in the
rmware cong page. Registration of the device
is required to access downloadable content and
rmware updates. Registration is performed at
at Polyend.com. This section not only covers
system wide features but also is a catch all for
topics not covered elsewhere.
System
13
279
Polyend Tracker Mini Manual
278
Polyend Tracker Mini Manual
NOTES

281
Polyend Tracker Mini Manual
280
Polyend Tracker Mini Manual
System
13
System
13
NOTESNOTES
13.2 Generic Firmware Update
Firmware updates may be provided by Polyend from time to time, to x
bugs or add new features. The process of updating can be performed in
several ways. When performing updates it is strongly advised to follow the
Polyend instructions supplied with each update. The instructions here are a
generic guide.
▌ FIRMWARE UPDATE
1. Download the latest rmware. Access rmware updates for your device
from your registered account at Polyend.
2. Copy the downloaded .ptf rmware le into the /Firmware folder. This
can be found in the root directory of the SD Card.
3. Insert the SD card into Tracker Mini and power up
4. Hold [Shift] + [4] or use [Menu] to select the ‘Cong’ Menu.
5. Navigate to the ‘Firmware’ menu. In the central window, select the
rmware option to install.
6. Press [Conrm], Screen button.
7. The rmware will install and the on screen prompts provided will guide.
The install process is typically less than 1 minute.
8. Tracker Mini should restart, but press On/Off if a manual start is
required after 100% of the update is completed.
13.1 Device Registration
In order for Polyend to provide device support and to give access to future
rmware updates, your Tracker Mini must be registered on the Polyend
website.
▌ REGISTRATION / SUPPORT CHECKLIST
• Create an account at Polyend.com.
• Register your device, ie Tracker Mini in the relevant account section.
• Access rmware downloads in your account.
• Licence information is available at polyend.com/licenses/
Download rmware
[Menu]
‘Cong’ - ‘Firmware’ - [Conrm]
Sub Folders
SD Card
/Root Directory
/Firmware
PolyendTracker Mini_1.6.0.ptf
PolyendTracker Mini_1.7.0.ptf
PolyendTracker Mini_1.5.0.ptf
1
2
5 64

283
Polyend Tracker Mini Manual
282
Polyend Tracker Mini Manual
System
13
System
13
NOTESNOTES
13.4 Resetting the Conguration.
There may be occasions when the changes in congurations have caused
problems and tracking back is not possible. An example may be that MIDI
settings applied may need to be reset. The whole conguration settings can
be reset to the defaults. This is performed in the cong menu.
▌ RESETTING CONFIG
1. Hold [Shift] + [4] or use [Menu] to select the ‘Cong’ Menu.
2. In the main menu list select the ‘Firmware’ option using the screen
navigation buttons.
3. In the Firmware sub menu select ‘Reset Cong’.
4. Press [Apply], 6
th
Screen button and follow the prompts. Any previously
changed settings will be restored back to default values.
13.3 Emergency Firmware Update
Firmware updates are available from the polyend portal for your registered
device. A reset button is provided, recessed behind the rear panel for
emergency situations . A reset can be performed if there are issues with the
update method or to clear Tracker Mini issues but should not be used as a
regular process for updates.
▌ TRACKER MIDI & FIRMWARE RESET
1. Download the latest rmware. Access rmware updates for your device
from your registered account at Polyend.
2. Copy the downloaded .ptf rmware le into the /Firmware folder. This
can be found in the root directory of the SD Card. Also ensure any
previous update les remain in the rmware folder.
3. Insert the SD card into Tracker Mini.
4. Use a pin or thin object to press the internal reset button. This is located
on the bottom of the device to the left of the input and output jacks.
5. Tracker Mini will reset and search the rmware folder on the SD Card. A
random rmware will be selected and installed in order to recover
Tracker Mini to a working state. The install process is typically less than
1 minute duration.
Recessed reset button. Use a
pin or thin object to trigger reset
Bottom Edge / Input & Output Jacks
The reset option is useful if any lock ups or freezing occurs on Tracker Mini. It is not necessary in these
situations to download a new OS. It is advised to keep a series ofcial, known good, rmware releases in the
/rmware folder. For example 1.5.0, 1.6.0, 1.4.0. That way steps 4-5 can be performed in case of issues and
a random update will be performed from a known state. A manual update in the ‘cong’ menu to select the
latest version can then follow.

285
Polyend Tracker Mini Manual
284
Polyend Tracker Mini Manual
System
13
System
13
NOTESNOTES
13.5 User Interface Style.
The ability to change the display and pad style is available in the
conguration setting. This may be useful when working in different
environments and essentially is based on personal taste.
▌ CHANGING USER INTERFACE STYLE
1. Hold [Shift] + [4] or use [Menu] to select the ‘Cong’ Menu.
2. Navigate using the screen buttons to the ‘General’ menu option.
3. In the central sub menu, three user interface elements exist:-
• Display Brightness. Options are High (default), Medium and Low.
• Display Theme. Options are Original (default) or Monochrome.
• Display Font. Font for text. Options are original (default) or new.
4. To change the setting highlight the desired sub menu option using the
screen buttons or arrow keys.
5. Press [Change], 6
th
Screen button option. The available options as
listed above are presented. Use the screen navigation or arrows to
select the desired option.
6. Press [Apply], 6
th
Screen button option to conrm the selection.
7. The desired setting will be visible on the screen.
13.6 Assignable Function Buttons
Tracker Mini has 4 assignable buttons that are used to quickly access
operating modes and their pages. Each of physical buttons can have two
pages assigned, accessed directly and also using shift. The assignments
are found in the ‘Cong’ menu options under ‘Fn buttons binding’
Default Button Assignments
▌ EDITING THE FUNCTION KEY ASSIGNMENTS
1. Hold [Shift] + [4] or use [Menu] to select the ‘Cong’ Menu.
2. Navigate using the screen buttons to the ‘Fn buttons binding’ option.
3. In the central sub menu, the 8 assignments are displayed. To change
the highlighted option within the desired sub menu press the (Up) and
(Down) screen buttons or D-Pad Navigation buttons.
4. Press [Change], 6
th
Screen button option. The available page options
are presented. Use the screen navigation or D-Pad Navigation buttons
to select the desired option.
5. Press [Apply], 6
th
Screen button option to conrm the selection.
Optionally the [Cancel] option can be used if required.
6. The desired selection will be assigned to the function button selected.
This will be available when using the 4 physical buttons directly or with
the [Shift] button.
Shift
21 3 4
Button Combo Function Button Combo Function
Fn 1 Pattern Shift + Fn 1 Song
Fn 2 Instrument Parameters Shift + Fn 2 Sample Loader
Fn 3 Sample Playback Shift + Fn 3 File
Fn 4 Master Shift + Fn 4 Cong
Unassigned Perform Unassigned Sample Editor
Unassigned Games Unassigned Sample Recorder
Fn 1 Fn 3Fn 2 Fn 4

287
Polyend Tracker Mini Manual
286
Polyend Tracker Mini Manual
System
13
System
13
NOTESNOTES
13.8 Games
Tracker Mini can run NES ROM games, and a collection are supplied
readily available and stored in the SD Card games folder and accessed
through the ‘File’ options. NES ROM les can be found online but there may
be compatibility and performance issues with some. Some communities
online have tested various games for using with Tracker Mini. Load any
other NES ROM les into the games folder on the SD to access.
▌ ACCESSING THE GAMES
1. Hold [Shift] + [4] or use [Menu] to select the ‘Cong’ Menu.
2. Press [Games], 8
th
Screen button. This will present the list of available
games that are located in the SD Card /Games folder.
3. Scroll and navigate the list using the screen (Up) (Down) buttons or
(Up) or (Down) buttons.
4. Press [Game Sound], 7
th
Screen button for game sound on or off.
5. Press [Start], 8
th
Screen button to start the highlighted game.
6. Controls will vary depending on which game is playing. The typical key
commands for control are:-
• The (Up), (Down), (Right), (Left) D-Pad buttons for navigation.
• The [A] and [B], 1
st
and 2
nd
Screen buttons for control.
• [Sel Start], 8
th
Screen Button, Select/Start.
6. To exit a game, Press the top On/Off Button.
Additional, compatible .nes les can be
downloaded from the web and when located in
the /Games folder, will be accessible to Tracker.
Sub Folders
SD Card
/Root Directory
/Games
Alter_Ego
Chase
Lan
LawnMower
Utaco
ZoomingSecretary
Default Games List (.nes)
13.7 Screen Capturing
The ability to capture screen images from the currently displayed page is a
built in feature of Tracker Mini.
▌ SCREEN GRAB OF CURRENT IMAGE
1. Select the page to capture.
2. Press [Shift] + On/Off Button. This is the power on button located on the
top edge of the unit. This action is not accompanied by any visual or
audible acknowledgement of capture being completed.
3. The screen will be captured and saved onto the SD card as a .BMP
image le in the snapshots folder. A slight delay with a control response
may exist while a screen capture is in progress.
Sub Folders
Screen Captured Files
RGB 800 x 480 Windows BMP Format
SD Card
/Root Directory
/Snapshots
Snapshot_001.bmp
Snapshot_002.bmp
Snapshot_003.bmp
Snapshot_004.bmp
Snapshot_005.bmp
Snapshot_006.bmp

289
Polyend Tracker Mini Manual
288
Polyend Tracker Mini Manual
System
13
System
13
NOTESNOTES
13.9 SD Card Compatibility & Backing Up
It is always good practice to backup or even better have a spare SD Card
loaded and ready for use with Tracker Mini. The following information on
SD compatibility is important:-
• A 16GB SD Micro SD Card is supplied with Tracker Mini. Larger size
SD cards can also be used. Supplied SD Card is: Sandisk Ultra,
Micro SD, 16GB, HC1 A1.
• The format of the card must be FAT32 MBR (Master Boot Record).
Other formats will not be recognised.
• Some folders and sub folders are created by Tracker Mini based on
the process carried out. Sample folders for example will be split when
reaching 100 les.
• Tracker Mini uses the SD card in real time and will not function
without the SD card being installed. A ‘bad’ folder / le structure on
the SD card may also cause Tracker Mini problems.
• Some hidden folders exist for example the ‘workspace’ folder. It is
good practice to create a duplicate copy of the SD card for backup
purposes. Also if Tracker Mini does not boot up and crashes,
restoring the full original folder / les structure or using the backup SD
card is advised.
• Tracker Mini is supplied with an SD Card USB reader for use with
most Mac / PC’s which helps transfer les.
• Polyend typically provide pre-release rmware as open beta. While
this is great to get early insights into new features, by denition beta
releases will have inherent problems. Only use beta versions to help
test for bugs and features and do not use in a live gig or critical
production environment.
Tip: SD cards can be notorious in there levels of performance with various gear. This is mainly due
to the wide variety of speeds and specications available. Gear producers do not and in fact
cannot test every single SD specication or each of the manufacturers products. It is therefore
recommended to stick as close as possible to the same SD Card type that the gear producer
supplies with its gear. At least it is known that this SD card type will then have been tested
thoroughly with the device itself by the device manufacturer as well as the user community.
▌ BACKING UP THE SD CARD FOLDERS & FILES
1. This is recommended as a rst task when rst operating Tracker Mini to
have the original structure saved. Also periodic backups is important to
save the projects and les which will be created over time.
2. Use a compatible SD card reader or the supplied USB SD Adapter to
connect the SD card to a PC or Mac.
3. Use the le manager (depends on the PC/Mac Operating System) to
create a ‘Tracker Mini Backup’ Folder in your documents folder and
create a sub folder for each backup i.e. ‘Original SD Aug23’, ‘Backup1
SD May23’. It is good practice to name backup folders by date.
4. Select all of the folders in the SD Card root directory and copy them to
the PC/Mac clipboard.
5. Paste, the copied folders into the ‘Tracker Mini Backup’ sub-folder for
the specic backup.
6. Return the SD card to Tracker Mini for normal operation.
Sub Folders /Original SD Aug23
/Backup1 SD May23
SD Card
/Root Directory
Copy / Paste
Documents
/Tracker Mini Backup

291
Polyend Tracker Mini Manual
290
Polyend Tracker Mini Manual
System
13
System
13
NOTESNOTES
13.11 Ofcial Specications
Audio Input:
• Unbalanced Stereo, TS (Tip-Sleeve)
• Line Input:
• Audio Input Impedance: 29 kOhm Impedance.
• Input level: 8.2 dBu peak
• Signal to Noise Ratio: 90 dB.
• Microphone Input:
• Microphone Input Impedance: 2.9 kOhm Impedance
• input level: 8.2 dBu peak.
Audio Output
• Line Output:
• Output level 9 dBu peak (when 10k Ohm Load).
• Signal to Noise Ratio: 97 dB.
• Headphone Output:
• Output level: 17.6 dB (when 16k Ohm Load)
• Signal to Noise Ratio: 98 dB.
13.10 Hexadecimal Option
The classic Tracker’s typically used hexadecimal number format. This can
be a little daunting if unfamiliar and especially in the more modern age and
therefore a decimal number format is used as default. However, maybe for
the more nostalgic users, numbering in hex mode is also an option.
▌ CHANGING BETWEEN DECIMAL & HEXADECIMAL VIEW.
1. Hold [Shift] + [4] or use [Menu] to select the ‘Cong’ Menu.
2. Press (Up) or (Down), 1
st
& 2
nd
Screen buttons to navigate to the
‘General’ menu. The (Up) (Down) buttons also can be used.
3. In the central window pane, Press (Up) or (Down), 4
th
& 5
th
Screen
buttons to navigate to the ‘Numbering mode’ option. The arrow keys can
be used to navigate in the central pane.
4. Press [Change], 6
th
Screen button. The options to change will appear.
5. Press (Up) or (Down) to select between ‘Decimal, Steps from 0’ to use
standard decimal numbers starting at step 0, ‘Decimal, Steps from 1’
where the decimal system is used and steps start at 1, and the
‘Hexadecimal’ option for a classic tracker view.
6. Press [Apply], 6
th
Screen button.
Hexadecimal to Decimal Converter
Hex 1 2 3 4 5 6 7 8 9 A B C D E F
Dec 1 2 3 4 5 6 7 8 9 10 11 12 13 14 15

Index
14
293
Polyend Tracker Mini Manual
292
Polyend Tracker Mini Manual
NOTES

295
Polyend Tracker Mini Manual
294
Polyend Tracker Mini Manual
1-Shot Play Mode 118, 120, 122,
126, 134
A
Adding Steps 66
ADSR 115
Aggregate Device 212
Amplier 203
Arm 90
Arpeggiator 152
Audio Editing 200
Audio Effects 201
Audio Inputs 285
Audio Output 212
B
Backing Up 288
Backward Loop 120
Band Pass 168
Bass Boost 240
Bit Depth 172
Bitcrusher 204
Brightness 284
C
Chance 150
Chords 94
Chorus 204
Compressor 205
Cong 40, 46
Copy 8, 58, 76
Crop 203
D
D-Pad 8, 10–11
Delay 170, 204, 234
Delete 37
Deleting Steps 67
Disarm 90
Display Theme 284
Duplicate Pattern 56
E
Edit Steps 67
Effect 109, 232
Envelope 111, 115
EQ 241, 249
Equal Slicing 124
Equalizer 205–206, 241, 249
Euclidean Patterns 84–85
Expand Pattern 56
Export 194, 197
F
Fade In 211
Fade Out 211
File 285
Fill 79–81, 84, 86, 89
Filter 163
Finetune 165
Firmware Update 281–282
Flanger 205
Font 284
Forward Loop 120
Function Buttons 12, 285
FX Descriptions 138
FX Types 100
FX1 Button 8
FX2 Button 8
G
Games 287
Global Mixer 182
Granular 131
H
High Pass 169
I
Import Instruments 45
Inserting Steps 67
Instrument Automation 111
Instrument Button 8
Instrument Parameter 96, 104–106
Invert 59
K
Keyboard 36
L
LFO 111–112, 161–165
LFO Shape 112
LFO Speed 113
Limiter 205, 208, 238
Line Input 184
Live Recording 89, 91
Load 35
Loop 121
Low Pass 167
lower quality sample 45
M
Manual Recording 73
Manual Slicing 124
Master 180
Index
14
Index
14

297
Polyend Tracker Mini Manual
296
Polyend Tracker Mini Manual
Master Pages 180
Metronome 40, 62
Mic Input 186
Micro SD Card 7
Micro-Tune 144
MIDI 249
MIDI CC In 258, 261, 263, 266
MIDI CC Out 255
MIDI Conguration 247
MIDI Denitions 246
MIDI Instruments 252, 255
MIDI Messages 176
MIDI synthesizer 260
MIDI Velocity 254
N
None 140, 142
Normalizer 203
Note 92–93
Note Button 8
O
Off 141, 143, 145
Overdrive 166, 204
P
Page Map 30
Panning 143, 145, 162
Paste 58
Pattern 52–54, 58, 60
Pattern Length 55
Pattern Number 55
Pattern View 62, 64
Perform Effect Values 269
Perform Effects 272, 276
Pingpong Loop 120
Play 8
Play Mode 117
Playing Songs 226
Polyphony 94
Position 159, 164
Power On 9
Preview 73, 75
Previewing Tracks 228
Project 33–34, 38, 40
Project Management 35
Q
Quantize 90
Quick Reference Commands 20–21
QWERTY Keyboard 17, 29
R
Random 154, 156
REC 8
Recording Audio 188
Recording Mode 72
Recording Options 90
Render 94, 192–196
Reset 282
Reverb 171, 236
Reverse 203
Reverse Sample 158, 174
Roll 151
S
Sample Editor 200
Sample Editor Effects 202
Sample Formats 187
Sample Playback 117
Sampling 189
Saturation 240
Save 35–36
Saving 35
Screen Buttons 6, 8, 54
Screen Capturing 286
SD Card 288, 291
Sharing Instruments 134
Shift 8
Shrink Pattern 57
Slice 160
Song Mode 219
Space 240
Step FX Reference 139
Step Jump 77–78
Swing 147, 149, 151
Synthesizer Mode 261
T
Tap tempo 38
Tempo 38–39, 146, 148
Timestretch beat 210
Timestretch note 210
Track Mixer 181
Tracker Legacy Files 283, 285
Tracks 16, 61, 65
Index
14
Index
14


Copyright © 2023 by Polyend
All rights reserved. This book or any portion thereof may not be reproduced or
used in any manner whatsoever without the express written permission of the
publisher except for the use of brief quotations in a book review.
August 2023 - Tracker Mini OS 1.0.0
Manual Produced in the United Kingdom
by
www.synthdawg.com
Synthdawg
301
Polyend Tracker Mini Manual
300
Polyend Tracker Mini Manual

