
1. JIRA Service Desk Documentation . . . . . . . . . . . . . . . . . . . . . . . . . . . . . . . . . . . . . . . . . . . . . . . . . . . . . . . . . . . . . . . . . . . . . . . . . . 2
1.1 Install JIRA Service Desk . . . . . . . . . . . . . . . . . . . . . . . . . . . . . . . . . . . . . . . . . . . . . . . . . . . . . . . . . . . . . . . . . . . . . . . . . . . . . 2
1.1.1 Supported Platforms . . . . . . . . . . . . . . . . . . . . . . . . . . . . . . . . . . . . . . . . . . . . . . . . . . . . . . . . . . . . . . . . . . . . . . . . . . . . 2
1.2 Getting started with JIRA Service Desk . . . . . . . . . . . . . . . . . . . . . . . . . . . . . . . . . . . . . . . . . . . . . . . . . . . . . . . . . . . . . . . . . . . 3
1.2.1 Getting started for service desk admins . . . . . . . . . . . . . . . . . . . . . . . . . . . . . . . . . . . . . . . . . . . . . . . . . . . . . . . . . . . . . . 4
1.2.1.1 Set up your service desk . . . . . . . . . . . . . . . . . . . . . . . . . . . . . . . . . . . . . . . . . . . . . . . . . . . . . . . . . . . . . . . . . . . . 5
1.2.1.2 Create your service desk request types . . . . . . . . . . . . . . . . . . . . . . . . . . . . . . . . . . . . . . . . . . . . . . . . . . . . . . . . . 7
1.2.1.3 Make queues for your service desk teams . . . . . . . . . . . . . . . . . . . . . . . . . . . . . . . . . . . . . . . . . . . . . . . . . . . . . . . 10
1.2.1.4 Add your service desk agents . . . . . . . . . . . . . . . . . . . . . . . . . . . . . . . . . . . . . . . . . . . . . . . . . . . . . . . . . . . . . . . . 11
1.2.1.5 Customize and share your service desk . . . . . . . . . . . . . . . . . . . . . . . . . . . . . . . . . . . . . . . . . . . . . . . . . . . . . . . . 13
1.2.1.6 Bring your service desk to the next level . . . . . . . . . . . . . . . . . . . . . . . . . . . . . . . . . . . . . . . . . . . . . . . . . . . . . . . . 14
1.2.1.7 Get your customers started with JIRA Service Desk . . . . . . . . . . . . . . . . . . . . . . . . . . . . . . . . . . . . . . . . . . . . . . . 17
1.2.2 Getting started for service desk agents . . . . . . . . . . . . . . . . . . . . . . . . . . . . . . . . . . . . . . . . . . . . . . . . . . . . . . . . . . . . . . 17
1.2.2.1 What is Workflow . . . . . . . . . . . . . . . . . . . . . . . . . . . . . . . . . . . . . . . . . . . . . . . . . . . . . . . . . . . . . . . . . . . . . . . . . . 21
1.2.3 How JIRA and JIRA Service Desk Work Together . . . . . . . . . . . . . . . . . . . . . . . . . . . . . . . . . . . . . . . . . . . . . . . . . . . . . 21
1.2.4 How JIRA Service Desk Collects Analytics . . . . . . . . . . . . . . . . . . . . . . . . . . . . . . . . . . . . . . . . . . . . . . . . . . . . . . . . . . . 22
1.3 Setting up service desk users . . . . . . . . . . . . . . . . . . . . . . . . . . . . . . . . . . . . . . . . . . . . . . . . . . . . . . . . . . . . . . . . . . . . . . . . . . 22
1.3.1 Users, groups and project roles . . . . . . . . . . . . . . . . . . . . . . . . . . . . . . . . . . . . . . . . . . . . . . . . . . . . . . . . . . . . . . . . . . . . 25
1.3.2 Managing agents . . . . . . . . . . . . . . . . . . . . . . . . . . . . . . . . . . . . . . . . . . . . . . . . . . . . . . . . . . . . . . . . . . . . . . . . . . . . . . . 25
1.3.3 Managing customers . . . . . . . . . . . . . . . . . . . . . . . . . . . . . . . . . . . . . . . . . . . . . . . . . . . . . . . . . . . . . . . . . . . . . . . . . . . . 26
1.3.4 Managing collaborators . . . . . . . . . . . . . . . . . . . . . . . . . . . . . . . . . . . . . . . . . . . . . . . . . . . . . . . . . . . . . . . . . . . . . . . . . . 28
1.3.5 Configuring public signup . . . . . . . . . . . . . . . . . . . . . . . . . . . . . . . . . . . . . . . . . . . . . . . . . . . . . . . . . . . . . . . . . . . . . . . . . 29
1.3.6 Troubleshooting issues with user management . . . . . . . . . . . . . . . . . . . . . . . . . . . . . . . . . . . . . . . . . . . . . . . . . . . . . . . . 31
1.3.7 Setting up users with the version 1.x pricing . . . . . . . . . . . . . . . . . . . . . . . . . . . . . . . . . . . . . . . . . . . . . . . . . . . . . . . . . . 32
1.4 Setting up service desks for your projects . . . . . . . . . . . . . . . . . . . . . . . . . . . . . . . . . . . . . . . . . . . . . . . . . . . . . . . . . . . . . . . . . 33
1.4.1 Setting up request types . . . . . . . . . . . . . . . . . . . . . . . . . . . . . . . . . . . . . . . . . . . . . . . . . . . . . . . . . . . . . . . . . . . . . . . . . 34
1.4.1.1 Troubleshooting issues with request types . . . . . . . . . . . . . . . . . . . . . . . . . . . . . . . . . . . . . . . . . . . . . . . . . . . . . . 38
1.4.2 Designing Customer Portal . . . . . . . . . . . . . . . . . . . . . . . . . . . . . . . . . . . . . . . . . . . . . . . . . . . . . . . . . . . . . . . . . . . . . . . 39
1.4.2.1 Branding your Customer Portal . . . . . . . . . . . . . . . . . . . . . . . . . . . . . . . . . . . . . . . . . . . . . . . . . . . . . . . . . . . . . . . 40
1.4.2.2 Organizing your Customer Portal . . . . . . . . . . . . . . . . . . . . . . . . . . . . . . . . . . . . . . . . . . . . . . . . . . . . . . . . . . . . . . 40
1.4.3 Configuring JIRA Service Desk notifications . . . . . . . . . . . . . . . . . . . . . . . . . . . . . . . . . . . . . . . . . . . . . . . . . . . . . . . . . . 41
1.4.4 Opening up or restricting access to your service desk . . . . . . . . . . . . . . . . . . . . . . . . . . . . . . . . . . . . . . . . . . . . . . . . . . 41
1.4.5 Setting up the email channel . . . . . . . . . . . . . . . . . . . . . . . . . . . . . . . . . . . . . . . . . . . . . . . . . . . . . . . . . . . . . . . . . . . . . . 42
1.4.5.1 Managing the email channel . . . . . . . . . . . . . . . . . . . . . . . . . . . . . . . . . . . . . . . . . . . . . . . . . . . . . . . . . . . . . . . . . 44
1.4.5.2 Troubleshooting issues with the email channel . . . . . . . . . . . . . . . . . . . . . . . . . . . . . . . . . . . . . . . . . . . . . . . . . . . 45
1.5 Working on a service desk . . . . . . . . . . . . . . . . . . . . . . . . . . . . . . . . . . . . . . . . . . . . . . . . . . . . . . . . . . . . . . . . . . . . . . . . . . . . 46
1.5.1 Adding people to participate in requests . . . . . . . . . . . . . . . . . . . . . . . . . . . . . . . . . . . . . . . . . . . . . . . . . . . . . . . . . . . . . 46
1.6 Reports . . . . . . . . . . . . . . . . . . . . . . . . . . . . . . . . . . . . . . . . . . . . . . . . . . . . . . . . . . . . . . . . . . . . . . . . . . . . . . . . . . . . . . . . . . . 48
1.7 SLAs . . . . . . . . . . . . . . . . . . . . . . . . . . . . . . . . . . . . . . . . . . . . . . . . . . . . . . . . . . . . . . . . . . . . . . . . . . . . . . . . . . . . . . . . . . . . . 48
1.7.1 Reporting on SLAs . . . . . . . . . . . . . . . . . . . . . . . . . . . . . . . . . . . . . . . . . . . . . . . . . . . . . . . . . . . . . . . . . . . . . . . . . . . . . . 53
1.7.2 Example: Creating a basic SLA . . . . . . . . . . . . . . . . . . . . . . . . . . . . . . . . . . . . . . . . . . . . . . . . . . . . . . . . . . . . . . . . . . . . 54
1.7.3 Example: Creating an SLA that doesn't track continuous time . . . . . . . . . . . . . . . . . . . . . . . . . . . . . . . . . . . . . . . . . . . . 56
1.7.4 Example: Creating an SLA with multiple cycles . . . . . . . . . . . . . . . . . . . . . . . . . . . . . . . . . . . . . . . . . . . . . . . . . . . . . . . . 56
1.7.5 Managing SLA data . . . . . . . . . . . . . . . . . . . . . . . . . . . . . . . . . . . . . . . . . . . . . . . . . . . . . . . . . . . . . . . . . . . . . . . . . . . . . 57
1.8 Providing self-help resources for your customers with a knowledge base . . . . . . . . . . . . . . . . . . . . . . . . . . . . . . . . . . . . . . . . 58
1.9 JIRA Service Desk 2.3 Release Notes . . . . . . . . . . . . . . . . . . . . . . . . . . . . . . . . . . . . . . . . . . . . . . . . . . . . . . . . . . . . . . . . . . . 60
1.9.1 Issues resolved in JIRA Service Desk 2.3 . . . . . . . . . . . . . . . . . . . . . . . . . . . . . . . . . . . . . . . . . . . . . . . . . . . . . . . . . . . . 63
1.9.2 JIRA Service Desk 2.3.2 Release Notes . . . . . . . . . . . . . . . . . . . . . . . . . . . . . . . . . . . . . . . . . . . . . . . . . . . . . . . . . . . . . 63
1.9.3 JIRA Service Desk 2.3.3 Release Notes . . . . . . . . . . . . . . . . . . . . . . . . . . . . . . . . . . . . . . . . . . . . . . . . . . . . . . . . . . . . . 64
1.9.4 JIRA Service Desk 2.3.4 Release Notes . . . . . . . . . . . . . . . . . . . . . . . . . . . . . . . . . . . . . . . . . . . . . . . . . . . . . . . . . . . . . 64
1.9.5 JIRA Service Desk 2.3.5 Release Notes . . . . . . . . . . . . . . . . . . . . . . . . . . . . . . . . . . . . . . . . . . . . . . . . . . . . . . . . . . . . . 64
1.9.6 JIRA Service Desk 2.3.6 Release Notes . . . . . . . . . . . . . . . . . . . . . . . . . . . . . . . . . . . . . . . . . . . . . . . . . . . . . . . . . . . . . 65
1.10 Best practices . . . . . . . . . . . . . . . . . . . . . . . . . . . . . . . . . . . . . . . . . . . . . . . . . . . . . . . . . . . . . . . . . . . . . . . . . . . . . . . . . . . . . 65
1.10.1 Best practices for designing the Customer Portal . . . . . . . . . . . . . . . . . . . . . . . . . . . . . . . . . . . . . . . . . . . . . . . . . . . . . 65
1.11 Reference . . . . . . . . . . . . . . . . . . . . . . . . . . . . . . . . . . . . . . . . . . . . . . . . . . . . . . . . . . . . . . . . . . . . . . . . . . . . . . . . . . . . . . . . 66
1.11.1 JIRA Service Desk licensing . . . . . . . . . . . . . . . . . . . . . . . . . . . . . . . . . . . . . . . . . . . . . . . . . . . . . . . . . . . . . . . . . . . . . 67
1.11.2 JIRA Service Desk - JIRA Configuration . . . . . . . . . . . . . . . . . . . . . . . . . . . . . . . . . . . . . . . . . . . . . . . . . . . . . . . . . . . . 67
1.11.3 JIRA Service Desk permissions . . . . . . . . . . . . . . . . . . . . . . . . . . . . . . . . . . . . . . . . . . . . . . . . . . . . . . . . . . . . . . . . . . . 69
1.11.3.1 Standard permissions . . . . . . . . . . . . . . . . . . . . . . . . . . . . . . . . . . . . . . . . . . . . . . . . . . . . . . . . . . . . . . . . . . . . . 71
1.11.3.2 Using custom permission schemes . . . . . . . . . . . . . . . . . . . . . . . . . . . . . . . . . . . . . . . . . . . . . . . . . . . . . . . . . . . 75
1.11.3.3 Resolving permission scheme errors . . . . . . . . . . . . . . . . . . . . . . . . . . . . . . . . . . . . . . . . . . . . . . . . . . . . . . . . . . 76
1.11.4 Valiantys VertygoSLA powers JIRA Service Desk SLAs . . . . . . . . . . . . . . . . . . . . . . . . . . . . . . . . . . . . . . . . . . . . . . . . 78
1.12 Glossary . . . . . . . . . . . . . . . . . . . . . . . . . . . . . . . . . . . . . . . . . . . . . . . . . . . . . . . . . . . . . . . . . . . . . . . . . . . . . . . . . . . . . . . . . . 79
1.12.1 Administrator . . . . . . . . . . . . . . . . . . . . . . . . . . . . . . . . . . . . . . . . . . . . . . . . . . . . . . . . . . . . . . . . . . . . . . . . . . . . . . . . . 79
1.12.2 Agent - JIRA Service Desk . . . . . . . . . . . . . . . . . . . . . . . . . . . . . . . . . . . . . . . . . . . . . . . . . . . . . . . . . . . . . . . . . . . . . . 80
1.12.3 Collaborator . . . . . . . . . . . . . . . . . . . . . . . . . . . . . . . . . . . . . . . . . . . . . . . . . . . . . . . . . . . . . . . . . . . . . . . . . . . . . . . . . . 80
1.12.4 Customer . . . . . . . . . . . . . . . . . . . . . . . . . . . . . . . . . . . . . . . . . . . . . . . . . . . . . . . . . . . . . . . . . . . . . . . . . . . . . . . . . . . . 80
1.12.5 Customer Portal 1 . . . . . . . . . . . . . . . . . . . . . . . . . . . . . . . . . . . . . . . . . . . . . . . . . . . . . . . . . . . . . . . . . . . . . . . . . . . . . 80
1.12.6 Issue - JIRA Service Desk . . . . . . . . . . . . . . . . . . . . . . . . . . . . . . . . . . . . . . . . . . . . . . . . . . . . . . . . . . . . . . . . . . . . . . . 80
1.12.7 Issue type . . . . . . . . . . . . . . . . . . . . . . . . . . . . . . . . . . . . . . . . . . . . . . . . . . . . . . . . . . . . . . . . . . . . . . . . . . . . . . . . . . . . 81
1.12.8 Knowledge base . . . . . . . . . . . . . . . . . . . . . . . . . . . . . . . . . . . . . . . . . . . . . . . . . . . . . . . . . . . . . . . . . . . . . . . . . . . . . . 81
1.12.9 Queue - JIRA Service Desk . . . . . . . . . . . . . . . . . . . . . . . . . . . . . . . . . . . . . . . . . . . . . . . . . . . . . . . . . . . . . . . . . . . . . . 81
1.12.10 Report . . . . . . . . . . . . . . . . . . . . . . . . . . . . . . . . . . . . . . . . . . . . . . . . . . . . . . . . . . . . . . . . . . . . . . . . . . . . . . . . . . . . . 82
1.12.11 Request . . . . . . . . . . . . . . . . . . . . . . . . . . . . . . . . . . . . . . . . . . . . . . . . . . . . . . . . . . . . . . . . . . . . . . . . . . . . . . . . . . . . 82
1.12.12 Request form . . . . . . . . . . . . . . . . . . . . . . . . . . . . . . . . . . . . . . . . . . . . . . . . . . . . . . . . . . . . . . . . . . . . . . . . . . . . . . . . 82
1.12.13 Service-level agreement (SLA) . . . . . . . . . . . . . . . . . . . . . . . . . . . . . . . . . . . . . . . . . . . . . . . . . . . . . . . . . . . . . . . . . . 82
1.12.14 SLA tracker . . . . . . . . . . . . . . . . . . . . . . . . . . . . . . . . . . . . . . . . . . . . . . . . . . . . . . . . . . . . . . . . . . . . . . . . . . . . . . . . . 82

1.
2.
3.
JIRA Service Desk Documentation
the power of JIRA in the hands of your service desk team. JIRA Service Desk combines an intuitive experience with powerful SLAPut
management and realtime reporting.
Intuitive, user-friendly experience:
Filing requests is easier than ever with the intuitive and clean
interface of JIRA Service Desk's Customer Portal. Customers see
exactly what they need, and nothing more, in a language that they
actually understand! IT Teams get to speak in their language and
customers get to speak in theirs.
Customizable queues:
Ensure that everyone is always working on the right requests at
the right time with queues powered by the amazingly flexible JIRA
Query Language (JQL). Queues help your team to divide and
conquer requests in real-time as they arrive. Manual triage and
prioritization of your requests is a thing of the past!
Advanced Service Level Agreements:
Behind every great service desk team, you'll find great Service
Level Agreements (SLAs) helping them to deliver consistent and
awesome performance. With , you can set upJIRA Service Desk
advanced SLA metrics, report on performance in real-time and
drive your team forward with highly visible SLA targets.
Powered by JIRA:
Millions of developers around the world count on the power and
extensibility of JIRA to help them to manage their work. Now, IT
and operations teams can use that power too! Choose the JIRA
platform for your service desk and get your software teams and
your operations teams together and working in one system. One
system to set up, one system to maintain, one system to learn.
Install JIRA Service Desk
JIRA Service Desk is a JIRA add-on, which makes it easy to
install and set up through the Atlassian Marketplace.
Related pages
Upgrading to JIRA Service Desk 2.0
Before you begin
You must have the JIRA System Administrators .' ' global permission
If your JIRA instance is on a server that cannot access the internet, download JIRA Service Desk from the Atlassian
. Marketplace
JIRA Service Desk is available with the following language packs: Spanish, French, German, and Japanese.
Installing JIRA Service Desk
Log in to JIRA as a user with the .'JIRA System Administrators' global permission
Click the 'cog' icon on the top bar (or click if using an older version of JIRA) and select . The Administation Add-ons Universal
(UPM) page will be displayed.Plugin Manager
Install the add-on.
If you have downloaded JIRA Service Desk, click . Upload add-on
If you haven't, search for JIRA Service Desk and install it.
A confirmation message and the add-on details will display, if it is installed successfully.
Disabling JIRA Service Desk for a project
After you've installed JIRA Service Desk and began using it, you can disable a service desk for any specific project without
uninstalling JIRA Service Desk. To disable a service desk for a project, go to the project administration page and use the Service Desk
page to disable it.
Supported Platforms
This version of JIRA Service Desk is compatibile with the following versions of JIRA:
6.3.8 or later
JIRA Service Desk is installed as a JIRA add-on (plugin), hence JIRA Service Desk is supported on all platforms that are supported by JIRA.
Getting started with JIRA Service Desk
JIRA Service Desk overview
As introduced in this tutorial, JIRA Service Desk combines the productivity and power of the JIRA platform with an intuitive user
experience that your service teams can use to successfully maintain your focus on the customer. Throughout this tutorial, we will
reference the example of a new customer who uses JIRA Service Desk to send requests to his company's IT Team so he can get settled
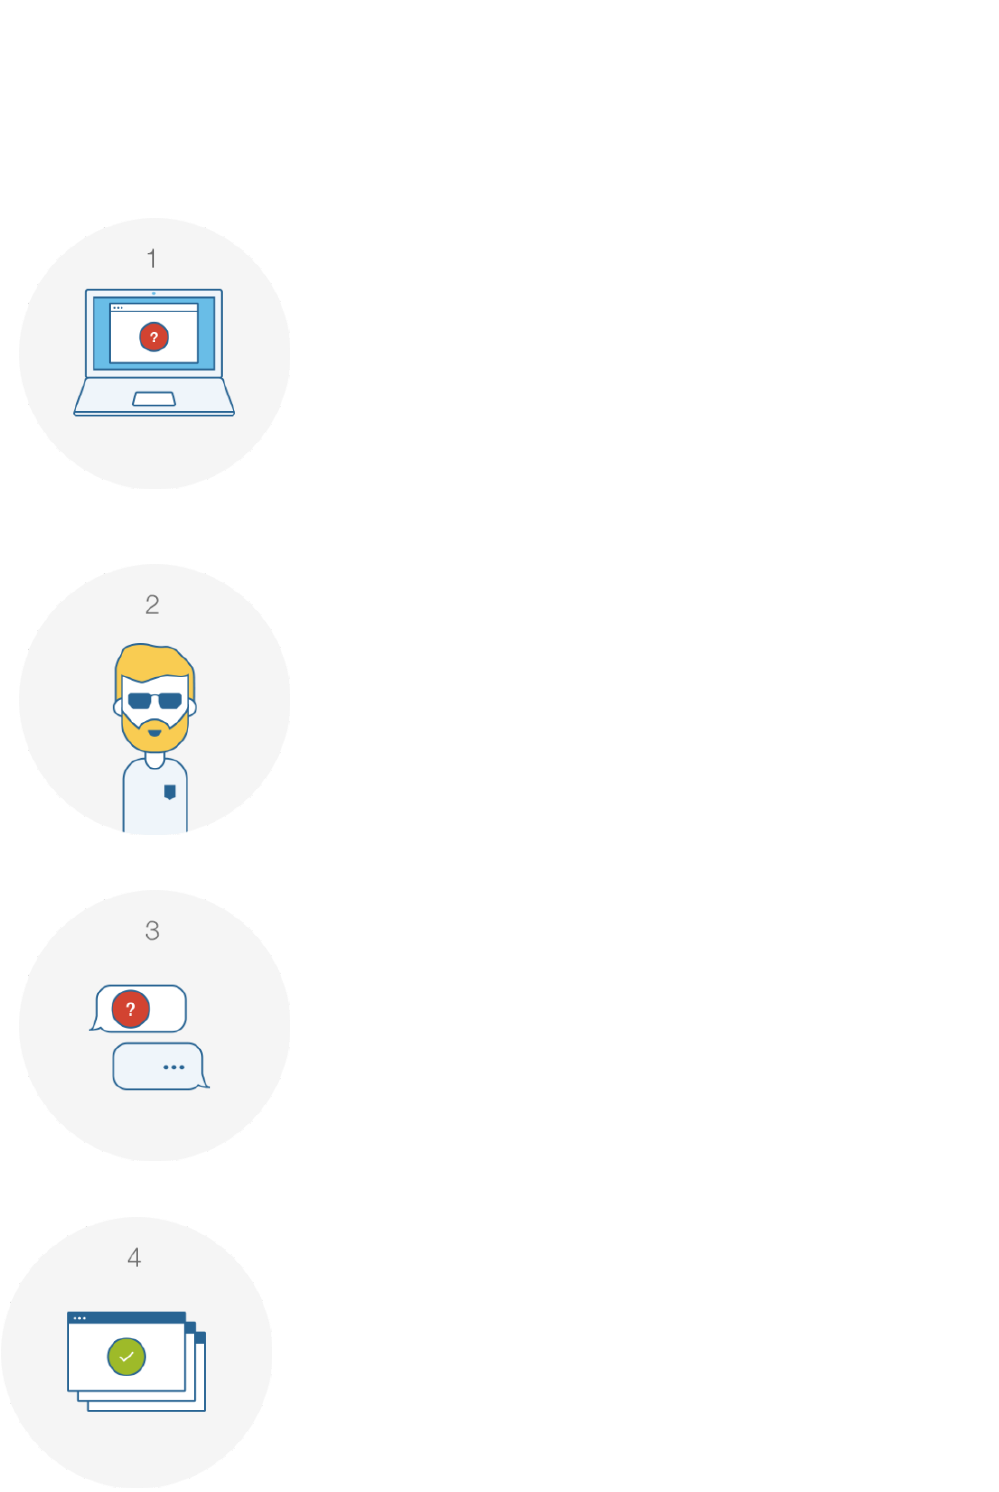
in his new role as quickly as possible. Here's how the customer and a service desk agent would work together to resolve a request using
JIRA Service Desk:
1 - Customer needs assistance
and submits a request to JIRA
Service Desk.
2 - Service desk agent picks up
the issue.
3 - Customer and service desk
agent discuss the problem.

4 - The customer is satisfied and
the service desk agent resolves
the issue!
Request vs. issue
A JIRA Service Desk request is what your customer submits to your service desk, while an issue is what an agent works on internally.
Customer view of a in the Customer Portal:request Service desk team view of an in JIRA:issue
JIRA Service Desk roles
There are four main roles in JIRA Service Desk: administrator, agent, collaborator and customer. This guide focuses on the
administrator, who sets up and configures JIRA Service Desk projects, and the agent, who works out of the preconfigured service desk
projects.
Admin
User with administrative rights for your service desk who can:
Access all features in JIRA Service Desk
Add and remove users to and from service desk projects
Configure the Customer Portal, request types, queues,
reports and SLA metrics
Perform all tasks outlined in Admin and Agent tutorials
Agent
User who works on and resolves customer requests who can:
Access the internal service desk interface
View the Customer Portal, queues, reports and SLA
metrics of assigned service desk projects
Add, edit and delete customer-facing and private
comments on issues
Manage knowledge base content
Ready to dive into JIRA Service Desk?
Click on the admin or agent buttons below to proceed.
Getting started for service desk admins
Welcome to JIRA Service Desk for admins! In this tutorial, we'll introduce you to your
workspace and walk you through the process of setting up a service desk project for your team
of agents and a corresponding customer-facing site (which we call the Customer Portal). We'll
be focusing on basic JIRA Service Desk features and tasks to help you get up and running
quickly. By the end of this tutorial, you will have:
Set up 1 service desk project
Added 3 agents
Prepared your Customer Portal to receive customer requests
Audience:
Service desk
administrators
Team
managers
Time: 30 minutes

1.
2.
3.
A quick look at JIRA Service Desk:
1 - Queues
As an admin, you will set up and configure queues for your
agents. Your agents can then view and work on issues that have
been triaged into these queues from this tab.
2 - People
This is where you can add new agents, customers and additional
admins to your project. You can see what each user group has
permission to access.
3 - Settings
This is where you will administer request types, email
communication channels and workflow statuses for your team.
You will also be able to customize the theme and branding of your
Customer Portal.
4 - Customer Portal
This link lets you view and navigate the customer view of your
service desk project.
Now that you are familiar with your service desk workspace, you can set up your own JIRA Service Desk site and add your first
project.
Set up your service desk
STEP 1 OF 5
Let's get your service desk ready to use by setting you up with a JIRA Service
DeskCloud site. Cloud is our hosted offering and will allow you to set up your own site without
installing a thing!
Sign up for a JIRA Service Desk site
If your team has an existing site, your administrator should have already granted you access to
the project you will be administering. Simply skip to the bottom of this page and click toNext
continue.
Signing up for JIRA Service Desk Cloud will provide you with a fully-functional JIRA Service
Desk site for one month.
Open in a new tab to view the signup page directly: this link
Follow the signup form steps to enter your site URL and admin username.
Once you have completed the signup process, grab a quick coffee (or tea, if that's your
preference) — it will take about 10 minutes for your JIRA Service Desk Cloud site to be
created. You will receive an email when your site is ready.

1.
2.
3.
4.
5.
Can't use Cloud?
If you cannot use
JIRA Service Desk
Cloud, instructions for
installing JIRA Service
Desk Server are
available below.
Installing
JIRA on
Windows
Installing
JIRA on Linux
Installing
JIRA on Mac
OS X
Create a project
JIRA Service Desk uses JIRA projects as the basis for the service desks you create. You can
set up separate projects for teams that have different configuration requirements and request
types. Let's get you set up with one project for a team managing office administration requests.
Click the link from your Welcome email to set your administrator password and log into
your new site.
Click in the top navigation bar of your site and select "Create aService Desk
Service Desk".
Select "New Service Desk Project". Choose a name and key for your project and click
:Create
Click on the Welcome to JIRA Service Desk page. You will be led throughGet started
a quick interactive product tour.
Come back to this tutorial when you have landed on this screen in your service desk
site:
Nice work! You now have a service desk site with one project. You will now learn to set up request types, which define the
requests customers can submit to your team's service desk project.

1.
2.
3.
4.
5.
Create your service desk request types
STEP 2 OF 5
Request types let you define and organize incoming issues so your service desk team can more
efficiently help your customers. If you're moving from an existing help desk application, you can
add your existing request categories during this step. If you're setting up service desk request
types for the first time:
Think about how your customer would write a request (e.g. 'Need a new monitor' vs
'Hardware Request');
Break things down into smaller chunks (e.g. 'Help with printer configuration', 'Help with
laptop problems', 'Help with software problems'); and
Avoid specialist terminology (e.g. 'I need access to a system' vs 'Deploy SSH key').
Here's what your request types page will look like by the end of this step:
Requests vs. Issues
Remember that
customers
submit trequests
o your service
desk and your
team picks up the
corresponding iss
to work onues
internally.
Create new request types
Your site comes with preconfigured request types (e.g. "Get IT help" and "Request a new
account"), but let's go ahead and add more to give you more practice.
Click the tab in JIRA Service Desk. You'll end up on the tabSettings Request types
by default.
Create a new request type, "Get wi-fi access", by filling in the , Icon Request
, , , and name Issue type Description Groups fields as shown. Click "
Add" when finished:
Click to change the request form fields that show up in the Customer Portal.Edit fields
These simplified fields help customers understand what information they need to
provide when submitting a request.
The "Summary" field should already be displayed in the Visible fields section. Click th
e Add a field button and select the "Priority" field to add this to the "Get wi-f- access"
request form.
Edit the and of the "Summary" field as shown. Click "Update"Display name Field help
when finished:

5.
6.
7.
8.
9.
Click the tab. The default JIRA workflow status names for theWorkflow Statuses
"Access" issue type will be displayed on the lefthand side. You might want to change
how these statuses appear to the customer filing a request. Enter the following
simplified status names on the righthand side as shown:
Click the tab to add one more new request type, "Need a new monitor"Request types
with the following details:
Click for this new request. On the tab, add the required "Due Date"Edit fields Fields
field (the "Summary" field will already be displayed).
On the tab, revise your workflow status names as shown below: Workflow Statuses
More on Workflow
Statuses: Each
request type maps to
a JIRA issue type
. You can read more
about how JIRA
Service Desk uses
JIRA issues in How
JIRA and JIRA
Service Desk Work
.Together
Organize your requests with groups

1.
2.
3.
1.
2.
3.
4.
A group is simply a label you can assign to each request type. Your request types will then be
organized into tabs in the Customer Portal based on these assigned groups. To add groups:
Click the tab and then use the column to change the following groupsSettings Groups
for each request type:
Request Type Group
"Need a new monitor" Purchase requests
"Get wi-fi access" Access requests
"Get IT help" General
"Request a new account" Access requests
Assign two groups ( and ) to the "Get wi-fi access" request toGeneral Access Requests
make this request type appear on two tabs in the Customer Portal and therefore easier
to find.
Click the link to see how JIRA Service Desk automatically sorts yourCustomer Portal
request types into tabs based on the groups you have added:
Create a request from the Customer Portal
Stay in the Customer Portal view so you can create test requests from a customer's
view.
Click "Get wi-fi access" and enter "Test wi-fi request" in the Summary (or "What do you
need?") field.
Click to view the open request in the Customer Portal. Create
Click to exit the customer view and return to your service desk admin view. Close
We think groupsTip:
are helpful if you have
requestseven or more
types.
1.
2.
3.
4.
5.
6.
Excellent work! You now have four request types and another test issues in your project. Next, you will learn how to sort these
issues into queues, which will allow you to manage your team's workload.
Make queues for your service desk teams
STEP 3 OF 5
Your teams will spend the majority of their time working out of the queues you set up. Agents do
not have the permissions to add new queues or configure existing ones; however, JIRA Service
Deskqueues allow you to automatically triage and prioritize issues for them. If you want your
team to focus on requests that must be completed by next week, for example, you can set up a
queue that only contains requests with a set due date in that week.
Your instance comes with preconfigured queues (e.g. "Unassigned issues"), but let's go ahead
and create three new queues for your team:
Click the tab and then select . Queues New Queue
Name your first new queue "Access requests".
Define the issues you want to appear in this queue by selecting the following
drop-down menus: (select "Access"); (select "Waiting for IT Team"), and Type Status
(select "Unresolved"): Resolutions
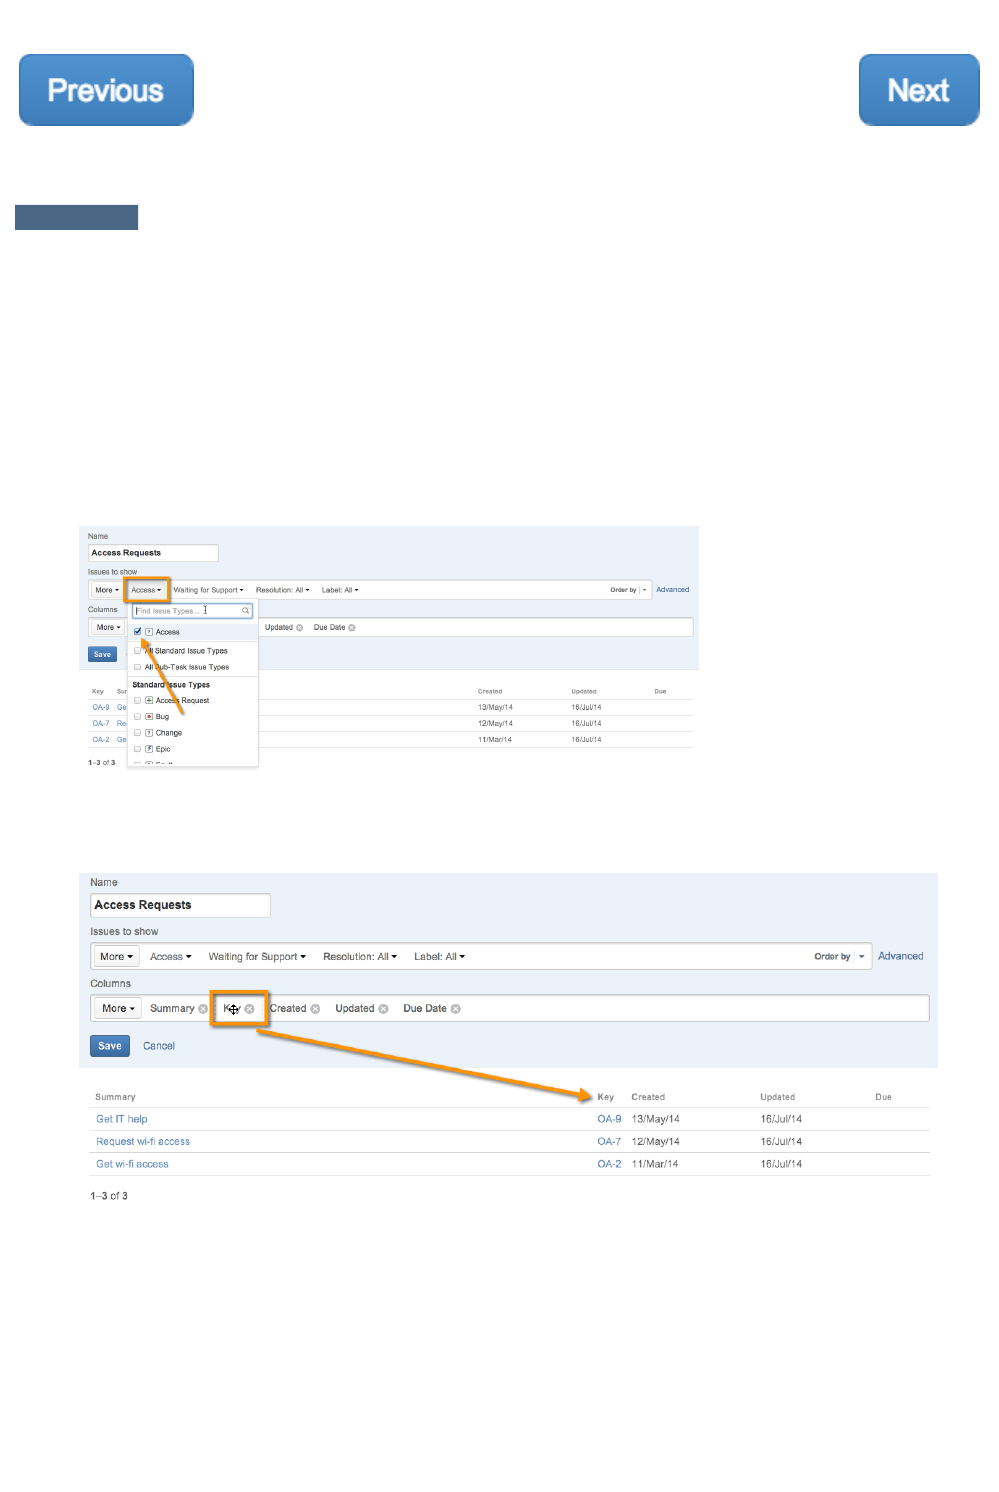
Select the following columns names that will display in this queue from the menu:More
"Key", "Summary", "Created", "Updated", and "Due Date". You can reorder the columns
by dragging the name (e.g. "Key") across the column field. Drag "Key" so that it is
displayed in the second column:
Click to add this queue to your team's workspace.Create
Create two new queues with the following two search queries:
"Completed purchases" for purchase requests that have been
successfully resolved

6.
7.
1.
2.
"Due this week" for requests that must be completed in the next week
Reorder your saved queues by clicking and dragging them as shown:
You now have three new queues in your project! You will next learn how to add agents to your instance, so you can get your
teams up and running with JIRA Service Desk.
Add your service desk agents
STEP 4 OF 5
There are four user roles you can assign in JIRA Service Desk:
The who create requests via email or the Customer Portalcustomers
Your team members, or , who view and respond to these requestsagents
A , or an agent with administrative capabilities for one projectproject administrator
People outside your team, or , who occasionally assist agents withcollaborators
requests
Add your agents
If you are a project administrator, you will need to contact your site administrator to add new
agents to your project.
Let's start by creating three agents - Diane, Martin, and Waldo:
Select the tab - you will land on the section by default - and click People Agents Add
.an agent
Enter Diane's email address and click :Add agent

2.
3.
1.
2.
3.
4.
5.
1.
2.
3.
Repeat the first two steps to add your additional agents, Martin and Waldo:
Assign issues to agents
Your agents will generally work out of certain queue that has issues automatically triaged into it;
however, let's test out manually assigning issues in case you ever come across a customer
request that you want a certain agent or team to handle.
From the tab, select one of your test requests.Queues
Click :Assign
Type Waldo's username into the "Assignee" field and click Assign.
When Waldo signs into JIRA Service Desk, this issue will appear in his personal
queue.
Assign another test issue to Diane.
Add your customers
You do not need to add customers to your service desk site during this tutorial but let's check
out where you would add them so you're familiar with the needed steps:
In the tab, click the section.People Customers
Click the button to enter individual customer email addressesInvite customers
Invited customers will receive an email invitation with a link to your Customer Portal,
where they can complete the signup process.
Public customer
signup
You can have your
customers sign up for
their own accounts
(without an individual
email invite) by
enabling public signup
.
You're almost done! You have now added 3 agents to your service desk project and reviewed the process of assigning issues

1.
2.
3.
4.
5.
6.
1.
2.
to these agents and inviting customers to your service desk proejct. You can now customize your Customer Portal and share it
with the rest of your team.
Customize and share your service desk
STEP 5 OF 5
The customers you have added to your service desk project can file requests in two ways. They
can log in and file a request via the Customer Portal or send an email to an email address that
you have linked to this service desk project. Let's finish setting up the Customer Portal and add
an email channel so your customers can take advantage of both communication methods.
Customize theme and branding of your Customer Portal
You can now rename your Customer Portal and add a logo so customers can quickly associate
this service desk with your team and company when they log in to file a request.
From the tab, click .Settings Portal settings
Add your Customer Portal name and introduction text by typing in the outlined fields:
Choose the "Use a custom logo for this Customer Portal" option.
Right click the sample image below to download it to your computer. You can then click
the "Choose logo" button to upload this image to your Customer Portal:
Click .Save logo
Click to view your changes from the customer view:Customer Portal
Set up an email channel
In addition to filing requests through the Customer Portal, customers can have the option of
opening requests and communicating with your agents via email (e.g.
[email protected]). Set up an email channel to enable this second communication
option.
In the tab, click . Settings Email settings
Email requests will be default be set to "Off" so click the button:Turn it on
Tip:
If you use POP, make
sure the email
account you choose
for this channel has
an so youempty inbox
do not lose any
existing emails.

2.
3.
4.
Select your email service provider and enter the email account login credentials as
requested.
Look out for the test email that will be sent to your email inbox and the corresponding
request that will be created in your service desk project.
Publicize your service desk
Now that your service desk project is ready to receive requests, you can share the service desk
email address (e.g. [email protected]) and a direct link to the Customer Portal with your
customers.
You can give one or both of the following URLs to your customers.
The URL to a specific portal as appeared in your service desk. You'd give this URL to
your customers if you've enabled public signup and want them to signup for accounts.
The signup link only appears on each individual portal.
To copy the URL of a portal, click the link again if you closed theCustomer Portal
above window. Your Customer Portal URL will be displayed above your new logo.
The URL to the global portal where your customers will see all the service desks they
have access to.
The URL is:
http://<computer_name_or_IP_address>:<HTTP_port_number>/jira/servi
cedesk/customer/portals
You can choose to:
Post a link on your intranet
Add a hyperlinked button to your web portal
Email your customers and let them know about the new, easy way to get help!
Congrats! Your service desk project is now complete.
You can now continue on to learn about 1) how your customers will use your service desk and 2) more advanced tips that will help
you better manage your customer requests and team workloads.
Bring your service desk to the next level
Now that you have your basic service desk up and running, you can learn about the following advanced features.
Serve your customers and your team better with SLAs
Service-level agreements (SLAs) help you communicate service agreements to your customers and keep track of your team's
performance. An SLA consists of a time metric and a corresponding goal or target. As the administrator, you can configure each SLA
metric and goal using the JIRA Service Desk SLA designer. SLA information will appear in both the customer-facing request and the

1.
2.
1.
2.
3.
internal issue. Your agents can also view the tab in their JIRA Service Desk workspace so they can easily reference theirSLA
performance goals. Let's have a quick look at the tab.SLA
In the tab, click to create a new SLA metric for your service desk project.SLA New Metric
For more information, open in a new window or tab in your browser. SLAs
Track your team's success with reports
JIRA Service Desk lets you display selected SLA metrics and goals in interactive reports. Reports can be used to help you visualize your
team's performance so you can identify bottlenecks and optimize your team's workload. Your team of agents can then view the read-only
versions of your reports to see how they are tracking towards their goals. Let's now have a quick look at the tab. Reports
Click the tab to view the pre-configured reports in your project.Reports
Click to create a new report or simply edit the pre-configured reports in your project. New Report
For more information, open in a new window or tab in your browser. Reports
Increase self-service with knowledge base integration
By connecting Confluence to your service desk project, you can help customers help themselves. Your customers can search for
solutions to their problems in the Customer Portal before they finish filing a request:

1.
2.
3.
Your agents can also take advantage of knowledge base integration by saving their issues as articles for future reference:
These KB articles will be a good resource for new agents in your service desk project and will help prevent existing agents from having to
create the same response over again for related issues types.
Open in a new tab to learn about setting up anproviding self-help resources for your customers with a knowledge base
application link between your Confluence and JIRA Service Desk sites.
In your service desk project, click the tab and then . Choose "Link to a knowledge base" and then theSettings Confluence KB
the linked Confluence space that you have chosen to store your knowledge base articles.
Your agents will now see the button when you open customer requests and your customers will be able to search forCreate KB
existing KB articles in the Customer Portal.

1.
2.
Want to learn more? Proceed to the documentation home linked below!
Get your customers started with JIRA Service Desk
After you set up your service desk in a way that serves both your agents and your customers, it's time to show your customers how to
start using JIRA Service Desk and get their requests fulfilled.
Create requests through the Customer Portal
Visit the Customer Portal.
Pick an option that matches what you need and fill in the details of the request.
Create requests by sending emails
Another way of creating requests is by sending emails to a service desk. Ask your service team if they support the email channel and if
they do, just email them directly from your inbox and all the communication thereafter can happen there too.
Create requests in multiple service desks
To put the same request in multiple service desks, you have the following options:
If all of the service desks you want to put the request in use the email channel, you can easily create the request by sending one
email message to all service desks' email addresses.
If not all of the service desks support the email channel, you need to create the request in the service desks one by one, either
through their customer portal or sending emails.
Track and comment on requests
The Customer Portal shows all the information about a request and you can check a request's status and read updates from agents as
they come in. You can add comments to requests on the Customer Portal as well.
Another way of tracking requests is through email notifications. You receive email notifications when agents respond to your requests
and when requests' status changes. To add comments to requests, you can just reply to the email notifications and your reply will be
added as a comment to the request in the system.
Want to learn more? Proceed to the JIRA Service Desk documentation home linked below!

1.
2.
3.
4.
Getting started for service desk agents
On this page, we will introduce you to your workspace and walk you through the process of responding to your customers' requests.
[ ] [ ] [ ]Navigate your workspace Work on customer issues Capture knowledge
Navigate your workspace
Open JIRA Service Desk in your web browser. Take a few minutes to become familiar with the layout:
1 - Find your customer issues
The Queues tab displays issues filed by your customers. These
issues appear in the order as configured by your service desk
administrator.
2 - Become familiar with how your customers see the service
desk
The Customer Portal link lets you see and interact with your
service desk from a customer's perspective.
3 - Search for service desk users
From the People tab, you can search for existing customers in
your service desk project, invite new customers (if public signup is
enabled), and see how many issues each of your agents is
working on in case issues need to be redistributed.
4 - Track your performance
The Reports and SLAs tabs display your team's work against the
expected response and resolution times of customer requests as
set by your administrator.
Work on customer issues
Your administrator has already set up customized queues to help organize incoming customer requests. Please contact your
administrator if you need to change a queue's configuration or add a new queue.
Open an issue
Click the tab. Queues
You will see the preconfigured queues set up by your administrator. Click to see the customer issues that have beenMy queue
assigned to you.
When you see the issue you need to work on, click the issue's Summary or Key to review the customer's request.
In addition to being able to edit and comment on a request, you can view a list of actions from the menu. Hover over eachMore
action to display a brief explanation:

4.
1.
2.
3.
4.
Respond to the customer
Review the issue and perform the needed task (e.g. grant the customer wi-fi access). Then click the buttRespond to Customer
on to type your response and preview it.
Use the tab to write your own note or to include another colleague on the issue by using the "@ mention"Internal comment
feature (type @username) and writing your comment:
Attach a file by clicking the menu at the top of the issue and .More selecting Attach
To ensure that the customer sees the attachment, right click on the attachment to and paste the link into acopy link address
comment surrounded by as follows: . Click to confirm thesquare brackets [description of attachment|attachment link] preview

4.
1.
2.
attachment link has copied correctly:
Resolve an issue
The customer receives a notification of your response via email and can then respond directly through that email channel or by following
the link to your service desk's Customer Portal. Once the customer's request is completed, you can click the Resol
ved button to close the issue and the issue will disappear from your queue.
Capture knowledge
If your administrator has linked your service desk with a Confluence space, you can capture your response as a knowledge base article.
You can then easily reference this article when responding to a similar issue in the future. KB articles will also appear in the Customer
Portal, directing customers to relevant information before they even finish submitting their requests.
Click the to enter the primary problem/desired outcome (or page title) and select the page template (How-To).Create KB article
Fill out the How-To template and save the page in Confluence. You will see that your issue is linked to this article for future
reference.

Nice work! Want to learn more? Proceed to the JIRA Service Desk documentation home linked below.
What is Workflow
A JIRA workflow is the set of and that an goes through during its lifecycle. The following diagram shows JIRA'sstatuses transitions issue
built-in workflow:
How JIRA and JIRA Service Desk Work Together
Each service desk you create with JIRA Service Desk is based on a JIRA project. If you have multiple teams within your business that
respond to different types of requests, you'll likely want to manage these in separate projects (for example, an IT project, an office &
supplies project, etc.). Each service desk can be designed to meet the specific needs for both the service desk team who manages the
requests and the customers who make them.
For information on setting up JIRA users to use JIRA Service Desk, see .Setting up service desk users
When you set up a service desk, you can either:
Create a new service desk project - This option is ideal if you have new internal processes that need to be managed through a
central tool. JIRA Service Desk will create all the basic components of the service desk: a template Customer Portal, generic
SLAs, and basic reports. JIRA Service Desk also provides the underlying JIRA features optimized for IT service desk requests: a
workflow, fields, and issue types. All you need to do is customize them to meet your needs!
Create a service desk for an existing JIRA project - This option is ideal if you've already been using JIRA in a help desk
capacity (for example, to fill IT requests, etc.). When you create a service desk for an existing project, JIRA Service Desk uses
the workflow, fields, permissions, and issue types you already have set up on the project as a basis for the flow of requests in
the service desk.
A look at how JIRA projects work in JIRA Service Desk
JIRA Service Desk lets you put the power of JIRA into the hands of your support agents (for example, by allowing them to move requests
through complex workflows). However, the Customer Portal lets you present a simpler experience to your customers. In other words,
JIRA's system workflow can be by your JIRA administrator.customized

customer portals let you map the components of JIRA to the information your customers will see and understand.
Each JIRA Service Desk project is based on a JIRA project. The request types within a service desk are based on JIRA issue types.
You use the Customer Portal screen to map request types to issue types and to customize how request types appear for customers. You
also use this screen to add new request types or remove ones you don't need. For more information on designing a Customer Portal,
see . Designing Customer Portal
The workflows and fields associated with an issue type can also be customized on the Customer Portal. See forSetting up request types
more information.
How JIRA Service Desk Collects Analytics
JIRA Service Desk tracks user events for the purposes of usage analytics so that we can improve the product.
How to change data collection settings?
If you use JIRA Service Desk Server (you install it from Atlassian Marketplace), you can opt in or out for data collection. You can change your
data collection settings at any time by going to .> System > Advanced > Analytics
If you use JIRA Service Desk Cloud, you will not be presented with an opt-in prompt. This is because data collection in Atlassian Cloud is
already permitted and described in our and and cannot be disabled.Privacy Policy End User Agreement
What do we collect?
All the data we collect is subject to the terms of our and our .Privacy Policy End User Agreement
JIRA Service Desk collects information regarding the type and frequency of feature usage within the product. We use these usage metrics to
better understand how you use our product so that we can improve the product in future releases.
How is data collected?
For all customers we use the Atlassian Analytics plugin to collect and analyze the data.
Setting up service desk users
With the JIRA Service Desk standard permission scheme and
project roles in place, adding users to a JIRA Service Deskproject
just involves creating the users and assigning them to the project
role you want them to have.
On this page
The People tab
Types of JIRA Service Desk users and the
issue view for them
Setting up users

1.
2.
3.
4.
The People tab
You manage the users for your service desk on the tab.People
Types of JIRA Service Desk users and the issue view for them
Agents use the service desk interface in JIRA to view their queues, reports
generated by the service desk administrator, and the SLA metrics they're working
against. When agents work on a customer request, they update and log information on
the request using the standard JIRA issue view. This gives them access to all the JIRA
features for managing issues. For details, see .Agent - JIRA Service Desk
Customers log requests through your Customer Portal. They
don't see the service desk tools used by your team. As their
request is being worked on, they receive emails on the status
changes and public comments made by the agent. They can also
use the Customer Portal to see a list of all their requests (current
or completed). For details, see Customer.
Collaborators are the users that occasionally help your team resolve requests by
making internal comments. For example, developers help support staff analyze a bug
and add a comment that explains the cause and any workaround available. Collaborato
rs don't have access to the service desk interface (e.g. queues, reports and SLAs) and
service desk projects appear as JIRA projects to them. They cannot work on issues, for
. For details, see .example, logging work or transitioning issues Collaborator
Service desk administrators use the service desk interface in JIRA to customize and
manage a service desk for a given project. Administrators are users with administrative
rights for a service desk and the underlying JIRA project. For the details about what
they can do, see .Administrator
Agents see the issue in the
service desk
Customers see the Customer
Portal
Collaborators see the JIRA issue
viewNote
This page applies to .the version 2 license
All purchases of JIRA Service Desk made on and after 10 September 2014 are on the
version 2 license, i.e. the new pricing model. For instructions on user management for
version 1 license, see .Setting up users with the version 1.x pricing

Setting up users
Use the following information to manage different types of users.
Users, groups and project roles
Users, groups and project roles are what you use the most when managing users and their permissions.
Managing agents
Agents are users that work on customer requests and communicate with customers. An agent consumes one JIRA Service Desk license
and one JIRA license.
Managing customers
JIRA Service Desk customers are users who create requests for the service team to work on. They do not have access to the service
desk interface in JIRA used by agents. Customers do not consume JIRA Service Desk licenses or JIRA user licenses.
Managing collaborators
Collaborators are JIRA users that occasionally assist agents with customer requests, e.g. developers who help support staff analyze
bugs. A collaborator consumes one JIRA user license.
Configuring public signup
You can enable public signup for your service desk so customers can create an account on the Customer Portal. Agents will also be able
to send new customers invitations to create an account. If you want new customers to be able to create requests by sending emails to
your service desk, you must enable public signup.
Troubleshooting issues with user management
This page contains information about the errors and problems that you might have when managing users in your service desk.
Setting up users with the version 1.x pricing

Users, groups and project roles
Users, groups and project roles are what you use the most when managing users and their
permissions.
JIRA Service Desk project roles
JIRA Service Desk automatically assigns the permissions to users for the project role they are
in.
The role is a JIRA default role. When you appoint a user as the administrator of Administrators
a service desk on the tab, the user is automatically added to this role. People
JIRA Service Desk adds the following roles to service desk projects.
Service Desk Customers: This role contains the customers of a service desk.
Service Desk Team: This role contains the agents on a service desk.
Service Desk Collaborators: This role contains the collaborators on a service desk.
By default, the user who creates a service desk project is in the and Service Desk Team Admi
role. If the JIRA option is disabled, the creator will alsonistrators Allow unassigned issues
be added to the role.Developers
For information about the JIRA option, see .Configuring JIRA Options
For information about the role, see .Developers Managing Project Roles
For information about how the permissions are set up for the roles in service desk
projects, see . JIRA Service Desk permissions
On this page
JIRA Service
Desk project
roles
The
service-desk-
agents group
and JIRA
Service
Desk license
The group and JIRA Service Desk licenseservice-desk-agents
In addition to the in JIRA, JIRA Service Desk adds the group to the system and uses this group to default groups service-desk-agents
manage license allocation.
All users in this group count towards the JIRA Service Desk license seats.
Agents are added to this group automatically when you create user accounts for them.
They are removed from this group when you revoke their agent license.
To understand how the group is associated with the license technically, see .JIRA Service Desk licensing
Managing agents
Agents are users that work on customer requests and
communicate with customers. An agent consumes one JIRA
Service Desk license and one JIRA license.Before agents can
work on customer requests in a service desk, they must have
access to the service desk. This means that agents must be
assigned to the service desk by an administrator.
On this page:
Create a new agent account
Grant a JIRA Service Desk license to an
existing user
Assign an agent to a service desk project
Revoke agent access to free up an agent
license seat
Create a new agent account
You must be a JIRA administrator, that is you have the or JIRA Administrators JIRA System Administrators global permission.
To create a user account, you have the following options:
In the header, go to > . Click the button to create a user account and select whichService Desk Manage agents New agent
service desks the new agent needs to access.
: start typing Keyboard shortcut 'g' + 'g' + 'service desk agents'
In one of your service desk projects, go to > . Click the button to create a user account. The userPeople Agents Add an agent
will be automatically assigned to the service desk project.
New agents will then receive an email that contains a link to to set their password.
New user accounts for agents are added to the group and group. When assigned to a service deskservice-desk-agents jira-users
project as agents, users are added as members of the role. For information about the group and the role, see Service Desk Team Users
., groups and project roles
Grant a JIRA Service Desk license to an existing user

1.
2.
1.
2.
You must be a JIRA administrator, that is you have the or JIRA Administrators JIRA System Administrators global permission.
In the header, go to > . Service Desk Manage Agents
: start typing Keyboard shortcut 'g' + 'g' + 'service desk agents'
Click . Follow the prompts to grant a service desk license seat to a user. Make user an agent
Assign an agent to a service desk project
Project administrators, i.e. service desk administrators, can assign agents to their individual service desks as needed.
You can do this in one of the following ways:
In a service desk project, go to > . People Agents
To assign an agent to the service desk, select \. Add an agent
If you are a JIRA administrator or system administrator: In the header, go to > . Find the agent inService Desk Manage agents
the allocated agent list and select . Assign service desks
: start typing Keyboard shortcut 'g' + 'g' + 'service desk agents'
To remove an agent from your service desk project, go to > , find the agent in the agent list, and select . People Agents Remove access
Revoke agent access to free up an agent license seat
You must be a JIRA administrator, that is you have the or JIRA Administrators JIRA System Administrators global permission.
In the header, go to > . Service Desk Manage Agents
Locate the agent, and click the button.Revoke agent access
Agents who have been revoked the agent license will become a collaborator on the service desks they have access to.
Managing customers
JIRA Service Desk customers are users who create requests for
the service team to work on. They do not have access to the
service desk interface in JIRA used by agents. Customers do not
consume JIRA Service Desk licenses or JIRA user
licenses. Customers can:
Create and track their own requests
Add comments to their own requests
Add other participants to their own requests
Every customer must have an account to create
requests. They need to log in to use the Customer Portal.
When customers contact your service desk with the email channel
for the first time, new user accounts will automatically be created
for them if public signup is enabled. If the service desk does not
allow public signup, emails sent by unregistered email addresses
will not be processed.
On this page
Managing customers and their requests
Adding customers
Allowing customers to sign up for
user accounts
Adding customers to your service
desk manually
Adding customers to your service
desk by groups with the project
role
Enabling request participants
Related pages
Managing agents
Managing collaborators
Configuring public signup
Managing customers and their requests
You can find customers and the requests they created in your service desk by using the section of the tab. We referCustomers People
to this section as the . The list shows twenty customers at most. You can search for customers that do not appear on thecustomer list
list.
Note
This page applies to .the version 2 license
All purchases of JIRA Service Desk made on and after 10 September 2014 are on the
version 2 license, i.e. the new pricing model. For instructions on user management for
version 1 license, see .Setting up users with the version 1.x pricing
Note
This page applies to .the version 2 license
All purchases of JIRA Service Desk made on and after 10 September 2014 are on the version 2 license, i.e. the new pricing
model. For instructions on user management for version 1 license, see .Setting up users with the version 1.x pricing

1.
2.
1.
2.
3.
4.
To look at requests created by a customer, use the and columns on the list. Open requests Closed requests
Screenshot: Customer list on the People tab
Adding customers
There are a number of ways to add customers to your service desk.
Allowing customers to sign up for user accounts
Public signup allows your customers to create accounts on the Customer Portal or by emailing into your service desk project. As new
customers sign up, they will be added to your service desk's customer list.
To enable public signup, see .Configuring public signup
Adding customers to your service desk manually
To add customers manually:
In your service desk, go to the tab > . People Customers
Select the button, and enter the email addresses of the customers. Invite customers
Mailing lists do not work.Note:
Invited customers will then receive an email invitation that links them to your Customer Portal. They can log in to your portal if their email
already exists in the system, or they will need to fill in details for their account and set the password after landing on the portal.
Customers are added as members of the Service Desk Customers role automatically after you invite them to your service desk.
Adding customers to your service desk by groups with the project role
You can add groups of customers by adding them to the project role.Service Desk Customers
Open the service desk in the administration console, go to > .Administration Projects
Choose your service desk.
Open the sectionRoles
Review the role and update the field. Enter one or multiple of your choiceService Desk Customers Groups JIRA user groups
and click .Update
The users in the groups you added will then have access to your service desk.

1.
2.
3.
Enabling request participants
You can allow your customers to add other participants to requests via the Customer Portal. You can also allow customers to search for
existing service desk users by name or email address.
In your service desk, go to the tab > .Settings Request participants
Switch the first setting to to allow customers to add request participants. On
Switch the second setting to to allow customers to search for existing users.On
Note that enabling these settings does not bypass JIRA issue-level security. If issue-level security (e.g. restricting an issue to only be
viewable by the reporter) has been applied, participants may not be able to access their requests. For more information, see Configuring
.Issue-level Security
Managing collaborators
Collaborators are JIRA users that occasionally assist agents with customer requests, e.g.
developers who help support staff analyze bugs. A collaborator consumes one JIRA user
license.Collaborators can:
View issues, comments and attachments
Add attachments and delete their own attachments
Add internal comments to issues and delete their own comments
Best practices

1.
2.
Collaborators should create issues in their own project (outside of the service desk project) to
track internal or long running work. This allows the team of collaborators to assign and log work
on issues and use their own workflow for resolving their own issues. For example, when a
support team runs into an application bug, this bug should be created as an issue in the
development team's project. The development team can then use tools like JIRA Agile to
allocate the bug into a sprint and see it through to an update in the application. Separating
customer issues with internal ones also allows the support team to link multiple support tickets
to the single underlying bug, avoiding duplication for the development team.
Examples of agents and collaborators working together on
requests
Application support example
Diane, an application support team member ( ), loops in Tony, a developer uagent (collaborator)
sing @mention to ask him for advice on an exception in a log file. Tony takes a look at the issue
in JIRA, views the attached log file and posts an internal comment for Diane with his analysis.
After that, Diane, as the assigned agent, conveys the findings to the customer to resolve the
issue.
IT service desk example
Martin, an IT service desk team member ( ), links an incident ticketagent
with an underlying network problem ticket for the network ops team in a
regular JIRA project. Andrew, a network ops team member, assigns this
network issue to himself and starts working on it. After fixing the network
problem, Andrew navigates to the linked incident in the IT service desk
and leave an internal comment ( ) for Martin, asking Martin tocollaborator
try the network connection again. Seeing the comment, Martin verifies
and tells the customer that the problem is resolved.
On this page
Best
practices
Examples of
agents and
collaborators
working
together on
requests
Adding a
collaborator
to a service
desk
Related pages
Managing
agents
Managing
customers
Adding a collaborator to a service desk
In the service desk, go to the tab > section. Click . People Collaborators Add collaborator
Follow the prompts, search for the user you want to add and then add the user to your service desk.
If you cannot find the user from the search, it means that the user does not have a user account in the system. You can only
add existing JIRA users as collaborators. You can in JIRA. Note that you must be a JIRA administrator to createcreate the user
users.
Configuring public signup
You can enable public signup for your service desk so customers
can create an account on the Customer Portal. Agents will also be
able to send new customers invitations to create an account. If
you want new customers to be able to create requests by sending
emails to your service desk, you must enable public signup.
When customers send emails to your email channel from email
addresses that do not exist as user accounts in the system, their
email addresses are automatically added as new users when
public signup is enabled. If the service desk does not allow public
signup, emails sent from new email addresses are not processed.
Screenshot: The signup option on a Customer Portal
On this page:
Opening your service desk up for public
signup
Turning off public signup
Enabling CAPTCHA
FAQs
Does public signup count towards
the license?
JIRA Service Desk public signup
v.s. JIRA public signup
Note
This page applies to .the version 2 license
All purchases of JIRA Service Desk made on and after
10 September 2014 are on the version 2 license, i.e. the
new pricing model. For instructions on user
management for version 1 license, see Setting up users
.with the version 1.x pricing

1.
a.
b.
c.
2.
a.
b.
c.
Opening your service desk up for public signup
Configuring a service desk to allow public signup is a two-step process:
Enable public signup for JIRA Service Desk. This step is is at the system level and when the setting is enabled, service desk
administrators can set their individual service desks to allow signup. If the setting is disabled, service desk administrators do not
see the signup option on their service desks.
To do this:
Log in as a user with the .'JIRA Administrators' global permission
Choose > . Scroll down to the section and choose .Add-ons JIRA Service Desk Configuration
Keyboard shortcut: start typing 'g' + 'g' + 'service desk'
In the section, enable the setting. Public signup
Enable signup for your service desk project. This step is at the service desk level and service desk administrators can perform
this action.
To do this:
Go to > .People Customers
On the right-hand side of the page, select . Restricted access
Select and Everyone with an account can access my Customer Portal Anyone can sign up for a customer
. account on my Customer Portal
Once you've enabled public signup for your service desk, you can your agents can use the button to invite newInvite Customers
customers to signup for an account on your Customer Portal. ou can also email customers the link directly or post the link on yourY
intranet. Once your customers create an account, they will be able to create requests straightaway.
If you already set up for your service desk, a new customer can just create requests by emailing your service desk andthe email channel
an account will be created for them automatically.
New user accounts are added to the role for the service desk and appear in your customer list on the Service Desk Customers Custom
section of the tab. Customers will receive email notifications about their user accounts. ers People
Turning off public signup
Turning off public signup does not affect the existing customers who've created their accounts via signup.
If you turn off the public signup setting for all the service desks at the system level, all service desks that allow signup will be disabled
automatically.
Enabling CAPTCHA
CAPTCHA for JIRA Service Desk is controlled through the JIRA CAPTCHA setting. If the JIRA CAPTCHA setting is enabled in JIRA,
customers will need to enter the word that is displayed in a picture in a text field when signing up for an account. CAPTCHA helps
preventing signup by spam systems. Follow the instructions on the page to enable CAPTCHA. Enabling Public Signup and CAPTCHA
FAQs
Does public signup count towards the license?
As with any customer account, user accounts that are created via public signup for JIRA Service Desk do not count towards your
license. For information about how licensing works, see .JIRA Service Desk licensing

1.
2.
JIRA Service Desk public signup v.s. JIRA public signup
The two signup settings (the JIRA setting and the public signup in JIRA Service Desk) work independently. For example, if themode
JIRA mode is set to private and public signup is enabled for JIRA Service Desk, users cannot sign up for accounts to access JIRA, but
they can sign up for accounts to access the Customer Portal of JIRA Service Desk. For more information about JIRA public signup, see
.Enabling Public Signup and CAPTCHA
Troubleshooting issues with user management
This page contains information about the errors and problems that
you might have when managing users in your service desk.
Related pages
JIRA Service Desk licensing
Users, groups and project roles
Cannot add agents, make users agents or revoke agent access because of read-only user
directories
Click here to expand...
All of these actions are changing the JIRA Service Desk agent license allocation and therefore involve modifying the
membership of the group. Adding agents and making JIRA users an agent add users to theservice-desk-agents
group; revoking agent access removes users from the group. When user directories are read only, JIRA Service
Desk cannot modify the group and therefore you cannot perform these actions.
To resolve it:
JIRA administrators can solve this problem by modifying the configuration of user directories. For more information,
see . Configuring User Directories
Cannot add new agents or make users agents because JIRA Service Desk cannot add
users to the service-desk-agents group.
Click here to expand...
These actions allocate the JIRA Service Desk agent license to users and need to add users to the service-desk-agents
JIRA Service Desk is group. This message appears when a group named service-desk-agents already exists before
installed. Because modifying existing groups that are not created by JIRA Service Desk can have negative impacts on
your system, JIRA Service Desk cannot proceed to finish the actions.
To resolve it:
Delete the existing group. JIRA Service Desk will then automatically create the group. service-desk-agents
JIRA Service Desk creates the group when you navigate to any of the following pages: the pagService Desk Agents
e and the section on the tab of a service desk.Agents People
Customers count towards JIRA license seats when using Atlassian Crowd
Click here to expand...
This is usually caused by customers being a member of a group that has the .JIRA Users global permission
To resolve it:
Remove the customers from groups that have the permission.
If you have set default groups for new users to be added to in Crowd for the directory connected to JIRA,
check if the groups have the global permission assigned. If they do, you have two options:JIRA User
Disable the default membership setting by removing the groups from the default group list.
This means that your JIRA users are not added to any(i.e. those that count towards your license)
group be default either when created.
If you want JIRA users, JIRA Service Desk customers, or both to be added to default groups, you can
do so by using separate directories for each type of user. Make sure that the default groups for JIRA
Service Desk customers do not have the global permission.JIRA Users

1.
2.
Setting up users with the version 1.x pricing
With the JIRA Service Desk standard permission scheme and
project roles in place, adding users to a JIRA Service Desk project
just involves creating the users in JIRA and assigning them to the
project role you want them to have.
On this page
Types of JIRA Service Desk users
Setting up users
JIRA Service Desk project roles and
permissions
Using custom permission schemes
Types of JIRA Service Desk users
There are three main ways users interact with JIRA Service Desk:
Service desk administrators use the service desk interface in JIRA to customize and manage a service desk for a given
project. Administrators are users with administrative rights for a service desk and the underlying JIRA project. For the details
about what they can do, see .Administrator
Service team members use the service desk interface in JIRA to view their queues, reports generated by the service desk
administrator, and the SLA metrics they're working against. When service desk team members work on a customer request, they
update and log information on the request using the standard JIRA issue view. This gives them access to all the JIRA features
for managing issues.
Customers log requests either through your Customer Portal . or by sending emails They aren't required to see the
service desk tools used by the service desk managers or team members. As their request is being worked on, they receive
emails on the status changes and public comments made by the service desk team. They can also use the Customer Portal to
see a list of all their requests (current or completed). For details about notifications, see Configuring JIRA Service Desk
.notifications
Setting up users
To do this:
Create the users in JIRA.
In your service desk, go to the tab, and assign a project role to your users or make sure that the groups which theyPeople
belong to are associated with the project role.
Screenshot: Setting up project roles for your service desk
In order for customers to submit requests through the Customer Portal, they must log in with their JIRA credentials (either through JIRA
or the Customer Portal). Customers can also update their name, email address, password, timezone, and avatar from the Customer
Portal. This information will be updated in the JIRA user directory automatically.
Note: Updating avatars does not work in Internet Explorer 8.
JIRA Service Desk project roles and permissions
Based on the three types of users, JIRA Service Desk creates two additional default JIRA project roles, Service Desk Team and Service
Desk Customers. These two roles mirror the way service team members and customers interact with JIRA Service Desk, and the
Administrators role mirrors that of the service desk administrators.
JIRA Service Desk also provides a standard permission scheme (JIRA Service Desk Permission scheme for [project]) that automatically
gives your JIRA Service Desk users the correct permissions for the project role you assign them. For example, giving users the Service
Desk Team role will allow them read-only access to JIRA Service Desk, as well as allow them to work on issues in JIRA.
Note:
This page applies to the version 1.x pricing
All purchases made on and after 10 September 2014
are on the version 2.x pricing. For instructions on user
management for version 2.x pricing, see:
Managing agents
Managing customers
Managing collaborators

Version 2.0 introduces the service-desk-agents group and the JIRA Service Desk agent access global permission in addition to the
default ones in the system. JIRA Service Desk uses these two new settings to manage license allocation when the version 2 license is
applied. Because you are using the version 1 license, it is recommended that you do not modify these two settings. This will also ensure
easier migration when you want to change to the new pricing model later. For more information about the version 2 license, see JIRA
.Service Desk licensing
Using custom permission schemes
The standard JIRA Service Desk permission scheme has pre-configured all the JIRA
permissions to support the way most service desk teams are set up. If you choose not to use
the standard permission scheme, make sure your users have the right JIRA permissions for
their role in your service desk team as described in the following table.
You can switch back to the standard one at any time by using the migration option on the Peopl
tab.e
Users Permissions
Service desk
administrators
Because service desks are built upon JIRA projects, you must have JIRA project in orderadministration permissions
to set up and administer a service desk. The project administration permission allows you to manage service desk
functionality like creating new request types, setting up new queues, creating SLAs, and generating reports.
As an administrator, you must also have all the permissions required for your service desk team
members and customers in order to see all the functionality they'll be using.
Service desk
team
members
If you use a custom permission scheme, make sure your service desk agents have the right permissions for their role
in the service desk team. The following JIRA permissions are recommended for service desk agents:
Create Issues (This permission gives users the ability to create issues in a Customer Portal)
Browse Projects (This permission gives users read-only access to the , , , and Queues Reports SLA Customer
tabs in JIRA, as well as access to the project's Customer Portal)Portal
Schedule Issues
Add Comments
Create Attachment
Service desk
customers
If you use a custom permission scheme, make sure your service desk customers have the right permissions. Using
the security type is recommended. This allows you to give customersService Desk Customer - Portal Access
access to the Customer Portal only (not JIRA).
These are the recommended JIRA permissions for service desk customers:
Create Issues (This permission gives users the ability to create issues in a Customer Portal)
Browse Projects (This permission gives users access to the project in the Customer Portal)
Add Comments (if you want customers to be able to add comments after they have submitted a request)
Create Attachments (if you want customers to be able to add an attachment when they create a request or add
an attachment to the request after it's been submitted)
Assign Issue (if you want to use the field to automatically channel issues to certain team members)Assignee
In addition, if the service desk project uses an , make sure that it is configured so that serviceissue security scheme
desk users can view issues. Otherwise, customers might be able to create issues but not view them after they've
been created.
Setting up service desks for your projects
Use the following information to set up JIRA Service Desk. Some of the settings can only be modified by JIRA administrators, for example
changing notifications. Service desk administrators (i.e. project administrators) can modify the other project settings for their individual
service desks.
Setting up request types
JIRA Service Desk provides a set of default request types that are configured for basic IT help desk scenarios. You can configure the default
ones to suit your company's needs or add new ones.
Designing Customer Portal
JIRA Service Desk pre-configures a Customer Portal for each service desk you set up. The Customer Portal is where you design the request
forms your customers will fill out.
Configuring JIRA Service Desk notifications
By default, when an issue is created through the Customer Portal for a JIRA Service Desk, JIRA Service Desk overwrites the project's JIRA
notification scheme and suppresses emails that would be sent to the reporter by the notification scheme.
New to JIRA
permissions?
See Managing Project
.Permissions

Opening up or restricting access to your service desk
Setting up the email channel
Your customers can open requests and communicate with your service team by working from their familiar email box when the email channel
is enabled for your service desk.
Related pages
Getting started with JIRA
Service Desk
Setting up request types
JIRA Service Desk provides a set of default request types that are
configured for basic IT help desk scenarios. You can configure the
default ones to suit your company's needs or add new ones.
On this page
Customizing the fields on a request type
Customizing the workflow statuses for a
request type
Hidden fields and unsupported fields
Customizing the fields on a request type
The fields and descriptions that appear in a request type are based on the field configured for the issue type (that is, the issue type the
request type is based on).
You use the tab to change the default JIRA field names to more customer friendly language. For example, the "Summary" fieldFields
appears as "What do you need?" for customers.

You can also keep fields hidden but available on the request type so that their value can be used for other processes. For more details
about how different types of fields work in JIRA Service Desk, see .Hidden fields and unsupported fields
If the issue type doesn't have the fields you need, you must to the JIRA issue type that the request type is based on. If theadd a field
issue type uses multiple screen schemes, the new field must be available in the create screen. See .Configuring Fields and Screens
Customizing the workflow statuses for a request type
JIRA Service Desk uses the workflow associated with the request's issue type for the flow of the request.

You can re-map the default workflow statuses to more customer friendly statuses that will appear for customers, and you can also map
multiple statuses to a single customer status to simplify the appearance of the workflow. Use the tab to customizeWorkflow Statuses
the workflow that customers will see.
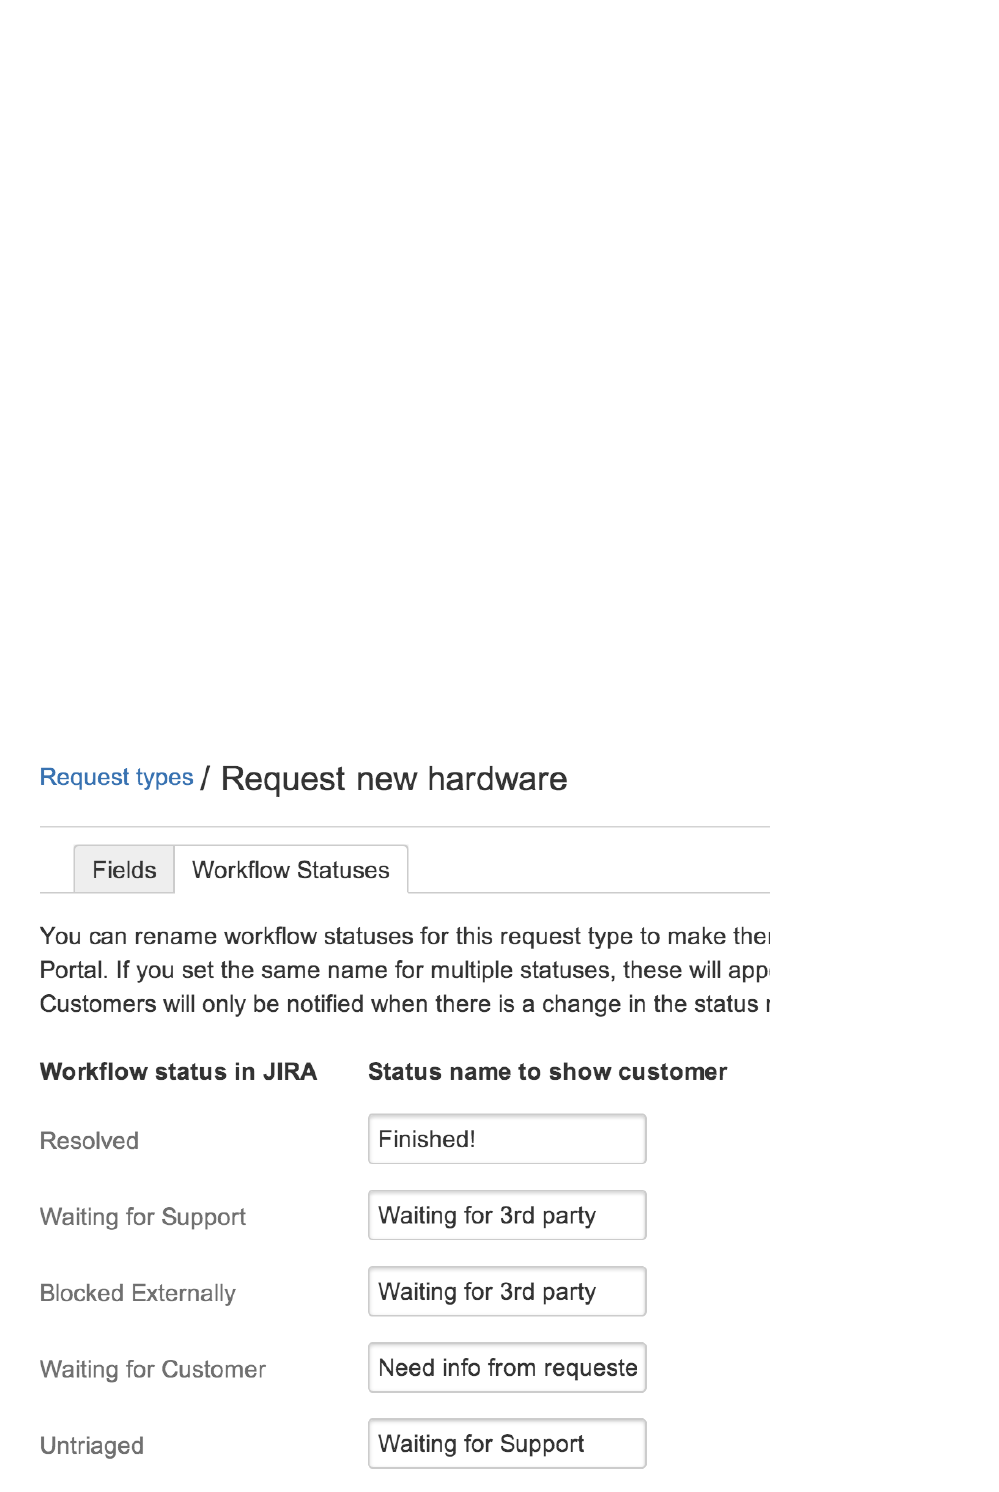

Only changes between these customer-visible 'status names' will be reflected in the Customer Portal and its notifications (e.g. a
transition between two workflow statuses can be hidden on the Portal by giving them the same 'status name'). For more information
about notifications, see .Configuring JIRA Service Desk notifications
If you need to change the workflow of a request, you must associated with the service desk project. You can find thisedit the workflow
workflow on the project administration section of the service desk project.
Hidden fields and unsupported fields
Each request type in a service desk is . Every JIRA issue type has a set of allowed (and possibly required)based on a JIRA issue type
fields associated with it. As you set up the request type, you can choose to include fields that are hidden on the Customer Portal but still
provide a value to assist with your internal processes and reporting. For example, you might want to set the value of the "Label" field as
"hardware" for the "Request new hardware" request type, and set the value as "software" for the "Request new software" request type.
Some fields used by an issue type are not supported for use in the Customer Portal; if you include these fields on a request type, they
will automatically be added to the section and you'll be required to set a value for them.Hidden fields with preset values
Other fields aren't supported for use in JIRA Service Desk.
These fields can be added to the request type and given a preset value, but you cannot make them visible on the Customer Portal:
Assignee
Linked issues
Any fields that are defined by other add-ons in JIRA
These types of fields can't be added to a request type and won't appear in the in the "Add a field" dialog:
Issue type
Log work
Reporter
Security level
Time tracking
Troubleshooting issues with request types
This page contains information about the errors and problems that you might have when setting
up request types for your service desk.
Cannot delete the request type because it is the default request type for the
email channel
Click here to expand...
If you see this error when trying to delete a request type, it means that the
email channel for your service desk uses this request type as the default
one for all the requests coming from emails. When JIRA Service Desk pulls
emails from the associated email account and creates requests, this request
type is assigned to the requests automatically.
To resolve it:
JIRA administrators can change the default request type for email requests to
be another one by going to > in your service desk.Settings Email settings
For more information about the email channel setup, see Setting up the email
. channel
Related pages
Setting up
request types
Troubleshooti
ng issues with
the email
channel
Setting up the
email channel
Cannot show a hidden field or make an optional field required because the request type is the default for the
email channel
Click here to expand...

When JIRA Service Desk creates new requests from emails sent to the email account associated with your service
desk, it copies the email subject to the field and the email content to the field. When moreSummary Description
fields are required, JIRA Service Desk cannot parse emails to fill them in with correct values.
To resolve it:
You have the following options.
If you want to show a hidden field, make it an optional one.
Ask your JIRA administrator to change the default request type for the email channel to use a different request
type, and then modify your request type to include more required fields. You can also create a new request
type for the email channel if no existing types are suitable. For more information about the email channel
setup, see . Setting up the email channel
Designing Customer Portal
JIRA Service Desk pre-configures a Customer Portal for each
service desk you set up. The Customer Portal is where you design
the request forms your customers will fill out. As the service desk
manager, you can map the JIRA features that are used to manage
each request to the user friendly language your customers will
see.
Tip: You can click the Customer Portal link at any time to see
how your changes will appear for customers.
Setting up a new Customer Portal
The first step in setting up a Customer Portal is configuring the request types the service desk will support. Each request type in a
service desk is based on a JIRA issue type. (See for more information on how JIRAHow JIRA and JIRA Service Desk Work Together
Service Desk works with JIRA.)
Note that a single JIRA issue type can be the basis for many different request types (for example, the "Purchase" issue type serves as
the basis for both the "Request new hardware" and "Request new software" requests).
Accessing multiple Customer Portals and requests raised in multiple service desks
If you have multiple service desk projects running, your customers only need to remember one URL and they can see the list of all the
Customer Portals they have access to in one place.
The URL to the list of portals is:
http://<computer_name_or_IP_address>:<HTTP_port_number>/jira/servicedesk/customer/portals
Next steps
Branding your Customer Portal

1.
Organizing your Customer Portal
Branding your Customer Portal
Give your Customer Portal that familiar look by using your
company's color scheme and logo. This is very easy to achieve:
the color scheme for your service desk will automatically match
that of your logo once your logo is uploaded.
By default, the header of the Customer Portal displays Help
. You can customize it by giving it your own name.Center
Related pages
Organizing your Customer Portal
Setting up request types
Choose > . Scroll down to the section and choose Add-ons JIRA Service Desk Confi
.guration
Keyboard shortcut: start typing 'g' + 'g' + 'service desk'
Organizing your Customer Portal
If you have several request types, you can use groups to organize
the Customer Portal. We think groups are helpful if you have
seven or more request types. Groups let you specify one or more
category names to each request type. Then, JIRA Service Desk
will automatically sort your request types into tabs in the Customer
Portal, making it easier for customers to find exactly the type of
request they need.
You must have more than one group for the groups to appear in
the Customer Portal. Groups are unique to each service desk; if
you want to use the same groups in all your service desks, the
service desk administrator must manually create the same
groups.
To add request types to one or more groups:
On the page in the tab, use the drop-down and type the group names. Request types Settings Groups
Tips
Drag and drop request types to re-arrange them on your Customer Portal.

1.
2.
3.
4.
5.
Configuring JIRA Service Desk notifications
By default, when an issue is created through the Customer Portal
for a JIRA Service Desk, JIRA Service Desk overwrites the
project's JIRA notification scheme and suppresses emails that
would be sent to the reporter by the notification scheme. In
addition to configuring JIRA Service Desk's notification scheme,
you can select either HTML or plain text as the default type for
service desk email notifications.
On this page
Who receives service desk notifications
Configuring notifications for a JIRA Service
Desk project
Setting the notification email type to HTML
or plain text
Notes on service desk notifications
Who receives service desk notifications
Your customers Your team
Your customers, i.e. the reporters of issues, receive email notifications when
the following events happen:
when they raise a request through the Customer Portal,
when their request is resolved,
when another user comments on their request, and
when there is a change in the request's status, i.e. the .'status name'
In this case, the issue reporter is also prevented from becoming an auto
watcher on the issue to prevent duplicate notifications.
The project's JIRA notification scheme takes effect for
all users on your service desk team.
Configuring notifications for a JIRA Service Desk project
Two settings impact how notifications work for a service desk project:
The setting for JIRA Service Desk at the system level and it controls the JIRA Service Desk notifications for allNotifications
service desks. This setting is enabled by default.
To disable JIRA Service Desk email notifications:
Choose > . Scroll down to the section and choose .Add-ons JIRA Service Desk Configuration
Keyboard shortcut: start typing 'g' + 'g' + 'service desk'
The that is associated with the project.JIRA notification scheme
If the setting for JIRA Service Desk is enabled, the JIRA notification scheme takes effect for the otherNotifications
users.
If the setting for JIRA Service Desk is disabled, the JIRA notification scheme works as defined for allNotifications
events and users.
Setting the notification email type to HTML or plain text
As a JIRA admin, you can set the default email type for service desk notifications to HTML or plain text. If your customers rely on
software that requires plain text or use a plain text mail client, you can change your default setting to plain text and apply this change to
new and existing customers.
Choose > System. Scroll down to the User Interface section and choose Default User Preferences.
Keyboard shortcut: 'gg' + start typing 'default user preferences'
Select . Edit default values
Change the to html or text and click .Default outgoing email format Update
At this point, the email format you have selected will only be applied to new service desk customers. If you also want to override
the email format chosen by existing service desk customers and agents:
Under , select . Operations Apply
Select to finish applying the email preference to all user accounts. Update
Notes on service desk notifications
Only changes between the customer-visible 'status names' will trigger email notifications (e.g. a transition between two workflow statuses
can be hidden on the Portal by giving them the same 'status name'). For more information about workflows, see Setting up request types
.
Opening up or restricting access to your service desk
While you set up your service desk project, one aspect to consider is accessibility, or who can
Groups are displayed in the alphabetical order. To display them in a certain order, just prefix group names with
numbers, e.g. . 1 Access, 2 Service not working
If you assign multiple groups to a single request type, the request type will appear on multiple tabs.

1.
2.
3.
4.
access your service desk and create requests. Depending on whom your team is servicing, you
can open your service desk up to everyone or restrict it to a specific list of customers.
On this page:
Opening up
or restricting
access to
your service
desk
Whe
n to
open
your
servi
ce
desk
Whe
n to
restri
ct
your
servi
ce
desk
Opening up or restricting access to your service desk
In your service desk project, go to > .People Customers
On the right-hand side of the page, select . Restricted access
Select the setting for your service desk as needed.
For restricted service desks, add your customers to your customer list so that they can create requests successfully.
To do this, use the button on the page. Invite customers Customers
When to open your service desk
As an example, an IT service desk is usually open to all the
employees in an organization and everyone can access it and
create requests. In this scenario, customersopen service desk
can create an account on the Customer Portal or email requests
to your service desk email channel to have an account created
automatically. Note that your JIRA administrator must first enable
. public signup
When to restrict your service desk
In comparison, for a service desk that handles contractors' leave
requests, you might want to make it only available to your
contractors so that the rest of your staff do not get confused about
where to put in leave requests. Service desks like this one are res
and only customers you invite can createtricted service desks
requests.
Setting up the email channel
Your customers can open requests and communicate with your
service team by working from their familiar email box when the
email channel is enabled for your service desk. Here's how it
works:
A customer sends an email to the email account
designated for your service desk.
A new request is created based on the email. The
customer receives an email notification that contains the
details of the request.
Your agent sees the issue in one of the queues and
works on the issue. When customer-visible comments are
added to the issue or the status of the issue is changed,
This page
Enabling the email channel for a service
desk
Using multiple email accounts
User accounts created from email requests
FAQs
Related pages
Managing the email channel
Troubleshooting issues with the email
channel
Note
This page applies to .the version 2 license
All purchases of JIRA Service Desk made on and after 10 September 2014 are on the
version 2 license, i.e. the new pricing model. For instructions on user management for
version 1 license, see .Setting up users with the version 1.x pricing

1.
2.
the customer receives email notifications.
When the customer replies to email notifications, the
reply is added as a comment to the issue.
Enabling the email channel for a service desk
Before you begin
You must be a JIRA administrator, that is you have the JIRA Administrators or JIRA System Administrators global
permission.
If your service desk does not allow public signup, to your customer list. add them
Every customer must have an account to create requests. Email messages sent from unregistered email addresses are not
processed.
If you use POP, make sure that your inbox is empty.
Why and how?
To link your email account with a service desk using POP, JIRA Service Desk requires the inbox of your email
account to be empty.
Starting with an empty inbox ensures that you do not lose emails unintentionally because emails are deleted
after they are pulled in by JIRA Service Desk when you use POP. To empty your inbox, you can move the
existing messages to another folder, archive them or delete them.
If you want certain messages in your inbox to be pulled in by JIRA Service Desk, you can move them back to
your inbox after the connection is established.
To enable the email channel:
In your service desk, go to . In the left-hand navigation, choose Settings Email settings.
Click .Follow the prompts to add your email account and select the default request type for requests created from theTurn it on
email channel. For Gmail and Yahoo Mail, you only need to enter your credentials. If you use other mail services, you will need
to provide server details as well.
After the email channel is set up, JIRA Service Desk will take note of when it has connected to the email account for the first time. Any
new messages sent to your inbox after that time will be pulled in as new requests or comments. Customers will receive email
notifications about the details of their requests. For information about notifications, see . MesConfiguring JIRA Service Desk notifications
sages that already exist in your email account are not processed.
A test email will be sent to the email account shortly, and you will see a new request created for it in one of your queues in JIRA Service
Desk.
Using multiple email accounts
You can only link one email account of your own with a single service desk. If you use more than one email address to interact with your
customers and want to integrate them with one service desk, you might be able to achieve this by setting up forwarding rules or aliases.
What these two options can achieve is that all the email messages from your multiple email accounts will land in the email account linked
with your service desk and therefore be pulled into your queues. You will need to configure the settings in your mail server.
User accounts created from email requests
When customers send an email for the first time, new user accounts are created automatically for them if your service desk allows public
signup. For information about public signup, see .Configuring public signup
User accounts for service desk customers are free and do not count towards your license.
The username is their email address and they will receive an email notification about the user account. The user account is also added
to the role of the service desk and you can find it in the customer list on the tab. For informationService Desk Customers People
about the role and the customer list, see and .Setting up service desk users Managing customers
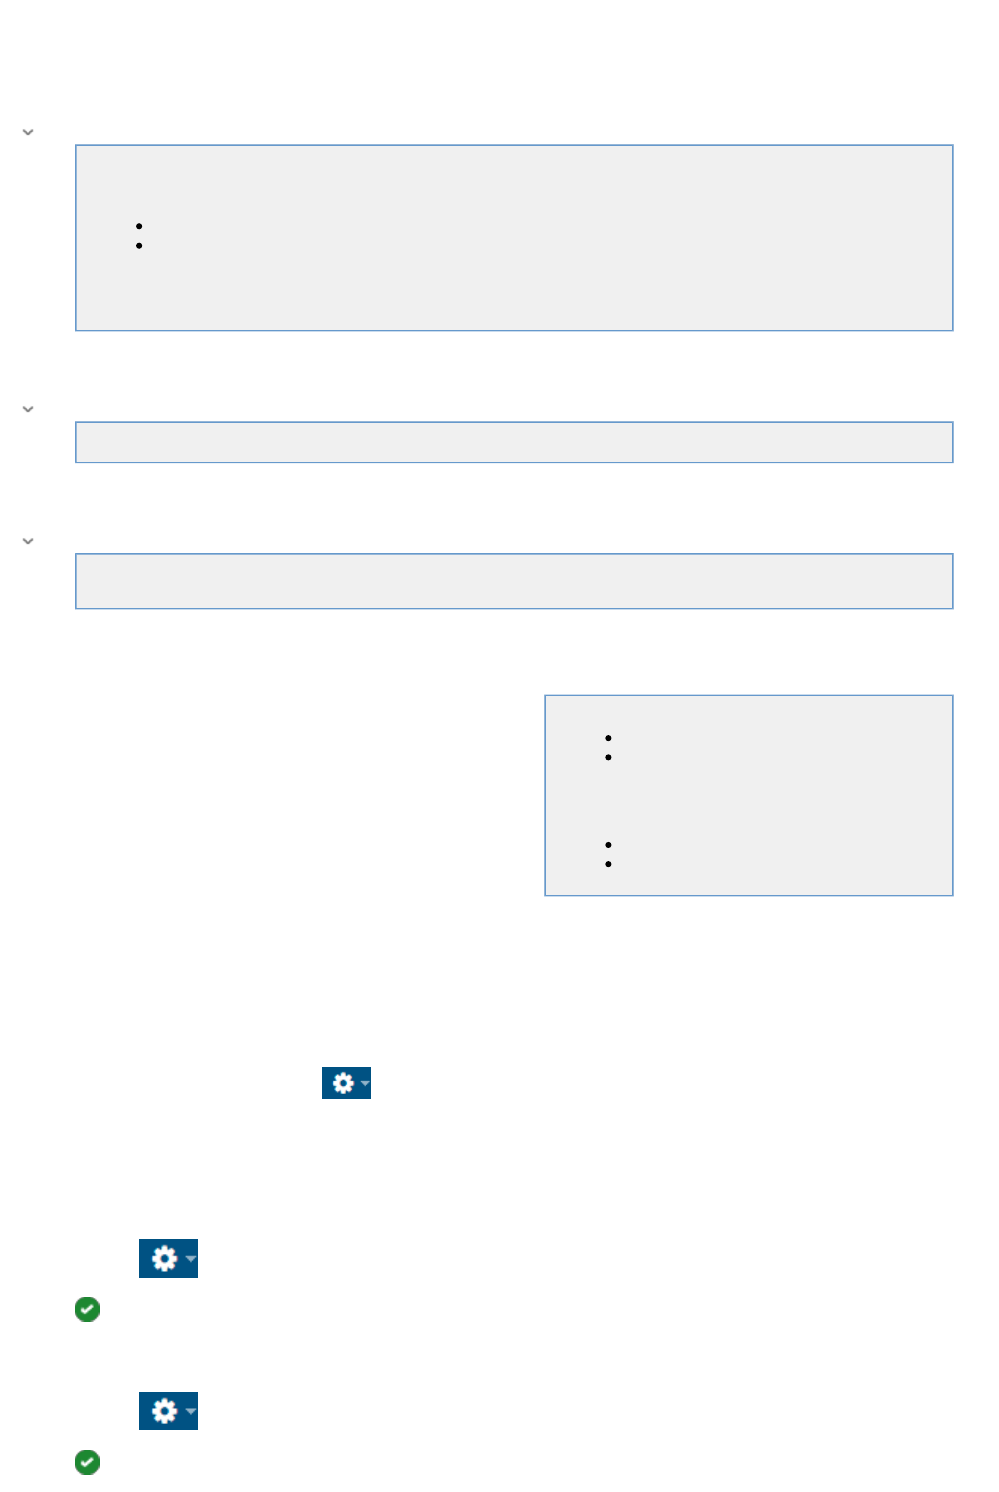
1.
1.
2.
FAQs
How are requests created from email messages?
Click here to expand...
After the connection is established between JIRA Service Desk and your email account, JIRA Service Desk checks the
inbox of your email account every minute. When seeing email message there, JIRA Service Desk will determine
whether they are replies to existing requests or new requests.
Replies will be added as comments to the matching issues.
For new requests, JIRA Service Desk creates new issues by copying the email subject to the fieldSummary
and the email content to the field. Description
If a request type has other required fields, JIRA Service Desk cannot fill out the request form correctly. Therefore,
request types that have more required fields cannot be used as the default one for the email channel.
What request types can be used as the default assigned to requests for the email channel?
Click here to expand...
A suitable request type for the email channel must have the field and the field as visible fields.Summary Description
Any other fields must be optional ones.
What happens to email messages in the linked email account?
Click here to expand...
If you use POP, email messages are deleted from your inbox once processed by JIRA Service Desk.
If you use IMAP, email messages are marked as read once processed by JIRA Service Desk.
Managing the email channel
Now that you have , you can controlset up your email channel
when JIRA connects to your mail server and filters relevant emails
into your service desk projects. You can also view logging
information directly in JIRA to check on the status of your mail
server connection.
This page
Managing global mail settings
Managing the email channel for multiple
service desk projects
Related pages
Setting up the email channel
Troubleshooting issues with the email
channel
Managing global mail settings
There are two global mail settings - email puller and email processor - that are used only by JIRA Service Desk and do not impact any
email settings you have set up for JIRA. Email puller connects to your mail servers every minute and pulls the email data into the
database. Emails with attachments larger than 25MB will not be pulled. Email processor filters the emails (e.g. to remove auto-replies
and spam) using information stored in the database.
You can access these settings by going to > > .System Global mail settings
Managing the email channel for multiple service desk projects
JIRA administrators can get an overview of all the service desks in the system that use the email channel and the email accounts linked
with them.
Choose > Add-ons. Scroll down to the JIRA Service Desk section and choose Email settings.
: start typing Keyboard shortcut 'g' + 'g' + 'email settings'
From the page, you can also check the connection email processing statuses of each linked email account. Note thatEmail settings
logging information older than 6 months is deleted daily.
Choose > Add-ons. Scroll down to the JIRA Service Desk section and choose Email settings.
: start typing Keyboard shortcut 'g' + 'g' + 'email settings'

2.
3.
1.
2.
Under , click .Actions View log
Click the or tab to view the corresponding log details.Connectivity log Processing log
Troubleshooting issues with the email channel
This page contains information about the errors and problems that
you might run into when setting up the email channel for your
service desk.
Related pages
Setting up the email channel
Checking the connection
To troubleshooting email channel issues, the first thing to do is to check the connection between JIRA Service Desk and your email
account. You will see error messages that show you why the email channel does not work for your service desk.
To check the connection:
Choose > Add-ons. Scroll down to the JIRA Service Desk section and choose Email settings.
: start typing Keyboard shortcut 'g' + 'g' + 'email settings'
Choose . Test
Resolving errors
The following table describes the common errors and provides information about how to resolve them when available.
Symptom Description and resolution
Gmail
Error message:
Unfortunately JIRA Service Desk couldn't connect to the mail
server. Here is what the mail server said: "[ALERT] Please log in
via your web browser:
http://support.google.com/mail/accounts/bin/answer.py?answer=78754
(Failure)
JIRA Service Desk checks email accounts
every minute. Gmail might suspect
inappropriate usage of this account and
lock it for security reasons.
To resolve this:
Create an application-specific
password for JIRA Service Desk in
Google Account settings. Details can
be found . here
Microsoft Outlook, POP3
Error message:
Unfortunately JIRA Service Desk couldn't connect to the mail
server. Here is what the mail server said: "STAT command failed:
Exceeded the login limit for a 15 minute period. Reduce the
frequency of requests to the POP3 server.
JIRA Service Desk checks email accounts
every minute. mightMicrosoft Outlook
suspect inappropriate usage of this
account and lock it for security reasons.
To resolve this:
Use IMAP.

1.
2.
Gmail accounts, POP3
Requests are created from archived messages.
When JIRA Service Desk checks your
email accounts for new messages, it polls
the . inbox folder
Gmail uses labels to classify messages
into categories and only has these folders:
, Inbox Sent Mail and (or ). ThisBin Trash
means that the archived messages are
still considered as in the inbox folder. With
JIRA Service DeskPOP3, is not able to
andidentify archived messages by labels
therefore still brings them in as requests.
To resolve this:
Use IMAP.
Customers send emails to create requests, but no requests are created and customers
do not receive any notifications.
This problem could be due to one or more
of the following causes:
The connection to the email account
failed.
The customer does not have a user
account in the system.
Every customer must have an
account before they can create
requests. Emails sent from
unregistered email accounts are not
processed.
The default request type for the email
channel became unsuitable for the
email channel.
Learn more
A suitable request type for the email
channel must have the fielSummary
d and the field as visibleDescription
fields. Any other fields must be
optional ones.
To troubleshoot the issue and
resolve it:
Check the connection as described
previously on this page.
Check if user accounts exist for your
customers. If not, create user
accounts for your customers. For
instructions, see Setting up service
.desk users
Working on a service desk
The following information explains how to use JIRA Service Desk to work on issues, e.g.
communicating with customers.
Adding people to participate in requests
Adding people to participate in requests
By default, requests are between the customer reporting an issue
and the agent resolving that issue; however, we have a
few different options for agents and customers who need to
involve other people in their requests.
On this page
Add customers
About request participants
Add internal users
Add customers
You can include customers other than the reporter of an issue to ask them for more information or keep them updated on the issue.
In JIRA Service Desk, we call these additional customers .request participants

1.
2.
Request participants can add comments and attachments to a request, and receive the same notifications from JIRA Service Desk as
the reporter. Participants can easily see who else is involved in a request both on the Customer Portal and in email notifications. This
makes it possible for them to work from their inbox. They can also add more participants.
To add request participants on an issue:
Navigate to an issue.
In the section of the issue, add users to the field. People Request participants
You can only add existing customers on the service desk.
If customers need to add participants via the Customer Portal, they can do so by selecting . Service desk administrators canAdd people
enable or disable this functionality. See for more information. Managing customers
To add request participants via email:
If you are creating or responding to a request via email, add a request participant's email address to the CC field. The participant must
have an existing JIRA Service Desk account to be added to the request. Note that email recipients in the TO and BCC fields will not be
added as request participants.
About request participants
Request participants will receive an email notifying them that they have been added. All customers,
including the reporter, will appear in the People involved section of the request on the Customer Portal.
Screenshot: Customers see who's involved in a request on the portal in the 'People involved' section
Screenshot: Notification details showing all the participants
Add internal users
Note that involving people in a request does not bypass issue-level security. If issue-level security (e.g. restricting an issue to
only be viewable by the reporter) has been applied, participants may not be able to access their requests. Service desk
administrators can refer to the instructions in to revise or delete an existing issue securityConfiguring Issue-level Security
scheme.

To involve internal users such as other agents or collaborators in an issue, for analyzing a bug in an application as an example, you can
mention them in a comment or add them as a watcher. They will then receive a notification from JIRA about the issue and can then
communicate with you internally about the issue.
For more information, see and in the JIRA documentation. Emailing an Issue Watching and Voting on an Issue
Reports
JIRA Service Desk provides powerful realtime reporting
functionality so you can see your team's performance metrics.
You can also create your own custom reports to query any
combination of performance data.
Your team members have access to a read-only version of the Re
tab so they can also see the data you're tracking.ports
Tip: See for detailed information on how to runReporting on SLAs
reports on SLA progress or status.
For information about the permissions needed to see and adminster reports, see .How JIRA and JIRA Service Desk Work Together
SLAs
JIRA Service Desk provides powerful built-in SLA management so
you can track how well your team adhere to the agreements you
have with your customers. JIRA Service Desk comes with a few
pre-configured SLA metrics to cover some of the most common IT
requirements; however you can modify them or create custom
SLA metrics to reflect the SLAs you use in your business.
The SLA tools in JIRA Service Desk are extremely flexible; review
this page for an introduction to how you can set up your service
desk to track your team's unique SLA metrics:
A look at how an SLA is constructed
How your team sees SLAs
Tip: JIRA Service Desk provides robust reporting tools that you
can use to track your team's performance against your SLAs.
Check out this page for tips on tracking your SLAs
For information about the permissions needed to see and administer SLAs, see .How JIRA and JIRA Service Desk Work Together
A look at how an SLA is constructed
An SLA is made up of two settings: time measurement and goals for issues. Together, these criteria make up an SLA.
You can't change the name of an SLA after you've saved it, so make sure that the name you choose will support the SLA
metric and any additional things you might need to measure in the future.

Setting up the SLA time metric
You can think of the time metric as a stopwatch that tracks time between two points in an issue's life-cycle. JIRA Service Desk lets you
control exactly when time is tracked, letting you start, stop, and pause the counting based on the status of an issue or when the issue
changes (for example, a comment is added). For example:
In an SLA that guarantees issues will be resolved in a certain amount of time, the time might start counting when the issue is
created and stop counting time when the issue is resolved.
In an SLA that guarantees a certain turnaround in response times between support and the customer, the time might start
counting when the issue is waiting for support. It might stop when the issue is once again waiting for the customer. Each time
the issue meets the start condition, a new cycle of the SLA will begin.
In an SLA that guarantees a certain response time excluding time spent waiting on a customer, the time might start counting
when the issue is created. It might stop counting when the issue is resolved, and it will pause each time the issue is waiting for a
customer.
Here's a look at how you use JIRA Service Desk SLA designer to set the conditions for the time metrics:
Notice that you can set multiple conditions for the start, stop, and pause time. Check out Example: Creating an SLA that doesn't track
for an in-depth look at how you can use this functionality.continuous time
Set up the SLA goals
While the time conditions on an SLA specify what your team considers to be "trackable" time for the SLA, the goal section of the SLA
designer lets you set the amount of time that's allowed for different scenarios. SLA goals can be in whole hours or in time increments
less than an hour. For example:
An SLA that guarantees issues will be resolved in certain amounts of time might specify Blocker issues will be resolved in 24
hours and Critical issues will be resolved in 36 hours.
An SLA might also guarantee times for very specific issue criteria. For example, an SLA for Blocker issues might specify that
Blocker issues created by a member of the Build Engineering team might have a goal of being resolved in 12 hours, while
Blocker issues created by a member of the Accounting team might have a goal of being resolved in 36 hours.
Here's a look at how you use the JIRA Service Desk SLA designer to set the goals for various issues:

Tips for creating good SLA goals
A best practice is to base a goal on criteria that doesn't change throughout an issue's lifecycle. For example, you would not
create a goal based on an issue status.
When creating SLA goals that use a fraction of an hour, write the time as Xh Ym (e.g. 3h 30m). You can write SLA goals as
hours, minutes, or both (but not days).
Creating SLA Calendars
By default, SLAs are measured against 24/7 working days. However, you can use SLA calendars to specify the working hours during
which time should count against the SLA target. For example, SLA calendars let you exclude holidays or weekends from the time that
affects the SLA metrics.
Use the button on the tab to create the calendars that work for your environment. Then associate them with SLAs asCalendar SLA
needed. See for an example of setting up an SLA that uses a 9-5 working day SLA calendar.Example: Creating a basic SLA
SLA calendars are unique to each service desk. If you want to use the same calendars in multiple service desks, you must re-create
them in that project.
SLA usage notes
If you edit an existing SLA, JIRA Service Desk will re-index all the existing issues in the project; the re-indexing will ensure that
the SLA status on the open issues reflects any changed criteria. All the historical SLA data for elapsed time will be recalculated
to measure against the new metrics. Note that the SLA status is only recalculated for open issues and not for resolved issues.
For example, when the goal for Blocker issues changes from 6 hours to 4 hours, all the closed issues are still considered having
met the goal as long as they were resolved in less than 6 hours. This ensures that your reports on closed issues remain
accurate for the issues' lifecycle.
If issue data changes in such a way that the goals for the issue change (for example, the priority changes from Critical to
Blocker), the time against the previous goal will be tracked against the new goal. In other words, if the support team spent an
hour on a Critical issue, when the issue is escalated to Blocker, the hour still counts against the new goal, even if it causes the

SLA to be breached.
Setting up a goal to be dependent on a different SLA is not recommended.
How your team sees SLAs
Your team members can see a read-only version of the tab so they can view how the SLA is configured. In the detail view of issues,SLA
the section lists even more detail about the SLA(s) that the issue is being measured against.SLA
Review the following sections for more detail on what the SLA tracker conventions indicate.
Ongoing SLAs
The SLA tracker uses colors to indicate the urgency of a given SLA for an issue based on the time remaining.
SLA has greater than 1 hour remaining.
SLA has less than 1 hour remaining. If the SLA goal is
one hour, the SLA has 30 minutes remaining.
Still confused?
The best way to understand SLAs is to look at the out-of-the box SLAs JIRA Service Desk provides, or practice making your
own. Check out these detailed examples of SLAs to get an idea of the different ways you can use SLAs in your team:
Example: Creating a basic SLA
Example: Creating an SLA that doesn't track continuous time
Example: Creating an SLA with multiple cycles

SLA has less than 30 minutes remaining. If the SLA
goal is one hour, the SLA has 15 minutes remaining.
SLA has breached the target. The amount of time past
the goal is shown as a negative number.
The time count may be configured to pause on certain conditions. A paused SLA will display a paused icon:
Completed SLAs
A completed SLA displays the time remaining when the SLA was completed (or the amount of time breached) and an icon to indicate
whether the SLA was completed successfully or unsuccessfully.
SLA completed successfully.
SLA completed unsuccessfully (it breached the target)
Multiple SLA targets
If the issue meets the criteria for multiple SLAs, trackers for each SLA will appear. In addition, if the SLA has had multiple cycles, you
can hover over the symbols for more details on how the SLA was met for that particular cycle. (For example, in an SLA that is measured
based on when an issue is waiting for support, you can see whether the SLA was met each time the issue started waiting for support.)

SLA sorting
When you view a list of issues (in a queue or elsewhere), you can sort them by their SLA resolution times. Ongoing issues are listed first,
with the shortest time remaining at the beginning of the list. Completed issues are ranked last but aren't sorted by the remaining time.
Reporting on SLAs
JIRA Service Desk provides robust that you can use to track your team's performance against your SLAs. This page lists thereporting tools
SLA-specific JQL conditions you can use to query the SLA data in your service desk, as well as examples for creating some common JQL
queries on SLAs.
State conditions
Duration conditions
Common SLA queries
State conditions
State conditions are JQL functions used with operators = or != . For example:
"Time to resolution" = breached() or "Time to resolution" != breached()
Success/fail functions
Function
name
with = with !=
breached() Gives all issues whose SLA last cycle (completed or
ongoing) has breached (target goal failed)
Gives all issues whose SLA last cycle has not breached (for
completed) or not breached yet (for ongoing cycles)
everBreached() Gives all issues whose SLA has any cycle (current or
past) that has ever breached.
Gives all issues whose SLA has all cycles (past or present)
successful or not breached yet (if ongoing).
SLA state functions
This state addresses the last SLA cycle. This cycle can be completed (the stop event is reached) or ongoing (the stop event is not reached
yet). When the cycle is ongoing, the cycle can be running or paused (if pause condition is true).
SLAs that have no cycles yet (the cycle has never been started) are not returned by these conditions.
Function
name
with = with !=
completed() Gives all issues whose SLA last cycle is completed Gives all issues whose SLA last cycle is not completed
running() Gives all issues whose SLA last cycle is ongoing and
not paused
Gives all issues whose SLA last cycle is not running (i.e.
completed or paused)
paused() Gives all issues whose SLA last cycle is ongoing and
paused
Gives all issues whose SLA last cycle is not paused (i.e.
completed or running)
Duration conditions
Conditions on duration are JQL functions used with operators <, <=, >, >=.
The '=' and '!=' operators are not supported.
These functions only apply to SLAs whose last cycle is ongoing (running or paused). Completed SLAs or SLAs without cycles will not be
returned.
Example:
"Time to resolution" < elapsed(2h) or "Time to resolution" < remaining("2h 30m")

There are two duration conditions:
Function
name
Description
elapsed() Gives issues whose SLA last cycle match condition on elapsed time since start event.
remaining() This function gives issues whose SLA last cycle match condition on remaining time before SLA breaches current goal
target duration.
This function is implicit, meaning that
"Time to resolution" > 5h
is the same as
"Time to resolution" > remaining(5h)
Common SLA queries
This table lists some examples of common SLA queries; the conditions you use for your own reports will vary depending on the way your
JIRA project is set up.
To find out Query
All issues that are about to break SLAs "Time to first response" < 1h and "Time to first response" != breached()
Issues that have plenty of time until they are due "Time to first response" > 40h
Issues that have at least one breached SLA cycle "Time to response" = everBreached()
The order of issues based on an SLA metric project = SIS ORDER BY "Time to resolution"
Example: Creating a basic SLA
This example looks at how you might create a very basic SLA for your service desk:
All critical and blocker issues must be resolved within 24 hours. You provide 24/7 support for certain customers (these issues are labeled
with "24H"). You provide 9 - 5 support for all other customers, but you don't track SLA metrics for them.
SLA configuration
(click to see a larger view)
Example issue workflow


Example: Creating an SLA that doesn't track continuous time
This example looks at how you might create a more complex SLA by pausing the time counter during the workflow:
Support wants to complete all issues within 40 hours. Time spent waiting on the customer doesn't count against the 40 hour goal.
SLA configuration
(click to see a larger view)
Example issue workflow
Example: Creating an SLA with multiple cycles
This example looks at how you might create a more complex SLA by starting and stopping the time counter throughout the workflow.
You might set up an SLA like this to track response times (for example, how long it takes your team to respond each time a customer
updates an issue with more information). This example also illustrates how goals for different issue criteria can be tracked from a single
SLA:
Support wants to respond to Access issues within two hours: this includes responding within two hours when the issue is created, as well
as each time the issue is updated with more information from the customer.
All other issues have a response time goal of 24 hours.
SLA configuration Example issue workflow

1.
2.
(click to see a larger view)
Tip: For a look at how SLAs with multiple start and stop conditions appear in the SLA tracker,
see .SLAs
Managing SLA data
When new SLA metric names are created, new custom fields are
created in JIRA to store them. The type of these custom fields is
SLA CustomField Type. As a JIRA administrator, you have the
following options to manage the SLA custom fields.
Learn more about .JIRA custom fields
Related pages
SLAs
1. Set whether project administrators can create new SLA metric names
New metric names create new custom fields. You can restrict the creation of them to only be available for JIRA administrators.
Choose > . Scroll down to the section and choose .Add-ons JIRA Service Desk Configuration
Keyboard shortcut: start typing 'g' + 'g' + 'service desk'
Use the option. If the setting is disabled, service deskAllow project administrators to create SLA custom fields
administrators can only select from existing metric names when creating SLAs.
2. Clean up unused custom fields
You can find out if there are SLA custom fields that are not used by any SLA metrics and clean them up with one simple click.
On the configuration page, the menu shows the number of unused custom fields if any. ToNumber of SLA fields currently not in use
delete them, click the button.Clean up

Providing self-help resources for your customers with a knowledge base
If you use Confluence, you can integrate its knowledge base
capabilities with JIRA Service Desk to help customers find
solutions on their own.
To integrate Confluence with JIRA Service Desk, go to the Settin
tab and then .gs Knowledge Base
Search on the global portal
Restricting the topic search
Creating knowledge base topics from an issue
Integrating JIRA Service Desk with Confluence
Notes on setting up a 2-legged OAuth application
link
About 2-Legged OAuth (2LO)
How to choose the user that you want searches
to be performed as
Troubleshooting issues with 2-Legged OAuth
Search on the global portal
A search box appears on the landing page if you've connected
Confluence with any service desk. Your customers can easily
search for anything they need to find out across all the spaces of
Confluence. If multiple Confluence servers are connected to
service desks, only the one will be used by the search boxprimary
on the landing page.
Restricting the topic search
You can control how Confluence suggests topics for each request type using the section. You can control this inRequest form search
two ways:
Prevent Confluence from suggesting pages - Select in the column for the request type. For example, youNo Search KB

might not want the "Get access to a system" request type to suggest pages since users have to request access through the
Customer Portal.
Limit the pages that will be suggested - In the column, enter the labels that must be applied toRestrict to articles with label
pages in order for them to appear in the suggested page list. For example, you might want to only include pages with the label
"purchasing" to appear when customers enter a "Request new software" request.
If you add label restrictions to a request type, these labels will also appear as the default labels for knowledge base articles Tip:
for issues based on that request type.created in JIRA
Creating knowledge base topics from an issue
If you link a Confluence space with a service desk, your team can create a knowledge base article based on an issue from the view issue
page in JIRA. Service team members can choose whether to create the article with a How-To article or Troubleshooting article blueprint;
those blueprints can help your knowledge base expand with cleanly organized topics.
The issue title and description are automatically added to the new Confluence page as its title and body text. (Any images in the issue
aren't copied over to Confluence.) If you've set up on the request type the issue was based on, those labels are label restrictions
automatically suggested for the article.
Service desk members must have the in the Confluence space to create a knowledge base article from an issue inAdd page permission
JIRA.
Integrating JIRA Service Desk with Confluence
You can connect JIRA Service Desk with Confluence 5.6 or later.
If you use an installed version of JIRA and Confluence, they must be linked via an using OAuth.application link
You must have to view a space in Confluence in order to select it as your knowledge base. If you don't have thispermission
permission, check with your Confluence administrator.
In order to use the topic search from the Customer Portal, customers must be Confluence users with to view thepermission
space the or Confluence space must allow anonymous access.
If the Confluence space is set up to allow anonymous viewing, any user can search the service desk when they're
putting in requests (in other words, they don't have to be Confluence users).
However, if the space viewing is restricted to certain users, customers must have the same username in Confluence in
order to search the space from the service desk.
Notes on setting up a 2-legged OAuth application link
An application link lets two applications ask each other for data. One application consumes data from another application that produces
data.
For JIRA Service Desk, the application that consumes data is JIRA and the application that produces data is Confluence. When
configuring the application link for JIRA Service Desk, the incoming authentication tab inside Confluence must be correctly configured.
When configuring 2-Legged OAuth, it is important to understand that the two applications actually maintain independent sets of
configuration information. The configuration in the incoming authentication tab of the application that produces data is different the
configuration in outgoing authentication of the application that consumes data
Confluence needs to correctly configure either "Allow user impersonation through 2-Legged OAuth" or specify a user in "Execute
as" in the incoming authentication tab.
JIRA only needs to enable 2-Legged OAuth on the outgoing configuration tab.
About 2-Legged OAuth (2LO)
Application links that use 2-Legged OAuth accomplish this communication in one of two ways. One way to handle this communication is
to trust all requests made over the application link and grant those requests access to everything. The second way to have requests
made over the application link is to pretend that each request is being made by an actual user. That pretend user is used to determine
what permissions should be applied to the request. The user the application link picks depends on how the application link is configured.
JIRA Service Desk uses the second way when making requests between applications.
To enable a 2LO application link you need to enable OAuth and select "Allow 2-Legged OAuth" in both incoming authentication
in Confluence and the outgoing authentication in JIRA.

1.
2.
3.
4.
5.
1.
2.
a.
b.
c.
d.
When you select 2LO, make sure that you also specify the user that is used by the application link when making requests.
How to choose the user that you want searches to be performed as
If your applications have the same users and you would like 2-Legged OAuth to pretend your users are making the request as
themselves: In the incoming authentication tab of the application that will serve the data, select "Allow user impersonation
through 2-Legged OAuth". This must be checked in the incoming authentication tab of the application that will serve the data as
it can only be configure by that application. Your users must have the same usernames in JIRA and Confluence.
If your users do not have the same usernames in JIRA and Confluence, you can create a special user with correct permissions:
In the incoming authentication tab of the application that will serve the data, add the user name you want to use in the text field
beside "Execute as" to have all searches made over the link be performed as though that user made the request. The user
name must be entered in the text field beside "Execute as" in the incoming authentication tab of the application that will serve
the data as it can only be configure by that application.
Note: This setting only opens up the search restrictions for users who do not have the he space. When theypermission to view t
open the Confluence pages by clicking the search results, they still do not get to see the pages due to the lack of the
permission.
If you want to retrieve data that is available to anonymous users, do not select “Allow user impersonation through 2-Legged
OAuth” and do not add a user name in the text field beside “Exectue as”. The user that 2-Legged OAuth uses, in this case, is the
anonymous user.
Troubleshooting issues with 2-Legged OAuth
You might see the following errors when connecting JIRA Service Desk to a Confluence knowledge base:
There was an error contacting Confluence. A possible cause of this could be an invalid
Application Link. Another possible cause could be that the current user does not have
access to Confluence. Please check that a valid Application Link to Confluence is set up
and that you have access to Confluence and have the appropriate permissions for this
action.
or
Client must be authenticated to access this resource.
These errors occur when the application link attempts to make a request in Confluence as a user that does not have permission to do so.
In this case JIRA Service Desk is attempting to make a space search in Confluence. That search is being performed by the application
link as a particular user and that user does not have permission to do the search.
To resolve the errors:
Check if 2-Legged OAuth is configured correctly in Confluence
Open application link configuration in Confluence. You cannot make the required changes from inside JIRA when using
2-Legged OAuth.
Select incoming authentication.
Is "Allow 2-Legged OAuth" checked? If Confluence does not have 2-Legged OAuth enabled, requests made by JIRA that
attempt to use 2-Legged OAuth are not processed.
Is "Allow user impersonation through 2-Legged OAuth" checked? In order for JIRA users to search as though they were
making the search in Confluence with their Confluence user permission, you must select this setting.
If "Allow user impersonation through 2-Legged OAuth" is not checked. is there a user name in the text field beside "Exectue
as"? When 2-Legged OAuth is enabled but "Allow user impersonation through 2-Legged OAuth" is not checked, all
searches are performed as the user entered in the "Execute as" text field. If no user is specified in that field, all searches will
be performed as an anonymous user.
Check if 2-Legged OAuth is enabled in JIRA
JIRA cannot change the settings about in Confluence but it also needs to have 2-Legged OAuth enabled.
Open application link configuration in JIRA, and then select outgoing authentication.
Is "Allow 2-Legged OAuth" checked? If JIRA does not have "Allow 2-Legged OAuth" checked, then 2-Legged OAuth is not
configured in JIRA.
If the incoming authentication tab only displays a single check box "Allow 2-Legged OAuth" and no other check box it may
suffer from a bug. This bug does not correctly enable 2-legged OAuth requests sent from JIRA when the application link is
first created. You can properly enable 2-legged OAuth by doing the following:
Uncheck "Allow 2-Legged OAuth" in the incoming authentication tab
Click the "Update" button
Check "Allow 2-Legged OAuth"
Click the "Update" button
JIRA Service Desk 2.3 Release Notes
What's new

In JIRA Service Desk 2.3, customers have joined the request participant party and can now add
other people to their requests. Agents also get something new: they can invite new customers
to a service desk project and raise requests on behalf of new customers from the Customer
Portal. Last, but certainly not least, service desk email channels are easier than ever to
manage.
24 February
2015
What's new
Fix list
Upgrade
information
Customers can add participants to their requests
When customers are looking at a request in the Customer Portal, they can add other (existing)
users so they can participate in the request too. Customers can also add participants via the CC
field in email requests.
Participants (except for the request creator) can "leave" a request from the Customer Portal
when they no longer want notifications about a request.
Read more...
Agents can raise requests on behalf of new customers
If you have enabled, your agents can create a request on behalf of a newpublic signup
customer from the Customer Portal – the new customer will receive an email invitation to the
Customer Portal and an email notification with a link to the new request. Agents can also invite
new customers from the JIRA Service Desk tab. People
Read more...
Improvements to the email channel
We've been working hard on making service desk email channels
easier to use. Nothing changes for your customers and agents,
but you will notice the following improvements:
Cleaner incoming mail page - Information about the
email accounts associated with your service desk
projects has been moved from the JIRA incoming mail
page to the JIRA Service Desk email settings page.
Better visibility into statuses - You can now easily see
the connection and email processing statuses from the
corresponding connectivity and processing logs on the
email settings page. Log information older than 6 months
is deleted daily.
One more change you'll notice: JIRA Service Desk now processes
emails in two steps, so you can enable email filtering (which can
remove auto-replies and spam from your queues) without
changing the connection to your linked mail servers.
Read more...

Plain text email notifications
If your customers rely on software that requires plain text or use a plain text mail client, you can
now change your default setting to plain text.
Read more...
Fix list
See .Issues resolved in JIRA Service Desk 2.3
Upgrade information
JIRA Service Desk 2.3 is compatible with JIRA 6.3.8 or later. You'll need to upgrade JIRA to 6.3.8 or later before updating JIRA Service
Desk to version 2.3. Before upgrading, please check and the upgrade notes for the JIRAEnd of Support Announcements for JIRA

version you're moving to.
Issues resolved in JIRA Service Desk 2.3
Below are the issues resolved in JIRA Service Desk 2.3, ordered by number of votes. For the
full details of the fixes, improvements and new features, please take a look at our .issue tracker
The describe the new features in this release.JIRA Service Desk 2.3 Release Notes
On this page:
Feature and
fix list
Feature and fix list
Key Summary T Votes
JSD-269 Allow customers to add other customers as request participants in the Customer Portal 198
JSD-546 Outgoing emails from JIRA Service Desk should support plain text format as in JIRA 8
JSD-1124 Should be possible to sign up a new customer in portal 6
JSD-1501 Customers unable to attach files when creating Service Desk Portal tickets 6
JSD-621 Conflicting pause and stop conditions prevent SLA from stopping 4
JSD-1587 Service Desk users should be able to change email notification type 3
JSD-1520 Customers do not receive issue created notifications if they have had their username changed 3
JSD-1600 Hipchat Notification is showing Created by null if username has combination of uppercase and lowercase letters. 2
JSD-1492 Internal Comment tab throws a JAVA Script error 1
JSD-1433 Add the request Participant field in the Customer Portal 1
JSD-1418 Google Apps portal login redirect broken in IE 10 & 11 0
JSD-1525 Error when creating Service Desk request with Notify Hipchat post function in Create Issue transition 0
JSD-1381 Logo as JPg cannot be uploaded 0
JSD-1646 As an Administrator or Agent, I should be able to selectively enable plaintext email notifications for Customers 0
JSD-1356 Custom field default values aren't applied to optional field in email submission 0
JSD-1799 Show primary key in the Customer Portal 0
16 issues
JIRA Service Desk 2.3.2 Release Notes
Fix list - 2.3.2 - 2 March 2015
Key Summary T Votes
JSD-1582 System add-ons disabled after restart of JIRA 2
JSD-970 Service desk sometimes treats Connect addon users as external customers 2
JSD-1493 JIRA ServiceDesk: Problem with finiding my Confluence Space while linking to ServiceDesk 1
JSD-1459 Columns missing on service desk queue due to hidden fields on selected columns 0
to retrieve your issuesAuthenticate
to retrieve your issuesAuthenticate

4 issues
JIRA Service Desk 2.3.3 Release Notes
Fix list - 2.3.3 - 9 March 2015
Key Summary T Votes
JSD-1408 Attachment Links in the Email is not Accessible 2
JSD-646 Issues are not transitioning when commenting via email 2
JSD-1490 Drop-down box remains visible after clicking the back button 1
JSD-1457 Missing translation variable replacement in comment 0
4 issues
JIRA Service Desk 2.3.4 Release Notes
Fix list - 2.3.4 - 23 March 2015
Key Summary T Votes
JSD-1491 Service Desk should recognise it's being included in an Email Thread 17
JSD-99 Customer portal doesn't honor translated statuses of the issue 7
JSD-544 Add links to previous comments 1
JSD-846 If an agent Reopens an issue customer portal shows issue as closed 1
JSD-1516 Portal shows None option for single select list when it is required and has a default value 1
JSD-558 Submitting an issue through service desk when 'Customer Issue Type' field is hidden should not be allowed 1
JSD-1550 Add People option is case sensitive when search is disabled 1
JSD-1655 Unable to Add Requests Participants when Search is Disabled and E-mail Contains Uppercase Letters 1
JSD-1576 Commenting on issue (without transitioning) changes the color of issue Status in Customer portal 0
JSD-772 Request names with apostrophe creates links that are not encoded 0
JSD-1623 The time of Date Time Picker is not working well when raising requests 0
11 issues
JIRA Service Desk 2.3.5 Release Notes
Fix list - 2.3.5 - 7 April 2015
Key Summary T Votes
to retrieve your issuesAuthenticate
to retrieve your issuesAuthenticate

JSD-1333 Error adding attachment with non-english characters sent via email 9
JSD-967 Service Desk does not respect JIRA password policy. 8
JSD-620 Emoticons are not showing on Customer Portal 5
JSD-1507 Anonymous comment in a ticket causes error rendering ActivityModule in Issue Navigator 1
JSD-1685 Issue creation via email failed if email subject exceeds 255 characters 1
JSD-1682 Create issue mail suggest customers can reply to the mail even when mail isn't setup. 0
JSD-1395 JSD does not support the reuse of labels in a new type label custom field 0
JSD-1639 Multiple User Picker field would not accept Username contain space 0
8 issues
JIRA Service Desk 2.3.6 Release Notes
Fix list - 2.3.6 - 21 April 2015
Key Summary T Votes
JSD-1747 JIRA Service Desk plugin upgrades reset the Message Threshold limit in the Advanced mail loop detection configuration 0
JSD-766 If user dismisses the kb suggestions box in portal, it never shows again, even for new requests. 0
2 issues
Best practices
Best practices for designing the Customer Portal
Your Customer Portal is where your customers interact with your service team. Here's some best practices on how to design an easy-to-use
Customer Portal that helps both your team and your customers work more efficiently.
Best practices for designing the Customer Portal
Your Customer Portal is where your customers interact with your service team. Here's some best practices on how to design an
easy-to-use Customer Portal that helps both your team and your customers work more efficiently.
Brand your Customer Portal with your company's color
scheme and logo. This is very easy: the color scheme for
your service desk will automatically match that of your
logo once your logo is uploaded. Wondering how? See Br
.anding your Customer Portal
Name your request types in your customers'
languages, i.e. using the keywords customers will be
looking for. For example, 'Access to a system' instead of
'VPN access'.
to retrieve your issuesAuthenticate
to retrieve your issuesAuthenticate

Help customers decide which request type to choose. How?
Use different icons for different request types. This is especially helpful for customers who come back to open the same
request types again as the icons stand out for them and they can easily spot the ones they are looking for.
Give examples and help text, e.g. for 'Software Request', you can add a description of 'If you need a software license,
e.g. Microsoft Office, raise a request here.'
You can also provide links to existing information that might be helpful for customers. For example, if you have already
purchased a number of licenses for Microsoft Office and listed the license numbers on your Intranet, you can add a link
to the page in the request type description and tell your customers to head straight to it to claim a license without
opening a request.
Keep the list of request types above the fold. If you have a large number of request types, e.g. more than 7, customers will
probably need to scroll to get to some of them. In this case, consider grouping some request types together. To set up groups,
use the drop-down and type the group names. Groups
Order the request types and request groups. As the
number of requests increases, you might see the trend in
the types of requests that get created. You can analyze
the trend and tweak the order in which request types are
displayed so that the popular ones appear at the top.
Drag and drop request types to re-arrange them
on your Customer Portal.
Groups are displayed in the alphabetical order.
To display them in a certain order, just prefix
group names with numbers, e.g. 1 Access, 2
. Service not working
If you assign multiple groups to a single request
type, the request type will appear on multiple
tabs.
Groups appear as tabs in the left-hand side of the Customer
Portal
For each field on the request form, add contextual
help. Help provided in context makes it easy for your
customers to complete the form. For example, specify the
dimension and the format of the photo for the attachment
field as shown in the screenshot. Add your contextual
help with the field.Field help
Set up a knowledge base. After using your service desk for a while, your team will
probably have accumulated a large amount of information that could be provided to
your customers so that they can solve some problems before even opening service
requests. At this point, you can consider integrating Confluence's knowledge base
capabilities with JIRA Service Desk. For information about how to achieve this, see Pro
.viding self-help resources for your customers with a knowledge base
Reference

JIRA Service Desk licensing
JIRA Service Desk - JIRA Configuration
JIRA Service Desk permissions
Valiantys VertygoSLA powers JIRA Service Desk SLAs
JIRA Service Desk licensing
This page explains the type of licenses the different users need to
use JIRA Service Desk.
If you want to find out the cost of running JIRA Service Desk,
head over to the pricing page: https://www.atlassian.com/software
./jira/service-desk/pricing
On this page:
What license do users need
How are users counted towards your JIRA
Service Desk license - the technical details
Resolving licensing issues
The number of agents exceeds
your license seats
What license do users need
Users JIRA
Service
Desk license
JIRA
user
license
Information
Customers No No Your customers can submit requests with the Customer Portal once logged in.
They can also create requests by sending emails to your inbox if you enable the email channel.
They do not count towards your JIRA Service Desk license or JIRA license.
Agents
Service desk
administrators
Yes Yes Agents are users that work on customer requests and communicate with customers.
Service desk administrators are agents with administrative privileges.
When you add a new agent to JIRA Service Desk, the new agent is added to the service-desk-age
group automatically. By default, this group is assigned with the nts JIRA Service Desk agent
global permission and therefore counts towards your JIRA Service Desk license.access
Collaborators No Yes If you have other users who help your service team resolving tickets and do not communicate with
your customers directly, you can purchase JIRA user license seats for them. These users are colla
in JIRA Service Desk.borators
For example, you can purchase JIRA user license seats for managers who approve purchase
requests, or developers who help support staff analyze bugs.
How are users counted towards your JIRA Service Desk license - the technical details
JIRA Service Desk pricing is based on agents. Agents are users that work on customer requests and communicate with
customers. Technically, an agent is any user account in the system with the JIRA Service Desk a global permission. Usersgent access
must have this global permission to use the licensed functions of JIRA Service Desk. By default, the group isservice-desk-agents
granted with this global permission and all agents belong to this group. This means that any user in the group counts towards your
license.
If you grant the JIRA Service Desk a global permission to other groups, users in those groups count towards your gent access JIRA
Service Desk too.
Resolving licensing issues
The number of agents exceeds your license seats
If you are experiencing this problem, you might have downgraded your license to a user tier that has fewer license seats than your
agents. When this happens, your customers can still raise requests, but other JIRA Service Desk functionality will be disabled. This
means that agents can only view issues and make internal comments, and they cannot perform other actions on issues any more, e.g.
You have two options in this situation: responding to customers.
Increase your license seats
Reduce the number of agents by revoking agent licenses from some agents
JIRA Service Desk - JIRA Configuration

Database tables
When you install the JIRA Service Desk add-on into your JIRA instance, the following additional tables will be created in your JIRA
database.
AO_54307E_CAPABILITY
AO_54307E_CONFLUENCE
AO_54307E_CONFLUENCEKB
AO_54307E_CONFLUENCEKBENABLED
AO_54307E_CONFLUENCEKBLABELS
AO_54307E_CUSTOMTHEME
AO_54307E_EMAILSETTINGS
AO_54307E_GOAL
AO_54307E_GROUP
AO_54307E_GROUPTOREQUESTTYPE
AO_54307E_IMAGES
AO_54307E_METRICCONDITION
AO_54307E_QUEUE
AO_54307E_QUEUECOLUMN
AO_54307E_REPORT
AO_54307E_SERIES
AO_54307E_SERVICEDESK
AO_54307E_STATUSMAPPING
AO_54307E_TIMEMETRIC
AO_54307E_VIEWPORT
AO_54307E_VIEWPORTFIELD
AO_54307E_VIEWPORTVALUE
AO_54307E_VIEWPORTFIELDVALUE
AO_54307E_VIEWPORTFORM
On this page
Database tables
Custom fields
Issue types and issue type scheme
Request types
Workflow
Default generated workflow statuses
Status mappings
Permissions
Global permissions
Project permissions and security types
Custom fields
If required, JIRA Service Desk will create the following JIRA :custom field
Custom field Type Notes
Customer
Request Type
String value Issues must have this field to be a JIRA Service Desk request. Otherwise, they are regular
JIRA issues.
Time to
resolution
An SLA field, stored in
JSON format.
This field stores SLA information for time until a request's resolution is set. See forSLAs
more information.
Request
participants
List of user keys This field stores the list of request participants in each issue. See Adding people to
for more information.participate in requests
When you create new time metrics for SLAs, JIRA Service Desk will create a custom field with the same name as the metric name. It will
store SLA information in the same format as the custom field mentioned above.Time to resolution
Issue types and issue type scheme
At installation time, JIRA Service Desk creates the following in JIRA. JIRA issue types
IT Help
Purchase
Change
Fault
Access
When you create a service desk project, a new issue type scheme with these five issue types will be created for the project. The scheme is
named .JIRA Service Desk Issue Type Scheme for Project <PROJECT KEY>

Request types
New service desk projects come with 2 request types set up:
Request name JIRA issue type Description
Get IT Help IT Help Get assistance for general IT problems and questions [example]
Request a new account Access Request a new account for an internal system [example]
Workflow
When you create a service desk project, JIRA Service Desk will create a default IT Support workflow for the project. The workflow is named J
IRA Service Desk IT Support Workflow generated for Project <PROJECT KEY>. A corresponding workflow scheme is also created,
named . JIRA Service Desk IT Support Workflow Scheme generated for <PROJECT KEY>
To learn more about how these two settings work, check and in the JIRA documentation.workflow workflow scheme
Note: An existing project being enabled as a service desk will keep its existing workflow scheme. You can change the workflow on the
workflow schemes page in JIRA administration.
Default generated workflow statuses
Workflow status Description
Waiting for Triage
The initial status when requests are created.
Waiting for Support
After requests have been triaged and each time the customer/reporter is waiting for a response.
Waiting for Customer
After an agent has actioned a request and is waiting for a response from the customer/reporter.
Resolved
When the request has been marked as resolved.
Status mappings
The workflow status names shown above are converted into customer-friendly names on the customer portal via workflow status mappings.
You can configure the status mapping per request type. The 2 default request types have the following workflow status mappings:
Workflow status in JIRA Status shown to customer (on Customer Portal and in email notifications)
Waiting for Triage Waiting for Support
Waiting for Support Waiting for Support
Waiting for Customer Requester Action Needed
Resolved Resolved
Permissions
Global permissions
JIRA Service Desk creates the service-desk-agents group and the JIRA Service Desk agent access global permission. JIRA Service
Desk uses these two new settings to manage license allocation. Do not modify these two settings directly. If you want to change license
allocation, use the page in the administration console. See .Manage Agents Managing agents
Project permissions and security types
Project permissions control the functionalities available to users in a service desk project. For information about permission setup for a
service desk project, see .JIRA Service Desk permissions
JIRA Service Desk introduces a new security type named . A security type is a concept that allowsService Desk Customer - Portal Access
restriction of users to certain permissions; examples of security types include and . Project Roles Groups Service Desk Customer - Portal
is a special security type that only applies to users while they are viewing the Customer Portal. It allows customers to use theAccess
Customer Portal without giving them access to JIRA.
JIRA Service Desk permissions
JIRA Service Desk provides a standard permission scheme (JIRA
Service Desk Permission scheme for [project]) that automatically
gives your JIRA Service Desk users the correct permissions for
the project role they are in.
For example, adding agents to your service desk will add users to
the Service Desk Team role. This role gives them access to JIRA
Service Desk and also allows them to work on issues.
This page introduces how the users on the tab of aPeople
service desk match to project roles and the permissions they
have.
On this page
What permissions does each role have?
How are permissions associated with each
role?
About the Service Desk Customer
- Portal Access security type
Using custom permission schemes
Related pages
Setting up service desk users
What permissions does each role have?
With the standard permission scheme, the different roles on your service desk have different levels of access as shown below.
Agent - JIRA Service Desk
Agents can:
Access both the Customer Portal and the
service desk interface in JIRA
View the Customer Portal, queues, reports
and SLA metrics for the service desks they
have access to
Access and edit issues in the service desks
they are assigned to
Add, edit and delete customer-facing and
private comments to issues
Manage content in the knowledge base
Customer
Customers can:
Create requests and track their own
requests
Add public comments to their own requests
Add attachments to their own requests
Administrator
In addition to what agents can do,
administrators can also:
Add agents, collaborators and customers to
a service desk
Remove agents, collaborators and
customers agents from a service desk
Configure request types and the Customer
Portal
Create and edit reports
Create SLAs for measuring progress
Connect a Confluence knowledge base to a
service desk
Configure the email channel a service desk
Collaborator
Collaborators can:
View issues, comments and attachments
Add attachments and delete their own
attachments
Add internal comments to issues and delete
their own comments
Watch and vote for issues
How are permissions associated with each role?
Each type of user displayed on the tab of your service desk matches a JIRA project role, and the project permissions for eachPeople
type of user are assigned to the JIRA project roles in the permission scheme.
To learn about the permissions assigned to each role, see . Standard permissions
Table: User and project role mapping
User JIRA project role
Agents
the roleService Desk Team
Customers
the roleService Desk Customers
Note: The permissions to this role are granted through the security type.Service Desk Customer - Portal Access
The security type checks this role to determine who are customers. For details about this security type, see the
.following section
Collaborators
the role Service Desk Collaborators
Service desk
administrators
the roleAdministrators
Screenshot: How the users on the People tab map to the JIRA project roles in the JIRA administration console

About the security typeService Desk Customer - Portal Access
The permissions assigned to customers are granted to the security type instead of the Service Desk Customer - Portal Access Servic
role. The security type gives people access to the Customer Portal onlye Desk Customers Service Desk Customer - Portal Access
(not JIRA). This security type checks the role Service Desk Customers to determine who are customers. So in summary, the security
type and the role work hand in hand to make sure that customers get the permissions they need to use the Customer Portal and cannot
access JIRA.
For example, if you want your customers to be able to create requests through your Customer Portal, grant the permissioCreate Issues
n to the security type, not the role.Service Desk Customer - Portal Access Service Desk Customers
Why does the security type have more permissions than what customers can do?
In the standard permission scheme, the security type has more permissions in place than theService Desk Customer - Portal Access
functionality available for customers to use. For example, the security type has the permission, but customersEdit Own Comments
cannot do this on the Customer Portal. This is because JIRA Service Desk built the functions that we think are the most commonly used
by service desk customers. We will evaluate the feature requests and expand the functions gradually. With the permissions in place now,
future functionality additions to the Customer Portal will be easier because you will not have to modify permission schemes to make use
of new functions in most cases. You can join the discussion on new features at our issue tracker: 707 issues - to seeAuthenticate
. issue details
Using custom permission schemes
If you want to customize the standard permission scheme, make sure that the roles have the mandatory permissions. See Using custom
.permission schemes
Standard permissions
This page shows the permission configuration for a standard permission scheme. JIRA Service Desk
To see an overview of how permissions are set up for a service desk, see . JIRA Service Desk permissions
If you want to customize the permission scheme, make sure that the mandatory permissions are assigned to the roles. See Usi
. ng custom permission schemes
If you run into permission-related problems, see .Resolving permission scheme errors
Project
Permissions
Users / Groups /
Project roles
Explanation
Administer
Projects
Project Role
(Administrators)
Permission to administer a project. This includes the ability to edit , project role membership pr
, and some ('Project Name', 'URL', 'Projectoject components project versions project details
Lead', 'Project Description').

Browse
Projects
Service Desk
Customer -
Portal Access
Project Role
(Service Desk
Collaborators)
Project Role
(Service Desk
Team)
Project Role
(Administrators)
Permission to browse projects, use the Issue Navigator and view individual issues (except
issues that have been restricted via ). Issue Security Many other permissions are dependent
, e.g. the 'Work On Issues' permission is only effective for users who alsoon this permission
have the 'Browse Projects' permission.
View
Development
Tools
Project Role
(Administrators)
Permission to , which displays information from Bitbucket, GitHub,view the Development panel
Stash, FishEye, Crucible and Bamboo, if JIRA is integrated with compatible versions of these
.applications
For older versions of Stash and FishEye or for Subversion and CVS, this grants permission to
view the for an issue, in the 'Commits' and 'Source' tabs. Noterelated source code commits
that for CVS, to view the related source code commits, the project needs to be associated with
at least one .Repository
View
(Read-Only)
Workflow
Project Role
(Service Desk
Team)
Project Role
(Administrators)
Permission to view the project's 'read-only' when viewing an issue. This permissionworkflow
provides the 'View Workflow' link against the 'Status' field of the .'View Issue' page
Issue
Permissions
Users / Groups /
Project roles
Explanation
Create Issues Service Desk
Customer -
Portal Access
Project Role
(Service Desk
Team)
Project Role
(Administrators)
Permission to create issues in the project. (Note that the Create Attachments permission is
required in order to create attachments.) Includes the ability to create sub-tasks (if sub-tasks
are enabled).
Edit Issues Service Desk
Customer -
Portal Access
Project Role
(Service Desk
Team)
Project Role
(Administrators)
Permission to edit issues (excluding the 'Due Date' field — see the Schedule Issues
permission). Includes the ability to convert issues to sub-tasks and vice versa (if sub-tasks are
enabled). Note that the Delete Issue permission is required in order to delete issues. The Edit
Issue permission is usually given to any groups or project roles who have the Create Issue
permission (perhaps the only exception to this is if you give everyone the ability to create
issues — it may not be appropriate to give everyone the ability to edit too). Note that all edits
are recorded in the Issue Change History for audit purposes.
Transition
Issues
Service Desk
Customer -
Portal Access
Project Role
(Service Desk
Team)
Project Role
(Administrators)
Permission to transition (change) the status of an issue.
Schedule
Issues
Service Desk
Customer -
Portal Access
Project Role
(Service Desk
Team)
Project Role
(Administrators)
Permission to schedule an issue — that is, to edit the 'Due Date' of an issue. In older versions
of JIRA this also controlled the permission to view the 'Due Date' of an issue.
Move Issues Service Desk
Customer -
Portal Access
Project Role
(Service Desk
Team)
Project Role
(Administrators)
Permission to move issues from one project to another, or from one workflow to another
workflow within the same project. Note that a user can only move issues to a project for which
they have Create Issue permission.

Assign Issues Service Desk
Customer -
Portal Access
Project Role
(Service Desk
Team)
Project Role
(Administrators)
Permission to assign issues to users. Also allows autocompletion of users in the Assign Issue
dropdown. (See also Assignable User permission below)
Assignable
User
Project Role
(Service Desk
Team)
Project Role
(Administrators)
Permission to be assigned issues. (Note that this does not include the ability to assign issues;
see Assign Issue permission).
Resolve
Issues
Service Desk
Customer -
Portal Access
Project Role
(Service Desk
Team)
Project Role
(Administrators)
Permission to resolve and reopen issues. This also includes the ability to set the 'Fix For
version' field for issues. Also see the Close Issues permission.
Close Issues Service Desk
Customer -
Portal Access
Project Role
(Service Desk
Team)
Project Role
(Administrators)
Permission to issues. (This permission is useful where, for example, developers resolveclose
issues and testers close them). Also see the Resolve Issues permission.
Modify
Reporter
Service Desk
Customer -
Portal Access
Project Role
(Service Desk
Team)
Project Role
(Administrators)
Permission to modify the 'Reporter' of an issue. This allows a user to create issues 'on behalf
of' someone else. This permission should generally only be granted to administrators.
Delete Issues Service Desk
Customer -
Portal Access
Project Role
(Service Desk
Team)
Project Role
(Administrators)
Permission to delete issues. Think carefully about which groups or project roles you assign
this permission to; usually it will only be given to administrators. Note that deleting an issue will
delete all of its comments and attachments, even if the user does not have the Delete
Comments or Delete Attachments permissions. However, the Delete Issues permission does
not include the ability to delete individual comments or attachments.
Link Issues Service Desk
Customer -
Portal Access
Project Role
(Service Desk
Team)
Project Role
(Administrators)
Permission to issues together. (Only relevant if Issue Linking is ).link enabled
Set Issue
Security
Service Desk
Customer -
Portal Access
Project Role
(Service Desk
Team)
Project Role
(Administrators)
Permission to set the on an issue to control who can access the issue. Onlysecurity level
relevant if issue security has been .enabled
Voters &
Watchers
Permissions
Users / Groups /
Project Roles
Explanation

View Voters
and Watchers
Service Desk
Customer -
Portal Access
Project Role
(Service Desk
Team)
Project Role
(Administrators)
Permission to view the voter list and watcher list of an issue. Also see the Manage Watcher
List permission.
Manage
Watcher List
Service Desk
Customer -
Portal Access
Project Role
(Service Desk
Team)
Project Role
(Administrators)
Permission to manage (i.e. view/add/remove users to/from) the of an issue.watcher list
Comments
Permissions
Explanation
Add
Comments
Service Desk
Customer -
Portal Access
Project Role
(Service Desk
Collaborators)
Project Role
(Service Desk
Team)
Project Role
(Administrators)
Permission to to issues. Note that this does not include the ability to edit oradd comments
delete comments.
Edit All
Comments
Project Role
(Service Desk
Team)
Project Role
(Administrators)
Permission to edit any comments, regardless of who added them.
Edit Own
Comments
Service Desk
Customer -
Portal Access
Project Role
(Service Desk
Collaborators)
Project Role
(Service Desk
Team)
Project Role
(Administrators)
Permission to edit that were added by the user.comments
Delete All
Comments
Project Role
(Service Desk
Team)
Project Role
(Administrators)
Permission to delete any comments, regardless of who added them.
Delete Own
Comments
Service Desk
Customer -
Portal Access
Project Role
(Service Desk
Collaborators)
Project Role
(Service Desk
Team)
Project Role
(Administrators)
Permission to delete comments that were added by the user.
Attachments
Permissions
Users / Groups /
Project Roles
Explanation

Create
Attachments
Service Desk
Customer -
Portal Access
Project Role
(Service Desk
Collaborators)
Project Role
(Service Desk
Team)
Project Role
(Administrators)
Permission to to an issue. (Only relevant if attachments are ). Note thatattach files enabled
this does not include the ability to delete attachments.
Delete All
Attachments
Project Role
(Service Desk
Team)
Project Role
(Administrators)
Permission to delete any , regardless of who added them.attachments
Delete Own
Attachments
Service Desk
Customer -
Portal Access
Project Role
(Service Desk
Collaborators)
Project Role
(Service Desk
Team)
Project Role
(Administrators)
Permission to delete that were added by the user.attachments
Time
Tracking
Permissions
Users / Groups /
Project Roles
Explanation
Work On
Issues
Project Role
(Service Desk
Team)
Project Role
(Administrators)
Permission to against an issue, i.e. create a worklog entry. (Only relevant if log work Time
).Tracking is enabled
Edit Own
Worklogs
Project Role
(Service Desk
Team)
Project Role
(Administrators)
Permission to edit worklog entries that were added by the user. (Only relevant if Time Tracking
is enabled). Also see the Work On Issues permission.
Edit All
Worklogs
Project Role
(Administrators)
Permission to edit any worklog entries, regardless of who added them. (Only relevant if Time
Tracking is enabled). Also see the Work On Issues permission.
Delete Own
Worklogs
Project Role
(Service Desk
Team)
Project Role
(Administrators)
Permission to delete that were added by the user. (Only relevant if worklog entries Time
is enabled). Also see the Work On Issues permission.Tracking
Delete All
Worklogs
Project Role
(Administrators)
Permission to delete any , regardless of who added them. (Only relevant if worklog entries Tim
is enabled). Also see the Work On Issues permission.e Tracking
Using custom permission schemes
If you want to customize the permission scheme for your service
desk, make sure that you grant permissions to users by granting
them:
to the role for administrators Administrators
to the role for agentsService Desk Team
to the role for collaborators Service Desk Collaborators
to the securityService Desk Customer - Portal Access
type for customers. For more information about this
security type, see .JIRA Service Desk permissions
If you grant permissions to groups or individual users instead of
the roles and security type, some functionality in your service desk
might be disabled.
On this page
Mandatory permissions by project roles
Related pages
Standard permissions
Resolving permission scheme errors
Mandatory permissions by project roles

If you choose to use custom permission schemes, the permissions in the following table are mandatory for the project roles in the typical
service desk context. If you configure the permissions for the roles differently than shown in the table and run into problems, you can find
the explanation of the problems and how you can fix them on the page.Resolving permission scheme errors
Project role Mandatory permissions
Administrators
This project role must have the project permission in order to set up and administer a serviceAdminister Projects
desk. This permission allows users to manage service desk functionality like creating new request types, setting up
new queues, creating SLAs, and generating reports.
This project role also must have all the permissions granted to the other users of the service desk in order to see
all the functionality they'll be using.
Service Desk
Team
Create Issues (This permission gives users the ability to create issues in a Customer Portal.)
Browse Projects (This permission gives users read-only access to the , , and tabs in aReports People SLA
service desk project, as well as access to the project's Customer Portal. Users can also see the tabQueues
and work on issues from within the queues.)
Edit Issues
Schedule Issues
Add Comments
Create Attachments
Service Desk
Customers
The permissions for customers must be granted to the security typeService Desk Customer - Portal Access
instead of the role. This configuration gives customers access to the Customer PortalService Desk Customers
only (not JIRA). The security type reads the role to determine who are customers.
Create Issues (This permission gives users the ability to create requests in a Customer Portal)
Browse Projects (This permission gives users access to the project in the Customer Portal)
Add Comments (This permission gives users the ability to add comments on their own requests.)
Create Attachments (This permission gives users the ability to add attachments when they create a request or
add attachments to the request after it's been submitted)
Assign Issue (This permission is mandatory for the field to work. The field is an optional Assignee Assignee h
and it automatically channel issues to certain team members.)idden field
In addition, if the service desk project uses an , make sure that it is configured so thatissue security scheme
service desk users can view issues. Otherwise, customers might be able to create issues but not view them after
they've been created.
Service Desk
Collaborators
Browse Projects (This permission gives users access to the issues in JIRA. They cannot see the service desk
interface, e.g. .Queues )
Add Comments (This permission gives users the ability to add internal comments.)
Create Attachments
Resolving permission scheme errors
When you use a custom permission scheme, if the permission
settings are different from those of the standard permission
scheme, you will see a permission error similar to the following
one.
On this page
Explanation of permission scheme errors
Resolving errors
What does the Fix
permissions button do?
What are major permission errors?
Related pages
For information about mandatory
permissions for JIRA Service Desk roles,
see . Using custom permission schemes
Explanation of permission scheme errors
JIRA Service Desk considers the differences between your permission scheme and the standard JIRA Service Desk one as errors and
there are two categories of errors:
Major errors: These ones either cause certain administration functionality to be disabled (for example you cannot add agents to
your service desk), or impact the day-to-day use of your service desk (for example customers cannot log in to the Customer
Portal). The following table describes what JIRA Service Desk considers as major errors. You must fix these errors for JIRA
Service Desk to return to normal operation.
Minor errors: The permission differences that do not impact how JIRA Service Desk works are considered as minor errors. You
do not have to use the standard permission setup for these permissions.

Resolving errors
You can resolve the permission errors by changing the permission scheme yourself or using the button in the errorFix permissions
message.
What does the button do?Fix permissions
The button on the message disassociates your custom permission scheme with the service desk project, creates aFix permissions
copy of your permission scheme with the name of <your_permission_scheme >, and associates this new scheme with the[number]
project. The new scheme fixes the errors by:
Granting the standard permissions to the , and roles and the Administrators Service Desk Collaborators Service Desk Team
security type as described on the page.Service Desk Customer - Portal Access Standard permissions
Removing the role from all the permissions assigned.Service Desk Customers
Leaving other permission setup as is.
Example:
Your original permission scheme The new permission scheme
The name of the original one is 'JIRA
Service Desk Permission scheme for
Project OA'.
The following permissions are set up
differently from the standard permission
scheme:
User has the John Smith Browse
permission. This is a minorProjects
error.
The roleService Desk Customers
has the permission.Create Issues
This is a major error.
The Service Desk Customer -
security type does notPortal Access
have the permission.Create Issues
This is the major error.
After you click Fix permissions, the 'JIRA Service Desk Permission scheme for Project
OA' permission scheme is dissociated with the project, and a new permission scheme
called 'JIRA Service Desk Permission scheme for Project OA 1' will be applied to your
service desk.
User will still have the permission.John Smith Browse Projects
The role is removed from the permission.Service Desk Customers Create Issues
The security type will be granted the Service Desk Customer - Portal Access Cre
permission. ate Issues
What are major permission errors?
Major permission errors cause certain functionality of JIRA Service Desk to be disabled.
Error Explanation
The role or the Service Desk Team
role isService Desk Collaborators
granted the Administer Projects
permission.
Granting the Administer Projects permission to your agents or collaborators means that all
agents or collaborators become administrators for your service desk.
This is a severe security issue. JIRA Service Desk will disable the functionality of agent or
collaborator management. As a result, administrators will not be able to add any agent or
collaborator.
The roleService Desk Customers
is granted any permission directly.
Granting permissions to this role gives customers access to JIRA functions. Customers should
only have access to a Customer Portal and permissions should be granted to the Service
security type.Desk Customer - Portal Access
As a result, administrators will not be able to add any customers to the service desk. Open
service desks will become restricted. Public signup will be disabled.
The role does notAdministrators
have the following required
permissions:
Browse Projects
Administer Projects
Edit Issues
No permission = Administrators cannot access the service desk.Browse Projects
No permission = Administrators cannot modify settings of theAdminister Projects
service desk.
No permission = Administrators cannot edit issues.Edit Issues

The Service Desk Customer -
security type doesPortal Access
not have the following required
permissions:
Browse Projects
Create Issues
Add Comments
No permission = Customers cannot access the Customer Portal of theBrowse Projects
service desk, that is they cannot log in.
No permission = Customers cannot create requests on the CustomerCreate Issues
Portal.
No permission = Customers cannot add comments to their requests.Add Comments
The Service Desk Team role does
not have the following required
permissions:
Browse Projects
Edit Issues
No Browse Projects permission = Agents cannot see the service desk.
No permission = Agents cannot edit issues and become collaborators.Edit Issues
The rolService Desk Collaborators
e does not have the following
required permission:
Browse Projects
No permission = Collaborators cannot see the service desk.Browse Projects
The rolService Desk Collaborators
e is granted the Edit Issues
permission.
Collaborators should not be able to edit issues and here's why:
For example, if you want to add a user as a collaborator on service desk HR and as an agent
on service desk IT, granting the permission to the Service Desk Collaborators roleEdit Issues
on the HR project will make the collaborator an agent on the HR service desk instead of a
collaborator.
Valiantys VertygoSLA powers JIRA Service Desk SLAs
We are happy to announce that Atlassian has acquired VertygoSLA from Valiantys. VertygoSLA is a leading add-on for JIRA in the Atlassian
Marketplace that allows organisations to track their service level agreements (SLAs) for acknowledgement times or resolution times.
VertygoSLA is incorporated into JIRA Service Desk, the latest service desk offering from Atlassian. Most of the features in VertygoSLA will
continue to be available in JIRA Service Desk, but redesigned with a completely new, streamlined user interface that closely integrates
service level agreements with the rest of the JIRA Service Desk offering. With the power of VertygoSLA, JIRA Service Desk allows you to set
up advanced SLA metrics, report on performance in real-time and drive your team forward with highly visible SLA priorities.
VertygoSLA will no longer be offered for sale separately from 2nd October 2013.
Already a VertygoSLA customer?
We have got you covered. As a valued customer of Valiantys VertygoSLA, we want to ensure that you continue to be as successful in using
JIRA as you possibly can. All customers who hold an active VertygoSLA license will be eligible to obtain a license for JIRA Servicefree
Desk at the same user tier as the VertygoSLA license.
To benefit from this promotion, please contact our sales team at before the 28th Feburary 2014.[email protected]
Alternatively, you can continue to use VertygoSLA. Valiantys will continue to support VertygoSLA until 2nd October 2015. All VertygoSLA
customers are eligible to renew their VertygoSLA licenses through to a maximum end date of 2nd October 2015.
Frequently Asked Questions
Who is eligible for the license promotion?
If you have an active VertygoSLA license as at 2nd October 2013, you will be eligible to obtain JIRA Service Desk for free. Please contact sal
before 28th February 2014.[email protected]
How long will the maintenance on my JIRA Service Desk license be?
The JIRA Service Desk license will have the maintenance expiry date as your current VertygoSLA license. You can renew your JIRA Service
Desk license at the end of the maintenance period.
Do I need to purchase a new JIRA Service Desk license if I miss the promotion?
Yes, you will need to purchase a new JIRA Service Desk license if you do not take up the promotion before 31st December 2013.

Will VertygoSLA still work if I take up the promotion?
Yes, your current VertygoSLA installation will continue to work even if you take up this promotion.
What are the differences in the features between JIRA Service Desk and VertygoSLA?
Although JIRA Service Desk incorporates VertygoSLA, we have significantly rewritten much of the product features, which means that there
are some key differences. These include:
VertygoSLA JIRA Service Desk
VertygoSLA supports working hour calendars JIRA Service Desk does not yet support working hour calendar support
As of JIRA Service Desk 1.1, working hour calendars are supported
Configure SLAs globally requiring administration
permission on JIRA
Configure SLAs within each project, requiring project administration
permission in JIRA only
VertygoSLA support negotiated start / end times for SLAs JIRA Service Desk does not support negotiated start / end times for SLAs.
VertygoSLA metrics start, pause, and end on set of JIRA
events
JIRA Service Desk metrics start, pause, and end on a subset of JIRA events,
and workflow statuses
VertygoSLA metrics only record on issues created after
the metrics have been created
JIRA Service Desk can retro-actively apply metrics to issues already existing
in JIRA before the metrics are created.
If there are specific features that you are looking for in JIRA Service Desk that was available in VertygoSLA, we encourage you to contact our
team via .http://jira.atlassian.com
Will there be a migration tool available to migrate from VertygoSLA to JIRA Service Desk?
Currently, there are no migration tools available.
Glossary
Administrator
Agent - JIRA Service Desk
Collaborator
Customer
Customer Portal 1
Issue - JIRA Service Desk
Issue type
Knowledge base
Queue - JIRA Service Desk
Report
Request
Request form
Service-level agreement (SLA)
SLA tracker
Administrator
Administrators are users with administrative rights for a service desk.
In addition to what agents can do, administrators can also:
Add agents, collaborators and customers to a service desk
Remove agents, collaborators and customers agents from a service desk
Configure request types and the Customer Portal
Create and edit reports
Create SLAs for measuring progress
Connect a Confluence knowledge base to a service desk
Configure the email channel a service desk
Related pages
Agent - JIRA
Service Desk
Customer
Collaborator

An administrator consumes one JIRA Service Desk license and one JIRA license.
Agent - JIRA Service Desk
Agents are users that work on customer requests and communicate with customers.
Customers create requests and these requests appear as issues in JIRA for agents to work on.
Agents can:
Access both the Customer Portal and the service desk interface in JIRA
View the Customer Portal, queues, reports and SLA metrics for the service desks they
have access to
Access and edit issues in the service desks they are assigned to
Add, edit and delete customer-facing and private comments to issues
Manage content in the knowledge base
An agent consumes one JIRA Service Desk license and one JIRA license.
Related pages
Managing
agents
JIRA Service
Desk
licensing
Customer
Collaborator
Administrator
Collaborator
Collaborators are users that occasionally assist agents with customer requests by making
internal comments. For example, developers help support staff analyze a bug and add a
comment that explains the cause and any workaround available.
Collaborators don't have access to the service desk interface (e.g. queues, reports and SLAs)
and service desk projects appear as JIRA projects to them. They cannot work on issues, for
example, logging work or transitioning issues.
Collaborators can:
View issues, comments and attachments
Add attachments and delete their own attachments
Add internal comments to issues and delete their own comments
Watch and vote for issues
A collaborator consumes one JIRA user license.
Related pages
Managing
collaborators
Agent - JIRA
Service Desk
Customer
Customers, also known as JIRA Service Desk customers, are users who create requests for
agents to work on.
Customers have access to the Customer Portal; they do not have access to the service desk
interface in JIRA used by the service team.
Customers can:
Create requests and track their own requests
Add public comments to their own requests
Add attachments to their own requests
Customers do not consume JIRA Service Desk licenses or JIRA user licenses.
Related pages
Agent - JIRA
Service Desk
Collaborator
Administrator
Customer Portal 1
The site where customers submit and track requests.
Agents, collaborators and administrators can also use the Customer Portal.
Issue - JIRA Service Desk
Customer requests are issues for the service team. An issue usually has more fields than the corresponding customer request.
When an agent works on customer requests, they use the JIRA issue view to update the requests, and all the information is recorded in the
corresponding issues.
To see how issues look like for customers, see .Request
An example JIRA Service Desk issue

Issue type
Issue types are a JIRA concept and are the underlying objects for request types.
One issue type can be the base for one or more request types.
When you customize what customers see on the Customer Portal by modifying the request
types with the service desk interface, you are changing the display of JIRA fields
Related pages
Request
Knowledge base
A knowledge base is where you provide help content for your customers so that they can find solutions on their own. You can add the
knowledge base capabilities to your service desk by integrating Confluence with JIRA Service Desk.
To see how you can build up knowledge and help your customers find solutions on their own, see Providing self-help resources for your
. customers with a knowledge base
Queue - JIRA Service Desk
A queue is a list of issues that are displayed based on a set of criteria. JIRA Service
Desk provides some pre-configured queues that sort issues for your team. You can create

additional custom queues to further optimize the view for the agents.
Here's how queues work:
Service desk administrators can create new queues.
Agents can view queues but can't create their own custom queues or change the order
the queues appear in. Keep this in mind when you design queues.
You can control the order of issues in a queue by the way you structure the JQL
statement you use to set up the queue.
Report
Reports are charts that illustrate the performance of your service desk.
A report consists of one or more series. A series plots a measurement through time and appears as a line on the chart. JIRA Service Desk
provides some pre-configured reports. You can create custom reports to query any combination of performance data.
Request
Customers create requests with the Customer Portal or by sending emails to the email account
that is linked with your service desk project.
Depending on what your organizations use JIRA Service Desk for, a request might represent a
support ticket, a leave request, etc..
Customers fill in the details of a request in a set of fields defined by the service desk
administrator and the request is saved as an issue in JIRA Service Desk. Customers interact
with agents by adding comments to the request. The status of the request is used to
communicate the progress of the request. To see how a request appears for agents, see Issue -
.JIRA Service Desk
An example request
Related pages
Customer
portal
Setting up the
email channel
Request form
A request form refers to the form where customers fill out the information when creating a request on the Customer Portal.
Service desk administrators define the fields available on a request form.
Service-level agreement (SLA)
See . An SLA in JIRA Service Desk is made up of two settings: time measurement andwikipedia
goals for issues.
Time metrics define how time is measured and goals set the amount of time that's allowed for
different scenarios.
SLA information appears on both issues and queues, so no matter where your team work,
they'll be able to see if they're on track to meet their SLA goals.
Related pages
SLAs

