
Policy Product Guide
Version 2019.1


Copyright Notice
This document is provided strictly as a guide. No guarantees can be provided or expected. This
document contains the confidential information and/or proprietary property of Ivanti, Inc. and its
affiliates (referred to collectively as “Ivanti”) and may not be disclosed or copied without prior written
consent of Ivanti.
Ivanti retains the right to make changes to this document or related product specifications and
descriptions, at any time, without notice. Ivanti makes no warranty for the use of this document and
assumes no responsibility for any errors that can appear in the document nor does it make a
commitment to update the information contained herein. For the most current product information,
please visit www.Ivanti.com.
Copyright © 2019, Ivanti. All rights reserved.
Protected by patents, see https://www.ivanti.com/patents.
Copyright © 2019 , Ivanti. All Rights Reserved. Privacy and Legal.
Page 3 of 237
Environment Manager 2019.1 Policy Product Guide

Contents
Policy Product Guide 1
Copyright Notice 3
About Environment Manager 7
Licensing 7
Architecture 9
Console 11
Environment Manager Administrative Tools 19
Service Packs 19
Best Practices for Configuration 21
Keyboard Shortcuts 25
Wildcards and Regular Expressions 26
About Policy Configuration 28
Managing Configurations 29
Advanced Configuration Settings 30
Personalization Servers Policy 39
Auditing 41
Run As User Library 47
Group Policy Location 50
Configuration Change Tracking 50
Default Timeout Settings 58
Configuration Tasks 58
Library 60
Configuration Layering 61
Components 61
Layered Configuration 62
Nested Layers 63
Excluded from Layering 63
Trigger Environment Actions and Conditions 64
User Messages, Blocked Text Libraries and Run As Libraries 64
Manage Layered Configurations 65
Configuration Dependencies 73
Configuration Endpoint Merging 77
Components in a Merge 77
ManifestGen Tool 79
BatchConfig Tool 82
Auditing Events - Configuration Endpoint Merging 83
Merging Configurations 83
Live Configuration Rules 86
Triggers 88
Computer Triggers 88
User Triggers 89
Process Start and Stop Triggers 91
Copyright © 2019 , Ivanti. All Rights Reserved. Privacy and Legal.
Page 4 of 237
Environment Manager 2019.1 Policy Product Guide

Network Triggers 92
Trigger Environment 94
Node Management 97
Configuring Nodes 97
Node Descriptions 98
Node Scheduling 99
Add New Node to a Configuration or Process Trigger 101
Arrange Nodes 103
Stop Sub Nodes on Fail 105
Node Groups 105
Clone 106
Reusable Nodes 107
Condition Management 112
Create a Condition 112
Condition Variables 113
Field Validation 116
Active Directory Based Conditions for Devices in Child Domains 119
Registry Conditions 119
File and Folder Conditions 122
Directory Membership Conditions 123
User Conditions 124
Computer Conditions 125
Session & Client Conditions 127
Custom Conditions 131
Reusable Conditions 133
Environment Conditions 135
Flow Control Conditions 137
Cache Roaming for Virtual Sessions 144
Manage VHD 147
Cache Roaming 150
Group Policy Object (GPO) Import 154
GPO Import 154
Action Management 156
Configuring Actions 156
Registry Actions 158
File and Folder Actions 163
Drives and Printers Actions 181
ODBC (Open Database Connectivity) Actions 186
Custom and Execute Actions 187
Group Policy Actions 190
Environment Actions 193
Shortcut Actions 198
Logon/Logoff Message 203
Fast Logoff Action 204
Self Heal Actions 204
Copyright © 2019 , Ivanti. All Rights Reserved. Privacy and Legal.
Page 5 of 237
Environment Manager 2019.1 Policy Product Guide

File Director Action 207
Set Desktop Wallpaper 211
Outlook Actions 211
Automation integration into Environment Manager Policy 215
Tools and Wizards 221
Policy Templates 221
Configuration Profiler 222
Group SID Refresh 224
Lockdown Management 225
App-V 4.x Wizard 237
Copyright © 2019 , Ivanti. All Rights Reserved. Privacy and Legal.
Page 6 of 237
Environment Manager 2019.1 Policy Product Guide

About Environment Manager
Environment Manager provides on-demand personalization of user desktops on-demand and helps
protect endpoints with fine-grained contextual policy control.
Environment Manager Personalization provides:
l Fast logon times
l A fully personalized desktop experience, regardless of location or device
l A secure desktop environment that adapts based on user context
Use Environment Manager Policy to:
l Enforce policy real-time throughout the user session, not just at login
l Help meet corporate and industry-based compliance mandates such as HIPAA, FINRA, and PCI
l Run multiple policies in parallel for the best possible user experience.
Licensing
The Licensing console allows you to manage User Workspace Manager product licenses.
The Licensing console allows you to:
l Manage licenses for single products, the User Workspace Manager Suite and Evaluation
licenses.
l Export license packages to MSI or LIC file format for saving to the Management Center or other
computers which can be remotely accessed.
l Import and manage licenses from LIC file format.
For information about license deployment to endpoints, see Management Center Help.
Managing Licenses
License details are included in the License Agreement which is issued when an order for ther software
has been completed.
The License Agreement includes the following information:
l Product, Feature, and Version Details
l Issue Date
l Expiry Date
l Customer Name
l Serial ID
Together with the license agreement you will receive either a TXT file or a LIC file. Use these in the
Licensing Console to add or import the license.
Copyright © 2019 , Ivanti. All Rights Reserved. Privacy and Legal.
Page 7 of 237
Environment Manager 2019.1 Policy Product Guide

Add a License
1. Open the Licensing console.
2. Click Add.
The Add License Key dialog displays.
3. Enter the License Key and click Add.
If you received a TXT file license, open the file and copy the license key, paste it in to the Add
License Key dialog.
If you received a LIC file license, refer to "Import License Files" on the next page.
Details of the license are displayed in the console and the license key is added to the following
location:
%ALLUSERSPROFILE%\AppSense\Licenses
Activate a License
Once added, some licenses require activating.
1. Select a license or add one to the licensing console.
2. Click Activate.
3. Type or copy and paste the activation code.
4. Press Enter to accept the code.
The license console saves the license key to the MS Windows registry on the local machine. The License
Status field updates to show the status of the license and the license details display in the lower part
of the console.
To check that the license is active on your endpoint, search the registry for the license code. If
the search finds the code, then the license is active.
Remove a License
1. Highlight the required license and click Remove.
A confirmation dialog displays.
2. Click Yes to confirm.
The selected license is deleted and removed from the console and the MS Windows registry or
%ALLUSERSPROFILE%\AppSense\Licenses location, whichever is applicable to the license type.
Copyright © 2019 , Ivanti. All Rights Reserved. Privacy and Legal.
Page 8 of 237
Environment Manager 2019.1 Policy Product Guide

Export License Files
Export licenses to an MSI or LIC file to create a backup and enable distribution to other endpoints
using the Licensing console or the Management Center.
1. Highlight the license you want to export.
2. Click Export to display Windows Save As dialog.
3. Browse to the required location to save the license file.
4. Enter a name for the file.
5. Select the file type: MSI or LIC.
6. Click Save.
A file is created and saved in the selected location. This file can be copied to any network location and
loaded via the Licensing console or in the Management Center console.
Import License Files
Import a previously exported license to an endpoint using the Licensing console.
1. Open the Licensing console.
2. Click Import to display the Windows Open dialog.
3. Navigate to the required LIC file.
4. Click Open.
Details of the license are displayed in the console and the license key is added to the following
location:
%ALLUSERSPROFILE%\AppSense\Licenses
Troubleshooting
I received a license, what do I do?
If you have received a product license you can load the license by launching the Licensing Console on
your client computer and entering the license code.
I have entered a license, but it says it is not activated, why?
Some licenses require activation before they can be used. Activation codes are provided by Ivanti.
Activate a license by entering the License and Activation codes into the console.
Architecture
The Environment Manager system consists of the Environment Manager Console, Environment
Manager Agent, Personalization Server and Database.
Copyright © 2019 , Ivanti. All Rights Reserved. Privacy and Legal.
Page 9 of 237
Environment Manager 2019.1 Policy Product Guide

The console is an administrative tool to create and manage configurations. The agent resides on the
controlled computers and can receive configurations from the Management Center or third party
deployment system to manage the machine and user environment. The console also provides a live
connection to the Personalization Database.
The Personalization Server runs as a website, using IIS on either Windows Server 2003or 2008. Client
machines (Tier 1) connect through HTTP(s) handlers, and the Console uses WCF Services.
The Personalization Server acts as a broker between the Client and Database, providing a secure
channel to read and write the Personalization data. It is designed to support thousands of users
simultaneously and multiple Personalization Servers can be configured in parallel to use a single
Database.
Environment Manager can operate either in Standalone or Enterprise mode. In Standalone mode, the
console saves its settings directly to the local system. In Enterprise mode, different configurations can
be deployed to the controlled computers depending on your system requirements. This help
describes the use of Environment Manager in Standalone mode.
For details on centralized management mode please refer to the Management Center Help system.
Copyright © 2019 , Ivanti. All Rights Reserved. Privacy and Legal.
Page 10 of 237
Environment Manager 2019.1 Policy Product Guide

Policy Configuration and User Personalization work together to provide complementary control of the
entire user environment. Inevitably there are some areas of overlap. The profile settings are applied in
the following stages:
l Default Settings - Policy Configuration
l Usually occur through the use of mandatory profiles, although Policy Configuration is free to
set anything at this stage.
l Virtual Settings - User Personalization
l User specific changes to their own personality settings that are being managed by User
Personalization. These are applied on top of the defaults.
l Enforced Settings - Policy Configuration
Any policies that the administrator wants to set regardless of how the user has changed their
application previously, so these are applied last. The user may be free to change these whilst the
application is running, but they will be reapplied the next time the application runs.
Console
The Environment Manager Console launches from the start menu:
Start > All Programs > AppSense > Environment Manager > Environment Manager Console.
When accessed in this way the console opens with an empty and untitled configuration. The console
also starts when a saved configuration is opened.
There are three variants of the Environment Manager console:
l Personalization - Installs only the personalization element of Environment Manager
l Policy - Installs only the policy element of Environment Manager
l Both consoles - Installs the combined console; both personalization and policy are installed.
The choice of which console to install is made during installation.
Copyright © 2019 , Ivanti. All Rights Reserved. Privacy and Legal.
Page 11 of 237
Environment Manager 2019.1 Policy Product Guide

Elements
Resolution
Recommended screen resolution for the console is 1024 x 768 pixels.
Installing the Consoles
The traditional Environment Manager installation, using Setup.exe, automatically installs the
combined console. Some administrators may not require access to both. For example, they may only
be responsible for configuring personalization and have no need for the policy side of the console.
Installing the Personalization or Policy consoles can only be done using the
EnvironmentManagerConsole MSIs.
For more information about installation, see the User Workspace Manager help.
Ribbons
Ribbons include buttons for performing actions, arranged in groups, according to the area of the
console to which the actions relate. For example, the Editribbon page includes all common tasks, such
as Cut, Copy and Paste.
Split ribbon buttons contain multiple options and are indicated by an arrow just below the button.
Click the arrow to display and select the list of options, or simply click the button for the default action.
Copyright © 2019 , Ivanti. All Rights Reserved. Privacy and Legal.
Page 12 of 237
Environment Manager 2019.1 Policy Product Guide

Help
The Help button on the Help ribbon launches the Help for the product and displays the topic relating
to the current area of the console in view. A smaller icon for launching the Help displays at the far right
of the console, level with the ribbon page tabs.
Navigation Pane
The Navigationpaneconsists of the navigation tree and navigation buttons. The navigation tree is the
area for managing nodes of the configuration. The navigation buttons allow you to view the different
areas of the console, i.e. the Policy Configuration and User Personalization.
Work Area
The Work Areaprovides the main area for managing the settings of the configuration and product.
The contents of the work area vary according to the selected nodes in the navigation tree and the
selected navigation buttons. Sometimes the work area is split into two panes. For example, one pane
can provide a summary of the settings in the other pane.
Additional Console Features
l Shortcut Menu — right-click shortcuts are available in the navigation tree and some areas of
the console.
l Drag and Drop — this feature is available in some nodes of the navigation tree.
l Cut/Copy/Paste — these actions can be performed using the buttons in the Edit ribbon,
shortcut menu options and also using keyboard shortcuts.
File Menu
The File menuprovides options for managing configurations including create new, open existing,
save, import and export configurations and print.
Option Description
New Creates a new default configuration which is locked for editing.
Open Opens an existing configuration from one of the following locations:
l Live configuration on this computer
l Configuration from the Management Center
l Configuration file from disk: AppSense Environment Manager Package Files
format (AEMP).
l Configuration from System Center Configuration Manager
Copyright © 2019 , Ivanti. All Rights Reserved. Privacy and Legal.
Page 13 of 237
Environment Manager 2019.1 Policy Product Guide

Option Description
l Configuration from Endpoint Manager - when opening a configuration from
an Ivanti Endpoint Manager Core Server, you will need a console connection. For
further details refer to the Connect the Endpoint Manager Core Server to the
Environment Manager Console step.
A live configuration is located on a computer which has Environment
ManagerAgent installed and running.
Save Updates the current configuration with any changes made since the last change.
Click the arrow by the icon to access the following Management Center Specific
options:
l Save and Continue Editing - Save the configuration and keep it locked and
open for editing. The configuration cannot be deployed whilst locked. Use to
save your changes whilst continuing to update the configuration.
l Save and Unlock - Save the configuration and unlock it ready for deployment.
l Unlock without saving - Unlock the configuration without saving changes.
A live configuration is located on a computer which has Environment ManagerAgent
installed and running.
Save As Saves the configuration with a new name to one of the following locations:
l Live configuration on this computer - Save the current configuration on the
current computer and apply it as the working configuration.
l Configuration in the Management Center - Creates the current configuration
in the package store on the selected Management Center.
l Configuration in System Center Configuration Manager - Saves your
configuration to the specified System Center Configuration Manager server.
l Configuration file on disk - Saves the current configuration as a file on a local
or network drive in AEMP format.
l Configuration in Endpoint Manager - Saves the current configuration to a
Package store in Ivanti Endpoint Manager. For further details on creating Policy
configurations for Endpoint Manager deployment refer to the Create a new
Environment Manager Policy and save it to your core server Help section.
Import
&
Export
l Import configuration from MSI - Imports a configuration from an existing MSI
package, for example, legacy configurations which have been exported and
saved from legacy consoles.
l Export Configuration as MSI - Exports the current configuration as a MSI
package.
Copyright © 2019 , Ivanti. All Rights Reserved. Privacy and Legal.
Page 14 of 237
Environment Manager 2019.1 Policy Product Guide

Option Description
Exit Closes the console. You are prompted to save any changes you have made to the
current configuration.
Quick Access Toolbar
The Quick Accesstoolbarprovides quick functionality for managing the configuration setup, such as
Save, Save and Unlock, Undo, Redo, and navigation to previously and next displayed views.
Button Description
New
Opens a new, empty default configuration which is locked for editing. If you already have
a configuration open, you will be prompted to save it before you open a new one.
Open Configuration from the Management Center
Opens an existing configuration from the Management Center.
Save
Saves changes to the configuration. The configuration will remain locked if opened from
the Management Center.
Save and Unlock
Saves the configuration to the Management Center and unlocks it to allow deployment.
The current configuration closes and a new default configuration opens.
Save As
Saves the configuration with a new name to one of the following locations:
l Live configuration on this computer - Save the current configuration on the
current computer and apply it as the working configuration.
l Configuration in the Management Center - Creates the current configuration in
the package store on the selected Management Center.
l Configuration in System Center Configuration Manager - Saves your
configuration to the specified System Center Configuration Manager server.
l Configuration file on disk - Saves the current configuration as a file on a local or
network drive in AEMP format.
Back and Forward
Copyright © 2019 , Ivanti. All Rights Reserved. Privacy and Legal.
Page 15 of 237
Environment Manager 2019.1 Policy Product Guide

Button Description
Cycle through the views you have visited in a session. For example, if you select the
Computer trigger and then the User trigger, the Back button takes you to the Computer
trigger and a subsequent click of the forward button, takes you to the User trigger.
These are navigation tools only and do not affect the action you have performed in the
console.
Undo
Clears the action history. Up to 20 previous actions are listed. Select the point at which
you want to clear the actions. The action selected and all preceding actions are undone.
Redo
Re-applies the cleared action history. Up to 20 cleared actions are listed. Select the point
at which you want to redo the actions. The action selected and all preceding actions are
redone.
Expand All
Expand all nodes, actions and conditions in a selected area of the console. Context
sensitive to the selected item and works in the navigation tree or the work area. For
example, if used when the Computer trigger is highlighted, all triggers and nodes within
the Computer trigger are fully expanded. To expand all triggers and nodes in a
configuration, select the Environment Manager item at the top of the pane and select
Expand All. In the work area, if a condition is highlighted, all sub conditions and actions
are fully expanded.
Collapse All
Collapses all nodes, actions and conditions - works as Expand All but in reverse.
Managing the Quick Access Toolbar
The Quick Access Toolbar can be configured to add and remove functions and change its position
within the console:
l Right-click on a ribbon button or file menu option and select Add to Quick Access Toolbar to
add it to the Quick Access Toolbar.
l Right-click on a toolbar item and select Remove From Quick Access Toolbar to remove it.
l Right click on a ribbon or the toolbar and select Show Quick Access Toolbar Below the
Ribbon to display the toolbar below the ribbon.
Copyright © 2019 , Ivanti. All Rights Reserved. Privacy and Legal.
Page 16 of 237
Environment Manager 2019.1 Policy Product Guide

Find and Replace
Environment Manager configurations can be searched using text strings and regular expressions. The
whole of the navigation tree can be searched or individual areas, such as a node or a trigger, can be
targeted. Searches include all nodes, child nodes, conditions and actions in a configuration or within
the selected area.
Find and Replace could be used, for example, to change the name of a server throughout the
configuration, to amend the IP address of a particular endpoint or just to find where in a
configuration a particular registry key is referenced.
Perform a Find and Replace
1. In the Edit ribbon, select Find and Replace.
The Find and Replace dialog displays. If you want to target the search, select the required area
of the configuration prior to opening the dialog. In the example below, the Computer\Process
Started trigger was selected. This can be changed in the dialog as explained in step 4.
2. In the Find field, enter the text to search for or the regular expression you want to use for the
search.
3. In the In field, define which elements of the configuration you want to search - Actions,
Conditions, Nodes and/or Reusable Nodes.
4. Check that the Where field shows the path to the area of the configuration you want to search.
If the path is incorrect:
o
Amend the path manually
o
Delete the path to search the whole configuration
o
Select a previously searched path from the drop-down
5. In the Replace with field, enter the replacement text. If you are performing a search, this field
can be left blank.
6. Configure the find options by selecting any combination of the check boxes:
o
Match Case - Search for only those items which match the capitalization of the text in
the Find text
o
Match Whole Word - Search for only those items which match the whole word in the
Find field.
o
Use Regular Expressions - Return any items which match the regular expression
entered in the Find field.
7. Click Find to display all items that match your search criteria.
Search Results
The search results list any item which matches the query and show where the item is found in the
configuration.
Copyright © 2019 , Ivanti. All Rights Reserved. Privacy and Legal.
Page 17 of 237
Environment Manager 2019.1 Policy Product Guide

In the example below, the user has searched for "CurrentVersion". The search results include the
registry key "Software\Microsoft\Windows\CurrentVersion\Explorer". This registry key is referenced in
actions found in two different triggers in the configuration. The path to each of the actions is
displayed beneath the match.
Select a path to automatically navigate to that area of the configuration. To move to the next match,
click Find Next.
If you want to replace text, select the required match and click Replace - to replace all matches click
Replace All.
Copyright © 2019 , Ivanti. All Rights Reserved. Privacy and Legal.
Page 18 of 237
Environment Manager 2019.1 Policy Product Guide

You can redefine a search at any time by updating the criteria and clicking Find to update the results.
For example, you restrict your search to Conditions or focus the search on another area of the
configuration.
To view or edit an action or condition in the search results, select the item and click View/Edit. The
item opens in the relevant dialog.
Environment Manager Administrative Tools
Environment Manager is packaged with standalone utilities that help administrators create
configurations and manage the Personalization Database. The tools are run independently from
Environment Manager and all our other products.
The Administrative Tools installer is included with the Environment Manager installation media in both
32 and 64-bit versions:
l EnvironmentManagerTools32
l EnvironmentManagerTools64
Once installed to the default location, the following tools are available:
l Environment Manager Monitor (EmMon)
l Personalization Server Log Viewer
l Environment Manager File Conversion
l EMP File Utility
l EMP Migrate Utility
l EMP Migrate Command Line Utility
l EMP Registry Utility
l File Based Registry Explorer
Service Packs
Service Packs are self-contained packages or patches that are used to update specific files within a
User Workspace Manager application without reinstalling the full application. Service packs can be
applied more often and reduce the need for system restarts on your endpoints. Service packs are
delivered as a Windows Installer patch (MSP) file and are often referred to as patch files.
Install a Service Pack
Service Packs can be installed or deployed using the same technology and techniques used when
installing MSIs. Both Microsoft System Center and the Management Center 8 FR4 can deploy MSPs. If
neither of these products are available, service packs can be installed using the command line
interface.
For example, the command:
Copyright © 2019 , Ivanti. All Rights Reserved. Privacy and Legal.
Page 19 of 237
Environment Manager 2019.1 Policy Product Guide

msiexec.exe /p EnvironmentManagerAgent64.msp
installs any files that have been amended as part of the patch for just Environment Manager 64 bit
agent.
The following command installs the base version of the Environment Manager Agent (MSI) and the
Environment Manager patch file (MSP) simultaneously:
msiexec.exe /i EnvironmentManagerAgent64.msi
PATCH=c:\fullpath\EnvironmentManagerAgent64.msp
A base version must be installed before the patch file can be applied.
If the patch file contains driver or hook files that are currently in use on the machine the patch is being
applied to, you are informed that a reboot is required. If you chose to continue, the system is restarted
when the patch has been applied.
For information on installing and upgrading service packs using Management Center, see the User
Workspace Manager help.
Installation Order and Dependencies
It is recommended that all components of a service pack are installed and that the
PersonalizationServerXX.MSP is installed first. All other components have no required install order.
Roll back a Service Pack
You can roll back or install service packs using either the Management Center (8 FR4 onwards) or the
Windows Control Panel.
When you uninstall a service pack, the product reverts to the previous latest build - whether a service
pack or base version.
With the exception of the Personalization Server component patch file (PersonalizationServerXX.msp)
All agent and console service pack components can be uninstalled.
Roll Back a Service Pack Using the Management Center
1. In the Management Center console, select Overview > Deployment Groups tab >
Deployment Groups.
2. Highlight the Deployment Group and select Settings > Assigned Packages.
The Assigned Packages work area displays a list of all the products and their associated
packages.
3. Highlight the required Environment Manager service pack and click Unassign from the Actions
menu.
Copyright © 2019 , Ivanti. All Rights Reserved. Privacy and Legal.
Page 20 of 237
Environment Manager 2019.1 Policy Product Guide

4. Click Review and Submit.
The Submit Changes dialog displays.
5. Check the details are correct and click Submit.
The patch is unassigned based on the deployment group Installation Schedule.
Roll Back a Service Pack Using the Windows Control Panel
From the Control Panel select Programs and Features and uninstall the required patch.
Best Practices for Configuration
This section outlines the key points for consideration when setting up your Environment Manager
configuration.
Mandatory vs Local Profiles
During design and implementation stages, consideration should be given to the type of profile which
needs to be used as the base to be loaded for the user before Environment Manager Personalization
overlays the user’s actual settings.
Typically, Mandatory profiles are used which are very light weight and contribute to faster logon times
for users. This profile is ideal for environments where all users are accessing devices which are
permanently online.
If users also use laptops to work offline, then you need to look at how their account is managed when
the laptop is offline; do they:
l Use an Active Directory account?
l Use a Local Profile and provide Active Directory credentials when accessing company resources?
In these instances, it may be easier to leave the user profile path within Active Directory blank and
allow users to load a local profile as a base. The cached copy of the local profile must be deleted using
the Microsoft utility, DELPROF.
Another solution is to create the MAN file for the Mandatory profile, placed within the location of
%SYSTEMDRIVE%\Default User.
This allows two benefits:
l You do not have to specify a path within the User properties of Active Directory
l As it is a Mandatory profile, the Windows operating system will flush this automatically.
This will require some time to copy to each managed device.
Copyright © 2019 , Ivanti. All Rights Reserved. Privacy and Legal.
Page 21 of 237
Environment Manager 2019.1 Policy Product Guide

Applications that use INI Files
Some applications that are used within an environment require the use of INI files or files of this type
to keep certain settings for the user.
If the INI file is kept within the user’s profile this is typically not a problem for Environment Manager
Personalization.
When the INI file is not kept within the user’s profile, but in another location, for example,
C:\Windows, then you may not want Environment Manager Personalization to capture information
from this location, due to the nature and the amount of files in that location.
At this point, you can use Environment Manager Policy actions to copy down the file or folder to the
location during either a Logon or a Process Start trigger for the application and then copy the file or
folder back up to the user’s home directory during a Logoff or Process Stop trigger.
Personalization Membership Performance
Each condition evaluates matches and queries at different speeds providing different response times.
These differences could be due to some conditions evaluating against local data and therefore
providing rapid response times. Other conditions may require connection to the network thereby
increasing response times and relying on connection speeds.
The conditions in the tables below have been rated by performance speed for carrying out matches
and queries. By creating configurations with these response times in mind, performance can be
optimized. For example, if a configuration contains OR conditions, place them in order of response
time with the quickest evaluating first. If the first condition matches, the configuration is not held up
by the slower response time of the second condition.
Directory Services Expressions
Condition Match Query
Site Membership Fast N/A
Computer OU Membership Slow Slow
User OU Membership Slow Slow
User Expressions
Condition Match Query
Is Administrator Fast N/A
User Name Fast Fast
User Group Name Fast Medium
Copyright © 2019 , Ivanti. All Rights Reserved. Privacy and Legal.
Page 22 of 237
Environment Manager 2019.1 Policy Product Guide

Computer Expressions
Condition Match Query
Computer IP Address Fast Fast
Computer Domain
Membership
Fast Fast
Computer NETBios Name Fast Fast
Computer Group Fast Medium
Computer Name Slow Slow
Enabling Reverse DNS Lookup on the server increases the performance of the Computer
Name condition.
Printer Settings for Personalization
If printer settings are required to be kept by the user, then the following keys need to be added to
Windows Settings within the Personalization Server:
HKEY_CURRENT_USER\Printers
HKEY_CURRENT_USER\Software\Microsoft\Windows NT\CurrentVersion\Devices
HKEY_CURRENT_USER\Software\Microsoft\Windows NT\CurrentVersion\Windows
Masquerading Applications
To enable managed applications to share user Personalization settings, it is necessary to create an
application group. For example, this could be a Microsoft Office group containing Word, Excel,
Outlook and PowerPoint.
It may, however, be useful to use a Masquerading Application to allow an application access to
another application’s personalization data without having to create an application group. For
example, running mlcfg32.cpl against Outlook’s personalization data to view its registry settings on
the client.
To do this, create an entry in the Advanced Settings dialog:
l Name: MasqueradingApps
l Value: rundll32.exe;office12\mlcfg32.cpl;outlook.exe;12.0.0.0:
This value equates to:
<RealExe>;<RealExe Commandline>;<TargetExe>;<TargetExeVersion>:
For this example, mlcfg32.cpl is grouped with Outlook to share its personalization data.
Copyright © 2019 , Ivanti. All Rights Reserved. Privacy and Legal.
Page 23 of 237
Environment Manager 2019.1 Policy Product Guide

<TargetExeVersion> matches the version configured in the database for Outlook. If it is set to
a wildcard (.*), any version can be supplied here.
These entries can be chained together to provide multiple settings.
Client Specific Masquerading
The MasqueradingApps setting is global and as such, applies on all managed end-point devices.
However, to achieve the same behavior, applications can be launched on individual client machines
with a special command-line argument: /APPSENSESPECIAL.
The syntax on the client is:
<RealExe> /appsensespecial:<TargetExe>:<TargetExeVersion>
Some applications such as regedit.exe, do not work correctly with extra command-line arguments.
These applications should be launched using a command shell which has been run with the
APPSENSESPECIAL switch.
For example, cmd.exe /appsensespecial:notepad.exe:1.0.0.0 would launch with the command shell
sharing the personalization settings of Notepad. Regedit.exe can now be launched from within the
command shell and will have access to Notepad’s settings.
In the above scenario, ensure that regedit.exe is not already defined as a managed
application or blacklisted.
There should be no other instances of cmd.exe or regedit.exe running.
Create Personalization Caches Based on Environment Variables
The Advanced setting, MasqueradeAppByEnvVar allows the Personalization cache used by Environment
Manager to be changed based on the existence of an environment variable on the end point.
This allows greater flexibility where Personalization is required for the same version of an application,
across multiple machines where one instance of the application is using different plug-ins.
For example, if Microsoft Excel 2007 is run on three Windows 7 devices, by design it would share
Personalization settings between all three. If one of those devices was running different plug-ins to
the others, it could be useful for this version of Excel to use separate Personalization settings.
Configure Personalization Caches Based on Environment Variables
The following steps show how to configure the user interface using the Excel scenario.
1. Create the following entry in the Advanced Settings dialog:
o
Name: MasqueradeAppByEnvVar
o
Value: TargetExe>%ENV_VAR%
Copyright © 2019 , Ivanti. All Rights Reserved. Privacy and Legal.
Page 24 of 237
Environment Manager 2019.1 Policy Product Guide

For the Excel scenario, the value would be Excel.exe>%MASQ%.
MASQ is an environment variable set on the client.
2. Create the following managed applications:
Name Executable OS RegEx Version RegEx
Excel Excel.exe .* .*
Excel MASQ Excel.exe.masq .* .*
The Excel.exe.masq executable entry provides an alternative to excel.exe using a different cache to
allow separate Personalization to be used for the same application.
Client Configuration
Add the environment variable called MASQ with a value of masq.
When Excel is run, its Personalization settings go into a cache called Excel MASQ.
If the MASQ variable is removed, Excel settings will go into a cache called Excel.
Keyboard Shortcuts
Environment Manager uses the following keyboard shortcuts:
Shortcut Key Function
Ctrl+X Cut nodes, actions and conditions.
Ctrl+C Copy nodes, actions and conditions.
Ctrl+V Paste nodes, actions and conditions.
Insert Used as multiple Add functions. For example to add a node or trigger in Policy
configurations and to add applications to White and Blacklists and
personalization groups in User Personalization.
Delete Delete navigation tree and work area elements such as nodes, actions and
application groups.
F2 Rename a navigation tree element such as a node or personalization group.
Ctrl+T Disable / enable nodes, actions or conditions.
Ctrl+F Find and replace specific text within a configuration.
Crtl+Arrow keys Move an element within both Policy Configuration and User Personalization
navigation trees.
Copyright © 2019 , Ivanti. All Rights Reserved. Privacy and Legal.
Page 25 of 237
Environment Manager 2019.1 Policy Product Guide

Shortcut Key Function
Enter Edit a condition or action. When a condition or action is highlighted, press
Enter to open the dialog box to edit the element.
Where a keyboard shortcut is available, it will be listed by the appropriate option in a drop-down list.
Wildcards and Regular Expressions
This section contains examples of wildcards and regular expressions and how they can be used in
Environment Manager.
Environment Manager uses CAtIRegExp Class regular expressions.
For further information on CAtIRegExp Class regular expressions, refer to www.msdn.microsoft.com.
Expression Matches
^[a-f]+ "alice" matches because her name starts with a letter between a and f
"john" does not match because his name starts with a letter greater than f
"Alice" does not match because her name does not start with a lowercase
letter
^[a-fA-F]+ "Alice" matches because with this expression uppercase letters are allowed
[a-zA-
Z]+\d\d\d$
"UserWithThreeNumbers123" matches because the user name is made up
of alpha numerics followed by 3 numbers
"UserWithFourNumbers1234" does not match because the user name has
four numbers in it
The domain name can also be specified in regular expressions. For example, appsense\\^[a-f]+
matches all user names which have a first letter a to h. Without a domain name in the regular
expression, the query matches any user names which have a first letter from a to h in any domain.
Expression Matches
(notepad)|(winword)|(calc).exe notepad.exe matches because it is in the list
wordpad.exe does not match because it is not in the
list
^!(notepad.exe) notepad.exe does not match because notepad is
specifically excluded
wordpad.exe matches because it is not notepad
^!((notepad.exe)|(calc.exe)| wordpad.exe matches because it is not in the list
Copyright © 2019 , Ivanti. All Rights Reserved. Privacy and Legal.
Page 26 of 237
Environment Manager 2019.1 Policy Product Guide


About Policy Configuration
An Environment Manager Policy configuration determines the behavior which applies to a machine or
user based on a set of conditions. The conditions are applied to various trigger points, such as a user
logging on or a process starting. Once a set of conditions is met, actions are applied to perform the
required behavior.
By creating a configuration, a policy of computer usage can be defined, specifying what users have
access to, how they access it and what they can subsequently do with it. Using the hierarchical
structure allows an execution order to be set for the configuration, creating a logical flow of computer
and user actions.
Settings can be applied to whole organizations, setting general preferred behaviors or be more
specific; disabling one option in an application for a particular user.
Policy Configurations are built using the framework provided in the Policy Configuration tree within
the Environment Manager console.
Copyright © 2019 , Ivanti. All Rights Reserved. Privacy and Legal.
Page 28 of 237
Environment Manager 2019.1 Policy Product Guide

Managing Configurations
Policy Configurations are built using the framework provided in the Policy Configuration tree within
the Environment Manager console.
At the top level, the hierarchy consists of three fixed nodes:
l Library - Contains reusable nodes and conditions referenced in the configuration
l Computer Triggers - Contains triggers relating specifically to the endpoint
l User - Contains triggers relating specifically to user actions
l Configurations are created within the Computer and User nodes by using a combination of the
following elements:
l Triggers are static elements found within the Computer and User nodes which represent the
events which ultimately trigger actions. Examples of triggers are Computer Startup and Process
Stopped.
l Nodes are essentially containers that allow conditions and actions to be associated with
triggers. Nodes act as the placeholders to create the hierarchy of the configuration, controlling
dependencies and defining processing order.
l Conditions define the rules which specify when actions are carried out. For example, a condition
might be created which applies to certain computers or user names. They allow actions to be
targeted allowing greater flexibility and customization.
l Actions are applied when conditions are met after a trigger is fired. For example, mapping
drives and printers, creating shortcuts and registry keys.
l Lockdown actions are also available. These are provided to disable or remove application items
and functionality. For example, disabling a menu option or button in an application or
prohibiting the use of certain keyboard shortcuts.
By building up these elements, a configuration is created which controls endpoint usage and user
access. For example:
Fixed Node Trigger Node Condition Action
User Logon Map Printer Computer Name is Equal to Endpoint 1 Map to Printer 1
The simple configuration above maps Printer 1 at logon for the computer Endpoint 1. During logon, the
Environment Manager agent checks the managed computer against that specified in the condition,
Endpoint 1. If the condition is met, the action to map the printer to Printer 1 runs. If the managed
computer is anything other than Endpoint 1, the action is ignored.
In the Environment Manager console, the example would be as follows:
Copyright © 2019 , Ivanti. All Rights Reserved. Privacy and Legal.
Page 29 of 237
Environment Manager 2019.1 Policy Product Guide

Advanced Configuration Settings
Configuration Settings
Enable Logon Sub-triggers
In Environment Manager 8.5, a new Logon trigger structure was introduced replacing the single
Logon trigger with three sub-triggers. This increases efficiency and speeds up logon times as
Environment Manager actions can be configured to run at their most appropriate point during the
user logon process:
l Pre-Session - Actions take effect before terminal services is notified of the logon. Registry,
Group Policy and Environment actions are compatible with this sub-trigger. During the
upgrade, actions which were previously in the Logon Environment tab are moved here.
l Pre-Desktop - Actions take effect when the user logs on to the system but before the desktop
shell has started. During the upgrade, actions which were previously in the Logon trigger are
moved here.
l Desktop Created - Actions take effect after the desktop shell and Explorer has started. To
improve efficiency and logon times, any non-critical Logon actions should be added to this
trigger, for example, mapping drives and printers.
Change the Logon Sub-trigger Setting
1. Select the Policy Configuration navigation button.
2. On the Manage ribbon, select Advanced Settings.
3. Select the Configuration Settings tab.
4. Apply the Enable logon sub-triggers option as required.
For the setting to take effect on managed endpoints, the Environment Manager Agent must be
restarted.
Copyright © 2019 , Ivanti. All Rights Reserved. Privacy and Legal.
Page 30 of 237
Environment Manager 2019.1 Policy Product Guide

Enable logon sub-triggers is applied by default for new configurations. When upgrading
configurations, you are asked if you want to upgrade to the sub-triggers model or keep the single
Logon trigger.
The graphic below show a single configuration before and after the Logon trigger upgrade:
After enabling Logon sub-triggers:
l Logon Condition 1 has been moved from the Logon Environment tab to a new Pre-Trigger
node beneath the Pre-Session trigger
l Nodes 1, 2, 3 and 4 have been moved from the Logon node to the Pre-Desktop trigger
l The Desktop Created sub-trigger has been added
For layered configurations, each layer must be upgraded individually or in bulk using the
BatchConfigTool before being added back to the upgraded base configuration.
If a configuration already includes nodes converted from triggers, they will revert to sub-triggers
when enabled.
The Pre-Session sub-trigger is only compatible with Registry, Group Policy and Environment actions.
When a node is converted back to the Pre-Session trigger, non-compatible actions are removed.
When you disable sub-triggers, a node structure is automatically created to replicate the sub-triggers.
The option to use the single logon trigger is included to enable backwards compatibility.
Functionality reverts to that of the 8 FR4 release and all changes to this feature made since 8.5
are excluded.
The graphic below show the same configuration before and after Logon sub-nodes have been
disabled.
Copyright © 2019 , Ivanti. All Rights Reserved. Privacy and Legal.
Page 31 of 237
Environment Manager 2019.1 Policy Product Guide

After disabling sub-triggers:
l Nodes 1, 2, 3 and 4 have been moved from the Pre-Desktop sub-trigger to being direct child
nodes of the Logon trigger.
l Any nodes, actions and conditions in the Pre-Session and Desktop Created sub-triggers are
moved to newly created nodes of the same name.
l Any actions which are moved to the newly created DesktopCreated node run before the
desktop is displayed to users.
When switching from sub-triggers to the single Logon node, we recommend that you review the
actions in the Pre-Session node for Environment actions which would be better placed in the Logon
trigger Environment tab.
See Trigger Environment.
Change the Sub-trigger Setting
1. On the Manage ribbon, select Advanced Settings.
2. Select the Configuration Settings tab.
3. Apply the Enable logon sub-triggers option as required.
4. Enable logon sub-triggers is applied by default for new configurations. When upgrading
configurations, you are asked if you want to upgrade to the sub-triggers model or keep the
single Logon trigger.
For the setting to take effect on managed endpoints, the Environment Manager Agent must be
restarted.
Copyright © 2019 , Ivanti. All Rights Reserved. Privacy and Legal.
Page 32 of 237
Environment Manager 2019.1 Policy Product Guide

Mid-session Config Changes
Define when changes to the configuration are delivered to users. On the Manage ribbon, select
Advanced Settings > Configuration Settings. Apply the Enable logon sub-triggers option as
required:
l Immediately - Changes are implemented as soon as the configuration is pushed out to
endpoints. Unapply actions are also executed immediately,
l At logon - When the updated configuration is deployed, changes are implemented the next
time a user logs on, before the User Logon triggers are fired. Unapply actions work as normal -
executed at logoff.
l At startup - When the updated configuration is deployed, changes are implemented the next
time the endpoint is started, before the Computer Startup trigger is fired. Unapply actions work
as normal - executed at the next restart.
For new configurations the default setting is At logon. However, for upgraded configurations the
Immediate setting will be applied to preserve the behavior of pre-8.5 configurations.
Network Events
Define when the Network Connected and Network Disconnected triggers are fired. The following
options are available:
l Enabled - The Network Connected and Network Disconnected triggers fire when each network
adapter establishes or disconnects a connection, regardless of whether a connection to the
same network already exists.
l Disabled - The Network Connected trigger fires when the first network adapter establishes a
connection to the network. The Network Disconnected trigger fires when the last network
adapter disconnects a connection to the network. Each trigger will fire only once for each
network.
For new configurations the setting is enabled. However, for upgraded configurations the setting is
disabled to preserve the behavior of pre-8.6 configurations.
For the setting to take effect on managed endpoints, the Environment Manager Agent must be
restarted
Caution: Enabling this option increases the number of network events. We recommended
that conditions are used to restrict actions based upon network connection attributes.
Folder Copy Actions
Define the behavior for Folder Copy actions that are running at logoff. The following options are
available:
Copyright © 2019 , Ivanti. All Rights Reserved. Privacy and Legal.
Page 33 of 237
Environment Manager 2019.1 Policy Product Guide

l Enabled - Folder Copy actions that are running at logoff are resumed at the next user logon.
l Disabled - Folder Copy actions that are running at logoff are not resumed at the next user
logon.
Custom Settings
Configure additional settings which will be applied on managed endpoints when an Environment
Manager configuration is deployed. Settings such as the default node timeout can be configured in
the console, removing the need to manually set the appropriate registry keys.
If a Custom Setting is added, it will be created on endpoints or override any existing setting. Custom
Settings can be configured to use apply the default value for that setting or to use the value you
assign it; both will override existing settings.
If a Custom Setting is not added, that setting will not exist unless it is already configured on the
endpoint, in which case that value is used.
When upgrading a configuration, a setting which already exists on an endpoint will be overwritten by
the value of the corresponding Custom Setting.
Copyright © 2019 , Ivanti. All Rights Reserved. Privacy and Legal.
Page 34 of 237
Environment Manager 2019.1 Policy Product Guide

Manage Custom Settings
1. Select the Policy Configuration navigation button.
2. From the Manage ribbon, select Custom Settings.
The Configure Custom Settings dialog displays.
3. Click Add to display the list of custom settings.
Copyright © 2019 , Ivanti. All Rights Reserved. Privacy and Legal.
Page 35 of 237
Environment Manager 2019.1 Policy Product Guide

4. Select the settings you want to configure and click OK. Multiple settings can be selected using
the Ctrl and Shift keys or all settings can be added by pressing Ctrl + A.
The selected settings are added to the Configure Custom Settings dialog.
Settings which are added will be configured on endpoints. Any settings which already exist on
an endpoint are used.
5. Set the values as required. All settings are initially set as Use Default, deselect the option to
update its value. Any updated settings are displayed in bold. If Use Default is selected for a
setting, the corresponding key is removed from the registry as it is not required for the default
behavior to apply.
6. Click OK.
The settings are applied when the configuration is applied to managed endpoints.
Printer Mapping
Setting Default Description
PrinterErrorCodes List of error codes separated by a comma.
AddPrinterSequential False Map printer actions can be performed concurrently or
sequentially. Updating this setting to True removes issues
created when the AddPrinterConnection API call is hit
concurrently.
Certificates
Setting Default Description
SpoofProfileForWholeSession False Windows mandatory profiles have a limitation restricting
users from installing and exporting private keys. PFX
certificate types contain embedded private keys and
cannot be installed when the profile is set to mandatory.
This setting changes the session so Windows thinks a
roaming profile is being used, allowing users to install
PFX certificates with private keys.
Policy Engine
Setting Default Description
RegexTimeout 2000 Set a timeout limit in milliseconds for invalid regexes which may
otherwise evaluate for a long time.
Copyright © 2019 , Ivanti. All Rights Reserved. Privacy and Legal.
Page 36 of 237
Environment Manager 2019.1 Policy Product Guide

Setting Default Description
NodeTimeout 30000 Set a limit in milliseconds which is given to nodes to complete
before the next node is run.
TriggerTimeout Infinite Set the length of time a trigger is given to complete its
processing. If the value is -1 or a value is not present, the
timeout will wait forever.
ShutdownBailTimeout Infinite Timeout value in seconds for actions still running at logoff or
shutdown. This applies to all running actions regardless of
which trigger originally instigated it. This should only be used
in for long running threads at logoff or shutdown.
Active Directory
Setting Default Description
UseAlternativeUserGroupTest False Specifies that when checking user group
membership, it should be dynamic and use the
OID_LDAP_MATCHING_RULE_IN_CHAIN filter. If set
to true, user group conditions use a more efficient
method of lookup which can also reflect group
changes during a session.
This only works if the Active Directory
server is later than Server 2003 R2.
ADUserGroupMembershipTimeout 120 When the UseAlternativeUserGroupTest setting is
used, you can specify a timeout value in seconds for
the OID_LDAP_MATCHING_RULE_IN_CHAIN query
before the request to the personalization server
and for policy user group OU Membership
conditions.
System
Setting Default Description
LegacyAppInit False Set this value to True to use AppInit_DLLs value
for injecting Environment Manager
components into processes during startup. If
set to false, DLLs are loaded by a kernel driver.
Copyright © 2019 , Ivanti. All Rights Reserved. Privacy and Legal.
Page 37 of 237
Environment Manager 2019.1 Policy Product Guide

Setting Default Description
EnableNestedComputerGroupQueries False Allow the client to query Active Directory for
nested computer groups. This setting can affect
the performance of the client.
Shell
Setting Default Description
CreateSpecialPaths False When set to true, the folder exists check is performed on CSIDs.
End Point Merging
Setting Default Description
BaseConfigMergeBehavior Remerge Controls whether new base configurations override end
point layers or are merged with them. Remerge- When a
new configuration.aemp is deployed to endpoints, a
merge with the existing configurations in the
MergeConfigs directory is triggered. The new Merged_
Configuration.aemp becomes the live configuration.
Replace- When the new configuration.aemp is deployed
to endpoints, it replaces the Merged_Configuration.aemp
as the live configuration.
Custom Scripts
Setting Default Description
PowerShellLoadUserProfile False This setting allows the PowerShell User Profiles to load
when PowerShell Custom actions and conditions execute.
When set to False, PowerShell is hosted by Environment
Manager and is no longer used natively.
If the PowerShellRunInHost engineering key is set
to set to on, it overrides any setting you have in
PowerShellLoadUserProfile and PowerShell will
always be hosted by Environment Manager.
Copyright © 2019 , Ivanti. All Rights Reserved. Privacy and Legal.
Page 38 of 237
Environment Manager 2019.1 Policy Product Guide

Override XenDesktop Session Connect Triggers
Setting Default Description
OverrideIcaSessionConnectTriggers False When this setting is enabled and set to True,
XenDesktop environments execute the Session
Lock/Unlock triggers when a user
disconnects/reconnects from their session.
This applies to XenDesktop versions 7.6 - 7.8
inclusive. This setting has no affect if users are
running XenDesktop 7.9 or later because these
versions execute the Disconnect/Reconnect
triggers anyway.
Desktop Refreshes
Setting Default Description
ExcludedRefreshRegistryKeys N/A Exclude named registry keys from being parsed during
the desktop refresh setting check.
Custom Setting and Engineering Key Interaction
PowerShellRunInHost=0 PowerShellRunInHost=1
PowerShellLoadUserProfile=0 Hosted Hosted
PowerShellLoadUserProfile=1 Native Hosted
Personalization Servers Policy
Enabling User Personalization is a policy decision and the setting is configured within the Policy
Configuration side of the console. It is the deployed configuration which determines whether
managed endpoints are subject to User Personalization and to which server endpoints connect.
It is recommended that multiple servers and/or virtual hosts are added to the Select Personalization
Server dialog so alternative servers can be easily selected for failover purposes.
Deploy the policy configuration that contains a list of Personalization Servers to the endpoints
sending the configuration.aemp to managed computers. The first time a user logs on to a managed
endpoint, the Environment Manager agent contacts the first personalization server to request the
actual list of servers the endpoint should use (based on the sites configured in the database). The
client then contacts the correct server to pull down the User Personalization configuration, containing
the list of the applications which should be personalized for the user.
Copyright © 2019 , Ivanti. All Rights Reserved. Privacy and Legal.
Page 39 of 237
Environment Manager 2019.1 Policy Product Guide

If all attempts to connect to a Personalization Server fail, then the User Personalization configuration
is not downloaded and User Personalization does not take place.
For details about configuring Personalization Servers, see the User Workspace Manager help.
To cater for such a scenario it is recommended that the 9661 - Timeout Communicating with
Personalization Server auditing event is enabled.
Configure a Personalization Servers List
1. Select the Policy Configuration navigation button.
2. From the Manage tab select Personalization Servers.
The Configure Personalization Servers dialog displays.
3. Click the add server button .
The Add Server dialog displays.
4. Enter the server name or click the ellipsis to search for the required server by specifying
locations and searching for server names.
Do not select or enter Localhost as the server name. If Localhost is entered as the
server name it is added to the configuration.aemp file as the location of the
Personalization Server. The client tries connecting to http://localhost/Personalization
which is incorrect and User Personalization is disabled.
5. Enter a Friendly Name for the server. This can be any text but should be something which will
enable you to identify the server. If no text is entered, the server name is used.
6. Select the required protocol - http or https.
7. Enter the server name or browse for the required server by specifying locations and searching
for server names.
8. Enter a port number. The port range for Personalization servers is 7771 to 7790 and the default
port is 7771.
Once the server details have been added, the URL for the server is displayed.
9. Click OK.
The server is listed in the Select Personalization Server dialog.
10. Repeat steps 3 to 9 to add more servers.
Servers in the list can have their details edited or be deleted from the list using the buttons at
the top of the dialog.
Copyright © 2019 , Ivanti. All Rights Reserved. Privacy and Legal.
Page 40 of 237
Environment Manager 2019.1 Policy Product Guide

11. If you have added more than one server, use the arrow buttons to reorder the list. When the
configuration is deployed, endpoints attempt to connect to each server in turn. If a connection
cannot be made with any server in the list, Personalization does not occur.
12. Click OK to save the server list.
When the configuration is deployed to endpoints, this list is used to determine which servers
managed users connect to.
Auditing
The Auditing option is used to define the rules for the capture of auditing information and the
location for storing the local event log. It also displays the events for which data is collected which can
be selected for inclusion in the local log. The Audit option is accessible from the Home ribbon. The
events available are context sensitive dependent on whether Policy Configuration or User
Personalization is selected.
In Enterprise installations, events can be forwarded to the Management Center via the Client
Communications Agent (CAA). When using this method for auditing, event data storage and filtering
is configured through the Management Center Console.
For more information, see the Management Center Help.
Configure Auditing Settings
1. Select either the Policy Configuration or User Personalization navigation buttons.
2. From the Manage ribbon, click Auditing.
Copyright © 2019 , Ivanti. All Rights Reserved. Privacy and Legal.
Page 41 of 237
Environment Manager 2019.1 Policy Product Guide

3. Use the radio buttons to define the required auditing settings:
Option Description
Send
events to
the
Applicati
on event
logSend
events to
the
Ivanti
event log
Select whether to save the event and associated application data to the
Application or Ivanti event log:
l Event Viewer > Windows Log > Application
l Event Viewer > Applications and Services Logs > Ivanti
You can select either Application or Ivanti event log, not both.
Make
events
anonym
ous
Anonymous logging searches the file path for any instances where a directory
matches the user name and replaces the directory name with the string
USERNAME. With this option set to Yes, the computer and user names are not
recorded for logged events.
Send
events to
local file
log
Write the events to a local file in either CSV or XML format. Click the ellipsis to
select a location for the file. The default location is:
%SYSTEMDRIVE%AppSenseLogs\Auditing\EnvironmentManagerEvents_%COM
PUTERNAME%.xml (or .csv).
Local file
log
format
Select whether the local file log is in XML or CSV format.
4. In the Local Event Filter, select the Log Locally checkbox for all the events which require
logging. When selected, events are displayed in bold.
5. Click Toggle selected to change the state between selected and cleared.
6. Click OK to save the settings.
Events
Event
ID
Event Name Event Description Event Log
Type
9300 Self healing process
started
A process being monitored for self healing
stopped and has been restarted.
Information
9301 Self healing registry key
replaced
A registry key being monitored for self healing
was changed and has now been reset.
Information
Copyright © 2019 , Ivanti. All Rights Reserved. Privacy and Legal.
Page 42 of 237
Environment Manager 2019.1 Policy Product Guide

Event
ID
Event Name Event Description Event Log
Type
9302 Self healing registry key
removed
A registry key being monitored for self healing
was inserted and has now been removed.
Information
9303 Self healing file replaced A file being monitored for self healing was
modified or removed and has now been
replaced.
Information
9304 Self healing file removed A file being monitored for self healing was
added and has now been removed.
Information
9305 Self healing service
stopped
A service being monitored for self healing
started and has now been stopped.
Information
9306 Self healing service started A service being monitored for self healing
stopped and has now been restarted.
Information
9307 Self healing registry value
replaced
A registry value being monitored for self
healing was changed and has now been reset.
Information
9308 Self healing registry
removed
A registry value being monitored for self
healing was inserted and has now been
removed.
Information
9399 Software is not licensed The Environment Manager software has not
been licensed.
Error
9400 Lockdown edit control
blocked drive
An edit control has had a blocked drive
entered into it.
Information
9401 Lockdown edit control
blocked text
An edit control has had blocked text entered
into it.
Information
9402 Lockdown accelerator
keys blocked
An application has had accelerator keys
blocked.
Information
9403 Lockdown dialog blocked An application has had a dialog box blocked. Information
9404 Lockdown MSAA access
blocked
An application has had access blocked for a
control using MSAA detection.
Information
9405 User logon action success A user logon action completed successfully. Information
9406 User logon action fail A user logon action failed to complete
successfully.
Error
Copyright © 2019 , Ivanti. All Rights Reserved. Privacy and Legal.
Page 43 of 237
Environment Manager 2019.1 Policy Product Guide

Event
ID
Event Name Event Description Event Log
Type
9407 User logoff action success A user logoff action completed successfully. Information
9408 User logoff action fail A user logoff action failed to complete
successfully.
Warning
9409 Computer startup action
success
A computer startup action completed
successfully.
Information
9410 Computer startup action
fail
A computer startup action failed to complete
successfully.
Warning
9413 Computer network
available
A computer network available action
completed successfully.
Information
9414 Computer network
available action fail
A computer network available action failed to
complete successfully.
Information
9420 User session reconnect
action success
A user session reconnect action completed
successfully.
Information
9421 User session reconnect
action fail
A user session reconnect action failed to
complete successfully.
Warning
9422 User session disconnect
action success
A user session disconnect action completed
successfully.
Information
9423 User session disconnect
action fail
A user session disconnect action failed to
complete successfully.
Warning
9424 User session locked action
success
A user session locked action completed
successfully.
Information
9425 User session locked action
fail
A user session action failed to complete
successfully.
Warning
9426 User session unlocked
action success
A user session unlocked action completed
successfully.
Information
9427 User session unlocked
action fail
A user session unlocked action failed to
complete successfully.
Warning
9428 Process start action
success
A process start action completed successfully. Information
9429 Process start action fail A process start action failed to complete Warning
Copyright © 2019 , Ivanti. All Rights Reserved. Privacy and Legal.
Page 44 of 237
Environment Manager 2019.1 Policy Product Guide

Event
ID
Event Name Event Description Event Log
Type
successfully.
9430 Process stopped action
success
A process stopped action completed
successfully.
Information
9431 Process stopped action fail A process stopped action failed to complete
successfully.
Warning
9432 Network connection
action success
A network connected action completed
successfully.
Information
9433 Network connection
action fail
A network connected action failed to complete
successfully
Warning
9434 Network disconnected
action success
A network disconnected action completed
successfully.
Information
9435 Network disconnected
action fail
A network disconnected action failed to
complete successfully.
Warning
9436 User logon (pre-session)
action success
A user logon (pre-session) action completed
successfully.
Information
9437 User logon (pre-session)
action fail
A user logon (pre-session) action failed to
complete successfully.
Information
9438 User logon (pre-desktop)
action success
A user logon (pre-desktop) action completed
successfully.
Information
9439 User logon (pre-desktop)
action fail
A user logon (pre-desktop) action failed to
complete successfully.
Information
9440 User logon (desktop
created) action success
A user logon (desktop created) action
completed successfully.
Information
9441 User logon (desktop
created) action fail
A user logon (desktop created) action failed to
complete successfully.
Information
9480 Configuration merge
update
The configuration merge folder has been
updated.
Information
9481 Configuration merge start The configuration merge has started. Information
9482 Configuration merge
complete
The configuration merge has completed
successfully.
Information
Copyright © 2019 , Ivanti. All Rights Reserved. Privacy and Legal.
Page 45 of 237
Environment Manager 2019.1 Policy Product Guide

Event
ID
Event Name Event Description Event Log
Type
9483 Configuration merge fail The configuration merge has failed. Information
9484 Configuration merge
timeout
The configuration merge has timed out waiting
for expected files.
Information
9495 Not configured IvantiEnvironment Manager has not been
configured.
Warning
9496 Configuration
unsupported
An old configuration has been found. Warning
9650 Managed application start A managed application has started. Information
9651 Managed application stop A managed application has stopped. Information
9652 Personalization load error Personalization settings for a managed
application failed to load.
Error
9653 Personalization save error Personalization settings for a managed
application failed to save.
Error
9654 Blacklisted process started A managed process has launched a blacklisted
process.
Information
9655 Personalization not saved Personalization settings not saved as another
group application is running.
Information
9656 Offline resiliency save
started
Offline resiliency save has been started for a
managed application.
Information
9657 Offline resiliency save
complete
Offline resiliency has successfully saved a
managed application’s personalization
settings.
Information
9658 Personalization settings
purged
Personalization settings purged as offline
mode is disabled.
Information
9659 Personalization settings
updated
User personalization settings updated from
personalization server.
Information
9660 Personalization failed Personalization for a managed application
failed.
Error
9661 Timeout Communicating
with Personalization
A timeout occurred while trying to
communicate with the Personalization Server.
Warning
Copyright © 2019 , Ivanti. All Rights Reserved. Privacy and Legal.
Page 46 of 237
Environment Manager 2019.1 Policy Product Guide
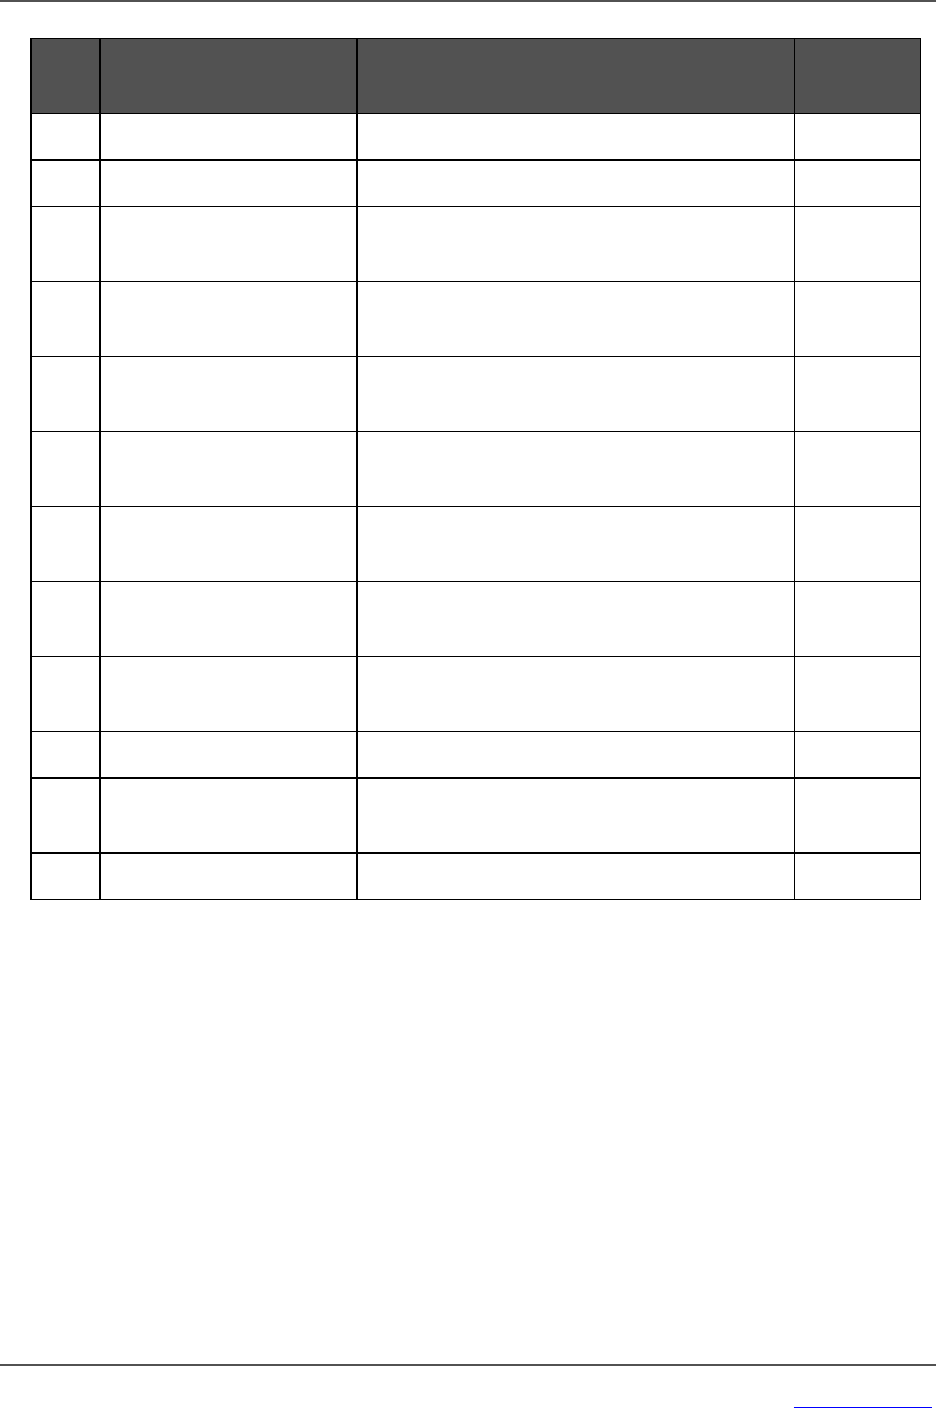
Event
ID
Event Name Event Description Event Log
Type
Server
9662 Trigger Action Times All the actions have run for the trigger. Information
9663 PreCache Application
Success
Successfully Precached Managed Application. Information
9664 PreCache Group Success Successfully PreCached Managed Application
Group.
Information
9665 PreCache Managed
Application Failure
Failed to PreCached Managed Application. Error
9666 PreCache Group Failure Failed to PreCached Managed Application
Group.
Error
9667 Personalization Profile
Import
A Profile Import is Active. Information
9680 Endpoint of Self Service
start failure
The Endpoint Self-Service process failed to
start.
Error
9690 Password Certificate
Failure
The password for certification has failed. Error
9691 Run As Failure The Run As action has failed. Error
9672 Action success The automated action has completed
successfully.
Information
9673 Action Fail The automated action has failed to complete. Error
Run As User Library
The Run As User Library is used to create and manage user profile information for use in Run As or
Connect As actions. This enables actions to be performed using different user credentials. For
example, a user may require mapping to a network drive or the ability to launch an application using
different credentials.
The users defined in the library are available from the Friendly Name drop-down in the Run As or
Connect As tabs in many of the action dialog boxes for user triggers.
As well as being accessed from the Manage tab, the Run As User Library is available by selecting the
ellipsis in the Friendly Name field. This allows new users to be added to the library whilst creating
actions.
Copyright © 2019 , Ivanti. All Rights Reserved. Privacy and Legal.
Page 47 of 237
Environment Manager 2019.1 Policy Product Guide

Security Certificates
The method used to encrypt and decrypt credentials for Run As User Library profiles uses a public key
and private key pair:
l The public key is used on the Environment Manager console to encrypt the password
l The private key is required by the agent to decrypt the password. The private key must be
distributed to every endpoint and installed in the Certificates - Local
Computer\Personal\Certificates folder.
Security certificates must be added to the Certificates - Local Computer\Personal\Certificates folder on
the Environment Manager console and verified that they are installed correctly. Certificates added to
this console location are displayed in the Security Certificates list.
The selected certificate is used to encrypt Run As credentials. The encrypted data is saved to the AEMP
configuration file. The configuration and certificate containing the private key must be distributed to
every endpoint being managed. If the private key is not installed on every endpoint the user action will
fail.
The agent will only decrypt credentials when authentication is required. Decrypted credentials are not
stored.
For more information about security certificates and how to deploy them, refer to DOC-71205
If the deployed security certificate expires user actions will fail. If the deployed certificate is
changed, then the passwords will need updating.
Copyright © 2019 , Ivanti. All Rights Reserved. Privacy and Legal.
Page 48 of 237
Environment Manager 2019.1 Policy Product Guide

Add a User to the Run As Library
1. Select the Policy Configuration navigation button.
2. From the Manage ribbon, select Run As User Library.
The Run As User Library dialog displays.
3. In the Select Certificatelist, click the encryption certificate required.
Details of the selected certificate are displayed.
The Expiry Date is validated and an icon warns when expiry is imminent:
Green tick icon indicates expiry date is greater than 60 days
Amber warning icon indicates expiry date is less than 60 days
Red cross icon indicates the certificate has expired
Copyright © 2019 , Ivanti. All Rights Reserved. Privacy and Legal.
Page 49 of 237
Environment Manager 2019.1 Policy Product Guide

4. Click Add.
5. Enter a Friendly Name which displays in the drop-down list on the action Run As tab.
6. Complete the user name, password and re-enter the password to confirm.
7. Add further users by repeating steps 4 to 6.
8. Select OK to save the entry and close the Run As User Library dialog box.
Group Policy Location
Group polices are stored in administrative template files (ADM and ADMX files). By default, the files are
stored in the following locations:
l ADM - C:\WINDOWS\Inf
l ADMX - C:\WINDOWS\PolicyDefinitions
You can change the default location. If you do, the new location is used for both ADM and ADMX files,
and is displayed when you open the dialog to create a Group Policy action. You can overwrite a default
location on a per action basis. The setting is stored in both the configuration and the console, which
results in the following:
l If multiple administrators access the same configuration, they see the same default location.
l You can access a configuration on multiple devices, and the location remains the same.
l The setting persists; so if you create a new configuration, the default location is as you set it for
the previous configuration.
To set a default Group Policy location:
1. In the Manage ribbon, select Group Policy Location.
The Group Policy Location dialog displays.
2. Browse to the location in which you want to store the Group Policy files.
3. Click OK.
Configuration Change Tracking
When Change Tracking is enabled, Environment Manager records any activity which occurs within the
configuration. The information is stored in a history.sdf file within an Environment Manager AEMP
configuration file.
Configuration changes that are recorded include adding and deleting nodes, actions and conditions.
Global options, such as adding to the Run As User Library and Personalization Server List, are also
recorded.
Change history is available at the following levels:
Copyright © 2019 , Ivanti. All Rights Reserved. Privacy and Legal.
Page 50 of 237
Environment Manager 2019.1 Policy Product Guide

l Node - Each node has its own history which lists changes to that node and any child nodes
l Trigger - All triggers include a History tab showing all nodes, actions and conditions within that
trigger which have been added or changed.
l Configuration - Lists every change made to a configuration including all the node and trigger
history as well as any changes to global settings and options
Enable and Disable Change Tracking
Change tracking is disabled by default for a new configuration. When a configuration is saved, so is
the setting which becomes the default position.
In the Manage ribbon, select Enable Change Tracking. Once enabled, details of each change to the
configuration are saved in the history and node version numbers are enabled.
When enabled, select Disable Change Tracking. When Change Tracking is disabled, the history
remains but no further changes are recorded.
If you disable Change Tracking and make changes to a configuration, when re-enabled, the
configuration history shows that changes have been made whilst change tracking was disabled. It will
not show any details of what has changed.
Change the Default Position to Enabled
1. Right-click Ivanti Environment Manager Console from the Start menu or task bar, and select
Properties.
2. In the Target field, add /trackchanges to the end of the path. Ensure there is a space between
the closing quotation marks and the parameter.
The target should now read: "C:\Program Files\AppSense\Environment
Manager\Console\EMConsole.exe" /trackchanges
When a new configuration is opened in the console change tracking is enabled. This does not impact
saved configurations who keep the setting at the state it was saved.
Copyright © 2019 , Ivanti. All Rights Reserved. Privacy and Legal.
Page 51 of 237
Environment Manager 2019.1 Policy Product Guide

Configuration History
On the Manage ribbon, select Configuration History to display details of all the changes made to a
configuration whilst change tracking is enabled. Whenever a configuration is saved, a new version of
the history is created outlining the changes made since the last save.
In the example below, the configuration contains history for three versions. Each version lists the
changes made for that version.
The Configuration History shows the following information for each change:
l Change - An overview of the change, for example New Node Added. More detail about a
change can be accessed by double-clicking any entry in the history. See Change Overview for
further details.
l Path - If the change relates to a node, the path to the node is displayed. For example,
User\Logon\Node A. For changes to global options and settings the path will always show
Configuration.
l User - The username and, where appropriate, domain name of the user who made the change.
l Date Time - The date and time the change was made.
Changes can be sorted in ascending or descending order by clicking the column headers.
Copyright © 2019 , Ivanti. All Rights Reserved. Privacy and Legal.
Page 52 of 237
Environment Manager 2019.1 Policy Product Guide

Node History
Once Change Tracking is enabled, every change made to a node is recorded in its History tab which
summarizes those changes. When you make changes to a node, it is annotated with an asterisk to
show that there are unsaved changes within that node. Once the configuration is saved, the asterisk
is removed.
Entries are added to the history as soon as the change is made. However, until the configuration is
saved, the changes are not committed. If a configuration is closed without saving, changes are
discarded and the history deleted.
For change tracking purposes, nodes are versioned. Each time a node is updated and the
configuration is saved, a new history version of the node is created. The node history shows each
version with the changes listed below.
In the example below, the configuration has been saved twice since change tracking was enabled. The
node is at version two and the history displays the changes made for both versions including who
made each change and when.
The history for version two shows that a child node has been created. Parent nodes only show that
the child node has been added, deleted or updated. Full details of the child node can only be viewed
by viewing the child node’s history. More detail about a change can be accessed by double-clicking
any entry.
See Change Overview for further details.
Copyright © 2019 , Ivanti. All Rights Reserved. Privacy and Legal.
Page 53 of 237
Environment Manager 2019.1 Policy Product Guide

Trigger Node History
The History tab for triggers such as Startup, Process Started and Log Off differs to that of nodes.
Triggers are not versioned in the history - the history shows a continuous list of all changes made to
child nodes and the trigger Environment tab since change tracking was enabled.
To help you easily identify where changes have been made, each history entry displays the
configuration path for the relevant node.
Move, Copy and Import Nodes
When you cut and paste a node into another node, the version number remains unchanged and the
entire node history is copied - it is the same node with the same history which has been moved. This
behavior applies if a node is moved to reusable nodes.
When you copy and paste a node into another node, the version number of the copied node is set at
"1" and the history only shows one entry stating where the node has been copied from. This behavior
is the same if a node is cloned or copied to reusable nodes or imported as a policy template.
If copying or cutting a node from one configuration to another, the history is as if the node has been
copied - the history tells you from which configuration the node originated.
Copyright © 2019 , Ivanti. All Rights Reserved. Privacy and Legal.
Page 54 of 237
Environment Manager 2019.1 Policy Product Guide

Save a Configuration
When you save a configuration to disk, the Management Center, SCCM or as the live configuration on
an endpoint, an overview of the changes you have made since the last save is displayed. Like node and
configuration histories, more detail about a change can be viewed by double-clicking any entry in the
history.
See Change Overview for further details.
You can optionally add comments which will be added to the Configuration History for that version of
the configuration. Although each new version of a configuration is identified by its own version
number, adding comments allows you to add your own identification.
Each time a configuration is saved, its version number is incremented and displayed at the bottom
right of the console - regardless of whether change tracking is enabled or not.
Copyright © 2019 , Ivanti. All Rights Reserved. Privacy and Legal.
Page 55 of 237
Environment Manager 2019.1 Policy Product Guide

Change Overview
More detailed information about each change can be accessed by double-clicking any history item
from the following areas:
l Configuration History
l Node History
l Review Changes dialog when saving a configuration
In the example above, the Change field displays a high level overview - a Delete File action has been
updated. This is the same text which appears in the history. The Details field shows which property has
changed - the Notes for the action were updated and the Run As setting was changed, amongst
other parameters.
Copyright © 2019 , Ivanti. All Rights Reserved. Privacy and Legal.
Page 56 of 237
Environment Manager 2019.1 Policy Product Guide

Undo and Redo Changes
If you undo a configuration change using the buttons in the quick access menu, the history of that
change removed. Similarly, if an undone change is redone, the history is restored. This applies to both
configuration and node histories.
Delete the Configuration History
Change history can be deleted when required and the amount of history you delete can be defined by
date or version number. You are given the option to export the history prior to deleting.
1. Select the Policy Configuration navigation button.
2. On the Manage ribbon, select Delete History.
3. Select and configure the history you want to delete:
o
All history - Delete the entire configuration history.
o
History older than date - Delete the configuration history up to the entered date.
o
History up to and including selected version - Delete the configuration history up to
the specified version number.
4. Select whether you want to Export then Delete or just Delete.
If you export prior to the delete the selected history is exported to CSV file at a selected location.
Deleting the history does not change or remove version numbers of nodes or configurations. When
the history is deleted, the version numbers stay the same and increment as normal on future saves.
Export Configuration History
Configuration History can be exported to a CSV file. You can export the whole history of the
configuration since change tracking was enabled or you can choose to export the history up to a
certain date or configuration version.
By creating a backup you can delete all or part of the history to reduce the configuration file size whilst
ensuring that you still have access to the change tracking data. The exported history file can be
opened in a spreadsheet so the data can be examined and queries run.
1. Select the Policy Configuration navigation button.
2. In the Manage ribbon, click Export History.
Copyright © 2019 , Ivanti. All Rights Reserved. Privacy and Legal.
Page 57 of 237
Environment Manager 2019.1 Policy Product Guide

3. Select and configure the history you want to export:
o
All history - Export the entire configuration history.
o
History older than date - Export the configuration history up to the entered date.
o
History up to and including selected version - Export the configuration history up to
the specified version number.
4. Click OK.
5. Select a location to save the CSV file and click Save.
Default Timeout Settings
Default timeouts are set for triggers, nodes, conditions and logon actions. If a timeout limit is
exceeded, the configuration element still runs to completion but is considered a fail and therefore
child nodes do not run.
The default values, in milliseconds, can be changed by editing the following keys, set under:
HKLM\Software\AppSense\Environment Manager
Key Type Default Details
TriggerTimeout DWORD Infinite The maximum time given for all nodes under a trigger to
run, for example, Logon or Process Started.
NodeTimeout DWORD 30000ms The maximum time given for all the actions and conditions
to run.
If a custom action contradicts a default timeout setting, the default setting is overwritten.
Configuration Tasks
This section describes how to save, create and import/export Environment Manager Configuration file
(AEMP) and how to import part configuration in the form of Policy Templates.
Save a Configuration
Users with non-administrative rights operating a product console in Standalone mode can
only view configurations with read-only permissions. The user can interact with the
configuration settings in the console but the settings cannot be saved and are not
implemented or retained after the console is closed. The user can export a configuration to
XML format but cannot import a configuration.
When changes are made to a configuration, you have the following options:
Save
This is the default Saveaction and is the same as Save on the Quick Access toolbar.
Copyright © 2019 , Ivanti. All Rights Reserved. Privacy and Legal.
Page 58 of 237
Environment Manager 2019.1 Policy Product Guide

l Save and continue editing - Save the configuration to the Management Center and keep the
configuration locked and open for editing. You cannot deploy the configuration while it is
locked.
l Save and Unlock - Save the current configuration in the Management Center and unlock it
ready for deployment.
l Unlock without saving - Unlock the current configuration in the Management Center without
saving changes.
If Change Tracking is enabled before the save is committed, a summary of the changes you have made
will be displayed.
Save As
l Live configuration on this computer - Save the current configuration on the current
computer and apply it as the working configuration. For a live configuration to work
successfully, the EM User Virtualization Service must be installed and running on the endpoint.
Administration rights are required to use this option.
l Configuration in the Management Center - Create this configuration in the package store on
the selected Management Center.
l Configuration in System Center Configuration Manager - Saves your configuration to the
specified System Center Configuration Manager server.
l Configuration file on disk - Save the current configuration as a file on a local or network drive
in AEMP format.
Create a Configuration
1. Launch the Environment Manager console from Start > Programs > AppSense > Environment
Manager. The Environment Manager console displays.
2. Click File > New.
A new configuration displays.
You must save a new configuration before any settings are implemented.
Import a Configuration
Configurations can be imported in to Environment Manager.
1. Select the Policy Configuration navigation button.
2. Select File > Import & Export > Export Configuration as MSI.
The Open dialog displays.
3. Navigate to the location of the MSI, select it and click Open.
Copyright © 2019 , Ivanti. All Rights Reserved. Privacy and Legal.
Page 59 of 237
Environment Manager 2019.1 Policy Product Guide

Export a Configuration
Configurations can be exported from Environment Manager.
1. Select the Policy Configuration navigation button.
2. Select File > Import & Export > Export Configuration as MSI.
The Save As dialog box displays.
3. Navigate to the location to where you want to save the MSI, click Save.
Import a Policy Template
A library of partial components can be setup by importing/exporting configurations as XML files to a
specified location.
1. In the Policy Configuration navigation tree, select where you want to import a partial
configuration.
2. From the Tools & Wizards ribbon, click AppSense Policy Templates and select Import
Template.
The Open dialog box displays.
3. Locate the .XML file you want to import and click Open.
4. The XML file is imported into the configuration.
Library
The Library node contains two fixed nodes; Reusable Nodesand Reusable Conditions. These are
nodes and conditions that can be used multiple times within your configuration. They are ideal for
grouping common sets of actions together that will regularly need to run in a variety of circumstances.
Copyright © 2019 , Ivanti. All Rights Reserved. Privacy and Legal.
Page 60 of 237
Environment Manager 2019.1 Policy Product Guide

Configuration Layering
Configuration Layering allows complex configurations to be built independently and combined into a
single deployable configuration which maintains the origin of each configuration item.
Layering enables separate business units or teams to maintain configurations which together are
deployed to endpoints ensuring changes can be implemented quickly and easily.
Components
Host Configuration
A host is the initial configuration to which layers are added. It is the only configuration in a layered
configuration which can be edited - nodes and library items can be added, edited and deleted.
A host can be any AEMP file compatible with the version of the Environment Manager you are using. A
host is no different to any other configuration - it is the term used to describe a configuration that
contains layers.
Layer
A layer is a configuration that has been added to a host. Like hosts, a layer can be any AEMP file
compatible with the version of the Environment Manager you are using.
When a layer is added to a host, its nodes and libraries are read-only and cannot be edited or deleted
from the layered configuration. They remain part of that layer and independent from the host. Nodes
and library items from a layer cannot be deleted or edited in the layered configuration. The layer must
be edited independently and added again to update the layered configuration.
There a two types of layer:
l Library Layer - Consists of the following:
o
Reusable Nodes
o
Reusable Conditions
o
Blocked Text Library
o
User Messages
o
Run As User Library
l Full Configuration - Everything included in the library layer, plus:
l Computer triggers
l User triggers
l Content
Copyright © 2019 , Ivanti. All Rights Reserved. Privacy and Legal.
Page 61 of 237
Environment Manager 2019.1 Policy Product Guide

Layered Configuration
A layered configuration is an AEMP file made up of a host and one or more layers. The layers are
independent from the host in that they are read-only and cannot be edited. A layered configurations
is no different from any other AEMP file in that it is a collection of nodes and library settings.
Layered configurations provide a way to combine multiple configurations into a single AEMP file,
without losing the individual identity of the layers and can also be a layer in another configuration.
In the example below the host configuration contains the Host node in the Computer Startup trigger.
Two configurations are to be added as layers, each with a node in the Computer Startup trigger:
Added layers are analyzed and combined with the host:
Copyright © 2019 , Ivanti. All Rights Reserved. Privacy and Legal.
Page 62 of 237
Environment Manager 2019.1 Policy Product Guide

The layers create a single configuration with each node positioned as they are in their individual layers.
Layer 1 and 2 are read only - their nodes cannot be edited or deleted within the layered configuration.
The node in the host configuration can be edited and deleted if required and any nodes added to the
layered configuration are added to the host. You can also reference nodes from the host as child
nodes in a layer.
Nested Layers
Layered configurations can be added to other hosts, nested and referenced within other layers
multiple times, as shown below:
The host configuration contains three layers. Layer 3 is a layered configuration containing Layer 4
creating a dependency between the two layers.
You cannot create this type of dependency directly in the host. In the example above, Layer 1 cannot
be moved into Layer 2. To achieve this Layer 1 would first need to be added into Layer 2 before Layer 2
is added to the host.
Excluded from Layering
When a layer is added to a host, the following settings are not included from the layers:
l Custom Settings
l Auditing
l Personalization Servers
In a layered configuration, settings for these sections are set in the host.
Copyright © 2019 , Ivanti. All Rights Reserved. Privacy and Legal.
Page 63 of 237
Environment Manager 2019.1 Policy Product Guide

Trigger Environment Actions and Conditions
Trigger Environment actions and conditions from the host and each layer are added to layered
configurations. There is no change to the behavior of Environment actions and conditions.
To see the Trigger Environment for a layer, highlight a compatible trigger and select the required layer
from the drop-down.
Compatible triggers.
l Computer
l Startup
l Network Available
l Shutdown
l User
l Logoff
l Network Connected
l Network Disconnected
l Session Reconnected
l Session Disconnected
l Session Locked
l Session Locked
User Messages, Blocked Text Libraries and Run As Libraries
A layered configuration includes the entries in User Messages, Blocked Text Libraries and Run As User
libraries from all layers. Their behavior is essentially the same as nodes in layered configurations - the
libraries from layers are read-only and when a new item is added in a layered configuration, it is added
to the host.
Copyright © 2019 , Ivanti. All Rights Reserved. Privacy and Legal.
Page 64 of 237
Environment Manager 2019.1 Policy Product Guide

When you view any of the libraries you can see which message belongs to which layer. They cannot be
edited or deleted from the layered configuration. The appropriate layer must be removed, edited and
added again.
In the example below, the Logoff Message can be edited as it belongs to the Host but the two other
messages are part of layers and cannot be edited. Any message can be referenced in Lockdown
conditions in the host and any other layer.
Manage Layered Configurations
Configure a Host
A host can be any AEMP file compatible with the version of the Environment Manager you are using. A
host is no different to any other configuration - it is the term used to describe a configuration that
contains layers.
1. Open a new or existing AEMP configuration in the Environment Manager console.
This initial layer will be your host configuration.
The configuration must have been created in the same version as the console you are using.
Older configurations must be upgraded to the console version before they can be added as a
layer.
For further information about Upgrading Configurations, see the User Workspace Manager
help.
2. Enable Change Tracking, if required.
If you want to keep the history of layers being added to a layered configuration,
Change Tracking must be enabled on the host.
3. Configure the library and trigger sections you need in the host.
Copyright © 2019 , Ivanti. All Rights Reserved. Privacy and Legal.
Page 65 of 237
Environment Manager 2019.1 Policy Product Guide

4. Add Custom Settings, Personalization Servers and Auditing options. For a layered
configuration, these options must be set in the host - they will not be included from the layers.
5. Save the configuration.
Add a Layer
Once you have a host configuration, multiple AEMP configuration files can be added to create a
layered configuration.
When you add a layer, it will either be new to that configuration or an update to an existing layer.
When you select a layer to add, the icons denote whether it is a new or update.
1. Before adding a layer, ensure all the Add Layer Rules are satisfied:
o
Layers must be valid configurations for the Environment Manager console they are being
added to. For example, you cannot add an 8.3 configuration to an 8.5 console.
o
Layers cannot be added if they are the same version or older than a layer already in the
host.
o
For example, Layer A version 2 exists in the layered configuration. You cannot add Layer
A version 1 as it is an earlier version.
o
Adding a new version of a layer will update all existing references of that layer to the new
version.
o
Configuration History is only added with a layer if Change Tracking is enabled on the
host configuration.
2. Open your host configuration.
3. In the Manage ribbon, in the Layers group, select Add.
The Add a layer dialog displays.
4. Click the Add drop-down and select one of the following:
o
Configuration file from disk (Default - selected if the Add button is clicked)
o
Configuration file from Management Center
o
Configuration file from SCCM
Each of these methods adds a layer.
Copyright © 2019 , Ivanti. All Rights Reserved. Privacy and Legal.
Page 66 of 237
Environment Manager 2019.1 Policy Product Guide

5. Select the configuration(s) you want to add as layers - multiple configurations can be selected.
The selected layers are added to the dialog and analyzed for compatibility with the host and
other layers. When adding layers to a new host, there are rules and conditions which a layer
must satisfy.
If identically named nodes from different layers exist in the same trigger, they will run in parallel.
For example, a new layer is added to a host. A node called "Node A" exists in the Process
Started trigger at the same level in both configurations. The Process Started trigger in the
layered configuration contains two nodes called "Node A" which would run in parallel.
Once analysis is complete, any errors arising from conflicts between the layers are identified.
Click the link in the Errors column to view further details.
6. For each layer, select whether you want to add the full configuration or just the library settings.
7. Click OK.
The nodes and library settings from the layers are added to the configuration.
8. Save the configuration.
The configuration can be distributed to endpoints using the Management Center or other
deployment method.
Review Layer Changes
When adding an updated layer, the new and existing versions of the layer are compared to see what
changes have been made in the new version. Click the View link in the History column to display a list
of added, updated and deleted nodes resulting from the incoming layer. The history will also show
details of any layers have been added or removed from that layer.
Copyright © 2019 , Ivanti. All Rights Reserved. Privacy and Legal.
Page 67 of 237
Environment Manager 2019.1 Policy Product Guide


Remove a Layer
Removing a layer deletes all of that layer's nodes and library items from a layered configuration. You
cannot delete a layer which has a dependency in another layer. As you create more complicated
configurations, dependencies can be created between layers and between hosts and layers.
For example, Layer A has been added to a host configuration. Layer A contains a reusable node which
is referenced by the host configuration on the logon trigger. You cannot delete Layer A without first
removing the reference to the reusable node.
1. Open a layered configuration.
2. In the Manage ribbon, in the Layers group, select Manage.
Each layer in the configuration is displayed in the Manage Layers dialog.
3. Select the layer you want to remove from the configuration and click Delete.
The action will be analyzed to check that deleting the layer would not break a dependency with
another layer. If an error is encountered, you will not be able to remove the layer.
If no errors are encountered, all nodes and library settings from that layer are removed from the
layered configuration
Merge a Layer
Merging a layer allows you to take ownership of that layer, breaking any links with the original
configuration. This is equivalent to copying every node and library item from the layer and pasting
them into the host, making them writable.
1. Open a layered configuration.
2. In the Manage ribbon, in the Layers group, select Manage.
Each layer in the configuration is displayed in the Manage Layers dialog.
3. Select the layer you want to merge with the host and click Merge or if you want to combine all
the layers in the configuration, click Merge All.
All nodes and library settings from the layer are added to the host. They now act as any other item in
the host - they can be deleted and edited. The layer no longer exists in the layered configuration.
Merging Example
The layered configuration contains Layer 1 and Layer 2. Each contains one Computer Startup node,
named Node 1 and Node 2 respectively.
Copyright © 2019 , Ivanti. All Rights Reserved. Privacy and Legal.
Page 69 of 237
Environment Manager 2019.1 Policy Product Guide
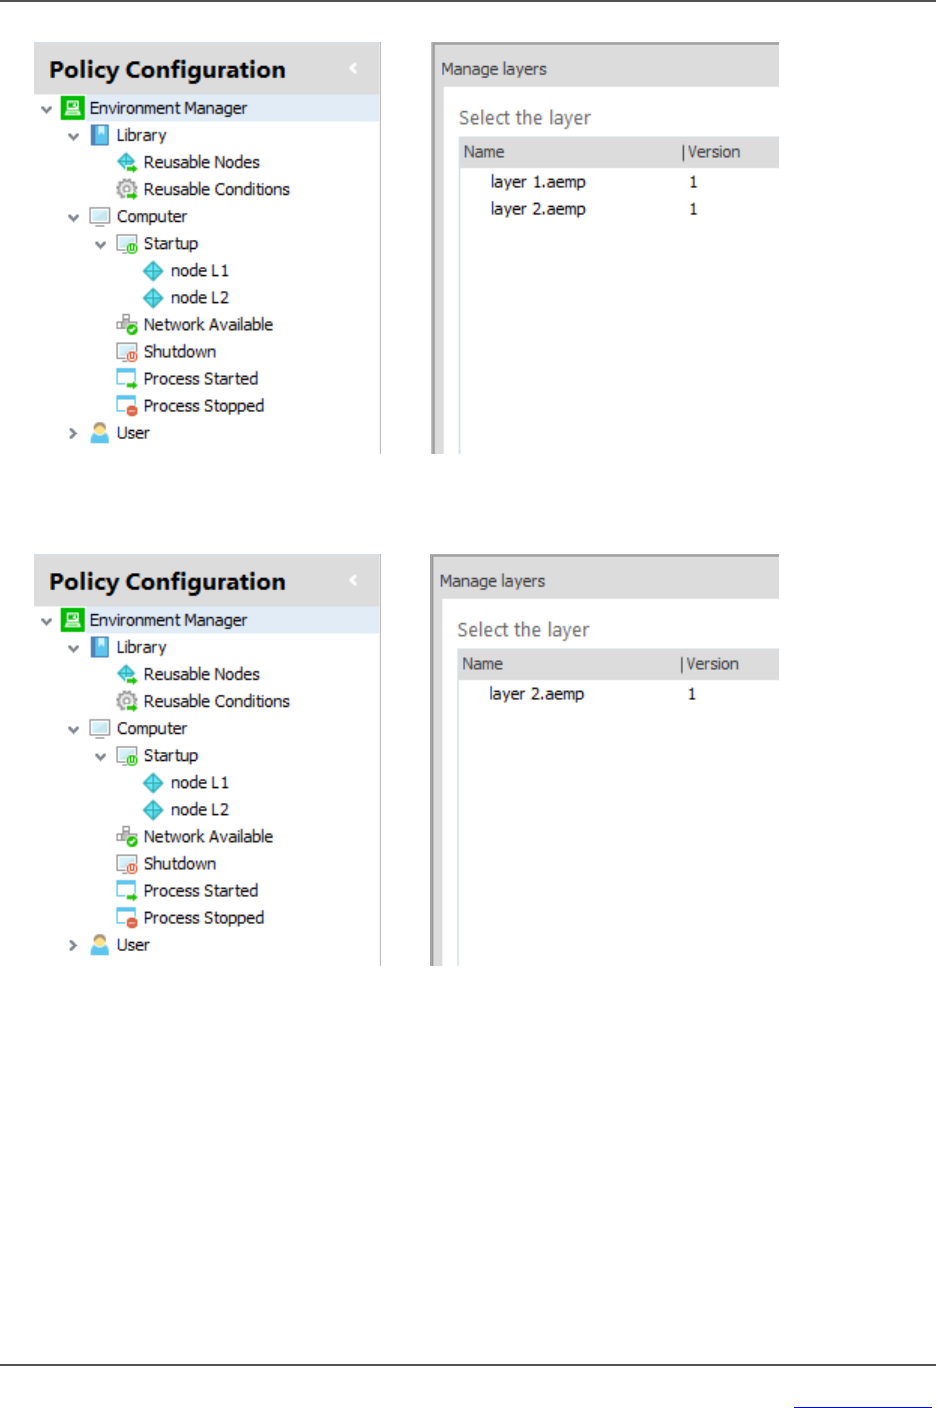
Layer 1 is merged with the host. Although the layered configuration looks the same, Node 1 is now
writable and part of the host configuration. Layer 1 is no longer a layer in the layered configuration.
If the layer being merged contains other layers those layers are not merged but become direct
dependents of the host. In the example below, Layer 1 contains Layer 3. When Layer 1 is merged with
the host, Layer 3 becomes a direct layer of the host.
Copyright © 2019 , Ivanti. All Rights Reserved. Privacy and Legal.
Page 70 of 237
Environment Manager 2019.1 Policy Product Guide

Rollback a Layer
The Rollback function allows you to return a layer to an earlier version. To rollback a layer, you must
have the access to the older version of the layer. It is therefore recommended that when using
configuration layering, you keep copies of all versions of the layers you use.
1. Open a layered configuration.
2. In the Manage ribbon, in the Layers group, select Rollback.
Each layer in the configuration is displayed in the Manage Layers dialog.
3. Highlight the layer you want to rollback.
4. Click the Browse drop-down and select one of the following:
o
Configuration file from disk (Default - selected if the Browse button is clicked)
o
Configuration file from Management Center
o
Configuration file from SCCM
Copyright © 2019 , Ivanti. All Rights Reserved. Privacy and Legal.
Page 71 of 237
Environment Manager 2019.1 Policy Product Guide

5. Select the layer you want to roll back to. It must be an older version of the same layer.
The layers are analyzed to check that performing the rollback would not affect another layer.
The larger the configuration, the longer the analysis takes. If an error is encountered the
rollback cannot be completed.
The current and rollback version numbers of the selected layer and its dependencies are
displayed so you can ensure the right version of the layer has been selected for rollback.
6. If there are no errors, click OK.
The layer is rolled back to the selected version.
Rollback Rules
Layers cannot be rolled back if they contain an earlier OR later version of a layer which is referenced in
another layer.
In the example below both layers contain Layer C version 3. You could not rollback to a layer which had
an earlier or later version of Layer C as version 3 is referenced in the other layer.
Copyright © 2019 , Ivanti. All Rights Reserved. Privacy and Legal.
Page 72 of 237
Environment Manager 2019.1 Policy Product Guide

Layer Properties
In the Manage ribbon, in the Layers group, select Properties to see details of the layers within a
configuration.
The following information is displayed:
l Friendly Name - Use this field to give the configuration a meaningful name which allows you to
easily identify it. Replace the AEMP filename in the Name field for a layer when adding, merging
and deleting layers or when viewing the layer properties.
l Version - The version number of the layered configuration.
l Unique Identifier - The configuration ID number unique to each layer.
l Depends on Configurations - The configurations included in the layered configuration.
Configuration Dependencies
Dependencies can be created between layers and between the host and another layer which can
affect how Configuration Layering works. Nodes, reusable conditions and message library items, from
one layer can be referenced in another layer. Nodes may not be able to be deleted or rolled back
where a dependency has been created between layers due to shared usage of an item.
Child Node Dependency
If a node is added to a layered configuration as a child of a node in a layer, a dependency is created
between the layer and the host.
Copyright © 2019 , Ivanti. All Rights Reserved. Privacy and Legal.
Page 73 of 237
Environment Manager 2019.1 Policy Product Guide

In the example below, the Node L1 is part of a layer that has been added to the host. Node H2 has been
added to the layered configuration as a child of Node L1. The layer cannot be removed from the
configuration because the host is dependent upon it containing the new node.
The layer cannot be removed from the configuration because the host is dependent upon it
containing the new node.
Reusable Node Dependency
If a reusable node from a layer is referenced in a layered configuration a dependency is created
between the layer and the host. If a reusable node is referenced as a child node of a node of another
layer, a dependency is created between the two layers.
In the example below, reusable nodes RNode L1 and RNode L2 are contained within layers which have
been added to the host. RNode L2 is referenced in the Computer Startup trigger as part of the host
and RNode L1 referenced as a child of the Node L1.
Layers containing the reusable nodes cannot be deleted because the reusable nodes are referenced in
the host and in a node from another layer. To delete the layer containing the reusable nodes all
references in the host and other layers must be removed.
Copyright © 2019 , Ivanti. All Rights Reserved. Privacy and Legal.
Page 74 of 237
Environment Manager 2019.1 Policy Product Guide
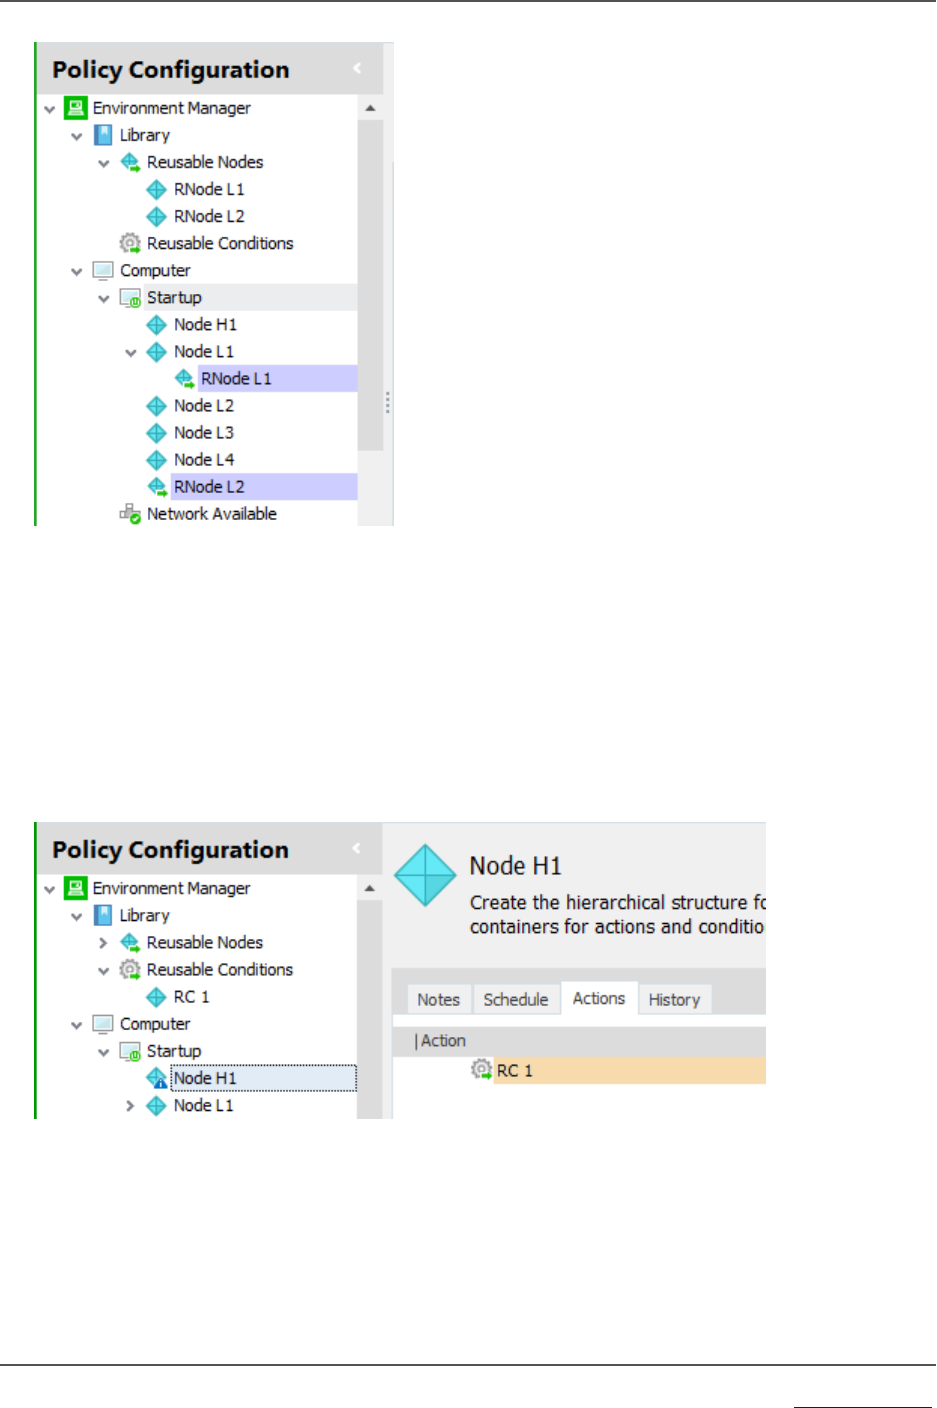
Reusable Condition Dependency
If a reusable condition from a layer is referenced in a layered configuration a dependency is created
between the layer and the host. A reusable condition added to a node in another layer creates a
dependency between the layers.
In the example below, reusable condition RC 1 is part of a layer which has been added to the host.
Node 1 is in the host configuration. The layer containing the reusable condition cannot be deleted
because the reusable condition is referenced another configuration.
Copyright © 2019 , Ivanti. All Rights Reserved. Privacy and Legal.
Page 75 of 237
Environment Manager 2019.1 Policy Product Guide

Message Library Dependency
If a message from a layer is used in a lockdown condition added to a layered configuration, a
dependency is created between the layer and the host. The same is true if a message from one layer is
used in a lockdown condition from a node in another layer.
Copyright © 2019 , Ivanti. All Rights Reserved. Privacy and Legal.
Page 76 of 237
Environment Manager 2019.1 Policy Product Guide

Configuration Endpoint Merging
Endpoint Configuration Merging uses the EM Agent to combine multiple AEMP configuration files,
saved on one endpoint, into a single configuration. Nodes, reusable conditions and message libraries
from each configuration are added to the merged configuration.
The merge is done by adding the individual configurations to a directory on the endpoint and
specifying, in a manifest file, the configurations which are to be merged. The EM Agent monitors the
merge directory and automatically merges configurations when a manifest file is added to the
directory.
Endpoint Configuration Merging allows different areas of a business to work independently on a
particular area of a configuration which can then be added to create a single configuration. Where
small changes to large configurations are required, a snippet of the area that has changed can be
created. The snippet can then be merged on endpoints removing the need to push out large
configurations.
Components in a Merge
Configuration merging relies on the following components.
Base Configuration
Every merge must have a base configuration - this is the first configuration in the merge onto which
the other configurations are added. A merged configuration takes the global attributes such as
Custom Settings, Auditing options and any Personalization settings, from the base configuration.
It is therefore essential that the settings which are not merged are defined in the base.
By default, the base configuration is set as the AEMP file which is created when a live configuration is
saved on an endpoint:
%ProgramData%\AppSense\Environment Manager\Configuration.aemp
The base configuration and all component configurations in a merge must be version 10.0 or later of
Environment Manager. Upgrade any older version configurations before merging.
Component Configurations
A merged configuration is made up of a base configuration and one or more component
configurations. Component configurations are AEMP files which are added to the base configuration
during a merge. To be part of a merge, component configurations must be stored in the
MergeConfigs directory.
Copyright © 2019 , Ivanti. All Rights Reserved. Privacy and Legal.
Page 77 of 237
Environment Manager 2019.1 Policy Product Guide

Nodes, pre-triggers, Run-As and User Messages from components are included in a merge. Other
settings such as auditing options are taken only from the base configuration. The base configuration
and all component configurations in a merge must be version 10.0 or later of Environment Manager.
Upgrade any older version configurations before merging.
MergeConfigs Directory
This directory is where component configurations for merging are stored and where a merge is
triggered when a valid manifest is detected.
When you start the EMCoreService on an endpoint, the MergeConfigs directory is created:
%ProgramData%\AppSense\Environment Manager\MergeConfigs
This directory is secured so only administrators can write to it. This ensures that end users
cannot affect the merge configurations.
Manifest
The manifest is an XML file that includes details of the configurations to be merged and dictates which
configuration is set as the base. The merge is initiated when the agent detects a manifest in the
MergeConfigs directory.
Manifests are created using the ManifestGen command line tool.
Below is an example merge_manifest.xml file.
<MergeManifest UseSystemBase="true" WaitForConfigs="true">
<MergeFiles>
<FileEntry Name="config2.aemp"
Checksum="563621a479c06d6d357b327283320288"/>
<FileEntry Name="config4.aemp"
Checksum="4bc481043e6991253de15ec6993ee43f"/>
</MergeFiles>
</MergeManifest>
Manifest Attribute and Tags
Attribute/Tag Description
MergeManifest
The root node of the configuration.
MergeFiles
The container tag for the list of AEMP files which are to be included in the
merge.
Copyright © 2019 , Ivanti. All Rights Reserved. Privacy and Legal.
Page 78 of 237
Environment Manager 2019.1 Policy Product Guide

Attribute/Tag Description
FileEntry Name
Identifies a configuration to be included in the merge. The file must be
present in the MergeConfigs directory to be included in a merge.
UseSystemBase
(Optional)
Can be set to "true" or "false" and instructs whether to either include or
exclude the default Configuration.aemp in the merge. This is the live
Configuration.aemp file found in %ProgramData%\AppSense\Environment
Manager. If set to true, the base configuration must already be present on
endpoints when the manifest is deployed otherwise the merge will fail. If
set to false the first configuration in the MergeFiles list is used as the base
configuration unless otherwise defined by the BaseConfig attribute.
WaitForConfigs
(Optional)
Determines the behavior when a manifest .xml is detected in the
MergeConfigs directory and not all named configurations are present. Can
be set to:
l True - The merge will wait indefinitely until all configurations
referenced in the manifest are present and then complete the
merge.
l False - The merge will fail if a manifest is detected in the
MergeConfigs directory which references a configuration which is
not present.
If you are using an installer, such as an MSI, to push out configurations
and a manifest to endpoints, it is recommended that you set this to "true"
as you cannot guarantee in what order the configurations and manifest
will be added. This does not apply if using the SystemBase
Configuration.aemp file. If the manifest merge is triggered and the
Configuration.aemp is not present, the merge will fail - it will not wait for
the base.
Checksum
(Optional)
An MD5 checksum unique to an AEMP file. If included the manifest, the
AEMP file in the MergeConfigs folder must have the same checksum to be
included in the merge. Base configurations are not referenced by a
checksum.
ManifestGen Tool
The ManifestGen is a command line tool which creates the XML manifest file used to define and trigger
a configuration merge. The XML file contains details of the AEMP files to be merged and can dictate
whether the default Configuration.aemp or a component configuration is used as the base in the
merge.
If a merge_manifest.xml already exists in the output directory, the tool fails and a new
manifest is not created - the current one is not overwritten.
Copyright © 2019 , Ivanti. All Rights Reserved. Privacy and Legal.
Page 79 of 237
Environment Manager 2019.1 Policy Product Guide
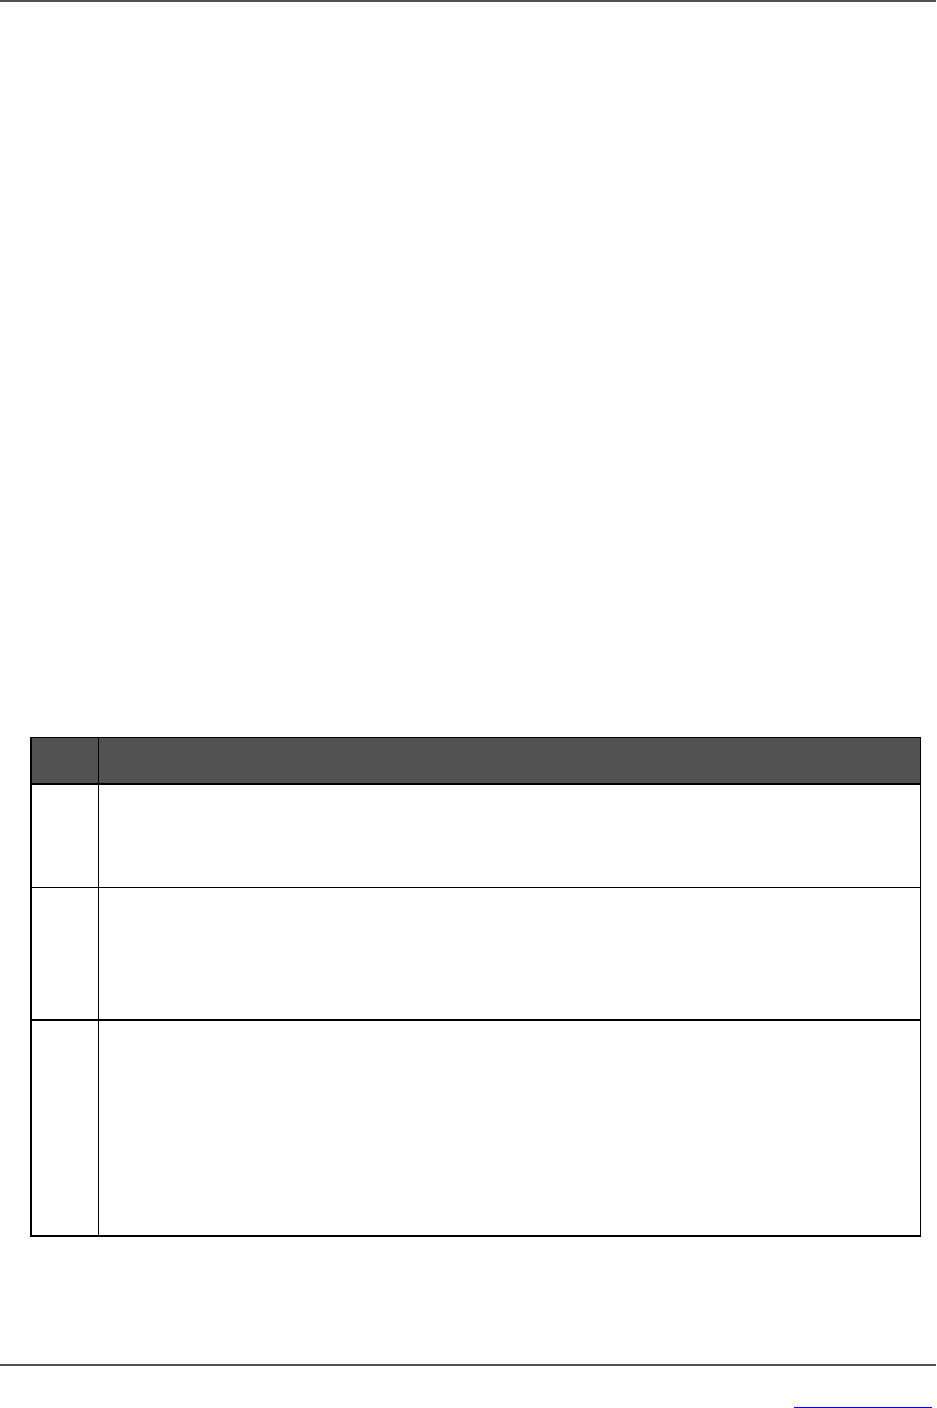
To make using the tool easier, add the location to the Path environment variable at Advanced System
Properties > Environment Variables > Path:
%PROGRAMFILES%\AppSense\Environment Manager\Console
Create a Manifest
1. Save the configurations you want to be merged in the MergeConfigs directory:
2. %ProgramData%\AppSense\Environment Manager\MergeConfigs
3. Open the Command Line Interface.
4. Enter cd %programdata%\appsense\environment manager to change the directory.
5. Enter manifestgen mergeconfigs\*.aemp.
If you run manifestgen in the MergeConfigs folder, the agent will pick up the manifest as soon as it is
created and immediately start the merge.
If successful, a merge_manifest.xml file is created in: %ProgramData%\AppSense\Environment
Manager
The manifest can now be used to trigger the merge and create a configuration.
Additional Commands
Arguments can be used in the ManifestGen tool to alter the manifest and affect the merge. You can
specify a different base configuration, output file and create a manifest without checksum values for
the configurations.
Suffix Description and Usage
-o
Output folder- Specify where the manifest.xml file is created, for example, manifestgen
mergeconfigs\*.aemp -o c:\configs creates a manifest in the Configs folder on
the C drive.
-b
Base configuration - Identify the base configuration and exclude the default base
configuration. For example, manifestgen mergeconfigs\*.aemp -b
config1.aemp creates a manifest that will create a merged configuration with
Config1.aemp set as the base configuration.
-nc
No checksum entries - By default, each configuration listed in the manifest has an MD5
checksum which allows unique identification of a configuration. If the checksum in the
manifest does not match that of the configuration the merge will fail or wait for a
configuration with the correct checksum. Using the -nc suffix with the ManifestGen tool
will not list checksums in the manifest and means that merges will succeed if the
configuration file names are correct, regardless of the checksum value. For example:
manifestgen mergeconfigs\*.aemp -nc
Copyright © 2019 , Ivanti. All Rights Reserved. Privacy and Legal.
Page 80 of 237
Environment Manager 2019.1 Policy Product Guide

Suffix Description and Usage
-nw
The default behavior when a manifest is added to the MergeConfigs directory is to wait
indefinitely until all configurations in the manifest are present and then perform the
merge. Using the -nw suffix, a merge will fail if the configurations listed are not present
when the manifest is added to the MergeConfigs directory. For example: manifestgen
mergeconfigs\*.aemp -nw If the manifest lists five configurations and only four are
present when the manifest is added to the MergeConfigs directory, the merge will fail. If
you are using an installer, such as an MSI, to push out configurations and a manifest to
endpoints, it is recommended that you do not use this suffix as you cannot guarantee in
what order the configurations and manifest will be added.
Edit a Manifest
Although manifests can be edited and created in a text editor, it is recommended that you use the
ManifestGen tool as it ensures the merge_manifest.xml file is in the correct format. If, for example, you
have an "&" in a file name, the ManifestGen tool will escape this to make sure it is a valid XML file.
Once created, a manifest file can be edited to change the attributes such as the base configuration
and the order in which the merge should take place.
For example, the command:
manifestgen mergeconfigs\*.aemp -b mergeconfigs\config3.aemp -nc
creates a manifest in which the default base configuration is not included and config3.aemp is set as
the base. The WaitForConfigs attribute is set to the default of "true" and checksums are not included.
<MergeManifest UseSystemBase="false" WaitForConfigs="true">
<MergeFiles>
<FileEntry Name="config3.aemp" BaseConfig="true"/>
<FileEntry Name="config1.aemp"/>
</MergeFiles>
</MergeManifest>
To edit the manifest, open the manifest in a text editor, make the required changes and save the file.
In this example, UseSystemBase is set to "true" and the BaseConfig command has been removed from
Config3.aemp. The order of the merge has also been changed.
<MergeManifest UseSystemBase="true" WaitForConfigs="true">
<MergeFiles>
<FileEntry Name="config1.aemp"/>
<FileEntry Name="config3.aemp"/>
Copyright © 2019 , Ivanti. All Rights Reserved. Privacy and Legal.
Page 81 of 237
Environment Manager 2019.1 Policy Product Guide

</MergeFiles>
</MergeManifest>
When merged, the default base Configuration.aemp file is included in the merge as the base
configuration and the order in which the component configurations are merged onto the base is
reversed. Note that the configuration set as the base, includes the global configuration settings such
as the Custom Settings that you want including in the merge. Therefore, care should be taken when
selecting a different configuration as the base.
Setting BaseConfig="true" for a configuration and UseSystemBase="true" in the same
manifest will cause a conflict and the merge will fail.
BatchConfig Tool
Only AEMP files which are at the latest version can be included in a merge. The BatchConfig tool
converts old AEMP files and XML snippets to AEMP files of the correct version.
Multiple files can be converted at the same time, producing one output file per input.
If one or more configurations from the source already exist in the output directory, the tool fails and
none of the configurations are converted.
To make using the tool easier, add the location to the Path environment variable at Advanced System
Properties > Environment Variables > Path:
%PROGRAMFILES%\AppSense\Environment Manager\Console
Batch Convert Configuration Files
1. Save or copy the AEMP and XML files you want to convert to a single folder.
2. Open the Command Line Interface.
3. Enter BatchConfigTool followed by details of the source and destination folders in the
following format:
BatchConfigTool <source directory\file type> -o <output directory>
Batch Convert Examples
BatchConfigTool C:\Configs\Source\*.xml -o C:\Configs\Output
This example converts XML snippets found in the source directory to current version AEMP files saved
in the output directory. The same format can be used to update old AEMP files to the current version:
BatchConfigTool C:\Configs\Source\*.aemp -o C:\Configs\Output
You can also convert both file types simultaneously:
BatchConfigTool C:\Configs\Source\*.aemp C:\Configs\Source\*.xml -o C:\Configs\Output
Copyright © 2019 , Ivanti. All Rights Reserved. Privacy and Legal.
Page 82 of 237
Environment Manager 2019.1 Policy Product Guide

In the example below, the Source directory contained an 8.3 AEMP file and two XML snippets.
Following conversion, the output directory contains three current version AEMP files.
The BatchConfig tool installs with the Environment Manager Console. However, it can be installed
independently using the EnvironmentManagerPolicyTools 32 and 64 bit installers which are included
in the User Workspace Manager media.
Auditing Events - Configuration Endpoint Merging
New auditing events for Configuration Endpoint Merging have been added to Environment Manager.
When viewed in Windows Event Viewer (select Windows Log > Applications), the events provide
further details such as what has caused a merge failure.
Merging Configurations
Once a manifest is created and the component configurations are present on the endpoints, you can
trigger the merge and create a new configuration.
A merge is triggered when a merge_manifest.xml is detected in the MergeConfigs directory which
should contain all the configurations you want to merge.
If the manifest lists configurations which are not in the MergeConfigs directory, the merge will be
delayed until all configurations are present. The base configuration and all component configurations
in a merge must be version 10.0 of Environment Manager. Upgrade any older version configurations
before merging.
To upgrade a configuration, open it in the required version of the Environment Manager and save. For
example, open an 8.6 configuration in the10.0 console to upgrade.
Using the -nw tag, a manifest can be created which will fail a merge if all configurations are
not present.
Empty Manifest
Adding an empty manifest to the MergeConfigs directory automatically merges all AEMP
configurations within that directory. It will merge all configurations in alphabetical order and set the
base as the Configuration.aemp found in:
%ProgramData%\AppSense\Environment Manager
If this AEMP is not present, the merge will fail.
Copyright © 2019 , Ivanti. All Rights Reserved. Privacy and Legal.
Page 83 of 237
Environment Manager 2019.1 Policy Product Guide

To create an empty manifest, open a new file in a text editor, create a zero-byte file and save as merge_
manifest.xml.
The same merge can be achieved using a manifest that, whilst not totally empty, does not include
details of the AEMP files to be merged:
<MergeManifest UseSystemBase="true"
<MergeFiles>
</MergeFiles>
</MergeManifest>
This provides the same results as a blank manifest but allows you to use the UseSystemBase attribute.
If you set this to "false" the merge will use the configuration which is first alphabetically in the
MergeConfigs directory, as the base.
Successful Merges
If the manifest is correct and the configurations listed are present in the MergeConfigs directory, the
Merged_Configuration.aemp is created and used as the live configuration on the endpoint.
In addition to the new configuration (Merged_Configuration.aemp) a copy of the successful manifest
is created, renamed as last_merge_manifest.xml, to provide a record of the merge and a backup of the
manifest. If present, the original merge_manifest.aemp file is deleted when the merge is complete.
The Configuration.aemp file is not altered during a merge and is no longer used by the agent unless
updated or the Merged_Configuration.aemp is not present.
Unsuccessful Merges
If an error occurs during the merge, it will fail and a new configuration file will not be created. Merges
can fail if:
l The checksums specified in the manifest do not match those of the actual configurations and
WaitForConfigs is set to "false"
l The manifest includes the -nw command and one or more configurations listed in the manifest
are not present in the MergeConfigs directory when it is added
l Friendly names in the Run As Library are the same in two of the configurations being merged.
l UseSystemBase is set to "true" and a base Configuration.aemp is not present when the merge
is triggered.
Copyright © 2019 , Ivanti. All Rights Reserved. Privacy and Legal.
Page 84 of 237
Environment Manager 2019.1 Policy Product Guide

l A manifest is invalid.
l One or more configurations are corrupt.
Following an unsuccessful merge, the merge_manifest.xml file is deleted and a copy of the
unsuccessful manifest (failed_merge_manifest.xml) is added to the directory.
Merged Behavior
The table below lists the areas of a configuration and gives an explanation of their behavior during a
merge.
Area Merged Behavior
Nodes Yes The merged configuration contains all the nodes from each of the
component configurations. If two nodes which affect the same
application exist in the same trigger, they will run in parallel. The
contents of individual nodes are not merged.
Action and
Conditions
Yes Actions and conditions are not analyzed - the merged configuration
will contain all actions and conditions from the merged configuration.
If two configurations both contain actions which affect the same
registry key for example, the merged configuration will contain both
actions. For such conflicts, last write wins. This is standard conflict
behavior in Environment Manager.
Auditing No The events from the base are used in the merged configuration whilst
the events from the component configurations are ignored.
Custom
Settings
No Merged configurations inherit their Custom Settings from the base
configuration. Settings from any component configuration in the
merge are discarded. It is therefore important that the Custom
Settings you require in the merged configuration are added to the
base configuration. This includes the BaseConfigMergeBehavior
Custom Setting. See Live Configuration Update Behavior.
Run As Library Yes Entries in the Run As libraries for all configurations are added to the
merged configuration to create a single list. All friendly names must be
unique. If two configurations in the merge contain a user with the
same friendly name, the merge will fail.
Block Message
Library
Yes The Block Message libraries from all configurations are merged. The
merged configuration contains all messages from the base and
Copyright © 2019 , Ivanti. All Rights Reserved. Privacy and Legal.
Page 85 of 237
Environment Manager 2019.1 Policy Product Guide

Area Merged Behavior
merged configurations including any duplicates.
Pre-triggers Yes When configurations are merged the pre-trigger actions from all
configurations are added to the merged configuration. There is no
validation for pre-triggers enabling duplicate and conflicting actions
to be merged.
Personalization
Settings
No Personalization settings, such as the server list, are not merged. The
merged configuration takes these settings from the base
configuration. Therefore any Personalization settings required in the
merged configuration should be defined in the base configuration.
Live Configuration Rules
When a live configuration is opened or saved on an endpoint, it is referred to:
%ProgramData%\AppSense\Environment Manager\Configuration.aemp
To allow for configuration merging, the live configuration can also refer to:
%ProgramData%\AppSense\Environment Manager\Merged_Configuration.aemp
The agent monitors the %ProgramData%\AppSense\Environment Manager directory for new
configurations. When a change is detected the agent loads a new configuration using the following
order of precedence:
l Merged_Configuration.aemp
l Configuration.aemp
If a Merged_Configuration.aemp exists in the directory, it will be the live configuration. If removed, the
agent continues to use the in-memory version - when the agent is restarted, the Configuration.aemp
file will become the live configuration.
Live Configuration Update Behavior
The BaseConfigMergeBehavior custom setting allows you to define how the live configuration is
affected when a Configuration.aemp file is pushed out to endpoints by the Management Center or
other deployment method.
You might be deploying a new Configuration.aemp file and want it to be the live configuration on
endpoints. Or the Configuration.aemp file might contain updates which you want to add to the
current live configuration. The Custom Setting can initiate both scenarios:
l Remerge - When the configuration is detected on an endpoint by the agent, a merge, based on
the last_merge_manifest.xml, is triggered and includes the new Configuration.aemp. The merge
creates a new Merged_Configuration.aemp which replaces the current live configuration. A
Copyright © 2019 , Ivanti. All Rights Reserved. Privacy and Legal.
Page 86 of 237
Environment Manager 2019.1 Policy Product Guide

last_merge_manifest.xml must be present otherwise the merge will fail. This is the default value
for the Custom Setting and is also the behavior if BaseConfigMergeBehavior is not added to a
configuration as a Custom Setting.
l Replace - When the configuration is detected on an endpoint by the agent, it replaces the
Merged_Configuration.aemp as the live configuration. Following the successful deployment of
the new Configuration.aemp, the Merged_Configuration.aemp is deleted from the directory.
Copyright © 2019 , Ivanti. All Rights Reserved. Privacy and Legal.
Page 87 of 237
Environment Manager 2019.1 Policy Product Guide

Triggers
Triggers in the Environment Manager console represent common computer and user events such as
Startup, Logon and Session Disconnected. They are static elements in the Policy Configuration
navigation tree; they cannot be edited, moved or deleted. An Environment Manager configuration is
built around the events to which the triggers relate. Nodes are created within triggers containing
conditions and actions. This creates a dependency between the trigger, condition and action. When
the trigger is fired, any conditions present are validated and if met, the action is carried out.
For example:
Trigger Condition Action
Computer Startup Computer > Computer IP Address File & Folder > Modify File Attributes
In the example below, the "Hidden" node, which contains a condition and associated action, has been
added to the Startup trigger. When a managed endpoint is booted up, the Environment Manager
agent checks to see if the IP address is between 100.100.100.100 and 123.123.123.123. If it is, the Word
document Test.docx becomes a hidden file. If the endpoint does not meet the condition, the Word
document properties remain unchanged.
When selected, each trigger, displayed in the work area, contains two tabs: Environment and
Summary. The Summary tab contains an overview of the contents of the trigger, showing each node,
its state (enabled or disabled) and the number of associated actions.
Triggers fall under two fixed nodes in the Policy Configuration navigation tree; Computer and User.
Computer Triggers
Trigger Description
Startup Executes actions when a computer is started. Useful to help create a
common image for all standard computers within an organization.
Network Available Actions execute once the network is available. This is useful for items
such as conditions that perform AD lookups or actions that copy files
Copyright © 2019 , Ivanti. All Rights Reserved. Privacy and Legal.
Page 88 of 237
Environment Manager 2019.1 Policy Product Guide

Trigger Description
from network locations. These items may not function correctly in the
Startup trigger as the network is not always available at that point.
Shutdown Executes actions when a computer is switched off.
Process Started Actions within this trigger are executed when a process is started.
Process Stopped Actions within this trigger are executed when a process is stopped.
User Triggers
Trigger Description
Logon Actions take effect when the user logs on to the system but before the
desktop shell has started.
Due to a compatibility issue with smart card readers, logon
actions do not run when logging on with smart cards. This
affects Windows 7 and Windows 2008 R2 operating systems.
For further information, see document 4747 on the Ivanti User
Community.
Logon > Pre-Session Actions take effect before terminal services is notified of the logon.
Registry, Group Policy and Environment actions are compatible with
this sub-trigger. During the upgrade, actions which were previously in
the Environment tab of the Logon trigger are moved here.
Logon > Pre-Desktop Actions take effect when the user logs on to the system but before the
desktop shell has started. During the upgrade, actions which were
previously in the Logon trigger are moved here.
Logon > Desktop
Created
Actions take effect after the desktop shell and Explorer has started. To
improve efficiency and logon times, any non-critical Logon actions
should be added to this trigger, for example, mapping drives and
printers.
Logoff The associated actions are executed when a user logs off. Environment
Manager Logoff actions run after Group Policy scripts and all post-
logon actions have completed. Following a forced logoff post-logon
actions still run to completion followed by any Logoff actions.
Copyright © 2019 , Ivanti. All Rights Reserved. Privacy and Legal.
Page 89 of 237
Environment Manager 2019.1 Policy Product Guide

Trigger Description
If using Remote Desktop Protocol v6.0, use the Session
Disconnect trigger for logoff actions as the remote application
procedure does not logoff, it disconnects.
Process Started Actions within this trigger are executed when a process is started.
If using Environment Manager and Streamed Applications,
refer to Streamed Applications.
Process Stopped Actions within this trigger are executed when a process is stopped.
Network Connected Actions and conditions within this trigger are executed when each
physical or virtual network adapter establishes a connection. If a
Personalization Server is defined within the configuration, a
Personalization configuration poll is also performed when the trigger is
fired. The trigger fires when a network is detected. The trigger will not
fire if the network is categorized as “unknown”.
Network Disconnected Actions and conditions within this trigger are executed when each
physical or virtual network adapter disconnects a connection. The
trigger also fires when the network is categorized as “unknown”. For
example, this could be because the domain controller has stopped
functioning or the wireless connection is out of range.
Session Reconnected Actions within this trigger are executed when a user’s disconnected
session is reconnected.
Session Disconnected Actions within this trigger are executed when a user’s live session is
disconnected.
Session Locked Actions within this trigger are executed when a user’s desktop is
locked.
Session Unlocked Actions within this trigger are executed when a user’s desktop is
unlocked.
Session Locked and Session Unlocked triggers will not apply to published applications. They
only apply to the session in which the application is running.
Triggers for XenDesktop Connections and Backwards Compatibility
Prior to Environment Manger 10.1, when using XenDesktop versions 7.8 or earlier, if you logged on,
disconnected , reconnected, locked, and unlocked, the following triggers were fired:
Copyright © 2019 , Ivanti. All Rights Reserved. Privacy and Legal.
Page 90 of 237
Environment Manager 2019.1 Policy Product Guide

User Behavior Actual Trigger (RDP) Actual Trigger (ICA)
Logon Logon Logon
Disconnect Disconnect Lock
Reconnect Reconnect Unlock
Lock Lock Lock
Unlock Unlock Unlock
This was because for ICA sessions , Lock and Unlock actions were triggered when the user
disconnected and reconnected. This behavior is corrected for XenDesktop 7.9 and later, but for users
running earlier versions, Environment Manager can now detect disconnections and reconnections in
XenDesktop 7.6 - 7.8 environments. This detection is enabled by default for version 10.1
configurations. When upgrading older version configurations (version 10.0 and older), the detection
mechanism is disabled by default. If you are using XenDesktop versions 7.6 - 7.8 inclusive, you can
override this using the IcaSessionConnectionOverride setting in Advanced Settings.
For more information, see Advanced Configuration Settings.
Logon Trigger
In Environment Manager 8.5, a new Logon trigger structure was introduced. The single Logon trigger
and Environment tab was replaced by three sub-triggers - Pre-Session, Pre-Desktop and Desktop
Created.
A new configuration opened in the 8.5 console uses the Logon sub-triggers. However to ensure
backwards compatibility, when upgrading a configuration you can select whether to use the new or
old logon trigger methods. You can switch between methods using the Advanced Options in the
Manage tab.
For further information about the Logon Trigger see Enable Logon Sub-triggers.
Process Start and Stop Triggers
When creating top level nodes within both Computer and User Process Start and Stop triggers,
different behavior applies:
l Nodes must have a Process Name condition applied - When adding a node to a Process Start or
Stop trigger the Process Name condition dialog box is automatically displayed. A condition
must be specified for the node. Pressing Cancel deletes the node.
l Actions and conditions can only be added by selecting the process condition within the work
area. Unlike other triggers, actions and conditions cannot be added by highlighting the trigger
in the navigation tree. The exception to this is other Process Name conditions which can be
added by selecting the process trigger.
Copyright © 2019 , Ivanti. All Rights Reserved. Privacy and Legal.
Page 91 of 237
Environment Manager 2019.1 Policy Product Guide

l The initial Process Name condition cannot be deleted from within the node. To remove, the
node must be deleted.
l Stop if fails cannot be disabled for the Process Name condition. If the condition fails, nothing
within the condition will run.
l Any reusable node can be added to a Process Start/Stop trigger proving the actions contained
are compatible with the trigger.
l When entering an application into the Match field, the file extension must be added; calc does
not work but calc.exe does.
l Prior to 8.1 a Process Name condition did not have to be applied to a Process Start/Stop trigger.
On upgrade, any actions and conditions are still created but in the absence of a Process Name
Condition, all top levelactions and conditions in node will run for every process that starts
during the user/computer session. This could have a detrimental effect on performance.
To ensure performance is not affected, add a process name condition and add the existing
actions and conditions.
These behaviors do not apply to child nodes created in Process Start and Stop conditions.
Computer Process Start and Stop triggers only detect system processes and User Process
Start and Stop triggers only detect user processes.
Network Triggers
The Network Connected and Network Disconnected triggers fire when each individual network
adapter connects or disconnects.
Session Variables can be used within the Network Available, Network Connected and Network
Disconnected triggers to determine attributes of the network connection. The built-in Session
Variables persist for the duration of the network trigger and will not be available after the trigger has
completed executing all of its nodes.
The following built-in Session Variables are available on the Network Available triggers:
Session Variable Description Example
Network.Domain DNS suffix of the adapter, specific to the connection.
Note: This is the domain name of the connection, rather
than the domain to which the machine is joined.
domain.local
Network.DomainType Domain type of the connected network. The possible
values are as follows:
0 - Workgroup machine connected to a private network
1 - Workgroup machine connected to a domain
network
2
Copyright © 2019 , Ivanti. All Rights Reserved. Privacy and Legal.
Page 92 of 237
Environment Manager 2019.1 Policy Product Guide

Session Variable Description Example
2 - Domain-joined machine connected to a domain
network
Network.Id GUID to uniquely identify the network. {9A445C40-
B550-4B79-
8F4F-
94475BCB5FCA}
The following built-in Session Variables are available on the Network Available, Network Connected
and Network Disconnected triggers:
Session Variable Description Example
Network.Domain DNS suffix of the adapter, specific to the
connection. Note: This is the domain
name of the connection, rather than the
domain to which the machine is joined.
domain.local
Network.DomainType Domain type of the connected network.
The possible values are as follows:
0 - Workgroup machine connected to a
private network
1 - Workgroup machine connected to a
domain network
2 - Domain-joined machine connected
to a domain network
2
Network.Id GUID to uniquely identify the network. {9A445C40-B550-
4B79- 8F4F-
94475BCB5FCA}
Network.Adapter.BSSID Media Access Control (MAC) address of
the access point.
6E:DD:3A:91:F2:8D
Network.Adapter.Description Description of the network adapter. This
is usually the manufacturer or type of
the network adapter
Intel(R) 82577LC
Gigabit Network
Connect
Network.Adapter.FriendlyName Friendly name of the network adapter
This is the name of the adapter as
displayed in the Network and Sharing
Center.
Local Area
Connection
Copyright © 2019 , Ivanti. All Rights Reserved. Privacy and Legal.
Page 93 of 237
Environment Manager 2019.1 Policy Product Guide

Session Variable Description Example
Network.Adapter.Id GUID to uniquely identify the network
adapter.
{F2DD3B93-5BD8-
489CA7C7-
32E2964AA0D5}
Network.Adapter.IPv4Address IPv4 address of the network adapter. 192.168.1.1
Network.Adapter.IPv4SubnetMask IPv6 address of the network adapter in a
shorthand notation
If the network is not an IPv6
network, then the address is a
local-link address starting
“fe80:” and is non-routable.
255.255.255.0
Network.Adapter.IPv6Address IPv6 prefix length of the network
adapter
64
Network.Adapter.IsVirtual Returns True if the network adapter is
software-based or False if the network
adapter is physical.
True
Network.Adapter.IsWireless Returns True if the network adapter is
IEEE 802.11 wireless or False if the
network adapter is wired.
False
Network.Adapter.MAC Media Access Control (MAC) address of
the network adapter.
3D:C5:DB:AC:46:B6
Trigger Environment
The trigger Environment optimizes efficiency when running configurations containing Environment
actions. Prior to version 8.1, environment variable actions were added to nodes in the same way as
other actions. When environment variables were run in this way, environment refreshes had a
potential impact on the running of the other actions in the trigger.
It is recommended that all environment and session variables are added to the required trigger
environments when upgrading a configuration to from a pre-8.1 version to 8.1 or later.
Environment actions which are in nodes within a trigger will not run or be refreshed until after all the
other actions in that trigger have run.
Actions within the Environment tab will not execute unless a node exists within the trigger.
Copyright © 2019 , Ivanti. All Rights Reserved. Privacy and Legal.
Page 94 of 237
Environment Manager 2019.1 Policy Product Guide

The trigger environment behaves in much the same way as nodes in that any condition appropriate to
the trigger can be added. However, only Environment actions can be added; all other actions are
unavailable for selection.
The trigger Environment is available for the following triggers:
l Computer
l Startup
l Network Available
l Shutdown
l User
l Logoff
l Network Connected
l Network Disconnected
l Session Reconnected
l Session Disconnected
l Session Locked
l Session Locked
The example below shows the Startup Environment tab containing one condition with an
Environment action and three further Environment actions.
Configure the Trigger Environment
1. In the Policy Configuration navigation tree, select a trigger.
2. Select the Environment tab.
Copyright © 2019 , Ivanti. All Rights Reserved. Privacy and Legal.
Page 95 of 237
Environment Manager 2019.1 Policy Product Guide

3. Select the Conditions tab and add any required conditions. It is not mandatory to use
conditions in the environment tab; Environment actions can be added directly.
4. Click Actions > Environment and select the required action:
o
Set Environment Variable
o
Append Environment Variable
o
Delete Environment Variable
o
Set Session Variable
o
Delete Session Variable
Copyright © 2019 , Ivanti. All Rights Reserved. Privacy and Legal.
Page 96 of 237
Environment Manager 2019.1 Policy Product Guide

Node Management
Nodes are used to help build up the structure of an Environment Manager configuration. They
provide containers which house conditions and actions within triggers. By creating a hierarchy of
nodes controlling the relationship between actions and the events which trigger those actions, a
policy of computer usage is defined.
Nodes provide extra flow control to the configuration by forming the bridge between triggers and
actions, allowing the dependency between trigger and action to be set.
Configuring Nodes
Nodes are configured using the Nodes ribbon. The options are also available from the node shortcut
menu and by using Keyboard Shortcuts.
Add Node
Nodes can be added to any trigger or existing node in the Policy Configuration navigation tree. The
Add Node option creates a new node as a child of the selected trigger or node in a configuration.
Delete Node
Select a node, condition or action, click Delete from the Edit tab, the shortcut menu or press the
Delete key and confirm.
Rename
Select a node, condition or action, click Rename from the Edit tab, the shortcut menu or press the F2
key. Enter the new name and press Enter.
Disable/Enable
When a node is disabled, it remains present in the configuration but is not passed to the Environment
Manager agent at run-time. This is useful when troubleshooting to help discover errors in a
configuration.
To disable a node, condition or action, click Disable from the Edit tab, the shortcut menu or press
Ctrl+T.
A banner displays at the top of the work area when a node is disabled. The node icon is faded and
associated conditions and actions are displayed in gray, italic text.
Copyright © 2019 , Ivanti. All Rights Reserved. Privacy and Legal.
Page 97 of 237
Environment Manager 2019.1 Policy Product Guide

To enable a node, condition or action, click Enable from the Edit tab, the shortcut menu or press
Ctrl+T. A node can also be enabled by clicking the link in the yellow banner at the top of the work
area.
When a node is disabled or enabled, any child nodes, actions and conditions, automatically match the
state of the parent.
Individual actions and conditions can be enabled and disabled using the same ribbon button,
shortcut menu option and keys.
Node Descriptions
In large environments, where multiple administrators need to view and edit configurations, node
descriptions provide a versatile method of adding free-text annotations. The feature is useful for
documenting configuration changes and describing node behavior.
Video:Node Descriptions
Watch a related video
There are three types of node descriptions:
l Descriptions - Click the text to add further information to a node, which can be viewed at a
glance.
l Comments - Highlight a node, action or condition in the Action tab of a node and select
Comment from the shortcut menu.
l Notes - Select the Node tab of a node to add more comprehensive text descriptions.
Copyright © 2019 , Ivanti. All Rights Reserved. Privacy and Legal.
Page 98 of 237
Environment Manager 2019.1 Policy Product Guide

Node Scheduling
Schedule Environment Manager policy actions to occur at specified times and frequencies. This allows
tasks to run without specific triggers being met and at regular intervals so policies can be reapplied.
The actions in a scheduled node are added as a task in Windows Task Scheduler, run at a time and
frequency specified in the node. Using node scheduling, tasks that are deployed with Group Policy
Objects can be managed by Environment Manager.
Video:Node Scheduling
Watch a related video
This feature can be used on the following triggers:
l Computer > Startup
l User Logon > Pre-Desktop
l User Logon > Desktop Created
Select the Schedule tab in a node under a compatible trigger and select Create as a scheduled task to
configure the schedule. To run the node's tasks when the trigger fires, select Execute the node and
all sub nodes immediately - otherwise the tasks will run only when scheduled and not when the
trigger is fired.
Copyright © 2019 , Ivanti. All Rights Reserved. Privacy and Legal.
Page 99 of 237
Environment Manager 2019.1 Policy Product Guide

Option Description
Schedule name The name that appears in the Windows Task Scheduler. Use a description of the
node functionality to make it easy to identify tasks.
Schedule type The schedule type is used in conjunction with the schedule date to define when
the task will occur. Select one of the following:
l One time - The task will run at the scheduled start date and time.
l Daily - The task will run daily, from the start date and time and at the
specified recurrence interval. For example, if Recur is set to 1, the task will
occur daily - if set to 2, the task will run every other day at the scheduled
time.
l Weekly - The task will run on the selected days of the week from the start
date and time and at the specified recurrence interval. For example, if
Recur set to 1, the task will run on the selected days every week - if set to 2
the task will run on those days every other week.
Copyright © 2019 , Ivanti. All Rights Reserved. Privacy and Legal.
Page 100 of 237
Environment Manager 2019.1 Policy Product Guide

Option Description
l Monthly - The task will run from the start date on the selected days each
month. You can specify the dates for the selected months or schedule the
task to run on particular days. For example, the first Monday of each
selected month.
Schedule date Select the date and time from which the schedule will start.
Recur Select the recurrence interval for daily and weekly schedules.
Repeat task Select the interval between task repeats and for how long the task will repeat.
The task will run on the start date and repeat at the set time interval for the
specified duration.
Delay task Select how long to delay the task from running after the task is triggered. The
delay time will be a random time between the time the task is triggered and the
specified delay time. For example, if the task is scheduled to run at 3.00 AM with a
delay time of 10 minutes, the task will start between 3.00 and 3.10 AM.
Windows Task Scheduler Default Values
Creating tasks in Windows Task Scheduler with Environment Manager is subject to the following
registry keys that can limit the number of queued and concurrent tasks:
l TasksInMemoryQueue [Default = 75, Max = 1000]
l TasksPerLeastPrivEngine [Default = 50, Max = 1000]
For further information see Microsoft article 269472.
Add New Node to a Configuration or Process Trigger
Add a new node to a configuration
1. In the Policy Configuration navigation tree, select the trigger or node that you want to add a
new node to.
2. In the Nodes ribbon, select Node.
A new child node is added to the highlighted node or trigger.
Add a new node to a process trigger
1. There are two process triggers within the Computer and User fixed nodes: Process Started and
Process Stopped. Any nodes added to a process trigger must have a condition applied which
Copyright © 2019 , Ivanti. All Rights Reserved. Privacy and Legal.
Page 101 of 237
Environment Manager 2019.1 Policy Product Guide

specifies a process or application for conditions and actions within the node
2. Select one of the process triggers, or a node within a process trigger.
3. In the Nodes ribbon, select Node. The Computer Process Name dialog displays.
4. Select a Condition to apply to the application or process; Equal, Not Equal, Query or Regular
Expression.
5. In the Match field:
o
Use the ellipsis to select the EXE file for the required application or process.
o
Manually enter the file path or EXE name.
o
Enter a regular expression to match the required applications and processes.
For example:%PROGRAMFILES%\\Microsoft Office\\Office\d\d\\winword\.exe
The regular expression \d matches any single digit. Microsoft Office uses different
default installation paths for each version - Office 2003 uses Office11 and Office 2013
uses Office15. Including Office\d\d in the file path ensures all versions of Word are found.
6. Select whether you want to only target those processes that are the same case as the letters in
the Match field.
7. Select Match case to only search for processes with the same capitalization as the text in the
Match field.
8. If required, select the Match Parameters checkbox to enable further validation to be added to
the match in the Parameters field.
9. Click OK to create the node with the condition applied. Any actions attached to the node will
only apply when triggered by the defined application or process.
Field Reference
Option Usage
Equal Actions are applied for the application or process defined in the Match field. The
Equal condition can also be used in conjunction with the Parameters field to apply
further validation.
Not Equal Actions are applied for all applications or processes other than that specified in the
Match field. For example, enter excel.exe in the match field to apply the associated
actions to all applications other than Microsoft Excel.
Query Targets all processes and applications which match the criteria specified in the
Match field. Wildcards can be used to target a range of applications and processes.
Regular
Expression
Use regular expressions to specify processes and applications.
Parameters Further validation can be added for Equal conditions by selecting the Match
Copyright © 2019 , Ivanti. All Rights Reserved. Privacy and Legal.
Page 102 of 237
Environment Manager 2019.1 Policy Product Guide

Option Usage
Parameters checkbox and adding extra definition in the Parameters field. For
example, you might want to apply different conditions and actions for users who use
Microsoft Access 2010 Retail and Runtime versions. To target the runtime version:
Match field: C:\Program Files\Microsoft Office\Office14\msaccess.exeParameters
field: /runtime Any actions applied to the process condition will only be applicable to
the Runtime version of access.
Example
You have a requirement to apply different conditions and actions for users who use Microsoft Access
2010 Retail and Runtime versions. To create a condition to target the Runtime version:
l Match: %PROGRAMFILES%\Microsoft Office\Office14\msaccess.exe
l Parameters: /runtime
Actions applied to the process condition will only be applicable to the Runtime version of access.
Arrange Nodes
The order in which the nodes are displayed in the Policy Configuration navigation tree determines the
level of dependency. If all the nodes are at the same level in the hierarchy then their configured
contents are executed in parallel. However, if the nodes are at different levels in the hierarchy, a
dependency on the node above is created and actions are executed in sequence.
Copyright © 2019 , Ivanti. All Rights Reserved. Privacy and Legal.
Page 103 of 237
Environment Manager 2019.1 Policy Product Guide

In the example above, Nodes 1, 3 and 7 will execute simultaneously. Node 2 and Nodes 4 and 5, will
only execute once Nodes 1 and 3 respectively, are complete. Likewise, Node 6 will only execute once
Node 5 is complete.
All nodes have a default timeout setting of 30 seconds. Child nodes will start automatically after the 30
second timeout, regardless of whether the actions within the parent node are complete or not. The
default timeout can be amended by editing the appropriate key in the registry.
The default timeout is overridden by any Custom Action or Custom Condition which contradict the
value. Custom Actions and Conditions enable a maximum time for running the script to be set, which
takes priority over the default setting for the node timeout.
To arrange nodes, highlight and use one of the following methods:
l Press Ctrl and the appropriate arrow key.
l Drag and drop.
l Click the arrow buttons on the Nodes ribbon.
l Right-click to display the context menu and select Move Left, Move Right, Move Up, or Move
Down.
l Click Cut, Copy and Paste from the Edit ribbon or use the corresponding shortcut menu
options or keyboard shortcut.
Copyright © 2019 , Ivanti. All Rights Reserved. Privacy and Legal.
Page 104 of 237
Environment Manager 2019.1 Policy Product Guide
Stop Sub Nodes on Fail
When applied, the Stop sub nodes on fail setting prevents any dependent sub nodes executing if a
condition is not met or an action fails to run to completion. The setting can be applied to any action or
condition and is enabled for new conditions by default.
To apply, select a node and set the Stop sub nodes on fail checkbox for each action and condition as
required.
You can see the Stop if sub nodes on fail status of each node in the navigation tree:
Node Groups
The Node Group option creates a node to which multiple reusable nodes can be added that must run
to a successful conclusion before any associated child nodes are run. Essentially, this means that child
nodes can be dependent on multiple parent nodes. Without node groups the dependency can only
be created between one parent and its child nodes.
Node group behavior is defined by the following rules:
l Only reusable nodes can be used within a node group but child nodes can be any appropriate
to the trigger.
l Reusable nodes within a node group run in parallel.
l If any of the reusable nodes within the group fail, the child nodes will not run
Example
The node group in the Computer > Startup trigger contains three reusable nodes; seen in the work
area by selecting the node group. For the child node to run, all three of the reusable nodes must
successfully complete.
Copyright © 2019 , Ivanti. All Rights Reserved. Privacy and Legal.
Page 105 of 237
Environment Manager 2019.1 Policy Product Guide

Create all required Reusable Nodes prior to setting up a node group. Only nodes which exist in
Library > Reusable Nodes can be added to the work area.
Create a Node Group
1. In the Policy Configuration navigation tree, select a trigger, or node within a trigger, within
which the node group is to be created.
2. In the Node ribbon, select Node Group. A node is created in the Policy Configuration
navigation tree.
3. Highlight the new node and click in the console work area.
4. On the Node tab, in the Add group, select Node Group Member and choose the required
reusable nodes.
5. Select a Reusable Node. The node is added to the node group node. Each added node can be
Enabled or Disabled as required, using the corresponding checkbox in the work area.
6. Repeat steps 4 and 5 to add further nodes.
7. When all required reusable nodes have been added, create the dependent child nodes.
Clone
The Clone feature allows nodes, with or without their child nodes, to be copied, moved and used as
reusable nodes.
Clone nodes with child nodes
Select the node you want to copy and on the Node ribbon, select Clone > Clone Node with Child
Nodes.
The node, its child nodes and associated actions and conditions are copied to the same location as
the original and renamed with a prefix of "Clone of".
Copyright © 2019 , Ivanti. All Rights Reserved. Privacy and Legal.
Page 106 of 237
Environment Manager 2019.1 Policy Product Guide

Move to reusable nodes
Select the node you want to move and on the Node ribbon, select Clone > Move to reusable nodes.
The node, its child nodes and associated actions and conditions are move to reusable nodes
Copy to reusable nodes
Select the node you want to move and on the Node ribbon, select Clone > Copy to reusable nodes.
The node and any associated actions and conditions are copied to reusable nodes and renamed with
a prefix of "Clone of". Child nodes are not copied.
Copy to reusable nodes with child nodes
Select the node you want to move and on the Node ribbon, select Clone > Copy to reusable nodes.
The node, its child nodes and associated actions and conditions are copied to the same location as
the original and renamed with a prefix of "Clone of".
Copy to reusable conditions
Select the condition you want to move and on the Node ribbon, select Clone > Copy to reusable
conditions.
The condition is copied to reusable conditions and renamed 'Reusable Condition'.
Stop sub nodes on fail is not supported for reusable conditions. If Stop Sub Nodes on Fail is
enabled on the condition being copied, it will be removed in the Reusable Conditions node.
Reusable Nodes
The Reusable Node functionality in the Environment Manager console changed in version 8.1
of Environment Manager. However, when upgrading a configuration for use in the 8.1 or later
version consoles, the previous Run Node functionality is enabled.
See Reusable Nodes and Pre-8.1 Configurations.
Reusable nodes enable a single node to be referenced multiple times within a configuration. They can
be added to any trigger which supports its actions and conditions. Reusable nodes are stored in the
Library and any change here reflects in each occurrence within the configuration.
To view where reusable nodes are referenced in the configuration, click Reusable Nodes in the Library.
Each reusable node is listed together with the path within the navigation tree of each instance.
In the configuration below, nodes RU Node 1 and RU Node 2 are reusable and have been referenced
within the Computer Startup and Desktop Created nodes. The Summary, lists the nodes and where
they are referenced in the configuration.
Copyright © 2019 , Ivanti. All Rights Reserved. Privacy and Legal.
Page 107 of 237
Environment Manager 2019.1 Policy Product Guide

Click on a reference to a reusable node in the Summary to select the reference in the navigation tree
and view its contents.
New reusable nodes can be created directly in the Library or existing nodes in the configuration can
be cloned and automatically added to the Library.
Actions and conditions within reusable nodes cannot be referenced to run in triggers which do not
allow that action or condition. For example, Drive & Printers actions do not run in Computer triggers.
A reusable node containing Drive & Printers actions will not be available from the Reusable Node or
Run Node drop-down with a Computer trigger selected.
Create Reusable Nodes
Create a reusable node
1. In the Policy Configuration navigation tree, select Library > Reusable Nodes.
2. In the Nodes ribbon, select Node.
3. Highlight the new node and create the required conditions and actions.
The node is now available as a Reusable Node in the configuration.
Create a reusable node from an existing node
When a node has been moved to Reusable Nodes, it is removed from its position in the configuration
and a reference to the reusable node must be created in its place if required.
Copyright © 2019 , Ivanti. All Rights Reserved. Privacy and Legal.
Page 108 of 237
Environment Manager 2019.1 Policy Product Guide

1. In the Policy Configuration navigation tree, select the node you want to make reusable.
2. In the Nodes ribbon, select Clone and select one of the sub options:
o
Move to Reusable Nodes - The node, its actions, conditions and all child nodes are
moved to Reusable Nodes.
o
Copy to Reusable Nodes - The node is copied, with associated conditions and actions
but without child nodes, to Reusable Nodes and renamed with a prefix of "Clone of".
o
Copy to Reusable Nodes with Child Nodes - The node, its actions, conditions and all
child nodes are copied to Reusable Nodes. The node and all child nodes are prefixed
with "Clone Of".
If either of the Copy to options is selected, the node in its original position will not be a
reusable node. If required, delete the original and replace with the reusable node.
The node, or an exact copy of the node, is available as a Reusable Node in the configuration.
Reference a reusable node in a configuration
1. In the Policy Configuration navigation tree, select the trigger or node to which you want to add
a reusable node.
2. In the Nodes ribbon, in the Add group, select Reusable Node.
3. Select a reusable node from the list of those available.
The actions in the reusable node are referenced to run from within the selected node.
Convert a Reusable Node to a Normal Node
1. Select a reference to a reusable node in the navigation tree.
2. In the Nodes ribbon, in the Edit group, select Convert to Normal.
All links to the reusable node are removed. The node can be edited independently without affecting
the reusable node and its references.
Stop Sub Nodes on Fail for Reusable Nodes
The Stop Sub Nodes on Fail instruction for actions and conditions in reusable nodes is enabled and
disabled within the Library. The setting is applied uniformly to each reference of that reusable node in
the configuration and cannot be changed for individual references within the configuration.
If a reusable node contains multiple actions or conditions with the Stop Sub Nodes on Fail setting
applied, when referenced in a configuration, any child nodes will only run if each node and condition is
successful. If one action with Stop Sub Nodes on Fail applied does fail, the child node will not run.
Copyright © 2019 , Ivanti. All Rights Reserved. Privacy and Legal.
Page 109 of 237
Environment Manager 2019.1 Policy Product Guide

In the example below, the Reusable Node (RU Node 1) has one dependent nodes: Node 1. Both nodes
contain one action, each with Stop Sub Nodes on Fail enabled. The reusable node is referenced in a
configuration and a dependent child is added at the level below. The Child Node will only run if all
actions in RU Node, Node 1 and Node 2 are successful. If any action fails, it will not run.
Stop Sub Nodes on Fail for Reusable Nodes on Upgrade
Prior to 8.1 reusable nodes were executed as actions configured within the actions work area of a
node. For 8.1and later versions of Environment Manager, reusable nodes can only be referenced as
nodes under a trigger. They can be added directly to triggers in a configuration. This affects the way
Stop sub nodes on fail works for reusable nodes and this must be considered when upgrading
configurations to 8.1 and later versions.
In pre-8.1 consoles, Stop sub nodes on fail could not be applied to actions and conditions within the
Reusable Nodes library. Stop sub nodes on fail was only available at reusable node reference level for
reusable nodes referenced within a configuration.
For 8.1 and later versions, each action and condition in a reusable node within the library has a Stop
sub node on fail instruction. When an 8.0 configuration is upgraded, all actions and conditions within
reusable nodes have Stop sub node on fail enabled. Therefore, if any action fails within a reusable node,
child nodes will not run.
As this could potentially change the behavior in a configuration, consideration must be given to the
impact an upgrade may have. Although, Stop sub node on fail can be disabled for each action or
condition as required, this may not create the desired behavior and the configuration may require a
more comprehensive update.
Copyright © 2019 , Ivanti. All Rights Reserved. Privacy and Legal.
Page 110 of 237
Environment Manager 2019.1 Policy Product Guide

Reusable Nodes and Pre-8.1 Configurations
Configurations are upgraded by importing the MSI or XML files created in a previous version of
Environment Manager, into the 8.1 console. AppSense Environment Manager Package (AEMP) files are
also upgraded in the same way.
In older versions of the console, a reference to a reusable node is added to a configuration using the
Run Node button on the Actions ribbon. In 8.x consoles, the Run Node button has been removed
and replaced with the Reusable Nodes button in the Nodes ribbon.
When a configuration is upgraded and opened in an 8.x console the Reusable Node button is added
to the Actions ribbon to replicate the functionality of previous versions.
Copyright © 2019 , Ivanti. All Rights Reserved. Privacy and Legal.
Page 111 of 237
Environment Manager 2019.1 Policy Product Guide

Condition Management
Conditions are used to create rules which enable actions to be executed based on who, where from or
how a user is connecting to a computer or application. Conditions based on Directory Membership,
User, Computer, Session and Client can be used to create a configuration which can define computer
usage throughout an organization.
They are the bridge between triggers and actions to provide context for applying the action. For
example:
Trigger Condition Action
User > Logon User > User Name Map Drive
The action is to map a drive when a user logs on. The condition allows a user to be specified so the
drive is mapped only for that particular user. Without the condition, the drive would be mapped for all
users at logon.
Actions can be set to execute when the criteria within the condition is true or false for the user or their
computer. For example, a condition can be created which applies the associated actions to a specified
computer or the actions could be set to execute for any computer other than that specified. Regular
expressions and ranges can also be used to create advanced conditions which apply to multiple
matches.
Simple regular expressions can be used such as entering [abc] will match anything which
includes any of the characters within the brackets. More complex queries can also be used, for
example, ^[a-f]+ will match any user name which begins with a letter from a to f.
For further information see Wildcards and Regular Expressions.
The positioning of a condition within the Policy Configuration navigation tree determines how it is
applied. Conditions at the same level within in the tree are evaluated simultaneously. A condition
which is a child of another condition, will only evaluate once the parent condition has been
successfully executed. All conditions, with the exception of Counter, can also be added to the
Environment tab in most triggers.
For any condition which queries the Active Directory, the Environment Manager administrator must
be a member of the target domain or have sufficient permissions to access and query the domain.
Create a Condition
This section applies to creating Directory Membership, User, Computer and Session & Client
conditions only as the dialog boxes these conditions use follow the same format.
1. In the Policy Configuration navigation tree, select a node or create a new node within the
trigger you want to apply the condition to.
Copyright © 2019 , Ivanti. All Rights Reserved. Privacy and Legal.
Page 112 of 237
Environment Manager 2019.1 Policy Product Guide

The condition can be added directly to the trigger in the Environment tab.
2. In the Conditions ribbon, select the required condition.
The condition tab, specific to the condition type displays by default. This tab allows the
parameters to be set using a common group of options and fields. See Condition Variablesfor
further details.
3. Define the condition using the available fields and checkboxes.
4. Select the General tab.
5. Enter a description and any optional notes. The description is used as the display name for
conditions. If this field is left blank the display name is automatically set from the configured
condition.
6. Click OK to save the condition.
The Environment Manager agent uses the condition to find a match with the same criteria for a
logged on user. If a match is found, any actions attached to the condition are executed.
Once created you can prevent a failed action from continuing to execute any dependent sub nodes by
selecting the Stop sub node on fail check box in the node work area. By default, Stop sub node on fail is
enabled for new conditions.
Condition Variables
Each type of condition can be specified using variations of the following fields, drop-downs and
checkboxes:
l Equal - A comparison is made against the contents of the Match field to target the users or
computers which fulfill those criteria. Enter the criteria into the Match field or use the ellipsis
(...) to search or select as required.
l Not Equal - Targets all users or computers which do not fulfill the criteria in the Match field.
Enter the criteria in the Match field or use the ellipsis to search or select as required.
l Query - Targets all users or computers which match the criteria specified in the Query field.
Using wildcards in the query allows a wide range of matches, for example:
l *Windows - target users or computers ending in the text Windows.
l Windows* - target users or computers starting with the text Windows.
l *Windows* - target users or computers containing the text Windows.
l Regular Expression - Use regular expressions to specify advanced queries for users or
computers.
l Between - Used for conditions where a range of values can be set. For example, a condition
could be created to apply to a selected range of IP addresses.
Copyright © 2019 , Ivanti. All Rights Reserved. Privacy and Legal.
Page 113 of 237
Environment Manager 2019.1 Policy Product Guide

l Evaluate once per session - When selected, a condition is evaluated and the result is cached. If
the condition is run again, the result is obtained from the cache rather than evaluating the
condition again. If you want multiple instances of the same condition to evaluate only once, a
reusable condition must be created and referenced multiple times. If you create multiple
conditions, they will each be run one. If a reusable node is referenced multiple times, evaluation
only occurs once in the session.
l This option is not available for conditions within Process Start and Process Stop triggers.
The behavior surrounding this option changed in 8.1. Prior to 8.1 the option was evaluated when the
configuration was parsed and cached for the session. In 8.1 and later versions, the option is not
evaluated until the trigger is fired when the result is cached for the whole session.
For example, a Process Start condition is created for calc.exe with the Evaluate once per session
checkbox selected. In 8.0 the result would be cached for the session when the configuration is parsed
at logon. In 8.x the result is not cached until calc.exe is run.
Condition Configuration Examples
The simple configuration below maps Printer 1 at logon for Endpoint 1. During logon, the
Environment Manager agent checks the managed computer against that specified in the condition;
Endpoint 1. If the condition is met, the action to map the printer to Printer 1 runs. If the managed
computer is anything other than Endpoint 1, the action is ignored.
In the Environment Manager console, the example would be as follows:
Adding a further condition at the same level creates an OR condition. This configuration maps Printer
1 at logon for Endpoint 1 OR Endpoint 5. If the computer is one of those specified, the action to map
the printer to Printer 1 runs. If the managed computer is anything other than Endpoint 1 or Endpoint
5, the action is ignored.
Copyright © 2019 , Ivanti. All Rights Reserved. Privacy and Legal.
Page 114 of 237
Environment Manager 2019.1 Policy Product Guide

If a condition is a child of another, an AND condition is created. A condition which checks if the user is
an administrator has been added as a child of another condition. By adding this, the action will run for
the computers specified AND the user is an administrator.
AND and OR statements can be combined to create AND OR conditions. This configuration maps
Printer 1 at logon for Endpoint 1 OR Endpoint 5 for users which have administrator rights.
Copyright © 2019 , Ivanti. All Rights Reserved. Privacy and Legal.
Page 115 of 237
Environment Manager 2019.1 Policy Product Guide

There is no limit to the number of conditions you can add to AND and OR conditions or the number of
AND OR conditions that can be used.
The AND OR labels and the item background colors can be turned on and off in the Options
Ribbon.
Field Validation
The table below lists the strings which are acceptable in the fields of the various conditions.
Condition Field Allowed String Example
User Group Match domain\group ivanti/sales matches the group ’sales’ in the ivanti
domain
LDAP CN=sales, DC=ivanti, DC=com matches the ’sales’
group in the ivanti domain
Query domain\gro* ivanti\sal* matches group names starting with "sal"
in the ivanti domain
domain\*gro ivanti\*les matches group names ending with "les"
in the ivanti domain
domain\*gro* ivanti\*ale* matches group names containing "ale"
in the ivanti domain
User Name Match domain\user ivanti\smithj matches the user name "smithj" in the
ivanti domain
Query domain\use* ivanti\smit* matches group names starting with
"smit", in the ivanti domain
Copyright © 2019 , Ivanti. All Rights Reserved. Privacy and Legal.
Page 116 of 237
Environment Manager 2019.1 Policy Product Guide

Condition Field Allowed String Example
domain\*use ivanti\*ith matches group names ending with "ith",
in the ivanti domain
domain\*use* ivanti\*ith* matches group names containing "ith",
in the ivanti domain
Computer
Group
Match domain\group ivanti\sales matches the group ’sales’ in the ivanti
domain
LDAP CN=sales, DC=ivanti, DC=com matches the "sales"
group in the ivanti domain
Query domain\gro* ivanti\sal* matches group names starting with "sal"
in the ivanti domain
domain\*gro ivanti\*les matches group names ending with "les"
in the ivanti domain
domain\*gro* ivanti\*ale* matches group names containing "ale"
in the ivanti domain
Computer
Name
Match computer SalesDesk01 matches the computer name
"SalesDesk01"
Query comp* SalesDesk* matches all computer names starting
"SalesDesk"
*comp Desk01* matches all computer names ending with
"Desk01"
*comp* Desk* matches all computer names containing
"Desk"
Computer
Domain
Match domain ivanti matches the domain name "ivanti"
domain ivanti.com matches the domain name "ivanti.com"
Query dom* iva* matches all computer domains starting "iva"
*dom *nti matches all computer domains ending "nti"
*dom* *ant* matches the domains containing "ant".
Computer
NETBIOS
Match computer SalesDesk01 matches the computer NETBIOS name
"SalesDesk01".
Query comp* SalesDesk* matches all computer names starting
Copyright © 2019 , Ivanti. All Rights Reserved. Privacy and Legal.
Page 117 of 237
Environment Manager 2019.1 Policy Product Guide

Condition Field Allowed String Example
"SalesDesk"
*comp Desk01* matches all computer names ending with
"Desk01"
*comp* Desk* matches all computer names containing
"Desk"
Computer IP
Address
Match xxxx.xxxx.xxxx.xxxx 192.168.0.1 matches the IP address 192.168.0.1
Between xxxx.xxxx.xxxx.xxxx
yyyy.yyyy.yyyy.yyyy
IP Address 1: 192.168.0.1, IP Address 2:
192.168.0.254 matches all IP addresses between
"192.168.0.1" and "192.168.0.254"
User OU
Membership
Match LDAP CN=sales, DC=ivanti, DC=com matches the
directory membership of user OU "sales" in the
ivanti.com domain
Query ou* sales* matches user OU names starting with "sales"
*ou *sales matches user OU names ending with "sales"
*ou* *sales* matches user OU names containing "sales"
Computer
OU
Membership
Match LDAP CN=sales, DC=ivanti, DC=com matches the
directory membership of computer OU "sales" in the
ivanti.com domain.
Query ou* sales* matches computer OU names starting with
"sales"
*ou *sales matches computer OU names ending with
"sales"
*ou* *sales* matches computer OU names containing
"sales"
Directory
Site
Match sitename testsite matches the site name "testsite"
Copyright © 2019 , Ivanti. All Rights Reserved. Privacy and Legal.
Page 118 of 237
Environment Manager 2019.1 Policy Product Guide

Active Directory Based Conditions for Devices in Child
Domains
Active Directory (AD) based client conditions convert the NetBIOS name of the client, obtained from
Windows Terminal Server (or Citrix equivalent), to a FQDN used to query AD. The FDQN cannot be
resolved if the terminal server is in the parent domain and is trying to resolve the FQDN of a
connecting device in a child domain. This impacts Device and Custom rules, with Active Directory based
client conditions, that are applied to terminal servers and VDIs in a root domain.
The terminal server must be configured with the DNS suffix of all child domains. The search list must be
configured on all terminal servers wanting to resolve names for connecting in child domains.
For example, for the parent domain.local, the child domains, childa.domain.local and
childb.domain.local, must be configured on the terminal server in order for AD based conditions to
evaluate correctly.
For information about configuring domain suffix search lists, see: https://support.microsoft.com/en-
gb/kb/275553
Registry Conditions
Registry conditions check whether or not registry keys and values exist on managed endpoints before
applying any associated actions.
Condition Description Computer
Trigger
User
Trigger
Registry Key
Exists
A condition which checks for the existence of specified
registry keys on managed endpoints and applies
associated actions accordingly. The registry can be
browsed to find keys and sub keys can be identified if
required. The Comparison drop-down allows the
condition to check whether any specified key and sub key
exists or does not exist.
Yes Yes
Registry Value
Exists
A condition which checks for registry values on managed
endpoints and applies associated actions accordingly.
Define the main and sub keys to be searched for the
entered value. The value can be set using parameters to
define the value name, type and actual value.
Yes Yes
Create a Registry Value Exists Condition
The Registry Key Exists condition is created in a similar dialog to the Registry Value Exists condition but
with fewer fields; Main Key, Sub Key and Comparison.
Copyright © 2019 , Ivanti. All Rights Reserved. Privacy and Legal.
Page 119 of 237
Environment Manager 2019.1 Policy Product Guide

1. In the Policy Configuration navigation tree, select the node or trigger to which you want to add
the condition. This can be:
o
A new node
o
An existing node
o
The Environment tab of a trigger
2. In the Conditions ribbon, select Registry > Registry Value Exists to display the Registry Value
Exists dialog.
Copyright © 2019 , Ivanti. All Rights Reserved. Privacy and Legal.
Page 120 of 237
Environment Manager 2019.1 Policy Product Guide

3. Complete the following fields:
o
Hive - Browse to the required registry value. A standard registry browser is used to
select the value.
o
The Key, Value name, Value type and Value are automatically populated from the
selected registry item but can be manually edited.
o
Comparison - Select the required option from the drop-down list:
Option Description
Exists Checks if a registry value name exists regardless of type
and value. The sub key can be set or left blank so that
the user can check for a value name set under the main
key only.
Does Not Exist Checks if a registry value does not exist. Uses the same
behavior as the Exists comparison.
Value Type Exists Checks the existence of a value name of a specific type
e.g. REG_SZ, REG_DWORD etc. The Value type is
available for selection and the main and sub key
behavior is the same as Exists.
Equal To Checks if the registry value is equal to a specific value.
The sub key can be set or left blank so that the user can
check for a value name set under the main key only. The
value type can be set, different value editors are
displayed dependent on the selection.
The Value field can be left blank as empty values are
allowed in the registry.
Not Equal To Checks if the registry value is not equal to that which is
specified. Uses the same behavior as the Equal to
comparison.
Less Than
Less Than or Equal To
Greater Than
Greater Than or Equal To
Checks the registry value against the selected
comparison. These are only available on the REG_
DWORD & REG_QWORD value types. Uses the same
behavior as the Equal to comparison.
4. Select the required numerical system for the registry value - this can be either Hexadecimal or
Decimal.
5. Click OK to save the condition.
Copyright © 2019 , Ivanti. All Rights Reserved. Privacy and Legal.
Page 121 of 237
Environment Manager 2019.1 Policy Product Guide

File and Folder Conditions
File and Folder conditions check whether or not specific files and folders exist on managed endpoints
before applying the associated actions. In addition to a search for the existence of files, a condition
can be set up to apply actions if a text file contains specific text.
Condition Description Computer
Trigger
User
Trigger
File Exists A condition which checks whether a file does or does not exist
on managed endpoints based on the name and location of the
file, the date the file was created, modified or accessed and its
size
Yes Yes
Text File
Search
A condition which searches for files on managed endpoints
which do or do not contain a specified text string. Set the file
location and enter the text to search the file for. The Text File
Search condition supports searching for both expanded and
unexpanded environment variables. On upgrade, single %
environment variables are replaced by double % environment
variables, for example, %UserName% is changed to
%%UserName%% following an upgrade. This ensures existing
behavior is maintained following an upgrade.
Yes Yes
Folder
Exists
A condition which checks whether a folder does or does not
exist on managed endpoints based on the name and location of
the folder, the date the folder was created, modified or accessed
and its size.
Yes Yes
Create a File or Folder Exists Condition
1. In the Policy Configuration navigation tree, select the node or trigger to which you want to add
the condition. This can be:
o
A new node
o
An existing node
o
The Environment tab of a trigger
2. On the Conditions tab, select File & Folder > File Exist or Folder Exists to display the
corresponding dialog.
Copyright © 2019 , Ivanti. All Rights Reserved. Privacy and Legal.
Page 122 of 237
Environment Manager 2019.1 Policy Product Guide

3. Complete the following fields:
o
Condition - Select Exists or Does Not Exist.
o
File or Folder - Browse to the required file or folder or manually enter the path and file
or folder name.
o
Date - Select the checkbox and define the date criteria for the file or folder.
o
Size - Select the checkbox and define the size criteria for the file or folder.
4. Click OK to save the condition.
Create a Text File Search Condition
1. In the Policy Configuration navigation tree, select the node or trigger to which you want to add
the condition. This can be:
o
A new node
o
An existing node
o
The Environment tab of a trigger
2. On the Conditions tab, select File & Folder > Text File Search to display the Text File Search
dialog.
3. Complete the following fields:
o
File - Browse to the required text file or folder or manually enter the path and file name.
o
Condition - Select whether the condition will look for the existence or absence of the
text.
o
Text - Enter the text for the condition to evaluate against.
4. Select the required checkboxes:
o
Match Case - To match the condition, the text must have the same capitalization.
o
Use Regular Expressions - Regular expressions can be used in the Text field.
5. Click OK to save the condition.
Directory Membership Conditions
These conditions check Organizational Unit (OU) membership, within Active Directory. Environment
Manager connects to Active Directory and compares the OU specified in the condition with that of the
current user or computer. If a match is made, any associated actions are executed. Match criteria is
selected using the browse button which browses for OU containers. You must be a member of an
Active Directory domain to browse for an OU container.
This condition could be used to ensure that only users in certain OUs can undertake certain actions.
Select the Include sub-OUs in match checkbox to search all sub-OUs of any specified OU. Without
this checkbox selected, the sub-OUs are ignored and only the OU in question is included in the
condition.
Copyright © 2019 , Ivanti. All Rights Reserved. Privacy and Legal.
Page 123 of 237
Environment Manager 2019.1 Policy Product Guide

Condition Description
User OU Membership A condition based on a user’s membership of a specified OU. Select
whether the condition should equal or not equal the entered OU or
enter a query to apply the condition to OUs.
Computer OU
Membership
A condition based on a computer’s membership of a specified OU.
Uses the same criteria as User OU Membership.
Client Computer OU
Membership
A condition based on the membership of a specified OU for a server
based or virtual client computer. Uses the same criteria as User OU
Membership.
Site Membership A condition based on the membership of a specific Active Directory
Domain Site. This typically relates to an organization’s departments or
a geographical location which hosts networks. Environment Manager
interrogates the domain to locate sites, providing them for selection
from the browse button in the Match field. To browse for sites, your
location must be associated with an Active Directory domain.
The OU name in the Match field for the User, Computer and Client Computer OU
Membership conditions are case sensitive. OU names entered with incorrect case will not
match.
User Conditions
Create conditions for particular users or groups of users identified using Active Directory account
name. The defined criteria are compared to that of the logged on user and the associated actions are
executed. By doing this you can target actions to users or groups of users to ensure that they can only
perform the actions which that user or group requires.
Condition Description Computer
Trigger
User
Trigger
User Name A condition for an individual user based on user name.
The user name must be prefixed by the appropriate
domain name: domain\user name.
No Yes
User Group A condition for a specific group of users such as Power
Users or Guests. The agent connects to the Active
Directory specified in the condition criteria and collates
a list of Security Identifiers (SID) for all the groups the
user is a member. A comparison is made with the list
against the SID for the configuration.
No Yes
Copyright © 2019 , Ivanti. All Rights Reserved. Privacy and Legal.
Page 124 of 237
Environment Manager 2019.1 Policy Product Guide

Condition Description Computer
Trigger
User
Trigger
Is Administrator A condition based on the administrator rights of the
user.
No Yes
Primary Group A condition based on membership of an Active Setup
Primary Group. All Active Directory users have a Primary
Group, used to support certain products. The default
setting for Primary Group is Domain Users for all Active
Directory users.
No Yes
User Process
Name
A condition to specify a process. Enter, browse or use a
regular expression to target the executable for the
process you want to create actions for. Can only be
used in User Process Started and Process Stopped
triggers.
No Yes
Computer Conditions
These conditions target individual computers or groups of computers using various identifiers.
Actions can be applied to a computer regardless of who is using it. The Environment Manager agent
checks the specified criteria against that of the managed computer and applies any associated
conditions to the computer or group of computers.
LSA support is not available on Computer conditions.
Condition Description Computer
Trigger
User
Trigger
Is Laptop A condition to check if the endpoint is a laptop. The
agent checks the endpoint for a battery. If one exists,
any laptop specific actions are performed.
Yes Yes
Computer Name A condition for a specific computer. The computer name
can be entered directly or searched for using specified
criteria on selected locations.
Yes Yes
Computer
Domain
A condition for a defined network of computers. Use the
Name Resolution Type drop-down to specify whether
the condition uses the DNS Domain or Windows Domain
naming conventions. The domain entered in the Match
field must be in the format used in your organization for
the selected naming convention. For example, a DNS
domain name could be testing.xyz.local whereas the
Yes Yes
Copyright © 2019 , Ivanti. All Rights Reserved. Privacy and Legal.
Page 125 of 237
Environment Manager 2019.1 Policy Product Guide

Condition Description Computer
Trigger
User
Trigger
Windows domain name would just be testing.
Computer
NETBIOS Name
A condition for a computer identified by its NETBIOS
name.
Yes Yes
Computer
Group
A condition based on a user group for a particular
computer. The agent checks the specified active
directory group or groups exist and compares the
Security Identifier (SID) against the SID of the user’s
computer for a match. The condition only matches
computers in the specified group - to include nested
groups, select the Search nested groups checkbox.
Yes Yes
Computer IP
Address
A condition based on an IP address entered into the IP
Address1 field. A range of IP addresses can be defined
using the Between radio button and IP Address 2 field.
For ranges, the IP address is not treated as a
whole number but based upon the value of
each octet. For example, if the range was from
190.190.190.190 to 200.200.200.200,
198.198.198.198 would pass but 198.198.210.198
would not as the third octet is not within the
set range.
Yes Yes
MAC Address A condition defined by the Media Access Control (MAC)
address of the network cards within a computer.
Yes Yes
Computer
Process Name
A condition to specify a process. Enter, browse or use a
regular expression to target the executable for the
process you want to create actions for. This can only be
used in Computer Process Started and Process Stopped
triggers.
No No
Operating
System
A condition that applies actions only when the specified
operating system is matched. The operating system can
be further defined to version, service pack, build
number, edition, CPU architecture and Terminal Services
enabled.
The Version text box provides a drop-down to select the
operating system version. It also supports free text,
Yes Yes
Copyright © 2019 , Ivanti. All Rights Reserved. Privacy and Legal.
Page 126 of 237
Environment Manager 2019.1 Policy Product Guide

Condition Description Computer
Trigger
User
Trigger
allowing you to enter any RTM number. For example, if
you wanted to specify Windows 8, enter the RTM
number - 6.2.9200.
For Build Number, select a condition, such as Greater
than or Equal to in the drop-down, then enter a build
number in the field. You cannot include a dot character
(.) in the build number. If the build number is
10240.17113, for example, you enter 10240. To ensure
you have the correct build number, you can check the
relevant Microsoft release information. For example, to
view build numbers for Windows 10 releases, go to
https://technet.microsoft.com/en-us/windows/release-
info.
Is VDI A condition which applies actions only when the
endpoint is one of the following virtual desktops:
l Xen Desktop 5
l Xen Desktop 7
l VMware view
l Quest vWorkspace
Yes Yes
Session & Client Conditions
These conditions use client and session attributes to target actions. These conditions look for a match
within the logged on user’s session or client. For example, a client Screen Resolution condition could
be configured so that a particular application can only be used on all clients with a screen resolution
of 1024x768 and above.
Condition Description Computer
Trigger
User
Trigger
Published
Application
Name
A condition based on the use of a particular
published application.
No Yes
Client
Connection
Protocol
A condition based on whether the user connection is
by console, Independent Computing Architecture
(ICA), Remote Desktop Protocol (RDP) or PC over IP
(PCoIP).
No Yes
Client IP Address A condition defined by the endpoint’s IP address No Yes
Copyright © 2019 , Ivanti. All Rights Reserved. Privacy and Legal.
Page 127 of 237
Environment Manager 2019.1 Policy Product Guide

Condition Description Computer
Trigger
User
Trigger
entered into the IP Address 1 field. A range of IP
addresses can be defined using the Between radio
button and IP Address 2 field.
For ranges, the IP address is not treated as a
whole number but based upon the value of
each octet. For example, if the range was
from 190.190.190.190 to 200.200.200.200,
198.198.198.198 would pass but
198.198.210.198 would not as the third octet
is not within the set range.
Client NETBIOS
Name
A condition for the connecting device identified by its
NETBIOS name.
No Yes
Client Screen
Resolution
A condition based on the screen resolution of the
connecting device. A specific resolution or a range
can be used to define when an action applies. This
condition is available for Remote Desktop Protocol
(RDP) and Independent Computing Architecture (IDP)
clients only. It will not work on the console.
No Yes
Client Color
Screen Depth
A condition based on the color screen depth of the
connecting device. Use the slider and radio buttons
to select the required value or range of values. This
condition is available for Remote Desktop Protocol
(RDP) and Independent Computing Architecture (IDP)
clients only. It will not work on the console.
No Yes
Client Computer
Domain
A condition for a defined network of client
computers. Use the Name Resolution Type drop-
down to specify whether the condition uses the DNS
Domain or Windows Domain naming conventions.
The domain entered in the Match field must be in the
format used in your organization for the selected
naming convention. For example, a DNS domain name
could be testing.xyz.local whereas the Windows
domain name would just be testing.
No Yes
Client Computer
Group
A condition based on an Active Directory client
computer group.
No Yes
Copyright © 2019 , Ivanti. All Rights Reserved. Privacy and Legal.
Page 128 of 237
Environment Manager 2019.1 Policy Product Guide

Condition Description Computer
Trigger
User
Trigger
Citrix Client
Settings
A condition based on attributes of the connecting
client. Notes
The Client OS condition is not compatible with the
Network Disconnected trigger.
The Client Version condition uses the version number
used in the marketplace, rather than the build version
number. For example, Citrix Receiver 14.1.0.0 relates to
build version number 4.1.0.56461.
The Client Encryption attribute condition is not
compatible with Citrix XenDesktop.
The NetScaler Session Policies and NetScaler
Hostname conditions are not compatible with Citrix
XenApp.
The Client Version, Client Encryption, NetScaler
Session Policies and NetScaler Hostname conditions
require the following to be installed:
The Citrix PowerShell Broker Snap-in on the client.
This snap-in can be installed on the client by running
Broker_PowerShellSnapIn_x86.msi or Broker_
PowerShellSnapIn_x64.msi from the Citrix installation
media.
For Citrix XenApp, PowerShell 3.0 or later on the
server.
For Citrix XenDesktop, PowerShell 3.0 or later on the
Virtual Desktop Agent client.
For further information see Add a Citrix_ Client
Settings Condition.
No Yes
Citrix vDisk Client
Settings
A condition to determine whether a Citrix vDisk is in
use and, if so, whether it is running in Standard or
Private mode.
No Yes
VMware
Variables
A condition based on attributes of the broker or
connecting client. This condition is available on all
User triggers, except Pre-Session and Pre-Desktop
triggers.
No Yes
Copyright © 2019 , Ivanti. All Rights Reserved. Privacy and Legal.
Page 129 of 237
Environment Manager 2019.1 Policy Product Guide

Add a Citrix Client Settings Condition
1. In the Policy Configuration navigation tree, create a new node or select an existing node under
the Logon Pre-Desktop sub-trigger.
2. Click Conditions > Session & Client > Citrix Client Settings.
The Citrix Client Settings dialog displays. If required, enter a description and any additional
information relating to the Citrix Client Setting in the fields provided on the General tab.
3. Select the Client Settings tab.
4. Select the Citrix Client Settings condition criteria from the following:
Attributes Description
Clients OS Match the client’s operating system, such as Android, iOS, Mac
or Windows.
Client Type Match the type of client, such as a phone, tablet or other device
Client Version Match the version number of the Citrix Receiver client. This uses
the build version number, rather than the version number used
in the marketplace. For example, Citrix Receiver 14.1.0.0 relates
to build version number 4.1.0.56461. To view the build version
number, see the About box within the Citrix Receiver.
Client Encryption Match the client encryption type from Basic, Logon Only, RC5
(40 bit), RC5 (56 bit) and RC5 (128 bit).
The encryption levels available for XenApp and XenDesktop
are Basic and RC5 (128 bit) only.
NetScaler Session Policies Match NetScaler session policies. Separate multiple policies
with commas
NetScaler Hostname Match the hostname of the NetScaler.
The Citrix PowerShell Broker Snap-in is required for the Client Version, Client
Encryption, NetScaler Session Policies and NetScaler Hostname conditions. This snap-
in can be installed on the client by running Broker_PowerShellSnapIn_x86.msi or
Broker_PowerShellSnapIn_x64.msi from the Citrix installation media.
5. Click OK.
Copyright © 2019 , Ivanti. All Rights Reserved. Privacy and Legal.
Page 130 of 237
Environment Manager 2019.1 Policy Product Guide

Custom Conditions
Use the Custom condition to create, import and export conditions using PowerShell, Visual Basic or
Java Script. Custom conditions can be used to cater for scenarios which are not available as standard
from the Environment Manager console. For example, to check if the Windows Firewall is switched on.
The scripts are held within the AEMP configuration, copied to disk at runtime, executed and then
deleted upon completion. Scripts can be imported and exported to enable reuse.
Large scripts and high numbers of scripts increase the size of an AEMP configuration which
can impact the time required to deploy configurations to end points and affect configuration
execution time.
It is recommended that custom conditions using PowerShell scripts should not be used on
the Logon trigger as running these scripts can cause slow logon times.
As Custom condition scripts are run in batch mode, any prompts or message boxes are not displayed
and the script times-out without being executed. To ensure that a condition script runs correctly,
remove or comment out any prompts or message boxes from the script.
Custom conditions can be applied to both computer and user triggers.
Exit Codes
All custom scripts must specify an exit code which when returned, is used by the Environment
Manager agent to determine whether the script has passed or failed. For scripts without an exit code
a success (0 value) is assumed by the agent. Each script type must use a specific exit statement.
Language Exit Statement
VBScript WScript.Quit [value]
JScript WScript.Quit([value])
PowerShell exit ([value])
Replace [value] with the exit code for the script: 0 for success and 1 for failure. For example:
WScript.Quit 0, WScript.Quit(0), exit (0).
PowerShell Scripts
Windows PowerShell scripts use various execution policies which can prevent the scripts from running
or only allow those signed by trusted publishers to run. Environment Manager overrides execution
policies and bypasses any restrictions to enable the PowerShell scripts to run.
Copyright © 2019 , Ivanti. All Rights Reserved. Privacy and Legal.
Page 131 of 237
Environment Manager 2019.1 Policy Product Guide

Execution polices for users and computers can also be set through Group Policy which override all
PowerShell execution policies. A user policy which does not allow any scripts, or only those which are
signed, will not affect the running of PowerShell Custom conditions if they are run as System. However,
if run as the current user the user policy will not allow the scripts and the Custom condition will fail. A
computer policy which does not allow any scripts, or only those which are signed, will not allow the
running of any PowerShell Custom conditions.
Therefore, to successfully run Custom conditions which use PowerShell, your Group Policy must be set
to allow these scripts to run for users and computers.
Environment Manager is compatible with PowerShell versions 1.0, 2.0 and 3.0.
Create a Custom Condition
1. In the Policy Configuration navigation tree, select the node or trigger to which you want to add
the condition. This can be:
o
A new node
o
An existing node
o
The Environment tab of a trigger
2. In the Conditions ribbon, select Custom to display the Custom Condition dialog.
3. Select the Type of scripting; PowerShell, VBScript or JScript.
4. Set the Time allowed to run. This is the number of seconds after which the script is terminated.
Setting the value to zero or leaving the field blank gives the script infinite time to complete.
Custom conditions override default node and condition timeouts.
5. Click the Options drop-down and configure the following options as required:
o
Evaluate Once Per Session - Select this option to run the condition once and cache the
result for the duration of the session. Otherwise the condition is evaluated each time it is
called upon within a configuration.
o
Run As System User - Select this option to enable the script to use functionality which
would not otherwise be accessible to the currently logged on user. For user triggers, if
this option is not selected, the script runs in the context of the logged on user.
Copyright © 2019 , Ivanti. All Rights Reserved. Privacy and Legal.
Page 132 of 237
Environment Manager 2019.1 Policy Product Guide

6. Enter the script using one of the following methods:
o
Type directly into the field
o
Drag and drop or copy and paste from another location.
o
Click the import button and select a file to open and use in the script field.
Session Variables can be added to the script from the Insert menu. The drop-down contains
any user-defined Session Variables and the following inbuilt variables:
o
SessionID - The current Session ID
o
UserSID - The user’s Security Identifier
o
UserTemp - The location of user’s Temporary Directory
7. On the Network Available, Network Connected and Network Disconnected triggers, further
built-in Session Variables can be added to the script to determine connection attributes. These
built-in Session Variables cannot be amended or deleted.
8. Click OK to save the script.
When triggered, the script runs to its completion and the resulting success or failure of the condition
is detailed in the debug log files.
Custom scripts which timeout are classed as failing and any child nodes and their associated actions
will not run.
Export Custom Scripts
Scripts can be exported and saved from the Custom Action dialog and imported into other conditions
and configurations.
1. Open a Custom condition.
2.
Click the export button and select a location to save the PowerShell, VBS or JS file.
3. Click Save to complete the export.
Reusable Conditions
Reusable conditions enable common conditions to be applied multiple times within a configuration,
without the need to create a new condition for each occurrence. The properties and settings for a
reusable condition are identical to every instance of that condition in the configuration and any
changes made to the reusable condition are reflected throughout the configuration.
This could be used for a condition which identifies a commonly used application or which uses the Is
Administrator condition; any condition which is required for repeated use. Reusable conditions can
be created as a new condition or existing conditions can be saved as reusable conditions.
Click the Reusable Conditions trigger to see where reusable conditions have been referenced in the
Policy Configuration navigation tree. Each reusable condition is listed with the path of each usage
instance displayed beneath.
Copyright © 2019 , Ivanti. All Rights Reserved. Privacy and Legal.
Page 133 of 237
Environment Manager 2019.1 Policy Product Guide

The Stop sub nodes on fail setting is applied individually for each instance of a reusable condition in the
Policy Configuration and cannot be applied universally to all instances.
The setting only becomes available when a reusable condition is added to a trigger.
Create a reusable condition
1. In the Policy Configuration navigation tree, select Library > Reusable Conditions.
2. Create a new node and name the node relevant to the condition.
3. Highlight the new node and create the required condition(s) from the Conditions ribbon.
The condition is now available for use in other triggers and nodes from the Reusable Conditions
button in the Conditions tab.
Create a reusable condition from an existing condition
In the Policy Configuration navigation tree, select the node containing the condition you want to
make reusable.
Highlight the required condition in the actions work area and select Copy to Reusable Conditions
from the shortcut menu. The option is also available from the Clone button in the Nodes tab.
Copyright © 2019 , Ivanti. All Rights Reserved. Privacy and Legal.
Page 134 of 237
Environment Manager 2019.1 Policy Product Guide

If the condition you are copying has Stop if fails enabled, you are prompted that this option is not
available in the reusable conditions library. As references to reusable conditions contain the Stop Sub
Nodes on Fail feature, it is not required in the library.
A new node is automatically created in the Reusable Conditions trigger containing a duplicate
condition which is now available as a Reusable Condition.
When a reusable condition is created from an existing condition, a copy is made of the original
condition which is identical for every subsequent use. However, this action does not link the original
and it is independent to the reusable condition.
Add a reusable condition to a configuration
1. In the Policy Configuration navigation tree, select the node to which you want to add the
condition.
2. In the Conditions ribbon, select Reusable Conditions and choose a reusable condition.
The condition is added to the node and highlighted in orange.
Environment Conditions
Environment conditions allow actions to be carried out when specified Environment and Session
variables exist, do not exist or match a defined value on an endpoint.
Session variables provide an alternative to Environment variables, enabling data to be passed through
a configuration more efficiently as they take less time to set and are internal to Environment Manager.
Session variables set in computer triggers are run in the System Session and are only available for
computer triggers. Likewise, those set in user triggers are run in the User Session and are only
available for user triggers.
A further Environment condition can also be set to run actions on an endpoint on specified days,
times and dates.
Condition Description
Environment
Variable
A condition based on matching environment variables. The condition could be to
check for the existence of the environment variable on endpoints or to match the
value of the variable.
Session
Variable
A condition based on matching session variables. Input the session variable name
and create a condition which matches or does not match the specified value.
Time and
Date
A condition which defines a time frame used to set when actions will apply on
endpoints. Individual days can be selected and date and time ranges can be
specified.
Copyright © 2019 , Ivanti. All Rights Reserved. Privacy and Legal.
Page 135 of 237
Environment Manager 2019.1 Policy Product Guide

Create an Environment Variable Condition
1. In the Policy Configuration navigation tree, create a new node or select an existing node to
which you want to add the condition.
2. In the Conditions ribbon, select Environment > Environment Variable to display the
Environment Variable dialog displays.
3. Enter the Environment Variable Name.
4. Select a Condition from the drop-down to govern whether or not associated actions will run:
o
Exists - The entered environment variable is found on managed endpoints
o
Does Not Exist - The environment variable is not found on managed endpoints
o
Equal To - The environment variable exists on the endpoint and matches the Value field
o
Not Equal To - The environment variable exists on the endpoint but does not match the
Value field
o
Contains - The environment variable exists on the endpoint and includes the string in
the Value field
5. For Equal To, Not Equal To and Contains conditions, enter the Value which will be used for the
match.
6. Click OK to save.
Create a Session Variable Condition
1. In the Policy Configuration navigation tree, create a new node or select an existing node to
which you want to add the condition.
2. In the Conditions ribbon, select Environment > Session Variable.
The Session Variable dialog displays.
3. Enter the Session variable Name.
4. Select a Condition from the drop-down box which will govern whether or not associated
actions will run:
o
Equal To - The session variable exists on the endpoint and matches the Value field
o
Not Equal To - The session variable exists on the endpoint but does not match the
Value field
5. Enter the Value which will be used validate the condition conditions.
6. Click OK to save.
Create a Date and Time Condition
1. In the Policy Configuration navigation tree, create a new node or select an existing node to
which you want to add the condition.
Copyright © 2019 , Ivanti. All Rights Reserved. Privacy and Legal.
Page 136 of 237
Environment Manager 2019.1 Policy Product Guide

2. In the Conditions ribbon, select Environment > Date and Time to display the Date and Time
condition dialog displays.
3. Use a combination of the checkboxes and drop-downs to define the days, dates and times on
which any dependent actions will run.
4. Click OK to save the condition.
Flow Control Conditions
The Flow Control condition group contains the following conditions:
Condition Description Computer
Trigger
User
Trigger
If
Condition
(and Else If
Conditions)
These create containers for conditions within an If Else group
that enable advanced flow control by allowing standard If/Else
If/Else logic found in most programming languages
Yes Yes
Counter A condition to control the number of times child actions and
conditions are run or evaluated in a single session. Use the
counter field to select the required number; the minimum
value that can be added is 1; there is no maximum value.
Yes Yes
If Conditions
An If condition creates a logical container in which a group of conditions can be configured together
and evaluated in turn. When one of the conditions is met, any associated conditions and actions are
run and evaluation of the group stops. A final, default action can be configured to apply if none of the
conditions are met.
The condition is created using an expression builder which by default contains an If condition and an
Else section. Optional Else If conditions can be added as required.
Create an If Condition
1. In the Policy Configuration navigation tree, create a new node or select an existing node to
which you want to add the condition.
If conditions cannot be created within Reusable conditions.
Copyright © 2019 , Ivanti. All Rights Reserved. Privacy and Legal.
Page 137 of 237
Environment Manager 2019.1 Policy Product Guide

2. On the Conditions ribbon, select Flow Control > If Condition.
The Expression Builder is displayed in the If Condition dialog.
The Expression Builder is used when creating If and Else if containers to configure the
conditions which the user or endpoint is evaluated against.
Conditions and Reusable Conditions are added to the Expression Builder and configured using
the same dialogs and in the same way as conditions are in any node. Any number of conditions
can be added to the Expression builder and the same AND and OR rules which apply to
conditions in any other nodes. Normal rules also apply as to which triggers conditions can be
applied. For example, User conditions cannot be created in Computer Startup triggers.
3. Select the Conditions or Reusable Conditions drop-down and choose the required conditions
to be added to the Expression Builder.
4. Select the Stop Sub Nodes on Fail and the Enabled checkboxes to the condition as required.
At least one condition must be enabled.
5. Repeat steps 3 and 4 to add more conditions.
6. Enter a Description in the Expression Builder. This text is used to name the first (If) condition in
the configuration and is mandatory.
7. Enter an If Group Description. This text is used to name the group of conditions in the
configuration.
8. Click OK.
An If Else Group is created in the selected node. The group contains the If condition as
configured in the Expression Builder and an Else section which is automatically created.
9. Select the If condition and add the required action(s) and condition(s) from the appropriate
tab. Multiple actions and conditions can be added at the same level or nested to as many levels
as required.
Copyright © 2019 , Ivanti. All Rights Reserved. Privacy and Legal.
Page 138 of 237
Environment Manager 2019.1 Policy Product Guide

10. Select the Else section and add the required action(s) and condition(s). Multiple actions and
conditions can be added at the same level or nested to as many levels as required or the section
can be left empty. If the Else section is left empty and none of the If or Else If conditions are met,
processing for the group completes without an action being carried out.
11. Select the Stop Sub Nodes on Fail and the Enabled checkboxes for added actions and
conditions as required.
If conditions and Else sections cannot be cut, copied or pasted. However, the conditions and
actions within can be cut, copied and pasted as normal behavior for actions and conditions.
If Condition Example Configurations
The configuration below shows a default If Else group with one If condition and one Else section:
When the trigger is fired the group is evaluated as follows:
l The If condition is met - The associated action is carried out and evaluation of the processing of
this group stops.
l The If condition is not met - The action is ignored and the Else action is carried out.
l An action is not associated with the Else section - No action is carried out for the whole group.
Further conditions can be added to If conditions and the Else section to add extra levels of evaluation:
Copyright © 2019 , Ivanti. All Rights Reserved. Privacy and Legal.
Page 139 of 237
Environment Manager 2019.1 Policy Product Guide

When the trigger is fired, the group is evaluated as follows:
l The If condition is met - The child condition is evaluated. If this condition is met the associated
action is carried out and group processing stops. If the child condition is not met the Else
section is evaluated.
l The Else child condition is met - The associated action is carried out and processing stops.
l The Else child condition is not met - No actions are carried out for the entire group.
Create an Else If Condition
An Else If condition is an optional If condition which can be added between an If condition and an Else
section. Else If conditions function in exactly the same as an If condition in that any number of
conditions and actions can be applied.
1. Select an If or an existing Else If condition.
2. On the Conditions ribbon, select Flow Control > Else If Condition.
3. Click the Conditions or Reusable Conditions drop-down and select the required condition. As
many conditions can be added to the Expression Builder as required.
4. Enter a Description. This text is used to name the Else If expression in the group and is
mandatory.
5. Click OK.
The Else If condition is created.
6. Select the Else If condition and add the required action(s) from the Actions tab. Multiple actions
can be added as required.
Multiple Else If conditions can be added at the same level in the configuration. Repeat the above
process to add further Else If conditions.
Copyright © 2019 , Ivanti. All Rights Reserved. Privacy and Legal.
Page 140 of 237
Environment Manager 2019.1 Policy Product Guide

Else If conditions work in the same way as If conditions; if the condition is met the associated action is
carried out and evaluation of the group ceases and if the condition is not met, the action is ignored
and the next Else If condition or Else section is evaluated.
Else If conditions and the actions and conditions within, can be cut, copied and pasted.
Else If Condition Example Configurations
The example group below evaluates the user group at logon and creates a relevant folder on their C
drive.
When a user in the Administrators user group logs onto a managed endpoint, the following
evaluation takes place:
l Is the user a member of the Users group? No.
The related action is not applied and the next condition is evaluated.
l Is the user a member of the Administrators group? Yes.
The action associated with that condition is carried out; a folder called Administrators is
created on the user’s C drive. As a condition has been met, no further evaluation occurs for this
group.
When a user in the Developers user group logs onto a managed endpoint, the following evaluation
takes place:
l Is the user a member of the Users group? No.
The related action is not applied and the next condition is evaluated.
Copyright © 2019 , Ivanti. All Rights Reserved. Privacy and Legal.
Page 141 of 237
Environment Manager 2019.1 Policy Product Guide

l Is the user a member of the Administrators group? No.
The related action is not applied and the next condition is evaluated.
l Is the user a member of the Power Users group? No.
The related action is not applied and the next condition is evaluated.
l The user is not a member of any of the user groups specified in the conditions.
The Else action applies by default and a folder called Guests is created on the user’s C drive.
Stop Sub Nodes on Fail and If Conditions
The Stop sub nodes on fail option prevents a failed action continuing to execute any dependent sub
actions or conditions. Normal Stop sub nodes on fail behavior applies to actions and conditions within If
conditions. However, Stop sub nodes on fail cannot be applied at the group level or to any of the
following:
l If conditions
l Else if conditions
l The Else section
The Stop Sub Nodes on Fail checkbox for these conditions and containers cannot be selected.
Delete If Conditions
The following deletion rules apply for If conditions:
l If conditions cannot be deleted from a group
l The Else section cannot be deleted from a group
l Else If conditions can be deleted and multiple Else If conditions can be deleted when selected
using Ctrl or Shift. The delete will not work if an If condition or the Else section is included in the
selection
Counter
The Counter condition allows the child actions and conditions to be run a specified number of times
within a single session. For example, an action could be set to run only for the first three times an
application is used in a session. If the application is run again, the action will not run.
Where multiple Counter conditions exist within a single trigger, the uppermost condition in a
hierarchy overrides any child conditions.
In the example below, all actions run once as defined by the first condition. The child condition to run
twice per session is ignored.
Copyright © 2019 , Ivanti. All Rights Reserved. Privacy and Legal.
Page 142 of 237
Environment Manager 2019.1 Policy Product Guide
Flow Control replaces the Run Once condition in the 8.0 console which can be replicated by
setting the counter to 1. On upgrade from 8.0,any Run Once conditions are upgraded to
Flow Control conditions automatically.
Create a Counter Condition
1. In the Policy Configuration navigation pane, select a node or create a new one.
2. Counter conditions can be added to all triggers except the following as these only run once per
user session or on endpoint startup:
o
Computer Startup
o
Computer Shutdown
o
User Logon
o
User Logoff
3. In the work area, select an action or condition.
4. In the Conditions ribbon, select Flow Control > Counter and select the number of times child
conditions and actions will run. The minimum value that can be added is 1; there is no maximum
value.
5. Click OK.
Copyright © 2019 , Ivanti. All Rights Reserved. Privacy and Legal.
Page 143 of 237
Environment Manager 2019.1 Policy Product Guide

Cache Roaming for Virtual Sessions
Cache Roaming functionality introduces capabilities to roam user application caches between sessions
in non-persistent environments. The Virtual Hard Disk (VHD) container is attached to the user's virtual
desktop or session allowing the necessary folders within the user profiles to be redirected here. The
feature is suitable for supported VDI infrastructures in virtual desktop environments, such as
XenDesktop, or Remote Desktop Session Host (RDSH) scenarios, such as XenApp. Applications do not
require any reconfiguration and no changes are made to user profiles.
The feature uses two actions to achieve this:
l Manage VHD - Mount an existing VHD or create and mount a new VHD.
l Cache Roaming - Redirect a user profile cache to the VHD.
The two actions can be used independently but most commonly, they will be used together - roaming
the VHD specified or created using the Manage VHD action, to the location defined in the Cache
Roaming action. The actions are available on Pre-Desktop and Desktop Created triggers, and
automatically detach on logoff and network disconnect. This allows users to reconnect when they log
on to another endpoint or start a new VDIsession. VHDs can optionally be detached on session
locked and session disconnected and can be added to reusable nodes for use on the compatible
triggers.
One of the main use cases for this functionality is the roaming of Outlook OST Cache files, providing
users instant access to their Office 365 mailboxes. Outlook Cached Exchange requires large OST files to
remain resident within a user’s profile. In Non-Persistent VDI and RDSH environments, the profile is
typically rebuilt at logon, resulting in the loss of user's OST files. Consequently, at the next logon,
Outlook has limited functionality while it downloads and rebuilds the OST cache, which can be
multiple gigabytes in size. Using this feature means that users with non-persistent VDI setups do not
need to be in ‘Exchange Online Mode’ - they can be in ‘Cached Exchange Mode’, persisting their entire
mailbox between sessions. This provides a much better user experience and can make users instantly
productive following migration to Windows 10 or Office 365 migration.
In addition to Outlook OST Cache files, the Manage VHD action includes built-in settings for roaming
OneNote, OneDrive, Windows and Outlook Search, and Skype for Business 2016/365 Global Address
List caches. Additionally, you can also create your own custom redirections. Example locations that
would be potential candidates are areas within the user profile that are too large for synchronization
via Environment Manager Personalization, but are key to providing an optimal user experience.
Copyright © 2019 , Ivanti. All Rights Reserved. Privacy and Legal.
Page 144 of 237
Environment Manager 2019.1 Policy Product Guide

OneDrive Cache Roaming
To provide a seamless user experience without major impact to system performance, Environment
Manager provides a policy method of persisting user profile settings across virtual sessions for
OneDrive. The template used for OneDrive cache roaming utilizes a filesystem redirection driver and
requires slightly different configuration to the other templates provided. Once configured, at user
logon the VHD is mounted (or created if it does not already exist). The user's OneDrive cache is
redirected to a sub folder at the root directory of the VHD. When the user logs off from their sessions
the VHD is automatically detached and re-mounted at the next logon.
Windows and Outlook Search
Environment Manager supports roaming both the Windows and Outlook search indexes via built-in
cache templates:
• Outlook Search template
The Outlook Search template enables a per-user profile of the Outlook search index to be
roamed between non-persistent sessions. The template delivers real improvements for users,
avoiding the need to download and rebuild the search index at every user logon.
Note, if a mandatory user requires a persistent Outlook search index cache they will need to
select both the Outlook OST and the Outlook Search cache templates.
• Windows and Outlook Search template (single user workstation)
The Windows and Outlook Search template enables the roaming of system-wide Windows
Search database between sessions on a single user workstation. Using the template, the
search index is delivered from a locally stored directory.
Note, there is no support for the template on concurrent sessions on Windows Server.
The use of both the search index cache templates together is not supported.
Concurrent users
Environment Manager now supports concurrent user access for Office 365 VHD containers. This
enables a user within a non-persistent Windows environment to have multiple sessions running at the
same time, for example to access Outlook from multiple virtual sessions.
Copyright © 2019 , Ivanti. All Rights Reserved. Privacy and Legal.
Page 145 of 237
Environment Manager 2019.1 Policy Product Guide

The Windows Office 365 environment allows multiple concurrent sessions but only one connection to
the cloud based storage. To enable multiple concurrent sessions, Environment Manager creates a
VHD for each device logon. Each VHD will synchronize with the cloud based storage, ensuring that files
are always updated. When a user logs out of a session, the VHD is detached, unlocked and becomes
available for another user session. A user can create many concurrent sessions.
At logoff from concurrent sessions, a maximum of 5 VHDfiles are retained per user. This ensures that
users have a pool of synchronized VHDs available to re-attach and from which to restore the Office 365
cache.
Cache roaming is designed to work only when making use of a VHD file action - i.e. redirecting
your caches to the mounted VHD rather than directly to a network share WITHOUT using the
VHD.
Copyright © 2019 , Ivanti. All Rights Reserved. Privacy and Legal.
Page 146 of 237
Environment Manager 2019.1 Policy Product Guide


3. Complete the fields to set up the action:
Setting Properties
VHD File Select or enter the path and filename of the VHD to be mounted. If the VHD
does not exist on an endpoint and the Automatically create VHD if it does
not exist option is selected, a VHD will be created in accordance with the
settings configured in this dialog.
VHDs should not be created on pre-existing mapped drives.
The VHD File location will typically be a UNCpath to a folder that the user
already has full access to, for example a User Home Folder location.
For advice on how to configure permissions on the VHDNetwork folder, we
recommend customers review Microsoft best practice for Home Folders as a
baseline here https://support.microsoft.com/en-us/help/274443/
This ensures that Domain Administrators and the Current User have Full
Control on the VHD file, with the User being the Owner of the Parent Folder.
VHD Root
Folder
The root directory of where the VHD will be mounted. The folder will contain
the VHDcontents such as Outlook PST files or the OneDrive cache for
example, and can be accessed like any other folder. This enables redirected
folders to be managed in a common location.
Automatically
create VHD if
it does not
exist
If the specified VHD does not exist on an endpoint, one will be created with
the settings defined in this dialog.
VHD Type Fixed - The size of the disc is determined on creation - it will always be the
size set in the Max Size field. This offers better performance than Expandable
VHDs but can have a negative impact on logon times.
Expandable - The size of the disc is variable and will grow to the maximum
size as data is added.
Max Size The maximum size of the VHD between 150MB and 2TB.
Even though each user is provided with 1TB of free OneDrive for Business
storage with Office 365, it is not necessary to set the Max Size of the VHD to
1TB as it is unlikely this full allocation of disk space will ever be used. However,
the Max Size can be configured on a contextual basis, using Policy
Conditions, to meet individual user needs.
Copyright © 2019 , Ivanti. All Rights Reserved. Privacy and Legal.
Page 149 of 237
Environment Manager 2019.1 Policy Product Guide

Cache Roaming
1. Select or add a node on the Pre-Desktop or Desktop Created triggers.
2. From the Actions ribbon, select VHD > Cache Roaming.
The Cache Roaming dialog displays.
Copyright © 2019 , Ivanti. All Rights Reserved. Privacy and Legal.
Page 150 of 237
Environment Manager 2019.1 Policy Product Guide


3. Complete the fields to set up the action:
Setting Properties
Cache
Template
Select a template from the drop-down:
l Custom
l OneDrive Cache
l OneNote Cache
l Outlook OST Cache
l Skype for Business 2016/365 Global Address List
l Outlook Search Cache
l Windows and Outlook Search Cache
Selecting one of the well-known application caches automatically populates
the Application Name and, where applicable, the Original Location fields,
though these can be overwritten if required.
To create custom cache settings, leave the default option as Custom and
complete the remaining fields as required.
In addition to roaming the Outlook OST, Skype and OneNote caches as
mentioned above, for full Office user roaming you will need to persist additional
Registry and File locations. Ivanti provides an Office 2016/365 template with our
Personalization Server which is available on the Ivanti Community here: DOC-
46793
Environment ManagerPolicy only customers can configure File/Registry
Actions to persist the required settings within the template to roam the
required Office User settings.
Application
Name
The name for the cache action that will display in the node work area. This is
automatically populated if you select a template from the drop-down but can
be overwritten if required.
Original
Location
This field is not applicable to the OneDrive, Windows or Outlook cache
templates.
The source folder of the cache files to be roamed. This is automatically
populated if you select a template from the drop-down but can be overwritten
if required.
This folder should not be personalized as it will cause issues when
personalization attempts to capture the folder at user log off.
Copyright © 2019 , Ivanti. All Rights Reserved. Privacy and Legal.
Page 152 of 237
Environment Manager 2019.1 Policy Product Guide

Setting Properties
Local, Network (including UNC paths) and DFS paths can be used and
environment and session variables are supported.
For this action to be successful, the specified folder must not already
be present within the profile.
Where the folder is present, additional actions are required within the
configuration. For example, if data is required post production in a
migration scenario, actions to either copy the data and delete the
folder are required. Alternatively, remove the folder, allowing the
action to complete successfully.
Tenant
Name
This field applies only to the OneDrive Cache template.
Enter the tenant name for your Onedrive implementation. Environment
Manager appends 'OneDrive' to the name entered to form the required folder.
Redirect
Location
The folder to which the original cache location will be redirected to. If using
with a VHD manage action, this should be a path to a sub-folder specified as
the VHD Root Folder.
Local, Network (including UNC paths) and DFS paths can be used and
environment and session variables are supported.
Cache Type This field is relevant to the Custom cache template settings only.
Select the Cache Type from the drop-down list.
Depending upon the cache template selected, additional options are displayed.
Delete redirection source if it exists
This option does not apply to Windows and Outlook Search cache templates.
By default this option is selected.
If this option is unchecked and data exists in the redirection source the cache
roaming will fail. As an administrator, unchecking this option could provide
protection against the loss of existing data.
Automatically roam OneDrive credentials
This option applies only to the OneDrive cache template. By default this option
is selected.
If this option is not selected users will need to roam credentials via
Personalization (by selecting the Security WSG) - or log in to OneDrive each
time they log on to a machine.
Copyright © 2019 , Ivanti. All Rights Reserved. Privacy and Legal.
Page 153 of 237
Environment Manager 2019.1 Policy Product Guide

Group Policy Object (GPO) Import
Using Environment Manager Policy to deploy group policy settings provides many benefits over a
native GPO. You can cut down your user login times by applying group policies only when you really
need them and control how frequently such policies are applied. In addition to being faster,
Environment Manager provides you with high levels of control over your policy options for Windows
10 devices - both on and off premise.
GPO Import
Environment Manager features a wizard that enables the import of GPO files and their conversion to
Environment Manager ADMX actions. See GPO Actions for more information.
On completion of the import, parent nodes are created automatically and displayed in the navigation
tree. Each node is named after its corresponding imported Group Policy Object name.
To run the GPO Import wizard you must have the Group Policy Management Console
installed. This is an administrative tool for managing group policies across your company and
it will enable Environment Manager to access your GPO location.
1. Select the Policy Configuration navigation button.
2. In the Tools & Wizards tab, click Group Policy Import to open the Group Policy Import wizard.
Throughout the wizard:
• To confirm and progress your import, click Next.
• Click Back to return to the previous page within the wizard.
• Click Cancel to abandon the import. Note that if you cancel after the import has started,
the already imported objects are added to the navigation tree. It is recommended that
you manually check both the Computer Startup trigger and User Logon and Pre-Desktop
triggers for any imported objects and remove them accordingly.
Copyright © 2019 , Ivanti. All Rights Reserved. Privacy and Legal.
Page 154 of 237
Environment Manager 2019.1 Policy Product Guide

3. In the introductory page follow the on-screen instructions to enter your domain name and
policy path.
4. Click Test Environment. This action checks the domain can be accessed via the logged on user
account, and that the GPO settings exist in the default policy path. If the test is successful a
check symbol is displayed next to the locations specified.
Click Next to continue with the import.
5. In the second page select the items you wish to import. The screen lists all items in your GPO
folder. To filter the items displayed, enter the initial character(s) of the name required.
Check the individual items required, or check Select All.
Click Next to continue.
6. Items selected for import are listed.
By default the Import as Individual ADMX actions option is selected. It will create an ADMX
action for each individual item imported. Clear this checkbox to create one ADMX action for
the imported set.
To confirm your selection click Import.
7. The completion page of the wizard provides a summary of the import.
Click Open Full Report to view the report. Unless you have any file type associations
configured, the report will open in Notepad.
8. Click Finish to close the wizard.
Parent nodes are created automatically in the navigation tree, displayed under the computer or user
triggers to which they apply.
Copyright © 2019 , Ivanti. All Rights Reserved. Privacy and Legal.
Page 155 of 237
Environment Manager 2019.1 Policy Product Guide

Action Management
Actions are the behaviors which are applied on managed endpoints when conditions are met upon
user and computer triggers. Within the Policy Configuration navigation tree actions can be added to
nodes directly beneath a trigger or to a condition within a trigger. When added directly to a trigger,
the action executes for all computers or users. Applied to a condition, the action can be targeted to
execute only when that condition is satisfied.
The placement of actions determines whether they run sequentially or concurrently and dictates
dependencies between them.
Actions at the same level in the hierarchy within a node run simultaneously.
Child actions run in sequence. A child action will run upon the successful completion of the parent or
when a timeout elapses; whichever event occurs first.
Configuring Actions
Selecting an action displays a dialog for defining the parameters and for that action. For most actions
you click Add to create a row in the dialog with which to define the action. Multiple rows can be
added, each of which create an individual action in the node. This behavior applies to the majority of
actions. Where this is not the case it is detailed in the sections for the specific actions in this chapter.
Each action dialog contains a tab specific to configuring that action. For example, the Copy File action
contains the Files to Copy tab and the Set Printer contains the Printer tab. In addition, the following
tabs are standard across multiple actions dialogs.
General
This tab contains optional Description and Notes fields and enables you to identify the specific
instance of an action. The text entered in the Description field becomes the name of the action in the
work area. If the field is left blank, a default name is created. The Note field can be used to add any
additional text for the action. This could be to add a more detailed description about what the action
does or any other relevant information.
Run As
Enables actions to run using different user credentials. For example, a user may require mapping to a
network drive or the ability to launch an application using different credentials. The user can be the
Current User, System or a User can be selected from the Run As User Library.
For further information on configuring the Run As User Library see Run As.
Copyright © 2019 , Ivanti. All Rights Reserved. Privacy and Legal.
Page 156 of 237
Environment Manager 2019.1 Policy Product Guide

Personalization
Policy actions can be configured at process start that conflict with personalization behavior. For
example, setting a registry key that is applied to the native registry that is also being managed by
Personalization in the virtual cache for the application.
In such cases, it is necessary to determine which behavior takes precedence. This is configured in
relevant Policy action dialogs using the Personalization tab. The tab gives the following two options:
• Policy Configuration takes precedence over User Personalization - When this option is
selected, Environment Manager applies the Policy setting to the real registry or file system and
the virtual cache. Therefore the process always applies the policy setting even if the registry
key or file path is virtualized. Although not seen in the user interface, this is achieved by
adding the virtual actions to the configuration.
• User Personalization takes precedence over Policy Configuration - When this option is
selected, the Policy setting is applied to the native registry or file system but not to the virtual
cache. As Personalization settings are applied to the endpoint after policy is applied, they are
read in preference to the native settings for any managed paths.
The Personalization tab is only available for the following actions and only when those actions are in a
node beneath the Process Started trigger.
Registry File and Folder Group Policy
Create Key
Delete Key
Set Value
Delete Value
Set Default Value
Copy File
Delete File
Move File
Rename File
Create Folder
Copy Folder
Delete Folder
Set ADM Policy
Set ADMX Policy
Conditions
Specify criteria relating to file and folder dates and size. The action will not take place if the selected
condition is not met:
Copyright © 2019 , Ivanti. All Rights Reserved. Privacy and Legal.
Page 157 of 237
Environment Manager 2019.1 Policy Product Guide

• Date - Specify a modified, accessed, or created date for the identified file or folder. For
example, only files that were created before a certain date are deleted. For file and folder
delete actions, you can use the Is Older Than option to specify that files and folders can be
deleted if a certain number of days have passed since they were created, last accessed, or
modified. In this case, you don't enter a date. You specify a whole number of days from 1 - 999.
For example, folders that have not been accessed in the last 100 days are deleted.
• Size - Set a condition based on the size of the file or folder. For example, only folders which are
below 1mb will be copied.
These file conditions cannot be used simultaneously.
For Copy File, Move File and Copy Folder this tab contains checkboxes for Compare to destination
timestamp and Compare to destination size. These options enable a comparison between the source
and destination files of the same name. This could be used to set up a condition which will only copy
the file if it was created at a later date than the one in the target location or is of a bigger size. This
removes the need to set a specific date or file size.
File Extension Exclusions
This tab is specific to File and Folder actions and enables a list of file extensions to be defined which
will not be included in the action. Any files which are of an excluded type are ignored.
File extensions can be entered with or without the preceding full stop. For example, both txt and .txt
are correct.
Wildcards can also be used to define multiple file extensions. For example, doc* would exclude all types
of Microsoft Word documents such as .doc, .docx, .docm.
Path Exclusion
Select specific folders or individual files which will not be included in the action. This tab is only
available to the Copy Folder action.
Applies to the Copy Folder action only and can only be defined once the source and target folders
have been selected.
Registry Actions
Registry manipulation enables registry keys and values to be setup for the user for the delivered
application set. Most applications require some form of default configuration to be present in order
for correct operation.
Registry Key actions allow registry keys to be created or deleted and enable registry key values to be
set, created and deleted.
Copyright © 2019 , Ivanti. All Rights Reserved. Privacy and Legal.
Page 158 of 237
Environment Manager 2019.1 Policy Product Guide

Importing a registry file enables an area of the registry of a local or remote endpoint to be added to
the registry of managed endpoints. This enables multiple registry keys and values to be created and
deleted without having to create each action individually.
Additionally, it is possible to import desired state settings from an existing machine or exported
registry file or even manipulate registry settings using registry hiving.
Create Registry Actions
1. In the Policy Configuration navigation tree, create a new node or select an existing node.
2. In the Actions ribbon, select Registry and choose the required option:
o
Create Key - Configure a list of registry keys which will be created on managed
endpoints when triggers and conditions apply. Keys are identified by selecting the
relevant hive and browsing to or entering the key.
o
Delete Key - Configure a list of registry keys to delete on managed endpoints.
o
Set Value - Identify a registry key and enter a value which will be set for that key.
o
Delete Value - Delete the value entered for the selected key on managed endpoints.
o
Set Default Value - Identify a registry key and enter a value which will be set as the
default value for that key.
3. Click Add.
4. Complete the fields as required. Each of these conditions uses as combination of the following
fields:
o
Hive - Select the hive containing the registry key.
o
Key - Enter or browse to the key within the registry.
o
Value Name - Enter or browse to the required value for the key.
5. Click OK to create the action.
6. Keys and values can be removed from the dialog boxes by selecting and clicking Remove.
The Create Registry Key and Delete Registry Key actions only include the Hive and Key fields.
Registry Value Actions
The Registry Value actions use the same fields as the Set Default Value dialog box above.
Import a Registry File
1. In the Policy Configuration navigation tree, create a new node or select an existing node.
2. In the Actions ribbon, select Registry > Import a Registry File to display the Registry Import
dialog.
Copyright © 2019 , Ivanti. All Rights Reserved. Privacy and Legal.
Page 159 of 237
Environment Manager 2019.1 Policy Product Guide

3. Select the required option:
o
Import File - Add the registry keys and values from a registry file exported from an
endpoint using Regedit or other registry tool.
o
Browse - Examine the registry of the local or a remote endpoint to select an area of the
registry to be imported into managed endpoints when triggered.
Keys and sub keys are displayed on the left side of the dialog box and any values for a selected
key are displayed on the right.
4. Select the Delete checkbox for all those keys, sub keys and values you wish to delete on
managed endpoints. Those not selected will be created and have values and default values set.
5. Click OK.
Actions are created for each create, delete and set value defined in the registry import.
Create a User Logoff Registry Hive Action
1. In the Policy Configuration navigation tree, create a new node in the User > Logoff trigger.
2. Rename the node to Export Registry Settings or similar.
3. In the Actions ribbon, select Registry > Registry Hiving to display the Registry Hiving dialog.
4. Enter a Title for example, Save User Profile Settings.
5. Enter or browse to the location where the settings will be saved, preferably on a network share
so that settings can be accessed from multiple computers. It is not necessary to create separate
folders for each user as Environment Manager will separate the user information being saved
using the following format:
<registry key name>.<domain>_<username>
6. Select Export the hive from the registry to file.
7. Click Add. The Registry Key dialog box displays.
8. Enter the key or select the ellipsis in the Key box to display the Browse Registry dialog box.
9. Select the areas of the HKCU registry you want to hive out. This can be from the local computer
registry or a registry on another machine.
Copyright © 2019 , Ivanti. All Rights Reserved. Privacy and Legal.
Page 160 of 237
Environment Manager 2019.1 Policy Product Guide

10. Enter the Value for the key and select the required options:
o
Use default value name - Use the default value name from the registry for the key. If
selected and the value does not contain any data, the hive will fail.
o
Restore Format:
o
Replace - Exports as a binary file which replaces any existing values or sub-keys on
import.
o
Merge - Exports as a Microsoft Regedit 5 file which merges with any existing values or
sub-keys on import.
o
Override File Name - Deselect Use registry key as file name to edit the default file path
in the File Name field set when selecting the key.
11. Click OK to add the registry key to the Registry Hiving dialog box.
12. Repeat the Add process for each registry key you want to hive out.
13. Click OK to save the action.
Once you have created the registry hive actions that will apply at logoff, you must configure
Environment Manager to import these registry settings when the user next logs on.
Create a User Logon Registry Hive Action
1. Prior to using this procedure, you first need to create the registry hive actions that will apply at
logoff. Use the link below to access that procedure.
2. In the Policy Configuration navigation tree, create a new node in the User > Logoff node.
3. Rename the node Import Registry Settings or similar.
4. In the Actions ribbon, select Registry > Registry Hiving to display the Registry Hiving dialog.
5. Navigate back to User > Logoff >Export Registry Settings node created earlier.
6. Right-click on the Save User Profile Settings action and select Copy.
7. Navigate back to User > Logon >Import Registry Settings node.
8. Right-click in the Actions list in the Node work area and select Paste.
9. Double-click the Hive Registry action that has just been copied. The Registry Hiving dialog
box displays.
10. Rename the title to Load User Profile Settings.
11. Select Import the hive from file to the registry and click OK.
The action is saved and renamed.
Registry Key Manipulation
Registry settings can be used to personalize applications and Windows Settings. This can be done in
Policy Configuration and User Personalization. However, it is recommended you only use Policy
Configuration or User Personalization to manage personalization to ensure optimum performance.
The Windows registry is divided into five separate keys:
Copyright © 2019 , Ivanti. All Rights Reserved. Privacy and Legal.
Page 161 of 237
Environment Manager 2019.1 Policy Product Guide

l HKEY_CLASSES_ROOT - Contains information relating to file associations and for object linking
and embedding.
l HKEY_CURRENT_USER - Contains the profile settings for the current user.
l HKEY_LOCAL_MACHINE - Contains configuration settings for the computer itself.
l HKEY_USERS - Contains all the actively loaded user profiles on the computer.
l HKEY_CURRENT_CONFIG - Contains settings related to installed software and device drivers.
Whenever a user makes any changes to their personal settings, the information is stored in the HKEY_
CURRENT_USER (HKCU) hive area of the registry. Therefore, if the registry settings are saved out when
the user logs off and re-imported the next time the user logs on, the user's personal settings are
available to roam with them, even if they are using a mandatory profile.
This is achieved using the Registry Hiving action within Environment Manager.
Registry Hiving
Whenever a user makes any changes to their personal settings, the information is stored in the HKEY_
CURRENT_USER (HKCU) hive area of the registry. Therefore, if the registry settings are saved out when
the user logs off and re-imported the next time the user logs on, the user’s personal settings are
available to roam with them, even if they are using a mandatory profile.
This is achieved using the Registry Hiving action within Environment Manager.
This section describes how to create a User Logoff Registry Action and a User Logon Registry Action to
hive out and back in user profile settings.
You first need to create the registry hive actions that will apply at logoff, and then you need to
configure Environment Manager to import these registry settings when the user next logs on.
Merge and Replace Restore Formats
Registry hives can be exported in one of two formats using the Registry Hive action: Replace or Merge.
It is important to select the right format for each key as some keys may not be suitable for a particular
format due to the different behavior of the formats.
The Replace format is a binary file whereas an export in Merge format produces a text file in the
Microsoft Regedit 5 format. Both contain the data for the exported registry key, all sub-keys and
values.
When importing a binary file exported in Replace mode, the entire key is replaced with the contents of
the file. As a result, any values or sub-keys which have been added since the export, are deleted.
When a Merge mode text file is imported, only the keys and values present in the export are applied to
the registry. As a result, any values or sub-keys which have been added since the export, will still be
present in the registry following the import.
Registry values, if individually selected, are always exported as a text file regardless of the mode.
Copyright © 2019 , Ivanti. All Rights Reserved. Privacy and Legal.
Page 162 of 237
Environment Manager 2019.1 Policy Product Guide

Example 1
HKCU\Software\AppSense is exported in Replace mode.
Sub-key HKCU\Software\AppSense\Settings is added after the export.
On import, the sub-key is deleted.
Example 2
HKCU\Software\AppSense is exported in Merge mode.
Sub-key HKCU\Software\AppSense\Settings is added after the export.
On import, the sub-key is not deleted.
File and Folder Actions
Use these actions to manage files and folders on user endpoints. Folders can be created, copied and
deleted at any of the defined trigger points. Files can be copied, deleted, moved, renamed and have
certain attributes amended. When used in conjunction with triggers and condition, these actions
enable user access to be controlled ensuring they have access to those files and folders they require
and restrict access to those they do not require.
Using triggers and conditions, a folder policy can be created for different types of user, tailoring a
session to their specific needs.
In the Actions ribbon, select File & Folder and choose one of the action types.
Copy File Action
Copy a file from one location to another when a trigger or condition is satisfied. For example, copy an
updated file from the user’s C drive to a network drive at shutdown.
Use the Files to Copy tab to select where to copy the files from and to. The source file can be renamed
on copy by adding a new filename and extension to the target path. For example:
Field Value
Source %USERPROFILE%\Documents\AppSense\config.aemp
Target %USERPROFILE%\Desktop
Change the target to %USERPROFILE%\Desktop\AppSense.aemp
The source file is copied to the user’s desktop but will be named AppSense.aemp.
If multiple files are added in the Files to Copy tab a separate action is automatically created for each in
the work area. Select the Fail if Exists checkbox to stop the action for endpoints where the file already
exists.
Copyright © 2019 , Ivanti. All Rights Reserved. Privacy and Legal.
Page 163 of 237
Environment Manager 2019.1 Policy Product Guide

Create a Copy File Action
1. In the Policy Configuration navigation tree, select a node or condition.
2. In the Actions ribbon, select File & Folder > Copy File. The Copy File dialog displays showing
the Files to Copy tab.
3. Click Add.
4. In the Source field, use the ellipsis (...) to navigate to thefile you want to copy.
5. In the Target field, navigate to the folder to which the source file will be copied when the action
is triggered. If the target path is followed by a backslash, the target folder is created if it does
not exist.
The source file can be renamed on copy by adding a new filename with extension to the target
path. For example,
o
Source - %SystemDrive%\Documents\Work\Today.doc
o
Target - \\Server01\Update\Archive1.doc
The source file, Today.doc, is copied but renamed to Archive1 in the target folder.
6. If required, select the Fail if Exists checkbox. This stops the action for endpoints where the
folder already exists at the target.
7. Repeat steps 3 to 6 to create further actions within the dialog. A separate action is created for
each action in the selected node. Highlight an action and click Remove to delete an action from
the dialog box.
8. Complete the optional tabs as required.
o
General
o
Run As
o
Personalization
o
Conditions
o
File Extension Exclusions
See "Configuring Actions" on page156.
9. Click OK.
10. Each action configured in the dialog is created in the selected node.
Delete File Action
Specify a path and file name to delete when a trigger and/or condition is satisfied. For example, this
condition could be used to delete a file containing sensitive information, when any user without
Administrator rights logs on.
Conditions and File Exclusions can be configured using the appropriate standard tabs.
Copyright © 2019 , Ivanti. All Rights Reserved. Privacy and Legal.
Page 164 of 237
Environment Manager 2019.1 Policy Product Guide

Create a Delete File Action
1. Select the Policy Configuration navigation button.
2. Select a node or condition.
3. In the Actions ribbon, select File & Folder > Delete File.
The Delete File dialog displays showing the Select File tab.
4. Click Add.
5. In the Source field, use the ellipsis (...) to navigate to thefile you want to delete.
6. If required, select the Force delete checkbox. This ignoresthe Read-only attribute enabling the
file to be deleted. If this option is not selected, read-only files are not deleted.
7. Repeat steps 3 to 6 to create further actions within the dialog. A separate action is created for
each action in the selected node. Highlight an action and click Remove to delete an action from
the dialog box.
8. Complete the optional tabs as required:
o
General
o
Run As
o
Personalization
o
Conditions
o
File Extension Exclusions
See Configuring Actions
9. Click OK.
Each action in the dialog is created in the selected node.
Example: Delete a file if it was last accessed more than a year ago
1. Select the Policy Configuration navigation button.
2. Select a node or condition.
3. In the Actions ribbon, select File & Folder > Delete File.
The Delete File dialog displays showing the Select File tab.
4. Click Add.
5. In the Source field, click the ellipsis (...) and navigate to thefile you want to delete.
6. If required, select the Force delete checkbox.
This ignoresthe Read-only attribute enabling the file to be deleted. If this option is not
selected, read-only files are not deleted.
7. Select the Condition tab.
Copyright © 2019 , Ivanti. All Rights Reserved. Privacy and Legal.
Page 165 of 237
Environment Manager 2019.1 Policy Product Guide

8. Select Use file conditions.
The condition options in the dialog become active.
9. In the Property drop-down, select Last Modified Time.
10. In the When drop-down, select Is Older Than.
The Date/Time boxes become inactive.
11. In the Days spinbox, enter a time period in whole days, in this case 365.
You can enter between 1 - 999 days. You cannot enter fractions of days.
12. Click OK.
The action is added to the selected node.
13. Save the configuration.
Move File Action
This action uses the same features and options as the Copy File action to move a file from one
location to another when a trigger or condition is satisfied.
Create a Move File Action
1. Select the Policy Configuration navigation button.
2. Select a node or condition.
3. In the Actions ribbon, select File & Folder > Move File.
The Move File dialog displays showing the Files to Move tab.
4. Click Add.
5. In the Source field, use the ellipsis (...) to navigate to thefile you want to move.
6. In the Target field, navigate to the folder to which the source file will be moved when the action
is triggered.
The source file can be renamed byadding a new filename and extension to the target path. For
example,
o
Source - %SystemDrive%\Documents\Work\Today.doc
o
Target - \\Server01\Update\Archive1.doc
The source file, Today.doc, is moved but renamed to Archive1 in the target folder.
7. If required, select the Fail if Exists checkbox. This stops the action for endpoints where the
folder already exists at the target.
Copyright © 2019 , Ivanti. All Rights Reserved. Privacy and Legal.
Page 166 of 237
Environment Manager 2019.1 Policy Product Guide

8. Repeat steps 3 to 6 to create further actions within the dialog. A separate action is created for
each action in the selected node.
Highlight an action and click Remove to delete an action from the dialog box. The action will
not be created.
9. Complete the optional tabs as required:
o
General
o
Run As
o
Personalizaton
o
Conditions
o
File Extension Exclusions
See Configuring Actions.
10. Click OK.
Each action in the dialog is created in the selected node.
Rename File Action
Rename a file at a specified location when a trigger or condition is satisfied.
Create a Rename File Action
1. Select the Policy Configuration navigation button.
2. Select a node or condition.
3. In the Actions ribbon, select File & Folder > Rename File. The Rename File dialog displays
showing the File to Rename tab.
4. Click Add.
5. In the Rename From field, use the ellipsis (...) to navigate to thefile you want to rename.
6. In the Rename To field, enter the new name for the file including the file extension.
7. Repeat steps 3 to 6 to create further actions within the dialog. A separate action is created for
each action in the selected node.
Highlight an action and click Remove to delete an action from the dialog box. The action will
not be created.
8. Complete the optional tabs as required:
o
General
o
Run As
o
Personalization
See "Configuring Actions" on page156.
Copyright © 2019 , Ivanti. All Rights Reserved. Privacy and Legal.
Page 167 of 237
Environment Manager 2019.1 Policy Product Guide

9. Click OK.
10. Each action in the dialog is created in the selected node.
Modify File Attributes Action
Change the attributes, commonly found within the properties of an existing file.For example, you
could make a file writable for administrators but read only for all other users, at logon. Each attribute
can be Set, Unset or Ignored. When the action is triggered on a user’s endpoint, those attributes
defined, will be applied to the selected file.
Create a Modify File Attribute Action
1. Select the Policy Configuration navigation button.
2. Select the node or condition.
3. In the Actions ribbon, select File & Folder > Modify File Attributes. The Modify File
Attributes dialog displays showing the Set File Attribute tab.
4. In the File field, use the ellipsis (...) to navigate to thefile you want to update.
5. Select an action for each of the following attributes:
o
Read-Only
o
Hidden
o
System
o
Archive
o
Temporary
Each attribute can be set to one of the following:
o
Set - Applies the attribute
o
Unset - Does not alter the attribute
o
Ignore - Does not alter the current setting
6. Complete the optional tabs as required:
o
General
o
Run As
See Configuring Actions.
7. Click OK.
8. The action iscreated in the selected node. When the action is triggered on a user’s endpoint,
the attributes defined, are applied to the selected file.
Copyright © 2019 , Ivanti. All Rights Reserved. Privacy and Legal.
Page 168 of 237
Environment Manager 2019.1 Policy Product Guide

File Type Associations Action
This action sets default file extensions for selected applications. File associations created from this
action overwrite default associations but users maintain the ability to override using the Open with...
command or the Default Programs Control Panel settings. When an association is made, files use the
icon associated with the executable when displayed in Windows.
1. In the Policy Configuration navigation tree, select or create a node or condition on the Pre-
Desktop, Session Unlock or Session Reconnect trigger.
2. From the Actions ribbon, select File & Folder > File Type Associations.
3. Enter a valid application path or use the ellipsis to navigate to the required application.
When the action runs, clients do not check that applications exists. File type
associations are created regardless of whether an application exists on endpoints.
4. Click Add.
5. Enter an extension or use the ellipsis to navigate to one.
6. Multiple file extensions can be associated with an application. Use CTRL to select multiple file
extensions from the list or repeat steps 3 and 4.
7. Click OK to save the action.
FTA Roaming
Environment Manager now includes an in-built Windows Settings Group (WSG) template to enable
roaming of Windows 10 File Type Associations (FTAs). The template allows the user to select default
programs for opening each file type, and for the selection to persist across sessions and devices. The
template can be added to Personalization groups as required. See Windows Settings Groups.
The template is enabled for users of Environment Manager Policy and Personalization together
(combined console).
For FTA roaming to work an action is required at computer startup to delete the Windows default
associations xml file from the endpoint.
Enable FTA Roaming for Environment Manager Policy and Personalization
1. From the Policy Configuration navigation pane ensure your Personalization Servers list is
maintained. See Personalization Servers in the Combined Console.
2. In the User Personalization navigation pane click Connect.
Note that the personalization server must be added to your configuration before FTA
roaming is deployed to endpoints.
3. In the User Personalization navigation tree select the personalization group required.
Copyright © 2019 , Ivanti. All Rights Reserved. Privacy and Legal.
Page 169 of 237
Environment Manager 2019.1 Policy Product Guide

4. Select the Windows Personalization tab.
5. Click Add.
The available Windows Settings Groups are listed in the navigation tree.
6. Select the File Type Association template and click OK.
The template is added to your personalization group.
7. To view the details of the template click Personalization Settings > Windows Personalization
> File Type Associations:
Note that in the Description field you are prompted to deploy a policy action to delete the
following file from the endpoint:
%systemdrive%\Windows\System32\OEMDefaultAssociations.xml.
8. Select and copy the file name from the Description field to your clipboard.
9. In the Policy Configuration navigation pane, create a new node or select an existing node in
the Computer > Startup trigger.
10. In the Actions ribbon, select File & Folder > Delete File then paste the copied name file
name from your clipboard.
Copyright © 2019 , Ivanti. All Rights Reserved. Privacy and Legal.
Page 170 of 237
Environment Manager 2019.1 Policy Product Guide

11. Save your configuration.
The configuration can now be deployed to endpoints.
Create Text File Action
When triggered, this action creates a text file at a specified location. This could be any type of plain
text file such as LOG, CSV, TXT or JS.
1. In the Policy Configuration navigation tree, select or create a node or condition.
2. In the Actions ribbon, select File & Folder > Create Text File.
3. In the File field, enter the required path and filename or use the ellipsis (...) to navigate to the
text file to create on managed endpoints. If the path does not already exist on an endpoint, it
will be created.
4. Apply the required behavior if the file already exists on an endpoint:
o
Fail if file already exists - The action fails and the existing file remains on endpoints. A
fail event is reported to any configured log. If the option is not selected, the action fails
but does not record an error.
o
Overwrite existing file - The existing file is replaced by the file defined in this action.
5. In the Editor field, enter any text or script to populate the file with.
6. Select the file attributes to apply to the created file:
o
Read-only
o
Hidden
o
System
o
Archive
o
Temporary
7. Select the required character encoding for the file:
o
ANSI
o
UTF-8
o
Unicode (UTF-16)
8. Complete the optional tabs as required:
o
General
o
Run As
See "Configuring Actions" on page156.
9. Click OK to create the action.
Update Text File Action
When triggered, this action replaces text in an editable text file. This could be any type of plain text file
such as LOG, CSV, TXT or JS.
Copyright © 2019 , Ivanti. All Rights Reserved. Privacy and Legal.
Page 171 of 237
Environment Manager 2019.1 Policy Product Guide

Create an Update Text File Action
1. Select the node or condition to add the action.
2. In the Actions ribbon, select File & Folder > Text File Update.
3. In the File field, use the ellipsis (...) to navigate to the text file you want to update.
4. In the Search For field, enter the text which you want to update. The search will look for the
exact sequence of words entered.
5. Use the checkboxes to apply the following settings.
o
Match Case - Will only match text which has the same case as the Search For text
o
Use Regular Expressions - Allows regular expressions to be used to broaden the search
criteria
o
Multi-Line Mode - Select if either text field contains more than one line of text.
6. In the Replace With field, enter the text you want to update the file with.
7. Complete the optional tabs as required.
o
General
o
Run As
See "Configuring Actions" on page156.
8. Click OK to create the action.
Create Folder Action
When triggered, creates a folder at a defined location on a user’s endpoint.
Copy Folder Actions
There are three different actions which can be used to copy folders.
Copy
Copy the contents of a folder from the source to the target folder as defined in the Copy Existing
Folder tab.
Only the contents of the folder are copied, the actual folder is not recreated at the destination
location. For example, if the folder %USERPROFILE%\Documents\Information is specified as the
source folder and %USERPROFILE%\Desktop is set as the target, the contents of the Information
folder are copied directly to the desktop. In order to place them in a corresponding folder, manually
amend the target field to:
%USERPROFILE%\Desktop\Information.
Copyright © 2019 , Ivanti. All Rights Reserved. Privacy and Legal.
Page 172 of 237
Environment Manager 2019.1 Policy Product Guide

If a folder copy action contains files and all those files fail to match the conditions set in the
action, the files are not copied but the folder is still created. Prior to Environment Manager 8.1
the target folder is not created if the files fail the conditions.
Mirror
The Mirror Copy Folder action creates an exact copy of a folder or folder structure and all the files
contained within, at the target location specified in the Copy Folder dialog. Files which already exist in
the target are overwritten from the source and any supplementary files in the target are deleted.
Synchronize
The Synchronize Copy Folder action combines the contents of two folders to produce a file and folder
structure which is identical in both locations. If two files of the same name, type and location are
encountered, the most recently modified is synchronized.
Use the Copy Folder dialog to specify the source and target folders to be synchronized when
triggered.
Create a Copy Folder Action
1. Select the Policy Configuration navigation button.
2. On the Actions ribbon, select File & Folder > Copy Folder.
The Copy Folder dialog displays showing the Copy Existing Folder tab.
When using Copy Folder actions, Read-only and Hidden attributes of folders and files are
copied - if a file being copied is read-only in the source, it will be read-only when copied to the
target. Advanced attributes for archiving, indexing, compressing and encrypting are not copied
and revert to their default settings.
3. Select the type of copy you want to perform:
o
Copy - Copy the contents of a folder from the source to the target folder as defined in
the Copy Existing Folder tab. Only the contents of the folder are copied, the actual folder
is not recreated at the destination location.
o
Mirror- The Mirror Folder action creates an exact copy of a folder or folder structure
and all the files contained within, at the target location specified in the Mirror Folder
dialog. Files which already exist in the target are overwritten from the source and any
supplementary files in the target are deleted.
o
Sync- The Synchronize Folder action combines the contents of two folders to produce a
file and folder structure which is identical in both locations. If two files of the same name,
type and location are encountered, the most recently modified is synchronized.
Use the Synchronize Folder dialog to specify the source and target folders to be
synchronized when triggered.
Copyright © 2019 , Ivanti. All Rights Reserved. Privacy and Legal.
Page 173 of 237
Environment Manager 2019.1 Policy Product Guide

4. From the Copy sub-folders drop-down, select the required behavior:
o
None - Only the top level folder and its contents are copied.
o
All - All sub folders are copied.
o
Specify the number of sub-folder levels - Sub-folders and their contents are copied to
the level selected.
5. Click Add.
6. In the Source field, use the ellipsis (...) to navigate to thefolder you want to copy.
7. In the Target field, navigate to the folder to which the source folder will be copied when the
action is triggered.
8. Files which already exist in the target folder are copied if the same file in the source folder has
changed. Environment Manager uses the file size and time stamp to determine whether a file
has changed. Updated file attributes, such as Read-only, do not denote a changed file.
9. Click the Options field and select as required. The available options are dependent on the type
of Copy Folder action selected. See Copy Folder Options for details.
10. Repeat steps 3 to 7 to create further actions within the dialog.
Highlight an action and click Remove to delete an action from the dialog box. The action will
not be created.
11. Complete the optional tabs as required:
o
General
o
Run As
o
Personalization
o
Conditions
o
File Extension Exclusions
o
Path Exclusion
See "Configuring Actions" on page156.
12. Click OK.
Each action configured in the dialog is created in the selected node.
If a folder copy action contains files and all those files fail to match the conditions set in the
action, the files arenot copied but the folder is still created.
Copy Folder Options
Depending on the type of copy, a combination of the following options are available from the Options
column for the action:
Option Copy Mirror Sync
Continue on error - If selected and an error occurs during execution, the
Copyright © 2019 , Ivanti. All Rights Reserved. Privacy and Legal.
Page 174 of 237
Environment Manager 2019.1 Policy Product Guide

Option Copy Mirror Sync
copy action continues. With this option checked and multiple files selected
for copying, if one file fails to copy the action continues and the action is
attempted for the remaining files. Failed copies are not retried. If the
option is not checked, an error will be thrown and the action stops. The
overall status of the action will still be a fail if this option is selected and an
error occurs.
Overwrite newer files - Use this option to determine the behavior when
attempting to copy files which already exist in the Destination folder. If the
option is selected and a newer version of a file exists in the Source folder,
the version in the Destination folder is overwritten. If the option is not
selected, the version of the file in the Destination folder is not overwritten.
This does not cause the action to fail but to move on to the next file in the
copy action. This option is selected by default.
Fail if folder exists - Select to ignore the operation if a corresponding
folder exists in the target. The action fails if the target folder already exists.
Exclude junction points - Select whether to include or exclude folders and
files identified as NTFS junction points or symbolic links in copy folder
actions. For further information about junction points, see
https://support.microsoft.com/en-us
Copy file attributes - Includes the Read-only and Hidden attributes of the
source folder in the copy - if a file being copied as part of a Copy Folder
action is read-only in the source, it will be read-only when copied to the
target. Advanced attributes for archiving, indexing, compressing and
encrypting are not copied and revert to their default settings.
Copy security attributes - Include the security permissions settings for
each user and group that has been assigned access rights for the folder
being copied. Note: The account executing the action must have the
appropriate security permissions for this setting.
Copy owner information - Copy owner information from the source.
Note
The account executing the action must have the appropriate
security permissions for this setting.
Include deleted files - When folders are synchronized, any files which have
been removed from either the source or the target folder since the last
sync, are removed from the corresponding location. This option is selected
Copyright © 2019 , Ivanti. All Rights Reserved. Privacy and Legal.
Page 175 of 237
Environment Manager 2019.1 Policy Product Guide

Option Copy Mirror Sync
by default.
For Copy Folder actions, exclusions and conditions can be applied using the standard action tabs.
Mirror and Synchronize Folder Actions Configuration
Parallel copy actions between the same folder should be avoided. For example:
When a node containing the above actions is run, unexpected behavior could occur as it is not clear
whether folders A and B should be mirrored or synchronized first.
In such scenarios the actions should be configured sequentially to clearly define the action:
The folders have been synchronized prior to the mirror.
Parallel copy actions between unrelated folders function as normal.
Synchronize Folder Behavior
The sections below explain Synchronize Folder behavior in various circumstances.
Copyright © 2019 , Ivanti. All Rights Reserved. Privacy and Legal.
Page 176 of 237
Environment Manager 2019.1 Policy Product Guide

Delete Behavior
Following synchronization, the source and target folders contain the same files. If a file is deleted from
one of the locations, it will be copied back when the folders are next synchronized - files are always
synchronized, never deleted.
Action Source Target
Create file in Source folder File A
Synchronize Source and Target File A File A
Delete file from Target folder File A
Synchronize Target and Source File A File A
However, if you select the Include deleted files option, when synchronized, the deletion of File A from
the target folder would be reflected in the source:
Action Source Target
Create file in Source folder File A
Synchronize Source and Target File A File A
Delete file from Target folder File A
Synchronize Target and Source
Rename Behavior
Following a folder synchronize, if a file is renamed in either the source or target folder, when the
folders are next synchronized, the original file and the renamed file will be present in both locations.
Action Source Target
Create file in Source folder File A
Synchronize Source and Target File A File A
Rename file in Target Folder File A File B
Synchronize Target and Source File A File B File A File B
As with deletes, the results are different if you select the Include deleted files option. When
synchronized, a file renamed in either the source or target folder, will be renamed in the opposite
location. In the example below, in the target location, File A is renamed to the File B. When the
locations are synchronized, the file is renamed in the source.
Copyright © 2019 , Ivanti. All Rights Reserved. Privacy and Legal.
Page 177 of 237
Environment Manager 2019.1 Policy Product Guide

Action Source Target
Create file in Source folder File A
Synchronize Source and Target File A File A
Rename file in Target Folder File A File B
Synchronize Target and Source File B File B
Delete Folder Action
Delete a selected folder from the user’s endpoint. The folder and all contents are deleted when the
associated trigger and/or condition is satisfied.
Create a Delete Folder Action
1. Select the Policy Configuration navigation button.
2. Select a node or condition.
3. In the Actions ribbon, select File & Folder > Delete Folder. The Delete Folder dialog displays
showing the Delete Folder tab.
4. Click Add.
5. In the Source field, use the ellipsis (...) to navigate to thefile you want to delete.
6. If required, select the Force delete checkbox. This ignoresthe Read-only attribute enabling the
file to be deleted. If this option is not selected, read-only files are not deleted.
7. Repeat steps 3 to 6 to create further actions within the dialog. A separate action is created for
each action in the selected node.;
Highlight an action and click Remove to delete an action from the dialog box. The action will
not be created.
8. Complete the optional tabs as required:
o
General
o
Run As
o
Personalization
o
Conditions
See Configuring Actions.
9. Click OK.
Each action in the dialog is created in the selected node.
Copyright © 2019 , Ivanti. All Rights Reserved. Privacy and Legal.
Page 178 of 237
Environment Manager 2019.1 Policy Product Guide

Folder Redirection Action
Folder redirection allows a user’s personal files and settings to be saved to another location at logon.
Folders can be redirected to any available location including a local folder, a network drive or the
user’s home drive, which is outside the profile itself. This helps users maintain access to their files and
settings when roaming between machines and improves loading times during logon.
Create a Folder Redirection Action
1. Select the Policy Configuration navigation button.
2. Create a new node or select and existing node in the User > Logon trigger.
3. Select File & Folder > Folder Redirection from the Actions ribbon.
The Folder Redirection dialog displays.
4. From the Source drop-down, select the folder you want to redirect.
5. Select the destination for the redirection or use the ellipses (...) to navigate to the required
folder.
UNC paths (including mapped drives which point to a network location) are not
supported as destinations for the History, Temporary Burn Folder (CD Burning) and
Temporary Internet Files (Cache) folders.
6. Select the copy method:
o
Do Not Copy - Files are not copied from the original folder to the redirected folder.
o
Use Folder Redirection Copy - Files are copied from the original folder to the redirected
folder using the Windows folder redirection action.
o
Use Environment Manager Copy - Files are copied from the original folder to the
redirected folder using an Environment Manager Folder Copy action.
Copyright © 2019 , Ivanti. All Rights Reserved. Privacy and Legal.
Page 179 of 237
Environment Manager 2019.1 Policy Product Guide

7. Select the Options to apply to the redirection:
o
Only copy modified files - Copy files that have been modified in the original folder since
the previous copy. Available only if Use Environment Manager Copy is selected.
o
Do not redirect if copy fails - Do not apply the folder redirection if the copy action fails.
Available only if Use Environment Manager Copy is selected.
o
Delete contents from original folder after copying - Delete files and subfolders from
the original folder after the copy is complete and the redirection is applied. Available only
if Use Folder Redirection Copy or Use Environment Manager Copy is selected.
o
Only user has permission to access redirected folder - Permissions are set on the
redirected folder to allow only the logged on user to access the folder.
o
Maintain access permissions to the source folder - Following the redirection, access to
the original folder is maintained for the logged on user.
o
Make redirected folder available offline - The redirected folder is available if the end
point enters an offline state after the redirection.
o
Remove the folder redirection at log off or configuration change - The folder
redirection is not applied permanently and is removed at user log off or when the
configuration changes.
8. The Only user has permission to access the redirected folder and Maintain access permissions to the
source folder cannot be enabled in the same action.
9. Click OK to save the action.
Folder Redirection Sources
The following folders can be used in the Folder Redirection action and are compatible with the
operating systems as shown.
Source Win7 Win8 Win10
Administrative Tools
AppData (Roaming)
Contacts
Cookies
Desktop
Documents (My Documents)
Downloads
Favorites
History
Copyright © 2019 , Ivanti. All Rights Reserved. Privacy and Legal.
Page 180 of 237
Environment Manager 2019.1 Policy Product Guide

Source Win7 Win8 Win10
Links
Music (My Music)
Network Shortcuts (NetHood)
Pictures (My Pictures)
Printer Shortcuts (PrintHood)
Programs
Quick Launch
Recent Items (My Recent Documents)
Saved Games
Searches
SendTo
Slide Shows
Start Menu
Startup
Templates
Temporary Burn Folder (CD Burning)
Temporary Internet Files (Cache)
Videos (My Videos)
Drives and Printers Actions
These actions map and unmap printers and drives as specified. They are useful for setting printers and
mapping drives when users log on to a specific computer, giving access to printers and drives
appropriate to their location.
Copyright © 2019 , Ivanti. All Rights Reserved. Privacy and Legal.
Page 181 of 237
Environment Manager 2019.1 Policy Product Guide

Map Drive
Create an action to map a drive on managed endpoints when triggered. For example, mapping users
to a shared drive at logon so they have access to required resources. Drives are automatically
unmapped at the end of a user session or following a configuration change unless the action is
created under compatible triggers and the Permanent option is selected. Any drive can be mapped
including SharePoint drives and local folders.
1. In the Policy Configuration navigation tree, select or create a node or condition.
2. In the Actions ribbon, select Drives & Printers > Map Drive.
Copyright © 2019 , Ivanti. All Rights Reserved. Privacy and Legal.
Page 182 of 237
Environment Manager 2019.1 Policy Product Guide

3. Click Add and configure the following settings:
Field/Setting Description
Drive Select which letter the drive maps to. The Next option is available on the
Pre-Desktop and Desktop Created Logon triggers. This will attempt to map
to the next unused drive letter.
If you are using a mixture of actions that set specific drives and actions that
use 'Next' drive setting, run the specific drive mappings first. This ensures all
drives map correctly. To do this, make 'Next' map drive actions dependent
children of specific drive mappings or create them in dependent child nodes.
Exclude Select which drive letters are ignored when the next available drive option is
selected. The next available drive which is not on the exclude list is mapped.
This is available on the Pre-Desktop and Desktop Created Logon triggers if
Next has been selected as the drive.
Path Enter the path or use the ellipsis to navigate to the required location.
Friendly
Name
A name that will be displayed instead of the path on managed endpoints.
The friendly name persists on endpoints unless explicitly cleared by mapping
the same drive without a friendly name. Unmapping the drive does not clear
the name.
Override Removes existing mapping to the specified drive on endpoints and remaps
the drive based on the settings defined in the action.
Hide The drive is mapped but is not visible in Windows Explorer on endpoints.
Hidden drives can still be accessed by entering the drive letter in the
Windows Explorer address bar or in a command window. This option is only
available if the action is added to the Pre-Destop Logon trigger.
Permanent The drive mapping persists on managed endpoints beyond the current
session. If not selected, the drive is unmapped at logoff or following a
configuration change. This option is only available on compatible triggers.
The Permanent option is not available on the following triggers:
Pre-Desktop, Process Started, Network Connected, Session
Reconnected, Session Locked, and Session Unlocked.
Copyright © 2019 , Ivanti. All Rights Reserved. Privacy and Legal.
Page 183 of 237
Environment Manager 2019.1 Policy Product Guide

4. Complete the optional tabs as required:
o
General
o
Connect As
See "Configuring Actions" on page156.
5. Click OK to save the action.
Unmap Drive
Create an action which unmaps a drive when triggered. For example, unmapping a drive when a user
disconnects from the network.
1. In the Policy Configuration navigation tree, select or create a node or condition.
2. In the Actions ribbon, select Drives & Printers > Unmap Drive.
3. Select the drive to disconnect.
4. Complete the optional tabs as required.
o
General
o
Run As
See "Configuring Actions" on page156.
5. Click OK to save the action.
Map Printer
Create an action to map a printer for users. For example, by combining this action with Computer IP
Address conditions, users are automatically connected to the correct printer for their location.
1. In the Policy Configuration navigation tree, select or create a node or condition.
2. In the Actions ribbon, select Drives & Printers > Map Printer.
The Map Printer dialog displays.
Copyright © 2019 , Ivanti. All Rights Reserved. Privacy and Legal.
Page 184 of 237
Environment Manager 2019.1 Policy Product Guide

3. Complete the following fields and apply the required settings:
Field/Setting Description
Remote
printer path
Enter the printer address or click the ellipses and select the required printer.
The address can be in UNC, Direct IP or HTTP. If using an IP address, the
default port, 9100, is used. To use an alternative port, add it to the end of
the IP address, separated by a colon, for example, 123.456.789.012:9101.
Friendly
Name
If using an IP address for a printer, enter an optional friendly name. This
allows you to easily identify the printer.
Unmap at
logoff
Apply as required to determine whether the printer mapping persists
beyond the user's current session or is unmapped when the user logs off.
Set as
default
printer
Select to make this printer the users' default.
Retries Enter the number of times endpoints will attempt to connect to the selected
printer. If the number of retries is exceeded, the printer is not mapped.
Timeout
(secs)
Enter the time, in seconds, to wait between connection attempts.
Driver
Location
If using an IP address for a printer, enter or select the location of the
relevant printer driver INF file. If the driver specified in the Driver Name field
does not already exist on an endpoint, the driver installs from the specified
location. If the driver fails to install, the printer is not mapped.
Driver Name If using an IP address for a printer, enter the name of the required driver. If
already installed on endpoints, the printer is mapped. If not installed, the
driver is installed from the specified driver location.
4. Complete the optional tabs as required.
o
General
o
Connect As
See "Configuring Actions" on page156.
5. Click OK to save the action.
Set Default Printer
Create an action to set the default printer for users. For example, by combining this action with
Computer IP Address conditions, users are automatically connected to the correct printer for their
location.
Copyright © 2019 , Ivanti. All Rights Reserved. Privacy and Legal.
Page 185 of 237
Environment Manager 2019.1 Policy Product Guide

1. In the Policy Configuration navigation tree, select or create a node or condition.
2. In the Actions ribbon, select Drives & Printers > Set Default Printer.
3. Enter the Remote printer path or click the ellipses and select the required printer.
4. The address can be in UNC, Direct IP or HTTP. If using an IP address, the default port, 9100, is
used. To use an alternative port, add it to the end of the IP address, separated by a colon, for
example, 123.456.789.012:9101.
5. Apply the Unmap at logoff setting as required to determine whether the printer mapping
persists beyond the user's current session or is unmapped when the user logs off.
6. Complete the optional tabs as required.
o
General
o
Connect As
See "Configuring Actions" on page156.
7. Click OK to save the action.
Unmap Printer
Create an action to unmap a specific printer or all existing printer connections when triggered.
1. In the Policy Configuration navigation tree, select or create a node or condition.
2. In the Actions ribbon, select Drives & Printers > Unmap Printer.
3. Do one of the following:
o
To unmap all existing printer connections, select Unmap All.
o
To unmap a specific printer, enter the Remote printer path or click the ellipses and
select the required printer.
The address can be in UNC, Direct IP or HTTP. If using an IP address, the default port,
9100, is used. To use an alternative port, add it to the end of the IP address, separated by
a colon, for example, 123.456.789.012:9101.
4. Click OK to save the action.
ODBC (Open Database Connectivity) Actions
Create, Amend and Delete ODBC actions. An action could be triggered when a user opens a particular
application, enabling access to a database containing relevant data.
ODBC connections enable a computer to access data from any application, regardless of the database
management system (DBMS). Use this action to establish a connection between a computer and a
database stored on another system. The following actions are available:
l Create ODBC Connection
l Amend ODBC Connection
Copyright © 2019 , Ivanti. All Rights Reserved. Privacy and Legal.
Page 186 of 237
Environment Manager 2019.1 Policy Product Guide

l Delete ODBC Connection
To specify an ODBC connection for any of the three actions select the Connection Details tab and
complete the following fields:
Field Description
Connection
Name
A unique name to identify the connection.
Driver Type A drop down list containing the available driver types
Current
Connections
The list is automatically populated with all available connections on the current
computer, based on the driver type selected.
Once the connection is defined, specific programs can be told to use the connection to access
information on that database.
Custom and Execute Actions
Custom Action
Custom Actions can be created using PowerShell, Visual Basic or Java Script to allow processing not
available from other Environment Manager actions. The scripts are held within the XML configuration,
copied to disk at runtime, executed and then deleted upon completion.
Actions with invalid scripts return a fail and any child actions do not run. Prior to Environment
Manager 8.1 custom actions passed whether the script was valid or not.
Separate auditing events are created for successful and unsuccessful actions, these can be viewed
through the Auditing button in the Manage ribbon.
Example script
' ==========================================================
' Checks to see if a process (EMCoreService.exe) is running
' =========================================================
strComputer = "."
Set objWMIService = GetObject("winmgmts:\\" & strComputer & "\root\cimv2")
Set objShell = CreateObject("Wscript.Shell")
Set colProcesses = objWMIService.ExecQuery _
("Select * from Win32_Process Where Name = 'EMCoreService.exe'")
Copyright © 2019 , Ivanti. All Rights Reserved. Privacy and Legal.
Page 187 of 237
Environment Manager 2019.1 Policy Product Guide

If colProcesses.Count =0 Then
Wscript.Echo "There are no instances of EMCoreService.exe running"
Wscript.Quit 0
Else
Wscript.Echo "EMCoreService.exe is running"
Wscript.Quit 1
End If
Separate auditing events are created for successful and unsuccessful actions. These can be viewed
through the Auditing button in the Manage ribbon.
Select the Type of script required; PowerShell, Visual Basic or Java Script and enter the script directly
into the dialog. Scripts can also be added using copy and paste or imported using the import button.
The following settings can be applied which affect the behavior of the action:
l Timeout - Set a timeout for the completion of the script. If the time set is reached the action will
fail. The maximum value that can be set is 60 seconds unless set to 0 which is infinite. Timeouts
set in Custom Actions overwrite the default node settings.
See Configuring Nodes and Default Timeout Settings for further details.
l Prevent script from running interactively - This option is selected by default and means that
scripts will run without pop-ups that require user interaction.
l Apply environment variables to configuration - With this option selected, any environment
variable set in the script is also set in the registry and EM Client enabling it to be used outside
of the script.
l Insert - Select a Session Variable to add to the script. The list includes the following built-in
variables:
l SessionID - The current Session ID
l UserSID - The user's Security Identifier
l UserTemp - The location of user's Temporary Directory
In the Network Available, Network Connected and Network Disconnected triggers, further built-in
Session Variables can be added to the script to determine connection attributes.
Exit Codes
All custom scripts must specify an exit code which when returned, is used by the Environment
Manager agent to determine whether the script has passed or failed. For scripts without an exit code
a success (0 value) is assumed by the agent.
Each script type must use a specific exit statement:
Copyright © 2019 , Ivanti. All Rights Reserved. Privacy and Legal.
Page 188 of 237
Environment Manager 2019.1 Policy Product Guide

l VBScript: WScript.Quit [value]
l JScript - WScript.Quit([value])
l PowerShell: exit ([value])
Replace [value] with the exit code for the script: 0 for success and 1 for failure. For example:
WScript.Quit 0, WScript.Quit(0), exit (0)
PowerShell Scripts
Windows PowerShell scripts use various execution policies which can prevent the scripts from running
or only allow those signed by trusted publishers to run. Environment Manager overrides execution
policies and bypasses any restrictions to enable the PowerShell scripts to run.
Execution polices for users and computers can also be set through Group Policy which override all
PowerShell execution policies. A user policy which does not allow any scripts, or only those which are
signed, will not affect the running of PowerShell Custom actions if they are run as System. However, if
run as the current user the user policy will not allow the scripts and the Custom action will fail. A
computer policy which does not allow any scripts, or only those which are signed, will not allow the
running of any PowerShell Custom actions.
Therefore, to successfully run Custom actions which use PowerShell, your Group Policy must be set to
allow these scripts to run for users and computers.
Environment Manager is compatible with PowerShell versions 1.0, 2.0 and 3.0.
Execute Action
These actions execute an application or process when triggered. Browse to the application from the
Filename field. The Working Directory is automatically added when the application is selected.
Additional Parameters can be added to pass to the program.
To enable the process to run using different user credentials, select the Run As tab and select the
user as required.
If the Do not create window (Console based applications) checkbox is selected, any command
windows associated with an application or process are hidden from the user.
Avoid including Execute actions at logon in nodes set to execute in sequence for files which require
user interaction to complete, such as program files. Otherwise, the logon process is halted indefinitely
as the logon script waits for the execute script to complete. For example, if the Execute action
launches notepad.exe, the logon script waits for Notepad to end before proceeding with the logon
process.
If the Do not execute children of this action until the process has exited option is unchecked this
scenario will not be held up as user interaction is turned off.
Copyright © 2019 , Ivanti. All Rights Reserved. Privacy and Legal.
Page 189 of 237
Environment Manager 2019.1 Policy Product Guide
Group Policy Actions
Group policy is a set of configuration rules relating to the working environment of users and
computers. You can add Group Policy rules to actions in a configuration. Settings for operating
systems, applications, and users can restrict or allow user functionality. For example, you can use
Group Policy to prohibit access to the Control Panel or to limit user profiles to a specific size.
Group polices are stored in administrative template files that describe where the registry-based
settings are stored. There are two types of files:
l ADM - Administrative template files that store settings for Windows XP and Windows Server
2003.
l ADMX - Administrative template XML files that store the settings for Windows Vista and
Windows Server 2008 and higher.
By default, Group Policy files are stored in the following locations:
l ADM - C:\WINDOWS\Inf
l ADMX - C:\WINDOWS\PolicyDefinitions
You can change the default location for storing Group Policy files in the Group Policy Location dialog,
which you access in the Manage ribbon.
For more information, see Group Policy Location.
You create Group Policy Actions in the Set Policy dialog.
Copyright © 2019 , Ivanti. All Rights Reserved. Privacy and Legal.
Page 190 of 237
Environment Manager 2019.1 Policy Product Guide

The dialog lists information about Group Policy settings in the following columns:
l Category - The parent path of the Group Policy setting according to the hierarchy in which
settings are organized in the dialog, for example Windows Components\FileExplorer\Explorer
Frame Pane.
l Policy - The name of the policy, for example Hide specified Control Panel items.
l State - A policy can be Enabled, Disabled, or Not Configured.
l Value - Some policy settings need a value setting, such as a date or file size.
l File Name - The name of the ADM or ADMX file within the policy itself.
You can use the columns' shortcut menu to choose which columns to display and how:
The policy details listed in the dialog are also included in the report produced by the Configuration
Profiler:
Copyright © 2019 , Ivanti. All Rights Reserved. Privacy and Legal.
Page 191 of 237
Environment Manager 2019.1 Policy Product Guide

When you create a Group Policy action, you can add multiple Group Policy settings to a single action.
You can use the Create as individual actions option to convert each policy setting into an action of its
own. Splitting multiple Group Settings into separate actions is irreversible. You cannot regroup the
new actions. However, once the actions are created, you can edit an individual action and add
additional Group Policy settings to it.
Policy settings applied though Environment Manager are automatically removed from managed
endpoints at logoff or when a configuration changes. If theApply policy settings permanently
checkbox is selected, the remove is not applied and the policy setting remains active on the endpoint.
Group policy administrative templates such as Site to Zone Assignment List for Internet Explorer,
require Client Side Extensions (CSE) to run. In previous versions of Environment Manager, these
policies could be configured but the agent was unable to run the CSEs.
The Environment Manager agent now supports these CSEs.
Folder Redirection using CSEs is not supported, as the CSE cannot be configured through
ADMX.
Create a Group Policy Action
1. In the Policy Configuration navigation tree, create a new node or select an existing node.
2. In the Actions tab, select Group Policy > Set ADMX Policy or Set ADM Policy.
The Set ADMX Policy dialog displays.
3. In the Policy folder text box, accept the default policy folder. Or click Browse to navigate to a
folder from which to select ADMX policy templates.
4. To add a policy setting, click Add.
The Policies dialog displays.
5. In the navigation tree in the left-hand pane, select a category. You can use the Filter locate the
required category more quickly.
The individual policies for that category display in the right-hand pane.
6. Double-click the required policy in the right-hand pane to configure its settings.
The Set Policy Values dialog box displays. It has two tabs: Options and Help.
Click Help to view a description of the policy setting. Click Previous Setting and Next Setting to
scroll through the settings in the selected policy folder.
7. In the Options tab, configure the setting as required: Enabled, Disabled, or Not Configured.
When Enabled is selected, some policies have additional settings to enter, such as a date or file
size.
Copyright © 2019 , Ivanti. All Rights Reserved. Privacy and Legal.
Page 192 of 237
Environment Manager 2019.1 Policy Product Guide

8. Click OK to add the policy to the Set ADMX Policy dialog.
9. Repeat steps 4 - 9 to add more policies.
You can use the Edit and Remove buttons to adjust the settings.
10. If required, select the Apply policy settings permanently checkbox.
Policy settings applied though Environment Manager are automatically removed from managed
endpoints at logoff or when a configuration changes. If you select the checkbox, the remove is
not applied and the policy setting remains active on the endpoint.
11. To split multiple settings into single actions, select the Create as individual actions checkbox.
Polices cannot be regrouped once you split them.
12. Click OK.
An action is created containing all the configured group policy settings.
Environment Actions
Environment actions enable both Environment Variables and Session Variables to be configured on
managed endpoints. When triggered, both types of variables can be set or deleted whilst Environment
Variables can also be appended.
Environment Variables
There are two common types of environment variables – user environment and system environment
variables. User environment variables are set on the User triggers in Environment Manager, and
system environment variables on Computer triggers.
Environment variables set in actions are available to all child actions or triggers and on any future
triggers. Variables are also available to other applications, such as Windows Explorer, but only after
the trigger containing the action completes.
l User environment variables typically store information related to resources and settings owned
by the user.
Examples of user environment variables include %TEMP% which points to a specific user’s folder
for storing temporary files or %HOMEPATH% which points to a user’s profile directory.
l System environment variables typically refer to locations of critical operating system resources
or architecture.
Examples of system environment variables include %windir% which is the path to the Windows
directory or %ProgramFiles% which points to the location of the Program Files directory
Copyright © 2019 , Ivanti. All Rights Reserved. Privacy and Legal.
Page 193 of 237
Environment Manager 2019.1 Policy Product Guide

Session Variables
Session variables provide an alternative to environment variables, allowing data to be passed through
an Environment Manager configuration without the limitations on lifetime and scope that apply to
environment variables - session variables extend across multiple processes for a given user and
session.
Session variables can be used and expanded anywhere within Environment Manager where
environment variables can be used. They can be used for applying bespoke file paths for map drive
and folder redirection actions and are particularly useful when used in the scripts within Custom
actions and conditions.
Environment Variable and Session Variable Actions
Set Environment Variable
Enter the Variable Name and Variable Value.
A list of existing environment variables available on the computer on which the Environment Manager
Console is running is displayed. These can be selected and their variable values edited as required.
The Environment Variable is set on managed endpoints with the value as entered.
Append Environment Variable
Enter the Variable Name, Variable Value to be appended and select the Separator to be used
between the existing Variables and Append values. The selected environment variable is updated to
include the append value using the entered separator.
A list of existing environment variables available on the computer on which the Environment Manager
Console is running is displayed. These can be selected and appended to by entering the Variable
Value to be appended and the Separator.
For example, you could append the PATH Environment Variable with a new location, specifying the
separator as a semi-colon.
Delete Environment Variable
Enter the Variable Name to be deleted from managed endpoints.
A list of existing environment variables available on the computer on which the Environment Manager
console is running is displayed. These can be selected for deletion.
Set Session Variable
Enter the VariableName and VariableValue to be used within the Environment Manager
configuration.
The Session variable is set on managed endpoints with the value as entered.
Copyright © 2019 , Ivanti. All Rights Reserved. Privacy and Legal.
Page 194 of 237
Environment Manager 2019.1 Policy Product Guide

Delete Session Variable
Enter the Session VariableName to be deleted from use within the Environment Manager
configuration.
Session Variable Format
Session variables are case insensitive and are referenced by enclosing round brackets and a preceding
$. For example:
$(SessionVariable)
Incorrectly formatted session variables do not expand. The table below gives some examples of
successful and unsuccessful expansions.
In these examples, the variable ’valid_variable’ has been set to ’SessionVariableValue’.
Reference Expansion
$(valid_variable) SessionVariableValue
$(variable_does_not_exist) $(variable_does_not_exist)
$() $()
$no_brackets_defined $no_brackets_defined
$(missing_closing_bracket $(missing_closing_bracket
$missing_opening_bracket) $missing_opening_bracket)
$(valid_variable) $(Valid_Variable) $(vALID_vARIABLE) $(VALID_
VARIABLE)
SessionVariableValue
$(valid_variable$(valid_variable)) $(valid_variable$(valid_
variable))
$(valid_variable)) SessionVariableValue)
$((valid_variable) $((valid_variable)
Default Session Variables
Environment Manager includes three in-built session variables:
l SessionID - The current Session ID
l UserSID - The user’s Security Identifier
l UserTemp - The location of user’s Temporary Directory
Copyright © 2019 , Ivanti. All Rights Reserved. Privacy and Legal.
Page 195 of 237
Environment Manager 2019.1 Policy Product Guide

These can used in actions and conditions and in particular, can be quickly added to custom scripts
using the Insert function.
Session Variable Examples
Using Session Variables in Policy Actions
In the example below a session variable is used to map a drive when users open Word. The session
variable is set at logon and is dependent on their Active Directory Organizational Unit (OU)
membership.
An If Else condition, run at logon, checks the OU of a user and sets a UserGroup session variable
relative to that group. For example, if the user is a member of Sales, UserGroup session variable is set
to ’sales’.
A Map Drive action runs when a user opens Word mapping a drive to the following location:
\\Docs\$(UserGroup)
The $(UserGroup) expands to the value set at logon. For example, if the user is a member of Sales, the
session variable will expand mapping the drive to:
\\Docs\Sales
Copyright © 2019 , Ivanti. All Rights Reserved. Privacy and Legal.
Page 196 of 237
Environment Manager 2019.1 Policy Product Guide

Using Session Variables in Custom Actions
This example demonstrates how session variables can be used in scripts with Environment Manager
custom actions.
Two actions have been added to the Logon > Pre-Desktop trigger - one which sets two session
variables and the other which maps a drive using those variables.
Custom Action
The following script in a Custom action obtains the user name from the environment and sets two
session variables - $(first_letter) and $(first_two_letters).
$user = $env:USERNAME
if ($user.Length -gt 1)
Copyright © 2019 , Ivanti. All Rights Reserved. Privacy and Legal.
Page 197 of 237
Environment Manager 2019.1 Policy Product Guide

{
$first_letter = $user[0]
$first_obj = New-Object -ComObject "EmClient.SetValue"
$first_obj.Name = "first_letter"
$first_obj.Value = $first_letter
$first_obj.Apply("")
$first_two_letters = $user[0] + $user[1]
$second_obj = New-Object -ComObject "EmClient.SetValue"
$second_obj.Name = "first_two_letters"
$second_obj.Value = $first_two_letters
$second_obj.Apply("")
}
Map File Action
The session variables set in the Custom action are used in the Map Drive action to map a drive for each
managed user:
%SYSTEMDRIVE%\%SESSIONNAME%\$(first_letter)\$(first_two_letters)\Home
Shortcut Actions
When triggered, these actions create shortcuts on managed endpoints. The shortcuts can be those
that are created in Windows Explorer or those that are pinned to the Windows Start menu or taskbar.
Copyright © 2019 , Ivanti. All Rights Reserved. Privacy and Legal.
Page 198 of 237
Environment Manager 2019.1 Policy Product Guide

Create a Shortcut Action
1. Configure an action to create a shortcut on endpoints.
2. In the Policy Configuration navigation tree, select or create a node or condition.
3. In the Actions ribbon, select Shortcut > Shortcut Management to display the Shortcut
Management dialog.
4. Select whether the action will Create or Delete a shortcut from endpoints.
5. In the Shortcut file path field, use the ellipsis to navigate to the required shortcut or enter the
path and filename.
Copyright © 2019 , Ivanti. All Rights Reserved. Privacy and Legal.
Page 199 of 237
Environment Manager 2019.1 Policy Product Guide
6. Select whether the shortcut remains on managed endpoints after log off. The default setting is
Apply Permanently. Deselect this option to remove shortcuts from managed endpoints at
logoff.
The following fields are automatically populated from the Shortcut file path but you can edit
them if required:
o
Target - The location of the program that the shortcut accesses.
o
Parameters - Define further parameters for the target program. For example, the
program could be Microsoft Word. If you enter a particular document in the target
parameters, that document will open in Word.
o
Start in Directory - The working directory of the program.
o
Run - Select whether the associated program should open, maximized, minimized, or
using the default view.
o
Comment - The text that displays when you hover over the shortcut icon.
o
Icon Filename - The location of the shortcut icon.
o
Icon - The icon used for the shortcut.
7. Click OK to save the action.
Import Multiple Shortcuts
Copyright © 2019 , Ivanti. All Rights Reserved. Privacy and Legal.
Page 200 of 237
Environment Manager 2019.1 Policy Product Guide

1. Import existing shortcuts into the wizard to create multiple shortcuts on managed endpoints.
2. Select or create a node or condition.
3. From the Actions ribbon, click Shortcut > Import Shortcut Wizard.
4. Click Add.
5. Select a shortcut file (LNK format).
The remaining fields are automatically populated and you can edit them as required.
6. Select whether the shortcut remains on managed endpoints after logoff. Shortcuts created
though Environment Manager are automatically removed from endpoints at logoff unless you
select Apply Permanently.
7. Click Add to add more shortcuts. To remove shortcuts, either select and click Remove or click
Remove All.
8. Click OK.
Each shortcut listed creates an individual Create Shortcut action in the work area.
Copyright © 2019 , Ivanti. All Rights Reserved. Privacy and Legal.
Page 201 of 237
Environment Manager 2019.1 Policy Product Guide

Create a Pinned Items Action
Pin or unpin applications to the Windows Start menu or taskbar on managed endpoints. The action
compares the existing pinned items on endpoints against the items that the action is configured to
pin.
1. Select or create a node or condition on the Pre-Desktop trigger.
2. On the Actions ribbon, select Shortcut > Pinned Items Action.
3. Enter the path, or navigate to, the executable for the required application.
Shortcuts with parameters cannot be pinned. For example, notepad.exe can be pinned but
notepad.exe abc.txt cannot.
Executables with switches cannot be pinned. For example, an application with the /prefetch:#
switch cannot be pinned.
4. Select whether to Pin or Unpin the application.
Copyright © 2019 , Ivanti. All Rights Reserved. Privacy and Legal.
Page 202 of 237
Environment Manager 2019.1 Policy Product Guide

5. Select whether the action applies to the Start Menu or the Taskbar.
6. Click OK to save the action.
Shortcut Management for Roaming Users
As a user moves between managed endpoints with different operation systems and applications,
some configured shortcuts are not valid for all environments. When this happens, Environment
Manager manages the following temporarily invalid shortcuts:
Shortcut or Link Supported Operating System
Standard shortcuts in the Windows file system that point to a
target does not exist
All supported operating
systems
Items pinned to the taskbar that point to nonexistent paths All supported operating
systems
Items pinned to the Start menu that point to nonexistent paths Windows 7, Windows Server
2008 R2
Environment Manager either hides the temporarily invalid shortcuts or - if possible - resolves the links
to point to an equivalent path, such as when a user moves between 32-bit and 64-bit environments. If
items pinned to the taskbar or Start menu are removed, the order of the pinned items is retained.
When a user returns to an environment where the shortcuts are valid, the shortcuts and pinned items
- and the order in which they are arranged - are restored.
Logon/Logoff Message
Configure the text displayed when actions in the Logon or Logoff triggers are running. Multiple
messages can be configured to display text specific to the related actions.
In the example below, the Logon Message is displayed for the duration of the three child actions.
Copyright © 2019 , Ivanti. All Rights Reserved. Privacy and Legal.
Page 203 of 237
Environment Manager 2019.1 Policy Product Guide

Nodes could be created for related groups of actions with a Logon/Logoff Message action as the
parent for the actions within that node. For example, you could put all Map Drive actions as children of
a Logon/Logoff Message to display the message “Mapping Drives” whilst the actions run. In another
node, you could run all your Session Variable actions whilst the message “Setting Session Variables”
displays.
Depending on the operating system and screen resolution settings, longer messages may be
truncated on some endpoints.
Fast Logoff Action
When triggered, users on managed endpoints in Terminal Services environments can end sessions
immediately whilst any remaining Environment Manager logoff actions run to completion. Depending
on the operating system, either the logoff screen or a blank screen is displayed on endpoints whilst
the logoff actions run.
This action can be added multiple times to the Logoff trigger with conditions applied to target the
action as required. For example, you could set the action only to apply to specific endpoints or user
groups which would benefit from Fast Logoff.
Add the action from the Actions tab and enable by selecting the Enable Fast Logoff checkbox.
Self Heal Actions
When triggered, the Self Heal action restores environment items including files, processes, services
and registry keys. Using Self Heal, computer and user settings can be restored to their original state in
the event of software failure or when unauthorized changes have been made. The self healing
mechanism restores settings in real-time. For example, if a Trojan virus is added to any of the Windows
start up keys, Self Healing immediately removes the threat.
Self Healing can be used to ensure critical applications, such as security software, are restarted or
repaired immediately following any failure resulting from malicious or accidental actions and provides
security against the threat of malicious software attempting to infiltrate and alter registry settings or
modify content.
Although the option to self heal the whole registry is available, it is resource intensive and is likely to
impact performance. Therefore, when configuring Self Healing Registry actions, it is recommended
that only those relevant sections of the registry are configured to be self healed.
Targeting only specific portions of the registry reduces the resource load on the Environment
Manager Agent during run-time. Self Heal is particularly useful for healing important processes, files,
services and registry keys that are critical to the day-to-day running of the system. Care should be
taken to ensure that critical items remain unaltered by the Self Heal function.
Caution:Stability issues may arise if software patches or upgrades to areas of your system
which you have chosen to self heal as Environment Manager automatically self heals these
changes and removes them.
Copyright © 2019 , Ivanti. All Rights Reserved. Privacy and Legal.
Page 204 of 237
Environment Manager 2019.1 Policy Product Guide

Currently only 32-bit and 64-bit applications are fully supported by the self healing process
mechanism. It is not recommended to self heal DOS or 16-bit applications using this method.
Attempting to self heal a DOS or 16-bit application process may present multiple instances of
the same application in a short period of time.
Create a Self Heal Service Action
1. In the Policy Configuration navigation tree, create a new node or select an existing node from
within the Computer trigger.
The Self Heal Service action is only available for Computer triggers.
2. In the Actions ribbon, select Self Heal > Self Heal Service to display the Self Heal Services
dialog.
3. Click Add > Browse Services to open a Service Browser listing the services on the local
machine. The service list for other machines in the Active Directory can be selected if required.
Services can be entered manually by selecting Add > Add Entry and completing the fields with
the service details.
4. Select the required service and click OK. Multiple applications can be selected using the Ctrl or
Shift keys.
The services are added to the Self Heal Service dialog box.
5. Set the Status for the service:
o
Always running
o
Never starts
6. Click OK.
Each service creates an individual action in the node work area based on the status selected.
Each action can be edited by double-clicking to open the Self Heal Service dialog box.
Create a Self Heal Registry Action
1. In the Policy Configuration navigation tree, create a new node or select an existing node.
2. In the Actions ribbon, select Self Heal > Self Heal Registry to display the Self Heal Registry
dialog.
3. Select the ellipsis in the Main Key field to open a registry browser and select a registry key. The
browser defaults to the registry of the local machine. This can be changed to the registry of
remote machines using the Connect button.
4. Click OK.
Copyright © 2019 , Ivanti. All Rights Reserved. Privacy and Legal.
Page 205 of 237
Environment Manager 2019.1 Policy Product Guide

5. The Main Key, Sub Key and Value Name (if applicable) fields are automatically populated. The
fields can be completed and edited manually if required.
6. Select the behavior required for the action:
o
Use default value - Select to maintain the default value for the registry keys on
managed endpoints satisfying any associated conditions when triggered. This disables
the Value Name field so it cannot be edited.
o
Ensure the registry item remains unchanged OR Ensure the registry item never exists
- The action will not allow changes to the registry item or not allow it to be created.
7. Click OK to create the action for the registry key selected using the defined criteria.
Create a Self Heal File Action
1. In the Policy Configuration navigation tree, create a new node or select an existing node.
2. In the Actions ribbon, select Self Heal > Self Heal File to display the Self Heal Registry dialog.
3. Select the ellipsis (...) in the Filename field to open a Windows browser and select the required
file. The file path and name can be entered manually if required.
4. Select the behavior required for the action:
o
Make sure the file is always present - The action ensures that the file exists when
triggered on managed endpoints which satisfy any associated conditions. Select the sub
option Ensure the file is never changed to stop the file from being modified.
o
Make sure the file is not present - The action will not allow the file to be created.
5. Click OK to create the action for the file using the defined criteria.
Create a Self Heal Process Action
1. In the Policy Configuration navigation tree, create a new node or select an existing node.
2. In the Actions tab, select Self Heal > Self Heal Process to display the Self Heal Process dialog.
3. Select a process by navigating to the appropriate executable using the ellipsis in either the
Process Name or Process Directory fields.
4. In the Parameters field, enter any parameters, separated by spaces, which the service needs to
run. For example, Auditing can take the name of a file in which it logs data. This can be entered
as follows: -log C:\Temp\MyLogFilename.txt.
5. Select the Run the process as SYSTEM user if required. This option is only available for actions
in User triggers.
6. Click OK to save the action.
Copyright © 2019 , Ivanti. All Rights Reserved. Privacy and Legal.
Page 206 of 237
Environment Manager 2019.1 Policy Product Guide

File Director Action
File Director User Settings
The File Director User Settings action allow user-level File Director settings to be set and Session
Variables to File Director paths to be created.
At logon, if the user is logged into the File Director client, Environment Manager sets the
$(DataNowHome) Session Variable to the user’s File Director directory appended with ’\Home’. If the
map point name for the home drive is not Home, an alternative map point name can be specified
within the File Director User Settings action.
Further Session Variables can be set to File Director paths, such as the Documents and Favorites
directories.Environment Manager Actions and conditions can be created easily using these Session
Variables.
Enable File Director User Single Sign On
1. In the Policy Configuration navigation tree, create a new node or select an existing node from
within the Pre-Session or Pre-Desktop Logon sub-triggers.
2. In the Actions ribbon, select File Director > File Director User Settings.
The File Director User Settings dialog displays.
3. Select Enable User Single Sign On to enable single sign on for the user.
Single Sign On must also be enabled for the machine.
Set Session Variables to File Director Paths
1. In the Policy Configuration navigation tree, create a new node or select an existing node from
within the Pre-Session or Pre-Desktop Logon sub-triggers.
2. In the Actions ribbon, select File Director > File Director User Settings.
The File Director User Settings dialog displays.
3. If the map point namefor the home drive is not Home, select Specify alternative map point
name used by $(DataNowHome) Session Variable and enter the map point name.
4. To set further Session Variables to File Director paths, click Add.
The Select a File Director Session Variable dialog displays.
5. Select one or more Session Variables to add to the action. Multiple Session Variables can be
selected using the Ctrlor Shift keys.
Copyright © 2019 , Ivanti. All Rights Reserved. Privacy and Legal.
Page 207 of 237
Environment Manager 2019.1 Policy Product Guide

6. Click OK to add the Session Variables.
The selected Session Variables are added to the File Director User Settings dialog.
7. If necessary, modify the Value field to amend the path for each Session Variable.
8. Click OK to create the action.
File Director Custom Settings
The File Director Custom Settings action allows File Director behavior to be modified for all users.
Environment Manager sets the specified endpoint-level settings at computer startup and
subsequently starts the File Director service.
The settings below are available.
Caution: Setting values outside of the expected range may introduce unexpected behavior in
File Director.
Value Description Unit Range Default File
Director
Authentication
> Enable Single
Sign On
Enable Single Sign On for the
machine. Single Sign On must be
enabled for the endpoint and user.
N/A Enabled
or
Disabled
Disabled 3.0 and
3.5
Logging >
Circular Logging
Enable circular logging. Log files are
written to
%LOCALAPPDATA%\DataNowLogs.
N/A Enabled
or
Disabled
Disabled 3.0 and
3.5
Networking >
Auto Throttle
Minimum
Set the minimum limit for File Director
throttling.
KBps Any
positive
value
30 3.0 and
3.5
Networking >
Auto Throttle
Percentage
Set the percentage of the estimated
upload pipe that File Director uses.
% 0 to 100 100 3.0 and
3.5
Networking >
Auto Throttle
Retest Interval
Set how frequently File Director
retests its available upload throttle.
The throttle is briefly removed during
the test.
ms Any
positive
value
36,000,000 3.0 and
3.5
Network
>Advanced >
HTTP
Connection
Request
Set the timeout value for HTTP
connection requests.
ms Any
positive
value
60,000 3.0 and
3.5
Copyright © 2019 , Ivanti. All Rights Reserved. Privacy and Legal.
Page 208 of 237
Environment Manager 2019.1 Policy Product Guide

Value Description Unit Range Default File
Director
Timeout
Network
>Advanced >
HTTP Name
Resolution
Timeout
Set the timeout for HTTP name
resolution.
ms Any
positive
value
0 3.0 and
3.5
Network
>Advanced >
HTTP Receive
Response
Timeout
Set the timeout for receiving HTTP
response to requests.
ms Any
positive
value
60,000 3.0 and
3.5
Network
>Advanced >
HTTP Send
Request
Timeout
Set the timeout for HTTP send
requests.
ms Any
positive
value
60,000 3.0 and
3.5
Sync > Disable
Default File
Exclusions
Disable the default file exclusions. N/A Enabled
or
Disabled
Enabled 3.0 and
3.5
Sync > Disable
Default Folder
Exclusions
Disable the default folder exclusions. N/A Enabled
or
Disabled
Enabled 3.0 and
3.5
Sync
>Advanced >
Cache Expiry
Time
Set the default cache expiry time for a
folder listing.
ms Any
positive
value
2,000 3.0 and
3.5
Sync
>Advanced >
Failed Upload
Retry Time Max
Set the maximum time to wait before
retrying failed uploads.
ms Any
positive
value
20,000 3.0 and
3.5
Sync
>Advanced >
Failed Upload
Retry Time Min
Set the minimum time after an upload
fails before it is retried. The retry will
not occur if the network is
unavailable.
ms Any
positive
value
5,000 3.0 and
3.5
Copyright © 2019 , Ivanti. All Rights Reserved. Privacy and Legal.
Page 209 of 237
Environment Manager 2019.1 Policy Product Guide

Value Description Unit Range Default File
Director
Sync
>Advanced >
Offline
Mapppoint
Timeout
Set the map point timeout before it
appears offline.
s Any
positive
value
30 3.0 and
3.5
Sync
>Advanced >
Recycle Server
Side Deletions
Set whether File Director reflects
server side changes by sending local
files to the Recycle Bin.
N/A Enabled
or
Disabled
Disabled 3.0 and
3.5
Developer >
Logon Token
Wait Period
Set the time at logon that File
Director waits for the session token.
s Any
positive
value
60 3.0 and
3.5
Developer >
Session Startup
Wait Time
Set the time that the service waits
while trying to initialize a user after
logon.
s Any
positive
value
90 3.0 and
3.5
Create a File Director Custom Settings Action
1. In the Policy Configuration navigation tree, create a new node or select an existing node from
within the Computer Startup trigger.
The File Director Custom Settings action is only available on the Computer Startup
trigger.
2. In the Actions ribbon, select File Director > File Director Custom Settings.
The File Director Custom Settings dialog displays.
3. Click Add.
The Select a File Director Custom Setting dialog displays.
4. Select one or more custom settings to add and click OK. Multiple settings can be selected using
the Ctrl or Shift keys.
The selected settings are added to the File Director Custom Settings dialog.
5. To set the value, deselect Use Default and enter a new value.
Updated settings are displayed in bold.
6. Click OK to create the action.
Copyright © 2019 , Ivanti. All Rights Reserved. Privacy and Legal.
Page 210 of 237
Environment Manager 2019.1 Policy Product Guide

Set Desktop Wallpaper
1. Set the background to be displayed on user endpoints.
2. In the Policy Configuration navigation tree, select or create a node or condition.
3. In the Actions ribbon, select Set Desktop Wallpaper.
4. Enter a folder path and filename or click the ellipsis to select the required image. The following
file types are compatible with this action:
o
Bitmap (*.bmp *.dib *.rle)
o
Jpeg (*.jpg *.jpeg *.jpe *.jfif)
5. Select how the wallpaper is displayed:
o
Center
o
Fill
o
Fit
o
Span
o
Stretch
o
Tile
6. Select Copy to to save the image on endpoints and enter or navigate to the required location.
7. Click OK to save the action.
For local Windows 7 users who have the Windows theme set and have not previously logged
onto a client, the wallpaper set by this action is overwritten by the Windows theme. This only
affects the initial logon - for all subsequent logons, the wallpaper defined in this action is
applied.
Outlook Actions
The Create Profile and Create 365 Profile actions use functionality and configuration tasks similar to
those involved in configuring Outlook Exchange Accounts using the Office Customization Tool (OCT).
For further information about the OCT, see: https://technet.microsoft.com/en-
us/library/cc179097.aspx
Configure a Create Profile Action
This action creates an Outlook mail profile for managed users and is primarily used for on-premises
Exchange accounts. To add this action, select or create a node or condition on a User trigger and
select Outlook > Create Profile from the Actions ribbon. There are three main tabs to configure:
Profile, Cached Mode and Outlook Anywhere.
Copyright © 2019 , Ivanti. All Rights Reserved. Privacy and Legal.
Page 211 of 237
Environment Manager 2019.1 Policy Product Guide

Profile
Complete the following fields:
l Profile Name - The display name for the profile on endpoints, visible through the Mail
Properties Control Panel or through Outlook when selecting a profile from startup. A profile is
not created if one of the same name exists on the endpoint.
l Mailbox Name - The name of the Mailbox Account for the given user. This is typically the
username of the logged on user and so is initially populated with the %USERNAME%
environment variable as a placeholder.
l Exchange Server - The name of the computer running the Exchange server.
l Configure any additional mail boxes to which users require access. Click Add and enter the
Display Name and Mailbox Distinguished Name for the required mailbox. The Mailbox
Distinguished Name looks up the LegacyExchangeDN attribute from the users AD account.
Repeat to add further mailboxes.
Cached Mode
Select Use Cached Exchange Mode and configure the following properties:
l Download shared folders - Synchronize shared mail and non-mail folders.
l Download public folder favorites - Synchronize public folder favorites.
l Path and filename of the Outlook data file - The location of the offline data file (OST) on
endpoints. This is optional and if left blank is saved to the default location for the operating
system in the profile.
l Directory path to store Offline Address Book files - The location of the offline address book.
This is optional and if left blank is saved to the default location for the operating system in the
profile.
l Mail to keep offline - The amount of data that is saved offline. Any mail older than the selected
period is not synchronized.
Outlook Anywhere
Configure the following properties:
l Configure Outlook Anywhere - Enable users to connect with Outlook Anywhere.
l Use this URL to connect to my proxy server for Exchange - The URL of the required Exchange
server.
l Connect using SSL only - Users can only connect using Secured Sockets Layer (SSL).
l Mutually authenticate the session when connecting with SSL - The server and client must
authenticate each other before a connection can be made using SSL.
Copyright © 2019 , Ivanti. All Rights Reserved. Privacy and Legal.
Page 212 of 237
Environment Manager 2019.1 Policy Product Guide

l Principal name for the proxy server - The name of the proxy server to which clients connect.
The principal name for the proxy server must be prefixed with msstd:. For example,
msstd:mail.company.local.
l On fast networks, connect using HTTP first then connect using TCP/IP - On fast networks
clients attempt to connect using HTTP. If this is unsuccessful, they attempt to connect using
TCP/IP.
l On slow networks, connect using HTTP first then connect using TCP/IP - On slow networks
clients attempt to connect using HTTP. If this is unsuccessful, they attempt to connect using
TCP/IP.
l Use this authentication when connecting to the proxy server for Exchange - Select the
authentication type:
l Password Authentication (NTLM)
l BasicPassword Authentication
Configure a Create 365 Profile Action
This action creates a mail profile specifically for connection to Outlook 365 accounts. To add this
action, select or create a node or condition on a User trigger and select Outlook > Create 365 Profile
from the Actions ribbon. There are two main tabs to configure: Profile and Cached Mode.
Profile
Complete the following fields:
l Profile Name - The display name for the profile on endpoints, visible through the Mail
Properties Control Panel or through Outlook when selecting a profile from startup. A profile is
not created if one of the same name exists on the endpoint.
l User Email - The email address for the given user. This field is blank by default which uses the
autodiscover service to look up domain users' mail connection.
Configure any additional mail boxes to which users require access. Click Add and enter the Display
Name and Mailbox Distinguished Name for the required mailbox. The Mailbox Distinguished Name
looks up the LegacyExchangeDN attribute from the users AD account. Repeat to add further
mailboxes.
Cached Mode
Select Use Cached Exchange Mode and configure the following properties:
l Download shared folders - Synchronize shared mail and non-mail folders.
l Download public folder favorites - Synchronize public folder favorites.
Copyright © 2019 , Ivanti. All Rights Reserved. Privacy and Legal.
Page 213 of 237
Environment Manager 2019.1 Policy Product Guide

l Path and filename of the Outlook data file - The location of the offline data file (OST) on
endpoints. This is optional and if left blank is saved to the default location for the operating
system in the profile.
l Directory path to store Offline Address Book files - The location of the offline address book.
This is optional and if left blank is saved to the default location for the operating system in the
profile.
l Mail to keep offline - The amount of data that is saved offline. Any mail older than the selected
period is not synchronized.
Configure an Update Mailboxes Action
1. This action adds and deletes additional mailboxes for existing Outlook profiles.
2. In the Policy Configuration navigation tree, select or create a node or condition on a User
trigger.
3. In the Actions ribbon, select Outlook > Update Mailboxes.
4. Enter the Profile Name to be modified. This is the display name for the profile on endpoints,
visible through the Mail Properties Control Panel or through Outlook when selecting a profile
from startup.
The configuration steps for opening and removing mailboxes are the same.
5. Click Add.
6. Enter a Display Name and the Mailbox Distinguished Name for the mailbox. The display
name must be unique within the action. If more than one mailbox has the same display name,
only the first will be added to the profile.
7. Repeat steps 4 and 5 to configure further mailboxes to add or remove.
8. Click OK to save the action.
When the action is triggered, the selected profile opens and the mailboxes specified are added or
removed as configured in the action. If the entered profile does not exist the action fails.
Configure an Email Signature Action
Configure an Outlook signature file for managed users.
1. In the Policy Configuration navigation tree, select or create a node or condition on a User
trigger.
2. In the Actions ribbon, select Outlook > Email Signature.
3. Enter a Name to identify the signature.
4. Configure the text for the signature. You can configure different signatures for New Messages
and Replies and Forwards or select Also use this signature for replies and forwarding to use
Copyright © 2019 , Ivanti. All Rights Reserved. Privacy and Legal.
Page 214 of 237
Environment Manager 2019.1 Policy Product Guide

the same message for all.
5. Click OK to save the action.
Automation integration into Environment Manager Policy
Automation functionality enables the capability of Ivanti Automation software to be used directly from
the Environment Manager console. Licensed users can create Environment Manager actions to
execute modules or projects defined in Ivanti Automation. This allows routine tasks such as
application installations or requests to be executed as automated IT workflows and run from within
an Environment Manager Policy action.
The automation functionality within Environment Manager requires a connection to be set up with an
Ivanti Automation Dispatcher. It also requires a Run As user profile to be specified. This profile will be
used to connect to the Dispatcher and so it must have permitted access.
When the server connection is established, Environment Manager console can connect to the
Automation Dispatcher server and retrieve a list of the configured modules and projects containing
automated tasks. As an administrator, you select the modules or projects you want to use.
By default, selected modules are referenced with the task parameters as originally configured. You can
choose to override the parameters and edit them directly from within Environment Manager. These
changes are not uploaded to the Ivanti Automation and only affect the automation tasks run as a
policy action within Environment Manager.
Automation tasks can be assigned from within the Environment Manager console. The following
triggers can be used to configure automation tasks:
l User logon
l Desktop Created
l Process Started
Note, a module is a container for one or more tasks. A project is a container for one or more modules.
Automation Settings
In order to use automation functionality, you must first establish a connection to your Automation
Dispatcher server. The Automation Settings dialog allows you to specify and test your connection.
Prerequisites:
l A Run As user profile is configured, with access to the Ivanti Automation Dispatcher. See Run
As User Library.
l The Automation Dispatcher Web API settings must be enabled. See Dispatcher Web API
Settings in the Ivanti Automation help.
Copyright © 2019 , Ivanti. All Rights Reserved. Privacy and Legal.
Page 215 of 237
Environment Manager 2019.1 Policy Product Guide

The Dispatcher that Environment Manager connects to must be listed in Dispatcher Discovery
in Ivanti Automation. This can be found in the Setup > Global Settings list, under the
Dispatcher Detection section. If it is not listed, the client cannot connect and a 404 Not Found
error will result.
Configure Automation Settings
1. Click the Manage tab on the Environment Manager ribbon, then click the Automation Settings
icon.
The Automation Settings dialog opens:
2. In the Dispatcher fields:
• Select the Protocol required for connection to the Automation Dispatcher server. The
default protocol for this connection is https.
Note that https requires security certificates to be installed on all endpoints. See "Security
Certificates" on page48.
• Enter the Host Name for the Automation Dispatcher server.
• Enter the required Port. The default port for https is 443. The default port for http is 80.
3. In the Run As User field, click the drop-down arrow and select the required Run As user profile.
The profile selected must have permitted access to the Automation Dispatcher server.
• To create or edit a user profile, click the ellipses to open the Run As User Library dialog.
• Click Clear Settings to remove values entered in this dialog, the Host Name and Run As
User name fields are cleared.
Copyright © 2019 , Ivanti. All Rights Reserved. Privacy and Legal.
Page 216 of 237
Environment Manager 2019.1 Policy Product Guide

• Click Test Connection. This action verifies connectivity to the Automation Dispatcher
server. If verified, the Automation Projects and Modules dialog opens, listing the
automation task modules and projects available to you.
4. Click OK to close the dialog.
Reference Automation Tasks
Having established connectivity you can now reference and configure automation tasks.
Parameters are used by automation tasks as placeholders for values in various fields including file
paths, user names, passwords etc. The actual values for parameters are provided when the task is run
on an agent. When you reference tasks from Automation, the option exists to override the parameters
using Environment Manager, allowing you to configure the tasks as required.
Changes made to parameters in Environment Manager apply only to the policy action executed from
Environment Manager, they do not affect Ivanti Automation. However, if referenced tasks are updated
within Automation, the parameters between the two applications become out of sync and the
automation task will not run correctly. To prevent errors from occurring, when the task parameters
are updated in Ivanti Automation, the Environment Manager configuration must be updated.
Note, the ability to override parameters in Automation is not supported for Automation
projects containing modules with different parameters.
Copyright © 2019 , Ivanti. All Rights Reserved. Privacy and Legal.
Page 217 of 237
Environment Manager 2019.1 Policy Product Guide

1. In the navigation tree, select the node required then click Actions > Automation >
Automation.
The Create an Automation Task dialog is displayed.
2. Next to the Task field, click the ellipses.
The Automation Projects and Modules dialog opens, listing the automation tasks available.
Select the project or module required, then click OK.
The selected item displays in the Task field.
3. If required, select the Wait for task to finish before continuing checkbox.
When enabled, Environment Manager will wait for notification from the Automation
Dispatcher server before continuing with the next action.
4. If required, select the Override Parameters checkbox.
When enabled, the dialog lists the parameters used in the selected module and allows you to
enter alternative values:
Copyright © 2019 , Ivanti. All Rights Reserved. Privacy and Legal.
Page 218 of 237
Environment Manager 2019.1 Policy Product Guide

• If you change parameters for a selected module, the changes apply to all project tasks
within that module.
• Passwords and user credential parameters are encrypted by the Automation application.
Environment Manager provides the same level of encryption.
• If you select the Override Parameters checkbox and then fail to enter parameter values,
your Automation tasks are referenced without parameters specified.
• Environment Manager allows support for environment variable expansion and session
variable expansion.
The use of %% to constrain environment variables is not supported by the Automation
Dispatcher. For example, %%username%%.
5. Click OK. The selected module is referenced by the Environment Manager console.
To trigger an automation task to run automatically, within Environment Manager, the task is
configured as a policy action. See "Action Management" on page156.
Resync Parameters
Having referenced automation tasks, if the task parameters are then updated within Ivanti
Automation, the parameter values become out of sync and could provide unpredictable results.
Note that when the user edits an existing action, the Environment Manager console detects any
parameters that are out of sync, and identifies them as invalid. Users are then prompted to press the
Resync button and overwrite the current values with the updated parameter values from Automation.
Copyright © 2019 , Ivanti. All Rights Reserved. Privacy and Legal.
Page 219 of 237
Environment Manager 2019.1 Policy Product Guide


Tools and Wizards
Policy Templates
Policy Templates enable partial configurations, saved as XML files, to be exported and imported to
other configurations. Rather than export an entire configuration, Policy Templates enable them to be
broken down by trigger or individual node and used as required. Exporting at trigger level saves all
the nodes in that trigger and when imported, each of those nodes is added to the selected trigger.
Any node or the contents of any trigger can be exported and imported. A reusable node imported
into a trigger is also created in the Reusable Nodes Library. Similarly, any reusable condition imported
as part of a node, is created in the Reusable Conditions Library. Templates created at trigger level can
be imported to a node and to reusable nodes.
Some conditions and actions are not compatible with all triggers but can still be imported into those
triggers. In these cases, although added to the trigger, the condition or action will not function. On
import, a message box displays showing the path of the incompatible action or condition.
Export a Policy Template
1. In the Policy Configuration navigation tree, select the node or trigger from which you want to
create a template.
2. In the Tools & Wizards ribbon, select AppSense Policy Template > Export Template.
A browser dialog displays.
3. Navigate to a location to save the template.
4. Click Save.
The template is saved in the selected location and can be imported into the Environment Manager
console.
Import a Policy Template
1. In the Policy Configuration navigation tree, select a node or trigger to which you want to add
the partial configuration.
2. In the Tools & Wizards ribbon, select AppSense Policy Template > Import Template.
A browser dialog displays.
3. Navigate to, and select the XML template file.
4. Click Open.
The nodes in the template are added to the selected trigger or node. Any reusable nodes and/or
reusable conditions created as part of the import are added to the appropriate reusable Library.
Copyright © 2019 , Ivanti. All Rights Reserved. Privacy and Legal.
Page 221 of 237
Environment Manager 2019.1 Policy Product Guide

Configuration Profiler
The Configuration Profiler allows reports to be created which interrogate the local loaded
configuration in the console.
General reports can be produced which deliver a comprehensive record of the whole configuration,
providing full details of each action and condition.
Reports can also be created which are refined based on condition values. For example, a report could
be run showing all the areas of the configuration which relate to a particular user group.
Once created, reports can be manipulated to change display attributes, such as page orientation and
watermarks. Reports can also be output for PDF, image and email formats.
Create a Configuration Profiler Report
1. Select the Policy Configuration navigation button.
2. In the Tools & Wizards tab, select Configuration Profiler to display the Configuration Profiler
dialog.
3. Select the required report type by selecting the appropriate radio button:
o
Complete Report (go to step 6)
o
Report based on specific criteria
4. From the Report Criteria list, click the Enter value to match field for the required criteria.
5. Enter a value for the criterion to report on. For example, entering a value of "Users1" for the
Computer Group criteria produces a report containing only those elements with a reference to
the Users1 computer group.
6. Repeat steps 3 and 4 to add further criteria.
Copyright © 2019 , Ivanti. All Rights Reserved. Privacy and Legal.
Page 222 of 237
Environment Manager 2019.1 Policy Product Guide

7. Using the Create indented report checkbox, choose a report display. If selected, the layout of
the report is based upon the Policy Configuration navigation tree. Each node, condition and
action is at the same hierarchical level as in the navigation tree.
If not selected, the report is flat with all items at the same level. The position in the hierarchy is
shown by a preceding blue number; level 1 being top of the hierarchy.
8. Click OK to run the report.
9. The report is generated and displayed in a document viewer within Environment Manager.
Copyright © 2019 , Ivanti. All Rights Reserved. Privacy and Legal.
Page 223 of 237
Environment Manager 2019.1 Policy Product Guide

10. Within the document viewer, the following options are available:
o
Search - Find specific text within the report
o
Save - Saves the report in a PRNX file
o
Print - Send the report to a printer
o
Page Setup - Define the margins and orientation of the report
o
Color - Change the color of the report background
o
Watermark - Define and add a watermark to the report
o
Export Document - Save the report as a PDF document or as an image file
o
Send via Email - Save the reports as a PDF or image file and attach to an email
Group SID Refresh
The Group SID Refresh option allows you to replace group and user domain names in a configuration
and refresh Security Identifier (SID) values in membership conditions.
This is useful when working across multiple environments where the SIDs are of different values. For
example, if you have been working in a test environment and want to move to a live environment, the
SID values in each environment will be different. Using the Group SID Refresh function, the SIDs in the
configuration can be quickly updated to match those in the live environment. In addition to refreshing
the SIDs, user and group domain names can be replaced in the configuration so they are correct for
the live environment.
Refresh SIDs
1. Select the Policy Configuration navigation button.
2. In the Tools & Wizards tab, select Group SID Refresh.
3. In the Find what field, enter a domain name or group query string.
4. Select the Update SID only checkbox as required:
o
If selected, the SIDs in relevant conditions are updated in the configuration
o
If not selected the Replace with field is enabled. In addition to the SIDs being refreshed,
domain names are changed to the value specified. Find options can be set for matching
case and whole words.
5. Click OK.
The SIDs for any matching domain are updated in the configuration
Copyright © 2019 , Ivanti. All Rights Reserved. Privacy and Legal.
Page 224 of 237
Environment Manager 2019.1 Policy Product Guide

Example - Update SID Only
Example - Replace
Lockdown Management
Lockdown is a mechanism to restrict or disable access to application and operating system
functionality, keyboard shortcuts and Microsoft Office application menus, toolbars and ribbons. By
applying conditions to triggers, user actions and application usage can be controlled. For example:
Copyright © 2019 , Ivanti. All Rights Reserved. Privacy and Legal.
Page 225 of 237
Environment Manager 2019.1 Policy Product Guide

Prevent users deleting browsing history using Internet Explorer Settings
l Stop users from changing network settings
l Lockdown shortcut keys, such as Print Screen
l Lockdown actions can only be applied to nodes within User triggers and are not available for
Computer triggers.
Using a combination of settings an overall policy of computer usage within an organization can be
defined to ensure computers are used appropriately and systems are not compromised.
The functionality is accessed from the Tools & Wizards ribbon or from the work area shortcut menu.
Create a Lockdown Using the General Wizard
1. Open the application which you want to lockdown and navigate to the item you want to block.
For example, to lockdown the security options in Internet Explorer, open the Internet Options
dialog.
2. In the Environment Manager console, select the Policy Configuration navigation button.
3. In one of the User triggers, create a new node or select an existing node to which you want to
add the lockdown action.
4. In the Tools & Wizards ribbon Lockdown group, select General Wizard.
5. In the General tab, enter a name and optional description for the lockdown.
6. In the Lockdown tab click and hold the Spy Tool button.
The Environment Manager console is minimized exposing the open application.
7. Drag the cursor onto the control in the application requiring lockdown. A red border indicates
the control selected and the available lockdown options are displayed.
8. Release the mouse button to select.
Control returns to the Environment Manager console, enabling options for the lockdown to be
defined. When the configuration is deployed to users, the lockdown is applied.
There are different control types for lockdown relating to various application and operating system
functionality. Each control type has different characteristics and settings. See General Wizard.
Configure an Edit or Combo Box Control Lockdown
1. Use the Spy Tool in the General Wizard to select an Edit or Combo Box control.
2. Select edit control filtered.
3. In the General tab of the Edit Control dialog box, give the lockdown a Description and add any
optional Notes.
Copyright © 2019 , Ivanti. All Rights Reserved. Privacy and Legal.
Page 226 of 237
Environment Manager 2019.1 Policy Product Guide

4. Select the Lockdown tab.
5. Select a message which will display when the lockdown is breached. Existing messages can be
added from the drop-down list or new messages created by clicking the ellipsis (...).
6. Click Add to configure block text libraries.
7. Click OK to save.
To set up Block Text and Blocked Message libraries, see Message Libraries.
Keyboard Wizard
The Keyboard Wizard prevents keys or a combination of keys, being used on the keyboards of
managed computers. The keys can be locked down across the whole computer or restricted to certain
applications.
1. Select the Policy Configuration navigation button.
2. In one of the User nodes, create a new node or select an existing node to which you want to
add the lockdown.
3. In the Tools & Wizards ribbon Lockdown group, select Keyboard Wizard.
4. The Keyboard Lockdown dialog displays.
5. Configure the following information:
o
The key or combination of keys to be locked down - with the cursor in the first field,
press the key or combination of keys to be locked down.
o
Define whether left and right versions of the same key are treated independently - select
the checkbox to identify the keys separately. For example, Left Ctrl and Right Ctrl.
o
Select a radio button to control whether the lockdown should apply to All Applications
or a Selected Application. Use the ellipsis (...) to browse to the application or drag-and-
drop the spy tool onto the required application.
6. Click OK.
The key or key combination is disabled as defined once the configuration is saved and deployed.
Office Wizard
The Office Wizard is used to lockdown specific Microsoft Office functions. Toolbar, menu and ribbon
items can be disabled in Microsoft Office applications.
1. Select the Policy Configuration navigation button.
2. In one of the User nodes, create a new node or select an existing node to which you want to
add the lockdown.
3. In the Tools & Wizards ribbon Lockdown group, select Office Wizard.
4. Click Next in the Welcome screen. All supported, installed Microsoft Office applications are
listed.
Copyright © 2019 , Ivanti. All Rights Reserved. Privacy and Legal.
Page 227 of 237
Environment Manager 2019.1 Policy Product Guide

5. Select the application you want to lockdown and click Next to open the application and display
a list of all menu options.
6. Select the menu items you want to disable. Use the search facility to find specific items.
7. Click Next to display a list of Toolbar or Ribbon items.
8. Select the Toolbar or Ribbon options which you want to disable. A search facility is available to
find specific options.
9. Once all Menu and Toolbar or Ribbon items for lockdown have been selected, click Next. The
Summary screen displays details of the number of controls selected for lockdown.
10. Select the Do not apply lockdown settings permanently checkbox as required.
Lockdown General Wizard
The General Wizard allows you to block or remove Windows objects in the operating system and
application interfaces. The wizard uses a drag-and-drop Spy tool to identify objects for lockdown.
The Environment Manager agent blocks or removes controls based on the basic attributes of
standard window controls
Control Description
Process
Name
The executable for the application to which the lockdown relates.
Control
Text
The text displayed by a Windows control, where relevant. For example, if you are
locking down a button, the control text will be whatever is written on that button. For
example, the control text for a Save as button will be Save as. For checkboxes, the
control text is the associated label.
Parent
Text
The text associated with the parent window of the Windows control and appears in
the header text of a dialog box. If you are locking down the OK button in a Font
dialog box, the parent text will be Font.
Control
ID
The ID assigned and used to identify a Windows control. The ID is common between
applications. For example, the Cancel button in the Save as dialog in Microsoft Word
has a Control ID of 2, as does the same button in the Save as dialog box of Application
Control. The Cancel button in the Print dialog box in Notepad also has a Control ID of
2.
Class
Name
The specific type or class to which a Windows control belongs, class such as Edit,
Button or SysListView32.
MSAA
Type
Application or operating system element types used for Microsoft Active Accessibility.
Each element type has a name and numerical identifier. For example, Scroll Bar (3) and
Radio Button (45).
Copyright © 2019 , Ivanti. All Rights Reserved. Privacy and Legal.
Page 228 of 237
Environment Manager 2019.1 Policy Product Guide

Control Description
Window
Style
The Microsoft Windows Style reference number for the object. As with the Control ID,
this reference is common to the same objects in different applications.
When a control has been selected using the Spy tool, the controls are displayed in the General Wizard
dialog box. The Window Controls captured depend on the control or type of control selected.
There are different control types for lockdown relating to various application and operating system
functionality, for example, Tree Control and Window Control. Each control type has different
characteristics and settings.
Some applications, such as Adobe Reader, use custom controls which might not be
recognized by the Spy tool. These controls cannot be locked down by Environment Manager.
Tree Control
Relates to hierarchical structures such as the folder structure in Windows Explorer Advanced Internet
Options.
Two methods of lockdown can be applied:
l Tree items removed - A dialog box lists each node in the tree. By selecting the appropriate
checkbox, nodes are removed from the tree in the application, when the configuration is
deployed.
Copyright © 2019 , Ivanti. All Rights Reserved. Privacy and Legal.
Page 229 of 237
Environment Manager 2019.1 Policy Product Guide

Removing some list items can cause undefined behavior in applications.
Ensure that any item removed does not disable functionality which is vital to the
running of the application.
l Window control hidden - The entire window control containing the tree is removed from view.
Dialog Box
Relates to windows which open separate to the application such as the Insert Object dialog box in
WordPad.
When the dialog hidden lockdown is applied, the dialog does not display. The relating menu option
appears but its use is redundant.
Edit Control
Copyright © 2019 , Ivanti. All Rights Reserved. Privacy and Legal.
Page 230 of 237
Environment Manager 2019.1 Policy Product Guide

Relates to fields in which text can be entered such as the Search field in help systems. Whole fields can
be locked-down or individual words can be prohibited and/or replaced with appropriate information
messages displayed to users.
Two methods of lockdown can be applied:
l Edit control filtered - Block or replace specified words and phrases and define warning box
content
l Window control hidden - The whole field is removed from view
List Control
Relates to any list of items such as Internet Explorer Security Settings or a list of files and folders in the
main window of Windows Explorer. List control also relates to the Desktop enabling icons to be locked
down.
l List items removed - A dialog lists each item in the list. By selecting the appropriate checkbox,
nodes are removed from the tree in the application.
Removing some list items can cause undefined behavior in applications. Ensure that
any item removed does not disable functionality which is vital to the running of the
application.
l Window control hidden - The entire window control containing the list is removed from view.
Copyright © 2019 , Ivanti. All Rights Reserved. Privacy and Legal.
Page 231 of 237
Environment Manager 2019.1 Policy Product Guide

Combo Box Control
Relates to list boxes which allow text to be entered to assist navigation. For example the Font combo
box in Notepad. Enter text in the field and the list automatically displays fonts matching the entered
text.
l Edit control filtered - Block or replace specified words and phrases and define warning box
content.
l List items removed - A dialog lists each item in the combo box. By selecting the appropriate
checkbox, items are removed from the box in the application.
Removing some list items can cause undefined behavior in applications. Ensure that any item
removed does not disable functionality which is vital to the running of the application.
l Window control hidden - The entire combo box control is removed from view.
Copyright © 2019 , Ivanti. All Rights Reserved. Privacy and Legal.
Page 232 of 237
Environment Manager 2019.1 Policy Product Guide

Menu Control
Relates to application menus such as File, Edit and View. Drag the cursor onto a specific menu or
highlight the menu bar to select all menus.
A dialog box lists each menu selected and their available options. Lockdown an entire menu or select
individual menu options. Menus and option are displayed but do not function.
Toolbar Control
Relates to toolbars and toolbar options in applications such as any of the selected toolbars in Internet
Explorer or the Back button.
A dialog box lists each option or icon in the toolbar. The whole toolbar can be locked down or
individual options disabled. Locked down options are visible but do not function.
Copyright © 2019 , Ivanti. All Rights Reserved. Privacy and Legal.
Page 233 of 237
Environment Manager 2019.1 Policy Product Guide

Window Control
Relates to Windows elements such as buttons, check boxes and radio buttons. Window Control can
also be applied to static items such as text and icons.
Applying the window control hidden lockdown to an element of a window, removes the option
entirely. In the screen graphic above, when the configuration is saved and deployed, the Enable
button will not appear.
MSAA Control
Relates to Microsoft Active Accessibility (MSAA) technology which is designed to help Assistive
Technology products interact with standard and custom user interface elements of an application.
This control locks down various application elements such as hyper links and Windows maximize and
minimize buttons.
MSAA control disabled items are disabled but still visible to the user.
Copyright © 2019 , Ivanti. All Rights Reserved. Privacy and Legal.
Page 234 of 237
Environment Manager 2019.1 Policy Product Guide
Message Libraries
Blocked Text Library
Blocked text allows you to configure a list of words or expressions which will be used to delete or
replace text entered into Edit and Combo controls. The Blocked Text Library controls the behavior for
any words which are added to it.
The message libraries are used and can be configured when using the General Wizard to create a
Combo Box or Edit Control type lockdown, with the edit control filtered lockdown option.
User Messages
Messages can be configured so that they display when a user attempts to select an option or other
application element, which has been locked down. User-defined messages can be set to display for
Edit, Combo Box and certain MSAA controls.
Apply a message to a lockdown by selecting one from the Message drop-down in the appropriate Edit
Control dialog box.
The Blocked Message Library includes a default Logoff Message. The message displays when the
logoff process is delayed due to the Environment Manager Agent completing actions.
The message can be customized by overwriting the text in the Message box. The Title must not be
altered from Logoff Message.
To disable the Logoff message, delete the Message text and the message box will not be displayed.
Configure the Blocked Text Library
1. Select the Policy Configuration navigation button.
2. In the Tools & Wizards ribbon Lockdown group, select Blocked Text Library.
The Blocked Text Library can also be configured when creating Edit and Combo Box
controls by following this procedure.
The Text List sets the behavior for the Text Items within.
3. Select Add > Add Blocked Text List
4. Enter a Description for the Text List.
Copyright © 2019 , Ivanti. All Rights Reserved. Privacy and Legal.
Page 235 of 237
Environment Manager 2019.1 Policy Product Guide

5. Select a behavior:
o
Use regular expressions - Use wildcards to define the blocked text. See Wildcards and
Regular Expressions . Some programs do not support the ^ when used at the start of
regular expressions.
o
Remove all text if blocked - Removes or replaces all text in the field when blocked text
is entered.
o
Remove blocked text - Removes or replaces only the blocked text item from the field.
Unblocked text is unaffected.
6. In the Replace With field, enter the text you want to replace the blocked text with. If no
alternative text is specified, the blocked text will be deleted.
7. Select the Block Drive Letter checkbox if required. This blocks any drive names (e.g. C:) which
have been disallowed by group policy from being entered in the selected edit control or combo
box.
Once the Text List has been defined, the Blocked Text Items (the words or phrases you want to
prohibit) must be added.
8. Click Add > Add Blocked Text Item.
9. Enter a word or phrase to be blocked.
10. Repeat steps 7 and 8 to add more text items.
11. Click OK to close the library.
The library is then used when enforcing Combo Box or Edit Control lockdowns to delete or replace the
word or words listed.
Configure User Messages
1. Select the Policy Configuration navigation button.
2. In the Tools & Wizards ribbon Lockdown group, select User Messages.
The Blocked Text Library can also be configured when creating Edit and Combo Box
controls by following this procedure.
3. Click Add to create a new message with the following elements:
o
Title - A name for the message, displayed in the library and when configuring messages
for controls.
o
Caption - The text used in the header of the message.
o
Message - The body of the message.
4. Click OK to add the message. It can now be used when configuring Lockdown actions.
Copyright © 2019 , Ivanti. All Rights Reserved. Privacy and Legal.
Page 236 of 237
Environment Manager 2019.1 Policy Product Guide

App-V 4.x Wizard
The App-V 4.x Wizard guides you through the steps required to extend an Open Software Description
(OSD) file.
The wizard is not compatible with App-V 5.
An OSD file is generated by App-V to define how an application is launched and configured. The App-
V action is designed to extend the capabilities of application delivery offered by Microsoft App-V. It
can be used to manipulate an OSD configuration file for an App-V sequenced application to configure
associated settings including environment variables, registry keys, pre and post launch scripts and
policies.
This allows the App-V delivered application to be tailored based on how or where the user is accessing
the streamed application.
The following OSD script types are supported:
l JScript
l Batch
l Perl
l HREF
The wizard guides you through the steps required to roll out an App-V Streamed Application to
managed endpoints:
l Select Source OSD
l Update OSD Details
l OSD Target File Location
l Summary
Copyright © 2019 , Ivanti. All Rights Reserved. Privacy and Legal.
Page 237 of 237
Environment Manager 2019.1 Policy Product Guide
