
The Thinking Person's Reality Show
ADVENTURE ACTIVITY GUIDE
ADVENTURE ACTIVITY GUIDE
The Thinking Person's Reality Show

For WETA
Director of Outreach and Education
Ferne C. Barrow
Editorial Coordinator
Karen Zill
Designer
Cynthia Aldridge
Illustrator
Christopher Zaccone
Editor
Barbara deBoinville
Executive Producers
Dalton Delan
Jeff Bieber
For the BBC
Executive Producers
Karen O’Connor (Episodes 101-106)
Andrew Law (Episodes 107-110)
Series Producers
Steve Evanson (Episodes 101-106)
Paul Manners (Episodes 107-110)
Project Advisors
Angela Birch
Imperial College of Science,
Technology and Medicine
London, UK
Mike Bullivant
The Open University
Milton Keynes, UK
Kimberlie McCue
Missouri Botanical Garden
St. Louis, MO
Dennis Schatz
Pacific Science Center
Seattle, WA
Kendall Starkweather
International Technology Education Association
Reston, VA
Peter Taylor
The Open University
Milton Keynes, UK
cc
ACKNOWLEDGEMENTS
Educational materials produced
by the New York Hall of Science
Director of Public Programs
& Special Events
Marcia Rudy, Ph.D.
Director of Education
Preeti Gupta
Director of Science
Martin Weiss, Ph.D.
Manager of Public Programs
Sylvia Perez
Supervisor of Public Programs
& Science Theater
Marcos Stafne
Manager of Science Programs
Frank Signorello
Science Program Assistant
Grace Jose
Exhibit Developer
Rita Hoffstadt
Web site
Look for more information about
Rough Science on the World Wide web:
www
.pbs.org/roughscience.
To purchase videotapes or DVDs of
Rough Science programs, contact:
Bullfrog Films
P.O. Box 149
Oley, PA 19547
1-800-543-3764
Order online at www
.bullfrogfilms.com
Closed captioned for viewers who
are deaf or hard of hearing.
All photos courtesy BBC.
INTRODUCTION
Everywhere you look you can see the fruits of scientific effort and technological innovation—
from mobile phones to medicines, from the clothes we wear to the foods we eat. In the
natural world, science has shed much light on the value and function of plants and
animals and the interplay of various life forms and
habitats. Scientists have opened our eyes to a star-
tling, exciting and sometimes bewildering universe,
and technology has given us a host of practical uses
for the discoveries of science.
Yet, in spite of the ubiquitous nature of science,
many people find the subject daunting and inacces-
sible. The Rough Science television series hopes to
change that. By showing how science can be put to
use in everyday life, Rough Science helps viewers
understand that science is a process involving some
basic knowledge, a good dose of curiosity, a little
guesswork, trial and error, and a bit of elbow grease to find solutions.
The Rough Science Adventure Activities Guidebook is a companion to the Rough Science
television series. The guide provides science and technology activities that encourage
collaborative learning and experimentation in an informal setting. Although written for
museum professionals, the guide presents activities of interest to teachers, parents, and
students. The activities could be completed not only in a museum but also at school or
at home. The activities that were chosen for the guide reinforce the scientific method
and inquiry skills, provide interactive, hands-on learning experiences for school age
children to adults, and make science and technology fun and engaging.
To request a Guidebook, please write to Rough Science Guidebook, WETA, 2775 South
Quincy Street, Arlington, VA 22206 or email us at [email protected].
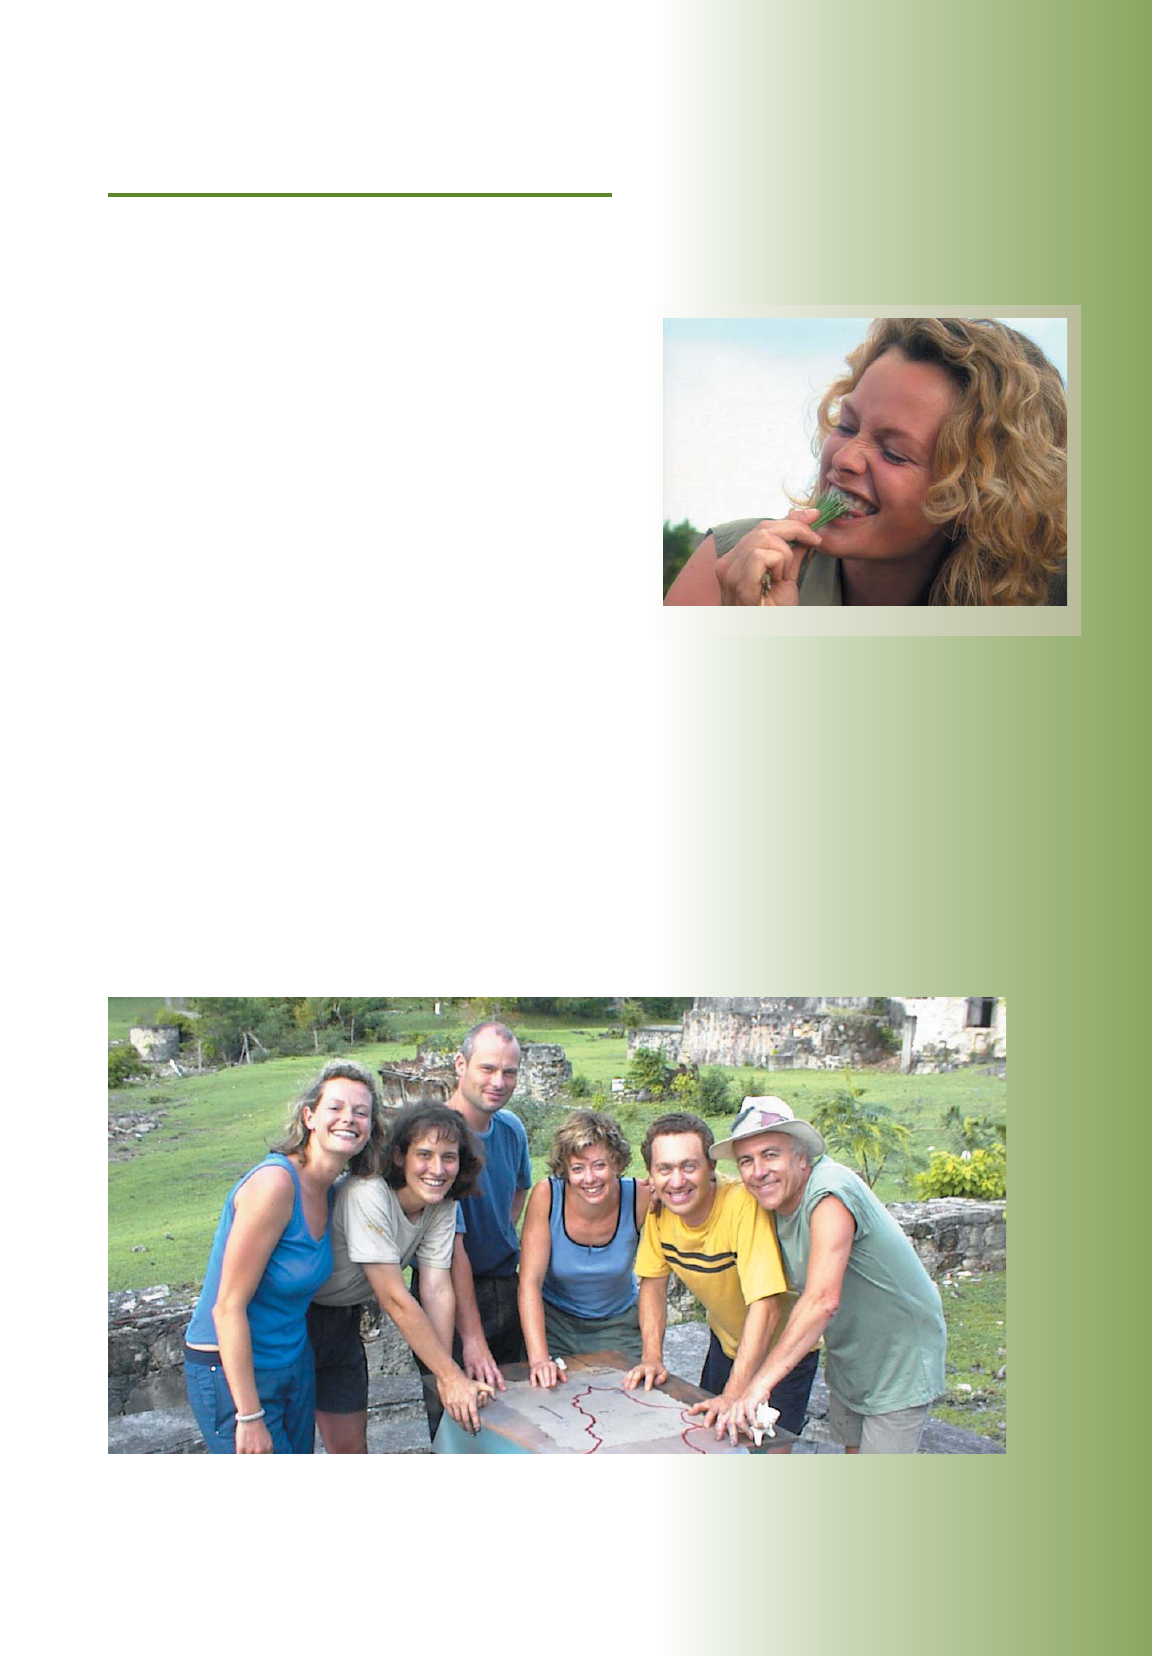
Kate Humble samples homemade toothpaste.
From left, series host Kate Humble, Ellen McCallie, Mike Leahy, Kathy Sykes, Jonathan Hare and Mike
Bullivant admire their map-making handiwork.
ROUGH SCIENCE • ACTIVITY GUIDE 1

WHAT IS ROUGH SCIENCE?
Television Series
A thinking person’s reality show, Rough Science is a ten-part series produced for the Open
University in the United Kingdom by the BBC and presented on American television by WETA
Washington, D.C. In the half-hour programs,
each one set over a three-day period, the cast
of British and American scientists must com-
plete specific tasks using only basic tools and
equipment and the raw materials they find on
their island location. The first six episodes
were filmed on Carriacou in the Caribbean;
the final four were filmed on the Italian island
of Capraia in the Mediterranean. The five
engaging scientists in each episode represent
the fields of chemistry, botany, physics, virology
and biology. See page 18 for biographical
sketches of the scientists. A synopsis of each
episode is on the inside back cover. The science
topics covered in the television series and
related activities include weather and
orienteering; chemistry, biology, and botany;
electricity; astronomy; and physics.
Outreach
The Rough Science television programs serve as a springboard for the education and
outreach activities described in this guidebook. Called Rough Science Adventures, these
activities give viewers the chance to experience challenges similar to those faced by
the scientists in the programs. Because the activities are based on the National
Science Education Standards, science and technology teachers may find them a
valuable source of enrichment in the curriculum. Public television stations as
well as other community organizations can also offer Rough Science Adventures
to their constituents. The
television series and the
Guidebook are innovative
means of involving people of
all ages and backgrounds in
hands-on science in friendly,
recognizable environments.
Web site
The companion Web site,
www
.pbs.org/roughscience,
contains descriptions of each
program, biographies
of the scientists, their pro-
duction diaries, resources for
educators, and additional
challenges that viewers can
try on their own.
Kathy Sykes is hard at work on
an island map constructed
from leaves.
With the intent of creating a celebratory sound, Kate Humble and
Jonathan Hare prepare to manufacture the big bang.

Rough Science Adventures at the Museum
This guidebook was written for museum professionals to use with different
audiences: young people in elementary school, middle school, and high
school, adults, families and groups of mixed ages. It covers a wide array
of science and technology topics that touch on everyday living, and the
activities can be adapted to all ages and skill levels. They also can be
tailored to enhance current museum exhibits and programs. For example,
the activities can be used at a variety of multi-day or one-time only events
such as:
Rough Science Activities
The activities selected for inclusion in the guidebook are similar
to activities already used in museums with multi-age visitors. Like the
television series, the activities have an island theme. They have been
grouped into eight scenarios: Water Quality Control Center, Weather
Station, Island Power Plant, Island Observatory, Island Restaurant, Tropical
Island Day Spa, and Tropical Island Party. (An additional scenario, Island
General Store, appears on the Rough Science Web site.) These scenarios
can serve as the starting point for a variety of museum or community
events described earlier.
Each scenario begins with a brief, scene-setting statement. This introductory
paragraph can be used by the educator as a script to involve the
participants. Feel free to ad lib or embellish as appropriate. Approached
in order, the scenarios provide cumulative learning for participants, but
each is designed to stand-alone. The order of activities may be changed
and activities added from other scenarios. For example, the making soap
activity presented in the Tropical Island Day Spa can be used for Island
General Store, Island Restaurant or Tropical Island Party.
After the introductory paragraph, each scenario issues several
“challenges,” explains the science behind the activity, lists the
needed supplies, and describes step-by-step how to proceed.
Note: A list of scientific supply companies can be found on the Rough
Science Web site, www
.pbs.org/roughscience
, under Discover More.
You may choose to substitute activities that you have developed for your
particular audience or that complement other aspects of your programming.
Alternatively, you may choose to issue some of the challenges to your
participants, provide them with the appropriate materials, tools, and
equipment, and let them come up with a variety of solutions to each
challenge, providing only as much guidance as they need.
• school group visits
• after-school programs
• summer camp programs
• scout badge programs
• sleepovers at the museum
• discovery days
• family nights
Plan to screen one or more
of the Rough Science
episodes as part of your
event. (Tapes can be pur-
chased from Bullfrog Films;
see inside front cover.)
Engage participants in
challenges similar to those
portrayed in the series.
(See Rough Science
Adventure Scenarios section
starting on page 4.)
Take participants on field
trips to natural habitats and
involve them in activities
that relate to the geology,
flora and fauna of the area.
Draw on the resources
the museum already has:
educators, scientists,
engineers, volunteers, and
technology experts on staff.
If possible, invite local
scientists, technology
teachers, and engineers
who may complement your
skills and knowledge.
Connect challenges with
current exhibits and
permanent collections
whenever possible.
How to Organize
Rough Science
Events
• member and corporate events
• teacher professional development days
• holiday programs for the general public
with drop-in workshops
• outreach with community organizations,
libraries, or schools
• field trips to natural habitats
Ellen McCallie employs fire to aid
in the creation of sunscreen.
ROUGH SCIENCE • ACTIVITY GUIDE 3

We want to know if the water on your
island is acidic or basic (alkaline).
Strongly acidic or strongly alkaline
water can be a sign of pollution and
can be harmful to plants and animals
and hazardous to drink. Carry out the
following test to check your water.
You need
a red cabbage
medium-size bowl
grater
strainer
small plastic or glass pitcher
5 clear plastic cups
baking soda
lemon juice
vinegar
cola
distilled water
“island” water (spiked with
something acidic like vinegar)
teaspoon
What you do
Grate one cup of red cabbage into a
medium-size bowl and cover it with 1/2
cup cold distilled water. Let it sit for 45
minutes. When the water turns red, strain
the cabbage juice into a plastic pitcher.
Use the cabbage juice to test for acids or
bases. Acids will make the cabbage juice
turn different shades of red, and bases
will make it turn different shades of blue.
Pour an equal amount of cabbage juice
into five plastic cups. Add 1 teaspoon of
baking soda (which is a base) to four of
the cups. The stronger the acid, the less
liquid you’ll use to get the original color
back. The fifth cup is your control. The
color of the juice in the cup with just the
baking soda is the color that you want to
get all of your mixtures to match.
Add the lemon juice, 1 teaspoon at a
time, to your first cup. How much lemon
juice did you have to add to get the
cabbage juice back to its original reddish
color? In the second cup repeat for
vinegar, and cola in the third cup. The
liquids you need to use the least of are
the most acidic. The liquids you need to
use the most of are the least acidic. The
liquids that don’t change the color at all
are bases. Now that you have a range of
reactions for comparison, test island
water in the fourth cup. What is your
conclusion? Is it acidic or basic?
What’s going on?
Red cabbage juice is an indicator. When
it comes into contact with a base, like
baking soda, it turns blue/purple. When
it’s mixed with an acid, like vinegar, it
stays red/pink. Pure water is neutral —
neither acidic nor basic.
Water can be “hard,” even
though it’s a liquid. Hard water
contains lots of minerals (such as
magnesium and calcium) that
leave deposits in pans and water
pipes. Hard water also makes it
difficult to lather up with soap.
Are you concerned about the lack
of lather when you soap up on
the island? Test your water to
see how hard it is.
You need
What you do
In the small jar mix a teaspoon of
the liquid soap with
1
/2
cup of the
distilled water to make a soap
solution. In the tall glass dissolve
1 teaspoon of Epsom salts in 2
cups of distilled water to make
hard “island” water. Pour distilled
water into one screw-top jar and
the same amount of “island”
water into the other. Use the
dropper to put one drop of soap
solution into the jar of island
water. Screw the lid on tight and
shake. If the water doesn’t foam,
add another drop of solution,
screw on the lid, and shake it
again. Repeat until the water
foams. Count how many drops of
soap solution you need. Repeat
the experiment using the screw-
top jar of distilled water. Which
water needed more drops of soap
solution to make it foam?
What’s going on?
Distilled water is “soft.” We
can use it as a measure of the
hardness—the mineral content—
of the “island water.” In hard
water the salts (magnesium and
calcium) interact with soap to
form a scum that will not form
bubbles (soap foam). Therefore,
the amount of lather is related
to the hardness of the water.
Test the Hardness of Water
“island” water
two screw-top jars
teaspoon
eye dropper
small open jar
tall drinking glass
distilled water
liquid soap
Epsom salts
measuring cup
WATER
QUALITY
CONTROL
CENTER
That tropical water really
looks inviting! Looks can
be deceiving. Before you
jump in for a swim, do a
little rough science to
check if that water’s as
pure as it looks.
The Challenges!
To determine if the
water is polluted, test
the acidity of the water.
To determine if the water
has a high or low mineral
content, test the hardness
of the water in a soap
solution.
To see what organisms
are in the water, make a
microscope.
To make sure that your
drinking water is safe,
design and build a
water filter.
Test the Acidity of Water
4 ROUGH SCIENCE • ACTIVITY GUIDE

Worried about the quality of
drinking water on the island?
Filtering is one of the best
methods of making water safe
to drink. This filter will remove
small particles from dirty water.
Make your own filtered water
using this method.
You need
2-liter soda bottle with cap
serrated knife
napkins or paper towels
gravel, sand, charcoal, and
cotton balls for the filter
dirty water (if your
“island” water looks too
clean, add cooking oil,
food coloring, pieces
of paper, or tiny
pieces of Styrofoam)
What you do
Remove the plastic
sheath from the outside
of the soda bottle and
screw on the cap. Cut
the bottle in half. Put
the top half of the bottle
upside-down (like a funnel)
into the bottom half. Line
the upside-down half-bottle
with a napkin or paper towel.
Put layers of gravel, sand, char-
coal, and cotton balls inside the
top half of the bottle. (Ask par-
ticipants to predict what they
think each of the filter materials
will remove from the water.)
Remove the bottle cap. Pour the
dirty water through the filter.
(Ask participants to comment on
any changes they notice and how
their observations fit with their
predictions.) Now scoop out each
layer of the filter and examine
what each layer has taken out of
the water. Experiment by putting
the filter materials into the
bottle in a different order each
time. What difference does the
order of the layers make? Clean
the bottle halves thoroughly
before you use them again.
What’s going on?
Different materials filter different
substances from the water. The
slower the water travels
through a material, the
more impurities are
removed. Here the
cotton fibers and
sand create a longer
path for the water
and impurities to
pass through and
solids get trapped.
Charcoal particles
are charged (like a
glass rod rubbed
with a silk cloth)
and they attract
oppositely charged
impurities.
For more activities, see
the Rough Science Web site:
www
.pbs.org/roughscience.
Make a Microscope
Water is full of plants and
animals that are too small to see
with the naked eye. Make a
simple microscope to see if you
can detect any tiny organisms
swimming around in the water.
You need
empty matchbox
piece of thin, transparent plastic
(e.g., from a plastic bag or
plastic wrap)
matchstick
petroleum jelly or lip balm
dropper
scissors
transparent tape
water samples
(e.g. from an “island” pond)
What you do
Cut out most of one of the large
sides of the matchbox sleeve. Be
careful not to cut it all out since
the sleeve still needs to hold
together. Next cut a piece of thin,
transparent plastic the same size
as the end of the sleeve (where
the tray slides in). Tape the plastic
across the end of the sleeve, tak-
ing care to keep the tape right to
the edges. Cut a hole in the side
of the sleeve to allow light to
enter. With the plastic-covered
end up, slide the sleeve onto the
tray of the matchbox (as if to
close the matchbox) with the hole
on the open side. Using the
matchstick, draw a circle of petro-
leum jelly on the plastic. Use the
dropper to place a single drop of
water in the circle. Put another
drop of water (pond water) on
the end of the tray and look at it
through your magnifying water
drop. Very carefully, slide the
sleeve up or down to focus your
microscope. This matchbox setup
can also be used to view other
items like small insects.
What’s going on?
This is a simple type of light
microscope that bends light
reflected by an object to make a
larger magnified image.
Activity adapted from How to
Build a Mini Microscope,
http://physics.about.com
.
water drop
object
look here
vaseline
tape
matchbox
sleeve
matchbox
tray
plastic
Microscope
Build a Water Filter
paper
towel
soda
bottle
top
soda
bottle
bottom
gravel,
sand,
charcoal
& cotton balls
(inside
paper towel)
Water Filter

Find the Dew Point
The island climate is completely different from the
one you’re used to. How do you avoid getting caught
in a torrential storm or a thick fog? The dew point
is the temperature at which moisture in the air
begins to form dew. It is a way of gauging the air’s
humidity. Here’s a way to calculate it.
You need
tin can paper towel
thermometer bowl
tablespoon water
ice cubes
What you do
Crush the ice cubes in the paper towel using the
back of the tablespoon. Fill the bowl halfway with
crushed ice. Make sure the outside of the tin can is completely dry. Fill the
can with cold water. Place the thermometer in the can. Add one tablespoon
of crushed ice and stir. Continue adding ice until a layer of dew is visible on
the outside of the can. Immediately read the thermometer to find the dew
point temperature. If it’s high, beware! The humidity is high also.
What’s going on?
All air contains water vapor. As air cools (when it comes in contact with the
cold can), the water vapor begins to condense. This is why glasses holding
cold drinks “sweat” in the summertime. The dew point is the temperature
at which moisture in the air begins to form dew. The higher the
dew point temperature, the higher the moisture content of
the air at a given temperature.
Activity adapted from Robert Wood. Science for Kids:
39 Easy Meteorology Experiments.
TAB Books, 1991.
WEATHER
STATION
The weather in the tropics
can be unpredictable. And
there’s no radio or TV station
to turn on and get a reliable
forecast. That’s why you’ll
need a weather station to
figure out what changes lie
ahead. You’ll want advance
warning if that big storm is
on the way. And you’ll want
to know which direction it’s
coming from.
The Challenges!
To calculate the moisture
content of the air, find the
dew point.
To predict changes in the
weather, make a barometer
.
To find out which way is
North, construct a compass.
To determine the wind
direction, build a wind vane.
Make a Barometer
A barometer shows changes in air
pressure. High pressure indicates
good weather, low pressure
indicates possible storms. By
consulting your barometer every
day, you’ll be able to make
predictions about weather changes.
(This can be a multi-day activity to
compare the daily differences in
air pressure.)
You need
tall glass or jar
bowl
4 paper clips
pen
water
What you do
Slide the paper clips onto the rim of
the glass and space them equally
around the rim. Fill the glass about
two-thirds full with water. Place the
bowl upside down over the glass.
Carefully turn the bowl and the glass
over so that the glass sits upside
down in the bowl. Some of the
water will run out of the glass but
most will stay inside it. With a pen
mark the level of the water in the
glass at the beginning of the activity.
Take your barometer outside into
the open air. Look for changes in the
water level in the glass over time.
(This may take several hours or even
longer than a day.)
What’s going on?
When the atmospheric pressure
of the air rises, the water in the
bowl will be forced downwards
by the weight of the air on the
water. This, in turn, will cause the
water in the glass to rise. A barometer
measures the weight of the amount
of air between the surface of the
earth (the water in the bowl) and the
top of the atmosphere.
Activity adapted from Robert
Wood. Science for Kids: 39 Easy
Meteorology Experiments
. TAB
Books, 1991.
Mike Bullivant devises a rain meter
as part of the island weather station.
6 ROUGH SCIENCE • ACTIVITY GUIDE

Build a Wind Vane
A change in wind direction often indicates an
imminent change in the weather. Be prepared
for sudden change by making this wind vane.
(You can also use the compass you made in the
previous activity to identify the
direction of the wind.)
You need
a long tack
scissors
modeling clay
a plastic pot or
container, e.g.,
from take-out food
ruler
glue stick
thin, colored card
drinking straw
2 pencils with eraser
compass
What you do
Turn the plastic container upside down. Make a
hole in the center by inserting the pencil, sharp
end first. Make sure that it is firmly in place.
With another pencil and a ruler, draw two large
triangles and four small ones on the colored card.
Then cut out the shapes. Glue the small triangles
to the base of the plastic container at equal
distances and on opposite sides from each other
as on a compass. One point of each small triangle
should overlap the edge of the pot, with the
pencil in the middle. Cut short slits in each end of
the straw and insert one large triangle in each
end to make an arrow-shaped “vane.” Push the
tack through the center of the straw and into the
eraser on the pencil sticking out of the pot.
Secure the other end of the pot to a surface with
a ring of modeling clay. Take the vane outside or
to a simulated windy weather area and watch it
swing in the wind. Finally, use your compass to
determine East, West, North and South, and then
label the small triangles accordingly. Now you can
tell which direction the wind vane is pointing.
What’s going on?
The direction in which the vane points indicates the
direction from which the wind is blowing. For
instance, in a westerly wind, the vane points “West.”
Activity adapted from Neil Ardley. 101 Great
Science Experiments
. Dorling Kindersley, 1993,
pp. 14-15.
Make a Compass
Make a compass to determine the different
directions: North, South, East, and West.
You need
needle
magnet
plastic container
a cork (1/4” to 1/2 “ thick)
pen
water
What you do
Fill the plastic container with water. Stroke one
end of the magnet along the needle in one
direction at least 50 times to magnetize the
needle. Lay the needle on the cork, with one end
of the needle in the center. Tape the needle
down. Float the cork in the container of water.
The needle will bob around until it points North,
towards the Earth’s magnetic north. When the
needle settles in position, mark North on the
side of the container. Now you can determine
the other directions and label them East on the
right, South on the bottom and West on the left.
What’s going on?
The Earth’s core is thought to consist largely of
molten iron, which crystallizes into a solid.
Convection caused by heat radiating from
the core, along with the rotation of the Earth,
causes the liquid iron to move in a rotational
pattern. It is these rotational forces in the liquid
iron layer that lead to weak magnetic forces
around the axis of spin. The magnetized needle
in a compass can detect very slight magnetic
fields. No matter where you stand on Earth, you
can hold a compass in your hand and it will
point toward the North. This is amazingly helpful
because you can tell which way to go no matter
what the weather or time of day.
ROUGH SCIENCE • ACTIVITY GUIDE 7
Compass

Some kinds of batteries produce elec-
tricity by a chemical reaction between
two different metals (electrodes)
immersed in acid (electrolyte).
Figure out how to make your own
batteries in case the limited supply on
the island runs out.
You need
two wires with the
ends stripped off
aluminum foil
scissors
small bowl
warm water
salt
tape
6 pennies (copper coins)
paper towels
1.5 volt penlight light
bulb
a paper plate
What you do
Partially dissolve 1 tablespoon of salt in
1 cup of warm water. Some salt should
still be evident in the bottom of the
bowl. Place a penny on the aluminum
foil and draw around it. Repeat five
times. Do the same thing with the
paper towel. Cut out the circles. You
should have six foil circles and six
paper ones. Tape the end of one wire
to a foil circle. Dip a paper circle in the
warm, salty water. Place the foil circle
with the wire on the plate, and put a
wet paper circle and a penny on top of
it. Using all the foil, pennies, and
paper circles, build alternate layers.
Then tape the other end of the wire to
the last coin and put it on top. This is
your battery.
Test the battery with the light bulb.
Attach the end of one wire to the
metal terminal end of the light bulb.
Wrap the end of the other wire
around the metal shaft of the
light bulb. Can you see the
bulb light up?
What’s going on?
The metal atoms in the foil
dissolve into the electrolyte
(the warm, salty water) and
electrons are left behind.
Electricity is created when
the electrons flow through a
circuit (the foil circles and
paper circles soaked in warm,
salty water). When the metals
eventually dissolve completely
into the electrolyte, no more electrons
are formed and the battery stops
working. The first battery (Volta’s Pile)
was developed about 1860 by Alessandro
Volta. He stacked discs of copper, zinc,
and cardboard soaked in salty water
in alternate layers and measured an
electronic current.
Activity adapted from Neil Ardley. 101
Great Science Experiments. Dorling
Kindersley, 1993. For instructions on
creating a similar battery, see
http://isaac.exploratorium.
Island
Power
Plant
Once you’ve taken care
of basics like food and
water, you’ll want to
experiment with ways
to create your own
electricity and
electrical gadgets.
Why don’t you employ
a little rough science to
create a power plant
on your island?
The Challenges!
To power things, make
your own battery.
To drive a paper wind-
mill to create a breeze,
build an electric motor
.
To see things at night,
make your own flashlight.
Make a Flashlight
When you’re on the island, you can’t just flick a switch and turn
on a light. There isn’t a constant electricity supply. But with a flashlight,
you’ll be able to see around your room at night and even venture outside for
a walk — moonlight or
no moonlight.
You need
sharp pencil
screwdriver
aluminum foil
plastic tape
Make a Battery
8 ROUGH SCIENCE • ACTIVITY GUIDE
3 pieces of wire with bare ends
empty dishwashing liquid bottle
2 batteries with 1.5 volts each
2 brass paper fasteners
a light bulb in a bulb holder
paper clip
scissors
cotton

Build an Electric Motor
It’s hard to sleep at night because of the heat.
How would you go about building a simple motor
to turn a paper windmill and create a breeze?
When a current passes through a coil of wire it
turns the wire into an electromagnet which
interacts with a permanent magnet to make the
coil spin. The spinning coil is a basic motor.
You need
5 small magnets (available at
electronics stores)
2 large paper clips
plastic, paper, or foam cup
2 feet of solid insulated 20-gauge
copper wire (non stranded)
masking tape
a 1.5 volt D cell battery in a battery holder
2 alligator clip leads (available at
electronics stores)
wire strippers
broom
What you do
Wind the copper wire around the end of a broom
handle to create a coil with a 1-inch diameter.
Take each end of the wire and wrap it around
the coil to hold the coil together. Leaving about
2 inches of wire sticking out from each end, strip
the insulation off these two ends using wire
strippers. Attach three magnets to the bottom of
the cup with masking tape. Turn the cup upside-
down and lay two magnets on top. (The magnets
underneath create a strong magnetic field and
keep the magnets on top in place with no tape.)
Unfold one end of a paper clip and tape it to
one side of the cup so that the rest stands up
above the cup. Unfold the other paper clip, and
tape it to the other side of the cup. The paper
clips will form a cradle for the coil. Attach one
end of the coil to one paper clip and the other
end of the coil to the other paper clip. Spin the
coil and adjust the height of the paper clips to
make sure that there is around 1/16 of an
inch between the coil and the top of the magnets.
Adjust the clips to make sure the coil stays
balanced and centered. Put the battery and
battery holder beside the cup. Attach one end
of an alligator clip to a battery terminal and the
other to a paper clip. Attach the other alligator
clip to the other battery terminal and the other
paper clip. Spin the coil to start it turning.
What’s going on?
The current running through the coil of wire
creates an electromagnet. What does this mean?
As with a bar magnet, one end of the coil has
become a North Pole, and the other a South
Pole. Each of the three magnets attracts its
opposite pole and repels its like pole of the
coil, causing the coil to spin.
ROUGH SCIENCE • ACTIVITY GUIDE 9
What you do
Cut the top off the empty dishwashing liquid bot-
tle. Tape foil shiny side up to the inside of the bot-
tle top. Use the pencil to make two small
holes in the side of the bottle near the bottom.
One hole should be about an inch below the other.
Firmly attach two pieces of wire to the bulb hold-
er. Tape the top of one battery to the bottom of
the other to make one long battery. Tape the third
piece of wire to the bottom of the battery. Tape
one of the wires from the bulb-holder to the
exposed terminal on the battery. Put the long bat-
tery in the bottle, carefully threading the wire
from the bottom battery through the lower hole.
Stuff cotton in the space between the batteries
and the walls of the bottle to keep the batteries in
place. Thread the wire from the bulb-holder through
the top hole in the bottle. Attach paper fasteners to
the two wires poking through the holes and push in
the fasteners.
Put the bulb-holder on top of the battery and tape
the center of the bottle top over the bulb. In other
words, put the bottle top on back-to-front so that
the aluminum foil is visible. Bend the paper clip and
fit one end under the lower paper
fastener to make a switch. (When the switch is
turned, current flows from the battery along the
wires to the bulb.) Press the other end of the paper
clip against the top fastener and see the flashlight
light up.
What’s going on?
There is a thin wire (a filament) inside the bulb
that glows white-hot when current flows through
it. The light reflects off the foil to produce a
bright beam of light.
For more activities, see the Rough Science Web
site: www
.pbs.org/roughscience.

Make a Star Clock
It’s night and you want to figure out the time by reading the positions of the
stars. Before the invention of clocks, people told the time by the movement
of the stars across the night sky. You can do the same using your star clock.
You need
star clock template or print from the Lawrence Hall of Science Web site:
http://www.lhs.berkeley.edu/StarClock/starclockprintout.html.
scissors
brass paper fastener
sharp pencil
What you do
Carefully cut around each star clock circle and poke a hole through the mid-
dle of each one. Place the small circle on top of the large circle. Push a
paper fastener through the holes in both circles and spread the fastener open
on the back of the clock. Go outside, look up at the sky, and using your star
clock find the Big Dipper and the North (or Pole) Star. Face the North Star. Put
your thumb over the current month. Slide
the outer circle around so that your
thumb is at the top. Turn the smaller disc
carefully until its stars line up with those
in the sky. You can now read the time in
the window. (If you are on Daylight
Savings Time, add one hour.) Compare
the time with your wristwatch to see how
close you get. It’s better to do this activity
when the moon is not full. A full moon is
so bright that it becomes difficult to see
the stars.
What’s going on?
The North Star never appears to move
because the Earth’s axis, the imaginary
line drawn from pole to pole through the
center of the Earth, points almost directly
to the North Star. The stars that appear
to revolve around the North Star are known as circumpolar stars. In mid-
northern latitudes, these stars appear to circle around the North Star without
rising or setting. The star clock estimates the time based on where the stars
appear relative to the North Star.
Activity adapted from Lawrence
Hall of Science. Earth, Moon,
and Stars. Regents of the
University of California, 1986.
Star Clock
brass
fastener
large
circle
small
circle
Island
Observatory
On the island, far away from
polluting lights and smog of
the city, you check out the
spectacular night sky. Using
a little rough science, study
the solar system while you
enjoy the solitude.
The Challenges!
To calculate time at night,
make a star clock.
To identify what’s in
the night sky, make a
telescope.
How to locate the North Star.
Cassiopeia
North Star
the Plough blade
Big Dipper
10 ROUGH SCIENCE • ACTIVITY GUIDE

Make a Telescope
When you first look up to find the Big Dipper to orient
your star clock, you may have trouble seeing it. Why don’t
you make sure you’ll find it by making your own telescope?
Even if you find the Big Dipper and the North Star with
ease, your telescope will help you to see the moon and
thousands of other stars in much greater detail.
You need
2 convex lenses of different focal lengths (e.g., use
2x and 4x lenses from drugstore reading glasses)
a cardboard tube at least as long as the sum of
the two focal lengths of the lenses
pen
tape
What you do
Fix one lens to each end of the tube with tape. Take care
not to obscure the view through the tube. Mark the end of
the tube with the shorter focal length lens. This will help
you figure out which way round your telescope is. Look
through this end.
What’s going on?
Telescopes use lenses to bend the incoming light. The
first lens (objective lens) gathers light and bends it into
focus and provides a small, upside down image of the
object you’re looking at. The second lens (the eye-
piece) then magnifies the object so that you can see it
better. When the two lenses are combined, you have a
telescope that magnifies the image.
For more information on how telescopes work,
see www
.howstuffworks.com.
Jonathan Hare and Kate Humble concoct a transmitter.
Suggestions for other activities
To understand the position and distance of different
planets and the sun, make a model of the solar system.
To understand the rising and setting of the sun at
different points on the Earth, make a solar calculator.
To measure the height of celestial objects in degrees,
make a clinometer.
To track the stars that you see, make a
constellation chart.
ROUGH SCIENCE • ACTIVITY GUIDE 11

Island
Restaurant
If you’re on a tropical island,
it’s great to know there is a
restaurant where the food
is fresh and the mood is
mellow. After you’re through
with your rough science,
don’t forget to make a
reservation!
The Challenges!
To cook meals for your
guests, make a solar oven.
To grow herbs and spices,
build a terrarium.
To provide warm water,
build a solar water heater
.
Build A Terrarium
Spice up your food and garnish
dishes with herbs and spices
grown in an herb terrarium
(herbarium). Your restaurant
will become an instant hit once
customers realize that their
palates will be pampered
with subtle flavors. Building a
terrarium is much easier than
tending a garden, and it’s low
maintenance.
You need
a glass or plastic container,
such as a candy jar or
picklejar, with a wide
mouth and tight-fitting lid
potting soil
potted herbs
colored stones
shells
water
soap
paper towel
What you do
Do some research to select
herbs that need similar
conditions (soil, light, water)
for growth. Take care to choose
plants that will not outgrow
the container. After cleaning,
rinsing, and drying the container
thoroughly, fill it full with
potting soil. Place the plants
in the soil at a depth similar
to that in their pots and press
Make a Solar Oven
Nothing beats home cooking! It’s your restaurant and you’re the chef. Get
creative with the menu. In fact, get creative with the oven. Make your own
solar oven to prepare exquisite meals for your guests.
You need
a box with a lid, e.g., a pizza box
black construction paper
aluminum foil
heavy plastic laminate
glue
transparent tape
scissors
ruler
magic marker
straw
What you do
Draw a square on the lid of the box and cut along three sides of it. Fold
back along the uncut side to form a flap that opens and shuts. Line the
inside of the flap with aluminum foil, smoothed over and glued into place.
Cut a piece of plastic to fit very tightly over the hole you created in the lid
of the box by forming the flap. Use enough plastic to overlap the underside
of the flap. Seal the plastic by taping it to the underside of the flap. (The
plastic has to be tightly sealed to make sure that no air can escape from
the oven.) Line the bottom of the box with foil, and glue it into place.
Again, take care to smooth out all wrinkles. Cut out a piece of black
construction paper to fit on the bottom and tape it in place. Close the lid
(including the plastic window) and prop the flap open, facing the sun. Move
the box around to get the maximum amount of sun into your oven. Try
cooking something like s’mores. Compare the solar oven with the solar
water heater, described on the next page.
What’s going on?
Energy, radiating from the sun, reflects off the foil. This heat energy is
then stored in the oven.
For more information on solar-powered technology, see
http://www
.solarnow.org/pizzabx.htm.
12 ROUGH SCIENCE • ACTIVITY GUIDE

Make a Solar Water Heater
Wash the sand off after a dip in the ocean with a relaxing warm shower hooked up to a solar water
heater. All it takes is a few simple objects and plenty of sunshine!
You need
water jug black paint
large fish tank with a lid paintbrush
aluminum foil water
transparent tape cardboard, with an area
thermometer greater than the base of the fish tank
What you do
Line the sides of the tank with aluminum foil, inside and out, and tape the foil firmly in place. Paint
the bottom of the inside of the tank black. Place the cardboard in a spot that is in the sun all day.
Place the tank squarely on the cardboard. Once the paint is completely dry, fill the tank with water.
Put the lid on the tank. Use the thermometer to test the temperature of the water every half-hour.
If it gets too hot for a comfortable shower, remove the lid until the water equilibrates with the
outside temperature.
What’s going on?
Sunlight (infrared energy) passes through the glass and is absorbed by the water. Water has a high
heat capacity (able to absorb and hold heat). A black surface absorbs some of the light (sunlight).
If trapped, as it is in this case by the insulation
(the foil), the heat (energy) accumulates and is
reflected into the water so it gets warmer. The
heat energy cannot escape as easily back through
the glass so the water stays warm.
Kathy Sykes devises an ingenious
electrical coil to facilitate cooling
the scientists’ surroundings.
ROUGH SCIENCE • ACTIVITY GUIDE 13
the soil down around them.
Squeeze water from wet paper
towels to moisten the soil around
the plants, but do not overwater
or you will kill them. (If you
need to, you can add more water
at a later date.) Decorate your
terrarium with colored stones
and shells. Close the lid tightly
and place the terrarium where
the plants will receive the light
they need. You have created a
self-sustaining ecosystem.
What’s going on?
The lid traps air inside the ter-
rarium. Plants use carbon dioxide
and sunlight during the day to
produce food and oxygen through
photosynthesis. At night, they
use the oxygen to create more
carbon dioxide. The water
trapped inside the terrarium is
absorbed through the roots of
the plants. It moves up through
the stems and evaporates
through the leaves. Like rain, the
water will condense on the top
of the terrarium and drip back
down to the bottom. The oxy-
gen, carbon dioxide, and water
are therefore constantly being
recycled by the plants.

Tropical
Island Day
Spa
Hot and sweaty from the
tropical sun? What better
way to recover than a
luxurious day in a spa?
Before you slather on that
facemask and kick back in
the sauna, you’re going to
have to figure out how to
create the essentials for a
day of pampering yourself!
Discover the rough science
behind what happens in a
day spa.
The Challenges!
To remove some of those
layers of grime, make
scented and textured soap.
To clean those pores and
keep your skin hydrated and
beautiful in the sun, create
a facial mask
.
Leave that astringent
cucumber mask on too long
and you’ll look like a prune!
On an island you won’t have
a watch or clock so construct
a sundial.
Add Scent and Texture to Soap
Soaps are made by boiling oils and fats with an alkali. Because this takes a
long time and can be dangerous, we’re going to use shredded olive oil soap
as our base and add oils and flowers for scent and texture. For safety, ask
the soap makers to tie back long hair and roll up their sleeves. Supervise
young participants. To dry the soap quicker, place it in the sun or in a low
oven for 15 minutes.
You need
2 saucepans, 1 large, 1 small
1-lb. bar of olive oil soap
grater
plastic or glass droppers
a selection of herbal tea bags (chamomile, green tea, fruit flavors)
teapot or pitcher
essential oils such as lavender, geranium, vanilla, sweet almond oil
(You can buy herbal teabags and essential oils in health food stores.)
dried flowers
oatmeal
tiny squares of candied fruit
a blunt object such as a butter knife
a cookie tray
What you do
Shred a bar of soap using the grater. Place the large pan on a burner and fill
the bottom with enough water to cover the bottom of the small pan that
you place inside the large pan. Take care to make sure that the inside of
the small pan stays completely dry, and that there’s always water in the
large pan. Place the grated soap in the small pan. Heat the large pan slowly
on a medium flame till the soap melts. Add 1/4 of a cup of strong tea (that
you have made) to the soap, mixing it in thoroughly. Spoon the soap mixture
onto a cookie tray in six equal measures. Knead, or mill, each soap mixture
with a knife. When the soap firms up, add your choice of essential oils using
the droppers. Continue to knead until the soap is hard enough to pick up.
Form it into a shape, then roll your bar of soap in dried flowers, oatmeal,
or candied fruit. Allow the soap to dry completely before you use it.
What’s going on?
Soap molecules have both fatty acid and salt-like
properties. The latter allow the soap to dissolve
in water, while the fatty acid properties allow the
soap to dissolve dirt and oils. The combination of
the two sets of properties gives soap its ability to
dissolve grease in water.
Ellen McCallie is the beneficiary of the sunscreen she con-
cocted, administered by host Kate Humble.
14 ROUGH SCIENCE • ACTIVITY GUIDE

Construct a Sundial
Whether your skin is oily or dry, it can benefit from
a facial mask. Mixing eggs with mint and honey will
make masks suited to oily skin; yogurt and cucumber
will help rehydrate dry skin. Put slices of cucumber
over your eyes while your mask is drying.
You need
What you do
In a small bowl, mix grated cucumber, yogurt, and
dried milk with a whisk to create a moisturizing
mask for dry skin. Mix egg, chamomile flowers,
fresh mint, and honey with a wisk in another bowl
to produce an astringent mask that will tighten
pores in oily skin. Apply the mask that matcher
your complexion to your face for 15 minutes,
and then rinse it off with warm water.
What’s going on?
The yogurt mask increases the flow of sebum (oil
produced by glands in your skin) by causing your skin
tissue to expand. The astringent (an agent that contracts
tissue to reduce secretions) mask made from mint
shrinks skin tissue and reduces the sebum flow.
Create a Facial Mask
eggs
cucumbers
plain yogurt
instant nonfat dried milk
chamomile flowers
fresh mint and honey
small bowls
whisks
graters
You have to watch how long you wear that facial
mask. So let’s make a timepiece for the spa.
You need
sundial template
a magnetic compass
card stock
elastic string with metal ends
atlas
What you do
Copy the sundial template onto card stock.
Fold the tabs to an angle that corresponds to
your latitude, as shown on an atlas. Then fold
down both tabs to form the base of the sundial.
Open your sundial to form a 90-degree angle
and fold in the supporting tabs. To finish the
dial, attach the elastic string through the holes
at the top and bottom at the points where all
the hour lines converge. This string is the
gnomon (pronounced no-mun) and casts the
shadow to indicate the time. To provide accurate
time, the sundial (1) must be orientated with
the gnomon pointing North/South; (2) must be
located where a shadow will be cast by the
gnomon most of the day. (Note: one can move
the dial from window to window as the day
progresses.) For greater accuracy, see the
Equation of Time chart on the upper face of
the sundial. A magnetic compass may be used
to determine the North/South line. Because of
the difference between magnetic North and
true North, the sundial reading could be off by
an hour or more. The
variation will depend
on the local difference
between magnetic and
true North.
What’s going on?
Your location on Earth
in relation to the sun
determines the time
where you are. Because
the Earth rotates as it
travels round the sun,
the date is also very
important. Compare 5 o’clock in the afternoon
in July with the same time in December. Your
watch or clock measures standard time. Your
sundial records solar time, which is not the
same. According to solar time, noon is when the
sun is directly overhead. Even though noon in
Boston, New York and Miami happens at the
same moment in standard time, there would be
noticeable differences if you measured noon at
all three locations in solar time.
Activity adapted from Sun Sculpture & Sundial-
Making Kit. New York Hall of Science, 2002.
For information on making other sundials, see
http://liftoff.msfc.nasa.gov/
- Liftoff to
Space Exploration: A Space Sciences Project.
For more activities, see the Rough Science
Web site: www.pbs.org/roughscience.
Mike Leahy and Mike Bullivant
fashion a sundial.
ROUGH SCIENCE • ACTIVITY GUIDE 15

Make Paper
You need to let people know when and where to come to the party. But first
you’ll need some paper to write your invitations.
You need
plain office paper, newspaper, magazines, egg cartons, toilet paper, paper
bags, old cards, nonwaxed boxes pre-soaked in warm water, tissue paper,
napkins, or construction paper (any of these types of paper or a mixture)
sponge
screening from a window or door
an old picture frame or other wooden frame
plastic tub large enough to accommodate the wooden frame
blender or food processor
white felt or flannel fabric
staples or tacks
liquid starch
2 cookie sheets
What you do
Rip the paper into small pieces and place it in a blender until half full. Fill
the blender up with warm water. Blend slowly until there is no trace of paper
and the pulp is smooth. Staple the screen to the frame as tightly as possible
to make a deckle. Fill half the basin with water and add 3 blenders-full of
pulp. (For thicker paper, add more pulp.) Stir well and add 2 teaspoons of liquid
starch. Submerge the deckle in the pulp and gently shake it until you have an
even covering on top of the screen. Lift the deckle above the water level and
let it drain off. (If the new paper on top of the screen is too
thick, take some pulp out of the tub. If the paper is
thin, add more pulp and re-stir.) When the deckle
stops dripping completely, carefully place one
edge along an edge of fabric and gently
ease the paper out of the deckle on top
of the fabric. Press out as much water
as possible with the sponge. Make
sure the paper has come apart
completely from the deckle. Stack
the fabric and paper pieces on a
cookie sheet. Put a piece of
fabric on top of the top sheet of
paper and cover the pile with
another cookie sheet. Press well
to remove any remaining water.
Gently separate the sheets of
paper and hang them in the
sun, or lay them on sheets of
newspaper, until they are dry.
What’s going on?
Paper is made from plant fibers –
old rags, trees. By chopping up the
paper, you are recycling the fibers in
the old paper to make new paper. The
liquid starch helps to prevent inks from
soaking into the paper fibers. For more infor-
mation on making paper, see http://www
.pioneer-
thinking.com.
Tropical
Island
Party
On vacation let your hair
down. What better place
for a party than a tropical
island paradise? But who
would have thought that
rough science could help
make you the perfect host?
The Challenges!
For original invitations, make
your own paper.
To wake up the party
poopers, create botanical
noisemakers.
For refreshments, offer
homemade ice cream
and soda.
What’s a tropical party
without ice cream? Take
the temperature down a
degree or two by making your
own chocolate ice cream.
You need
What you do
In the glass, mix one spoon of
cocoa powder, two spoonfuls of
milk, and one spoonful of
cream. Put some ice in the
bowl and cover it with lots
of salt. Put the glass on
top of the ice and
pack ice around
the glass.
Cover all the ice with
salt. Place the dish towel
over the bowl and leave the
ice cream mixture to set for an
hour. Voilá — delicious chocolate
ice cream!
What’s going on?
The salt lowers the freezing tem-
perature of the ice. This actually
makes the ice colder. The ice
absorbs heat from the ice cream
mixture. The ice cream gets cold-
er and colder until it eventually
freezes.
How about using flavors
other than chocolate?
Lemon, vanilla, orange,
or raspberry?
Make Ice Cream
cream
milk
ice cubes
dish towel
cocoa powder
tablespoon
salt
large glass bowl
16 ROUGH SCIENCE • ACTIVITY GUIDE

Make Lemon or Orange Soda
Throwing a party is thirsty work! You’ll need something to quench
your thirst and give you the energy to keep dancing all night. Make a
refreshing soda from a few simple ingredients.
You need
a lemon or orange
a glass
water
sugar
1 teaspoon baking soda
What you do
Squeeze a lemon or orange and put the juice in the glass.
Add an equal volume of water and some sugar till your
drink tastes sweet enough. Stir in the baking soda and
stand back as your drink fizzes.
What’s going on?
Baking soda is a chemical compound called a carbonate. Lemon and orange juices contain acids. When a
carbonate and an acid are mixed, they produce a salt. Baking soda is a buffer. In the presence of an
acid, carbon dioxide gas is released, producing the bubbles in your drink. A similar reaction, producing
carbon dioxide, is used in certain fire extinguishers.
Additional scenarios, activities, and ideas can be found on the Rough Science Web site:
www
.pbs.org/roughscience.
Mike Bullivant seeks sustenance for the
team with calabash fruit.
Suggestions for other activities
To make sounds like a horn, recorder, drum,
and whistle, make musical instruments from
natural materials (willow sticks, vines, tree
branches, shells, blades of grass).
To have neat jewelry to wear, make
bracelets and rings from plants.
Make Botanical Noisemakers
You don’t want anyone to miss the fun!
Let everyone know where the party is with some
rattles, shakers, and other noisemakers.
You need
dried beans, peas, rice, nuts in shells, or other dry seeds
2 aluminum pie plates
empty film canisters and lids
empty plastic bottles and lids
craft sticks
tape
scissors
What you do
Place a handful of beans, peas, nuts, or seeds between two pie plates and then tape the plates
together around the edges. Use a pair of scissors to make small slits in the bottom of the canisters,
and insert craft sticks through the holes. Put different amounts of rice inside the film canisters and
put on the lids. Put other plant materials inside the plastic bottles. Shake them to different
rhythms.
What’s going on?
Sounds come from vibrations. Shaking the noisemakers causes the beans, rice, or other plant
materials to hit against the pie plates and vibrate, thus creating sound.
Activity adapted from Jill Frankel Hauser and Loreta Trezzo Brare. Kid’
s Crazy Concoctions.
Williamson Publishing, 1998.
ROUGH SCIENCE • ACTIVITY GUIDE 17

THE ROUGH SCIENTISTS
Mike Bullivant — chemist
Mike Bullivant works part-time as a course manager in the chemistry department at the Open
University and part-time as a TV/video/CD-ROM/radio presenter. Bullivant studied chemistry as an
undergraduate at the University of Wales (Cardiff) and went on to do research for a doctorate in
organic photochemistry at the Universities of Cardiff and Nottingham.
Vanessa Griffiths — biologist (episodes 7-10)
Longing as a child to be the next Jacques Cousteau, Vanessa Griffiths followed her passion to become
a marine biologist, earning her degree in marine biology at Liverpool University. After college Griffiths
spent a year doing field research at the marine station on the Isle of Man, then went on to get her
master’s degree and teaching certificate. She now teaches ecology at the Orielton Field Center in
Pembrokeshire in the United Kingdom, where she has introduced hundreds of school children to the
vast marine life that can be found in an afternoon at the beach.
Jonathan Hare — physicist
Jonathan Hare studied physics at Surrey University. During his doctoral studies in chemical physics at
Sussex University, he was involved in some of the first pioneering work on Buckminsterfullerene, the
60-atom molecule that earned a Nobel Prize for its discoverers. This work led from astronomy via
chemistry into a new area of material science. Hare currently manages The Creative Science Center
and is part of the Vega Science Trust at the University of Sussex, which creates science programming
for television and the Internet. He also works as a consultant on educational programs for
multinational corporations.
Mike Leahy — biologist
Mike Leahy left school by “mutual agreement” while studying for his final high school exams and
began an apprenticeship as a motor mechanic. Leahy was an active member of the environmental
movement during the late 1980s and early 1990s, and while still a mechanic, he studied for a biology
degree at night school. At the age of 26, armed with a high school degree, he left his work in
mechanics to study for a degree in environmental biology at Oxford Brookes University and gained a
honors degree within two years. Leahy moved on to Oxford University where he earned a doctorate in
virology. With 14 publications in international journals, he is now considered a leader in the field of
influenza virus replication.
Anna Lewington — botanist (episodes 7-10)
A writer and educator, Lewington is perhaps best described as a ethnobotanist for her studies of the
ways plantsare used by various peoples of the world — from the indigenous tribes of the Amazon rain-
forest to our own modern culture. She graduated from Birmingham University and earned her master’s
degree from St. Andrews University. Lewington has authored numerous books and articles on the ways
humans use plants.
Ellen McCallie — biologist (episodes 1-6)
Ellen McCallie grew up in St. Louis and is a tropical ecologist and educator. She spent a year in Bogor,
Indonesia, as an American Field Service (AFS) exchange student before attending Grinnell College in
Iowa, where she earned a bachelor’s degree in biology with a concentration in environmental science.
McCallie then spent a year as a Fulbright scholar, conducting research on the pollination of agroforestry
trees in the Amazon basin. Her graduate research was conducted in Timor, Indonesia, focusing on
alternatives to slash-and-burn agriculture. McCallie became the first education curator of the
Sophia M. Sachs Butterfly House and Education Center in St. Louis before starting her own elementary
science curriculum business. She is currently the coordinator of interpretation in the education division
at the Missouri Botanical Garden in St. Louis.
Kathy Sykes — physicist (episodes 1-6)
Kathy Sykes is a science communicator working on a variety of projects, including serving as director of
the Cheltenham Festival of Science in the United Kingdom. She was previously head of science for
Explore@Bristol, a new hands-on science center, developing ideas for the content of the institution. Sykes
is a physicist, with a doctorate from Bristol University and is still doing post-doctoral research there. She
completed her first degree there before going to teach math and physics in Zimbabwe for three years.
THE ROUGH SCIENTISTS
18 ROUGH SCIENCE • ACTIVITY GUIDE

ROUGH SCIENCE EPISODES
Led by host Kate Humble, five scientists are challenged to put their collective scientific knowledge
to practical use. Transported to isolated locations, they are presented with a series of tasks, with
two notable restrictions: they must complete their work within three days and, with the exception
of a rudimentary tool kit, they must use only indigenous materials. A synopsis of each episode is
provided below along with brief details of the science challenges (indicated in bold type).
Episode 1 – Mapping it Out
Kate Humble and the team of five scientists take up the challenge of charting the sights and
sounds of their tropical island. Starting from scratch, they have to make an accurate scale map,
botanical paper and inks, and a sound-recording device. The team members have very good
heads for math and plenty of versatile local plants to get them started, but impassable mangrove
swamps and tropical downpours soon seem intent on scuttling their plans.
Episode 2 – Bugs and Barometers
The team has to pit their wits against nature – and bugs – in the latest challenge. Can they get a
biology lab (antibacterial cream), microscope and weather station (barometer, hygrometer,
anemometer) built and tested on their tropical island? With only a basic toolkit to work with,
the island’s plants and seaweed have to be employed – and with nothing but clear skies weather
forecasting can still be a little problematic.
Episode 3 – Time and Transmitters
The scientists find they have to borrow some wartime tricks when challenged with building a
transmitter and radio – but will they be able to communicate across their tropical island base?
There’s also an accurate portable clock and a botanical kite to design, and, once again, the
island’s natural plants and resources get the scientists thoughts running in strange new directions.
Episode 4 – Feel the Heat
The challenges don’t come much tougher than this as the team of scientists tackles the task of lowering
the temperature on their sweltering tropical island base. The chemistry of cooling paradoxically seems
to involve heating things up first. With just three days to complete the task of making ice, as well
as producing working thermometers and sunscreen, their patience is soon simmering.
Episode 5 – Sun and Sea
The challenge of building an underwater light to examine the marine life around their tropical
island base finds the team grappling with natural power sources (filaments and phosphorus from
cow bones). The scientists find they need a little human elbow grease to generate electricity to
charge up a battery.
Episode 6 – Science of Celebration
The science of sound and fireworks helps the team devise ways of going out with a bang in the
last set of challenges on their Carribean island. Tasked with creating a concert and spectacle to
light up the Caribbean night sky, the scientists find they are struggling to find harmony, while
their pyrotechnics seem to generate more heat than light. Can they turn it around to stage a
spectacular finale?
Episode 7 – Mediterranean Mystery
Swapping their high-tech labs for a disused prison, the five scientists are ferried to a mystery
Mediterranean island where they must pool their collective wits. Can they work out their exact
latitude and longitude, manufacture an insect repellent from scratch, and improvise a radio
from an old saucepan?
Episode 8 – Simmering Shutterbugs
Our scientists have worked out where they are on the globe, but can they now master a series of
science-based challenges using just the natural resources of the island? Can they improvise a
low-tech camera and film, make a compass to get their bearings, and dye a flag. Seawater,
seaweed and urine prove to be indispensable ingredients, but things don’t quite go to plan.
EPISODE DESCIRPTIONS
ROUGH SCIENCE • ACTIVITY GUIDE 19

Episode 9 – Power Supplies
In this episode, two of the team go head to head in a race
to generate power, while the others set about building a
pharmacy. They extract and dispense a string of natural
remedies, including an antiseptic made from myrtle and
olives, and an anti-flatulent from fennel seeds.
Episode 10 – Sustenance and Sayonara
Wrapping up their stay on their isolated Mediterranean
island, the scientists face the challenge of using their science
skills to put food on the table. One of them faces an epic
struggle to make soap to clean the dishes, while two other
team members improvise toothpaste from seaweed,
seashells and mint. They also try to make a record player.
RESOURCES • BOOKS
Kathy Sykes feels success is at hand in the
creation of an underwater flashlight.
Books
Ardley, Neil. 101 Great Science Experiments. Dorling Kindersley, 1993.
Bosak, Susan. Science is…: A Sourcebook of Fascinating Facts, Projects and Activities.
Reprint ed. Firefly Books. 2000.
Browning, Marie. Natural Soapmaking. Sterling Publications, 1999.
Day, John A., Shafer, Vincent J., and Peterson, Roger Tory. Peterson First Guide to Clouds
and Weather. paperback. Houghton Mifflin Co., 1998.
Doherty, Paul, and Rathjen, Don, eds. Science Snackbook: Teacher Created Versions
of Exploratorium Exhibits. The Exploratorium, 1991.
Graf, Rudolph F., and Sheets, William. Build Your Own Low-Power Transmitters: Projects
for the Electronics Experimenter. Newnes, 2001.
Greene, Alan. Primitive Photography: A Guide to Making Cameras, Lenses and Calotypes.
Butterworth-Heinemann (Trd), 2001.
Harris, James G., and Harris, Melinda Woolf. Plant Identification Terminology: an
Illustrated Glossary.
Spring Lake Pub., 2001.
Hauser, Jill Frankel, and Braren, Loretta Trezzo. Kids’ Crazy Concoctions. Williamson Publishing, 1998.
Hodgson, Michael. Basic Essentials: Weather Forecasting. 2
nd
ed. Globe Pequot Press, 1999.
Home Made Best Made: Hundreds of Ways to Make All Kinds of Useful Things.
Reader’s Digest General Books. Reader’s Digest Adult, 1998.
Kerrod, Robin, and Holgate, Sharon Ann. The Way Science Works. DK Publishing, 2002.
Lawrence Hall of Science. Earth, Moon, and Stars. Regents of the University of California, 1986.
_______. Electricity. Regents of the University of California, 1983.
_______. Height -O-Meters. Regents of the University of California, 1988.
_______. Hot Water and Warm Homes from Sunlight. Regents of the University of California, 1986.
_______. Of Cabbages and Chemistry. Regents of the University of California, 1989.
_______. Secret Formulas. Regents of the University of California, 1996.
Levabre, Marcel. Aromatherapy Workbook. Inner Traditions International Ltd., 1997.
20 ROUGH SCIENCE • ACTIVITY GUIDE

Web sites
Astronomy & Space
http://www.astrosociety.org/education
http://spacelink.nasa.gov/
http://spaceplace.jpl.nasa.gov/spacepl.htm
http://spacescience.nasa.gov/education/educators/index.htm
http://science.nasa.gov/ssl/pad/solar/sunspots.htm
Biology/Botany
http://www.herbalgram.org
http://www.herbal-medicine.org
http://www.herbreference.com
http://www.wilderness.org-
http://www.worldwildlife.org
General Science & Technology Activities
http://www.col-ed.org/cur/science.html
http://www.exploratorium.org
http://www.ology.amnh.org/
http://www.windows.ucar.edu/tour/link=/windows3.html&edu=high
http://www.howstuffworks.com
Metric Conversion
http://www.pbs.org/roughscience (interactive metric converter)
http://www
.pbs.org/wgbh/nova/unitsprint.html (printable conversion chart)
Sound & Electricity
http://www
.smm.org/sound
Timekeeping & Sundials
http://www
.physics.nist.gov/time
Weather
http://www.nasa.gov
http://www.noaa.gov
http://www.oceanconvservancy.org
RESOURCES • WEB SITES
Liles, J.N. The Art and Craft of Natural Dyeing: Traditional Recipes for Modern Use.
University of Tennessee Press, 1990.
Mayall, R. Newton and Mayall, Margaret W. Sundials: Their Construction and Use. Dover, 2000.
McGee, Harold. The Curious Cook: More Kitchen Science and Lore. John Wiley & Sons, 1992.
Miller, Susan. The Soapmaker’s Companion: A Comprehensive Guide with Recipes, Techniques,
and Know How. Storey Books, 1997.
Monihan, Kevin, and Douglass, Don. GPS Instant Navigation: From Basic Techniques to
Electronic Charting. Fine Edge Productions, 2000.
Murray, Michael T., and Pizzorno, Joseph. Encyclopedia of Natural Medicine. Prima Publishing, 1997.
Rogers, Kirsteen, and Dowswell, Paul. The Usborne Complete Book of the Microscope.
EDC Publications, 1997.
Trionfante, Jeffrey V. Sunclocks: Sundials to Make and Use. Jvt Publishers, 1999.
Wood, Robert. Science For Kids: 39 Easy Meteorology Experiments. TAB Books.
ROUGH SCIENCE • ACTIVITY GUIDE 21

Rough Science is a co-production of the BBC and Open University in association with WETA Washington, D.C.
Major funding is provided by the National Science Foundation. Corporate funding is provided by DuPont.
Rough Science was supported, in part, by the National Science Foundation. Opinions expressed
are those of the authors and not necessarily those of the Foundation.
© Greater Washington Educational Telecommunications Association, 2002
