MySQL for Visual Studio

Abstract
This is the MySQL for Visual Studio User Manual. It documents the MySQL for Visual Studio through 1.2.10.
For notes detailing the changes in each release, see the MySQL for Visual Studio Release Notes.
For legal information, including licensing information, see the Preface and Legal Notices.
For help with using MySQL, please visit the MySQL Forums, where you can discuss your issues with other MySQL
users.
Document generated on: 2023-07-31 (revision: 76371)

Table of Contents
Preface and Legal Notices .................................................................................................................. v
1 General Information ......................................................................................................................... 1
1.1 New in Version 1.2 ............................................................................................................... 1
1.2 New in Version 2.0 (Development Release) ........................................................................... 3
2 Installing MySQL for Visual Studio ................................................................................................... 9
3 Enabling the MySQL Toolbar ......................................................................................................... 11
4 Making a Connection ..................................................................................................................... 13
4.1 Connect Using Server Explorer ........................................................................................... 14
4.2 Connect Using MySQL Connections Manager ...................................................................... 16
5 Editing .......................................................................................................................................... 19
5.1 MySQL SQL Editor ............................................................................................................. 19
5.2 Code Editors ...................................................................................................................... 20
5.3 Editing Tables .................................................................................................................... 22
5.3.1 Column Editor .......................................................................................................... 24
5.3.2 Column Properties ................................................................................................... 25
5.3.3 Table Properties ...................................................................................................... 26
5.4 Editing Views ..................................................................................................................... 28
5.5 Editing Indexes ................................................................................................................... 30
5.6 Editing Foreign Keys .......................................................................................................... 31
5.7 Editing Stored Procedures and Functions ............................................................................ 32
5.8 Editing Triggers .................................................................................................................. 34
6 Using the ADO.NET Entity Framework ........................................................................................... 37
7 MySQL Application Configuration Tool ........................................................................................... 39
7.1 Entity Framework ................................................................................................................ 40
7.2 Web Providers .................................................................................................................... 41
7.3 Using the MySQL Connection String Editor .......................................................................... 46
8 MySQL Project Items .................................................................................................................... 49
8.1 MySQL ASP.NET MVC Items ............................................................................................. 49
8.2 MySQL Windows Forms Items ............................................................................................ 58
9 MySQL Data Export Tool ............................................................................................................... 61
10 DDL T4 Template Macro ............................................................................................................. 69
11 Debugging Stored Procedures and Functions ............................................................................... 71
A MySQL for Visual Studio Frequently Asked Questions .................................................................... 83
iii

iv

Preface and Legal Notices
This is the user manual for MySQL for Visual Studio, an add-on to Microsoft Visual Studio.
Licensing information. This product may include third-party software, used under license.
If you are using a Commercial release of MySQL for Visual Studio, see one of the following for licensing
information, including licensing information relating to third-party software that may be included in this
Commercial release:
• MySQL for Visual Studio 1.2 Commercial License Information User Manual
• MySQL for Visual Studio 2.0 Commercial License Information User Manual
If you are using a Community release of MySQL for Visual Studio, see one of the following for licensing
information, including licensing information relating to third-party software that may be included in this
Community release:
• MySQL for Visual Studio 1.2 Community License Information User Manual
• MySQL for Visual Studio 2.0 Community License Information User Manual
Legal Notices
Copyright © 2004, 2023, Oracle and/or its affiliates.
This software and related documentation are provided under a license agreement containing restrictions
on use and disclosure and are protected by intellectual property laws. Except as expressly permitted
in your license agreement or allowed by law, you may not use, copy, reproduce, translate, broadcast,
modify, license, transmit, distribute, exhibit, perform, publish, or display any part, in any form, or by any
means. Reverse engineering, disassembly, or decompilation of this software, unless required by law for
interoperability, is prohibited.
The information contained herein is subject to change without notice and is not warranted to be error-free.
If you find any errors, please report them to us in writing.
If this is software or related documentation that is delivered to the U.S. Government or anyone licensing it
on behalf of the U.S. Government, then the following notice is applicable:
U.S. GOVERNMENT END USERS: Oracle programs (including any operating system, integrated
software, any programs embedded, installed or activated on delivered hardware, and modifications of
such programs) and Oracle computer documentation or other Oracle data delivered to or accessed by
U.S. Government end users are "commercial computer software" or "commercial computer software
documentation" pursuant to the applicable Federal Acquisition Regulation and agency-specific
supplemental regulations. As such, the use, reproduction, duplication, release, display, disclosure,
modification, preparation of derivative works, and/or adaptation of i) Oracle programs (including any
operating system, integrated software, any programs embedded, installed or activated on delivered
hardware, and modifications of such programs), ii) Oracle computer documentation and/or iii) other Oracle
data, is subject to the rights and limitations specified in the license contained in the applicable contract.
The terms governing the U.S. Government's use of Oracle cloud services are defined by the applicable
contract for such services. No other rights are granted to the U.S. Government.
This software or hardware is developed for general use in a variety of information management
applications. It is not developed or intended for use in any inherently dangerous applications, including
applications that may create a risk of personal injury. If you use this software or hardware in dangerous
v

Access to Oracle Support for Accessibility
applications, then you shall be responsible to take all appropriate fail-safe, backup, redundancy, and other
measures to ensure its safe use. Oracle Corporation and its affiliates disclaim any liability for any damages
caused by use of this software or hardware in dangerous applications.
Oracle, Java, and MySQL are registered trademarks of Oracle and/or its affiliates. Other names may be
trademarks of their respective owners.
Intel and Intel Inside are trademarks or registered trademarks of Intel Corporation. All SPARC trademarks
are used under license and are trademarks or registered trademarks of SPARC International, Inc. AMD,
Epyc, and the AMD logo are trademarks or registered trademarks of Advanced Micro Devices. UNIX is a
registered trademark of The Open Group.
This software or hardware and documentation may provide access to or information about content,
products, and services from third parties. Oracle Corporation and its affiliates are not responsible for and
expressly disclaim all warranties of any kind with respect to third-party content, products, and services
unless otherwise set forth in an applicable agreement between you and Oracle. Oracle Corporation and its
affiliates will not be responsible for any loss, costs, or damages incurred due to your access to or use of
third-party content, products, or services, except as set forth in an applicable agreement between you and
Oracle.
This documentation is NOT distributed under a GPL license. Use of this documentation is subject to the
following terms:
You may create a printed copy of this documentation solely for your own personal use. Conversion to other
formats is allowed as long as the actual content is not altered or edited in any way. You shall not publish
or distribute this documentation in any form or on any media, except if you distribute the documentation in
a manner similar to how Oracle disseminates it (that is, electronically for download on a Web site with the
software) or on a CD-ROM or similar medium, provided however that the documentation is disseminated
together with the software on the same medium. Any other use, such as any dissemination of printed
copies or use of this documentation, in whole or in part, in another publication, requires the prior written
consent from an authorized representative of Oracle. Oracle and/or its affiliates reserve any and all rights
to this documentation not expressly granted above.
Access to Oracle Support for Accessibility
Oracle customers that have purchased support have access to electronic support through My Oracle
Support. For information, visit
https://www.oracle.com/corporate/accessibility/learning-support.html#support-tab.
vi

Chapter 1 General Information
Table of Contents
1.1 New in Version 1.2 ....................................................................................................................... 1
1.2 New in Version 2.0 (Development Release) ................................................................................... 3
MySQL for Visual Studio provides access to MySQL objects and data from Visual Studio. As a Visual
Studio package, MySQL for Visual Studio integrates directly into Server Explorer providing the ability to
create new connections and work with MySQL database objects.
Functionality concepts includes:
• SQL Development: By integrating directly into Visual Studio, database objects (tables, views, stored
routines, triggers, indexes, etc) can be created, altered, or dropped directly inside Server Explorer.
Visual object editors include helpful information to guide you through the editing process. Standard data
views are also available to help you view your data.
• Query Designer: Visual Studio’s query design tool is also directly supported. With this tool, you can
query and view data from tables or views while also combining filters, group conditions, and parameters.
Stored routines (both with and without parameters) can also be queried.
• Stored Routine Debugging: Use the full debugging support for stored routines. Using the standard
Visual Studio environment and controls, you can set breakpoints, add watches, and step into, out of, and
over routines and calls. Local variables can be added to the watch window and call stack navigation is
also supported.
• Entity Framework: The Entity Framework is supported, to allow template based code generation and
full support of the model designers and wizards.
For notes detailing the changes in each release, see the MySQL for Visual Studio Release Notes.
1.1 New in Version 1.2
This section summarizes many of the new features added to 1.2.x in relation to earlier versions of MySQL
for Visual Studio.
• Support for MySQL 8.0 Features
• New or Changed Tool Support
• Version Support for Visual Studio
• Item Templates versus Project Templates
For notes detailing the changes in each point release, see the MySQL for Visual Studio Release Notes.
Support for MySQL 8.0 Features
• Starting with MySQL for Visual Studio 1.2.9, SSL PEM connections can be made using the classic
MySQL protocol. Both PEM and PFX certificates are permitted with Connector/NET 8.0.16 or higher
1

New or Changed Tool Support
when the server supports SSL connections. For configuration instructions, see SSL Connections with
Server Explorer.
• MySQL for Visual Studio 1.2.8 supports the MySQL 8.0 release series (requires MySQL Connector/NET
6.9.12, 6.10.7, or 8.0.11) including:
• MySQL data dictionary, which uses INFORMATION_SCHEMA tables rather than tables in the mysql
database (see MySQL Data Dictionary).
• The caching_sha2_password authentication plugin introduced in MySQL 8.0 (see Caching SHA-2
Pluggable Authentication).
New or Changed Tool Support
• Starting with MySQL for Visual Studio 1.2.9, the plugin detects when the version of Connector/NET
has been changed after MySQL for Visual Studio was installed and prompts to update the necessary
configuration files using the Configuration Update Tool. Visual Studio must be restarted to activate the
updated configuration files.
• The MySQL Website Configuration tool was renamed to MySQL Application Configuration and extended
to automate entry updates to the app.config file in the MySQL for Visual Studio 1.2.9 release.
Version Support for Visual Studio
• MySQL for Visual Studio 1.2.10:
• Support for Microsoft Visual Studio 2015 was removed.
• MySQL for Visual Studio 1.2.9:
• Support for Microsoft Visual Studio 2019 was added.
• Support for Microsoft Visual Studio 2012 and 2013 was removed.
• MySQL for Visual Studio 1.2.7:
• Support for Microsoft Visual Studio 2017 was added.
• Support for Microsoft Visual Studio 2010 was removed.
Item Templates versus Project Templates
Beginning with MySQL for Visual Studio 1.2.5, the project templates used to create MySQL Windows
Forms and MySQL MVC projects are no longer be available, as they were replaced with MySQL Project
Items:
• MySQL MVC Item replaces MySQL MVC Project.
• MySQL Windows Forms Item replaces Windows Form Project.
These item templates offer the benefit of adding items to existing projects new windows forms or MVC
controllers/views connected to MySQL, based on MySQL Entity Framework models, without the need of
create an entirely new MySQL project.
In addition, item templates better follow the Visual Studio template standards, which are oriented to create
projects regardless of the database connectivity.
2

New in Version 2.0 (Development Release)
For information about using Item Templates, see Chapter 8, MySQL Project Items.
1.2 New in Version 2.0 (Development Release)
This section summarizes many of the new features added to the 2.0 release series in relation to the
MySQL for Visual Studio 1.2 release series. MySQL for Visual Studio 2.0.5 is a development release.
New features are described in the following sections:
• Viewing MySQL Query Output
• Version Support for Visual Studio
• Switching Connections from Script and Code Editors
• Making a Connection
• MySQL Toolbar
• MySQL JavaScript and Python Code Editors
For notes detailing the changes in each point release, see the MySQL for Visual Studio Release Notes.
Viewing MySQL Query Output
An output pane was added to the MySQL SQL, JavaScript, and Python editors to display information about
each executed query. The output pane includes the information that previously appeared in the Messages
tab.
Figure 1.1 MySQL SQL Editor Output
Version Support for Visual Studio
Beginning with MySQL for Visual Studio 2.0.5:
• Support for Microsoft Visual Studio 2017 was added.
• Support for Microsoft Visual Studio 2010 was removed.
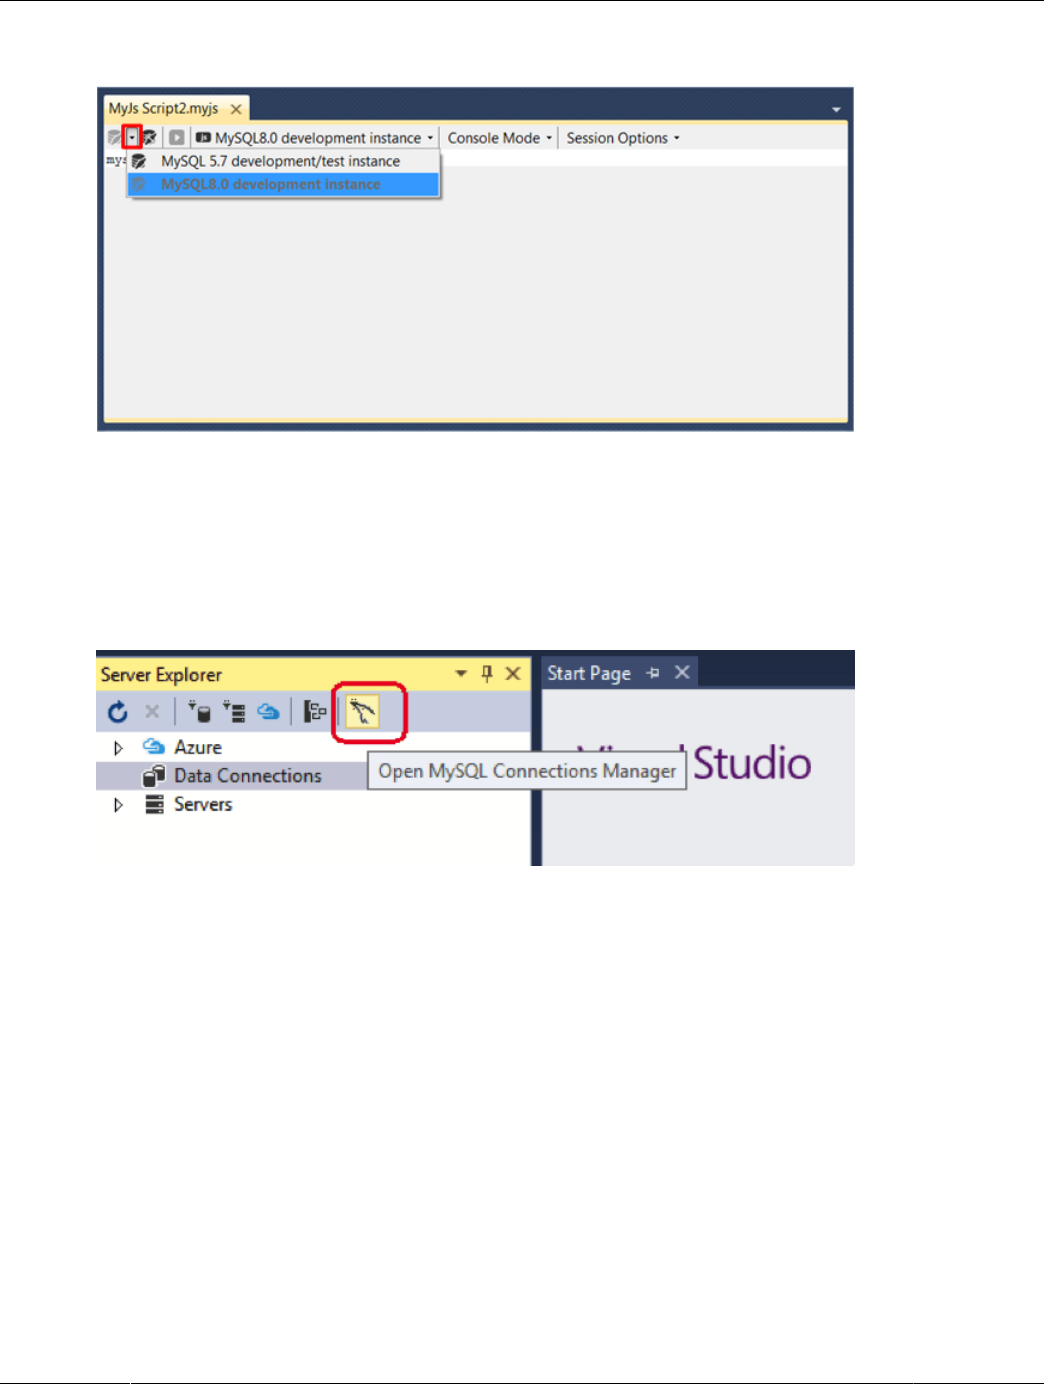
Switching Connections from Script and Code Editors
A drop-down list was added to the toolbar of the SQL, JavaScript, and Python editors from which you can
select a valid connection. JavaScript and Python editors show only the connections that support the X
Protocol.
3
Making a Connection
Figure 1.2 Switching Connections
Making a Connection
A new MySQL Connections Manager tool was added, and it can create and manage MySQL
connections. It is found under the Server Explorer.
Figure 1.3 Opening the MySQL Connections Manager Dialog
This button opens the MySQL Connections Manager dialog that enables the sharing of stored MySQL
connections with MySQL Workbench, if it is installed. MySQL connections are displayed in a simpler way
and can be created and edited from within this dialog. These connections can be imported to the Visual
Studio Server Explorer for use with Visual Studio.
After opening the MySQL Connections Manager:
4

Making a Connection
Figure 1.4 MySQL Connections Manager Dialog: Choosing a Connection
To add a new MySQL connection with the MySQL Connections Manager:
Figure 1.5 MySQL Connections Manager Dialog: New Connection
5

MySQL Toolbar
MySQL Toolbar
In the Server Explorer, and with MySQL Server 5.7, the MySQL connection context-menu was changed to
show the options to create JavaScript or Python scripts, along with the existing SQL script option.
Figure 1.6 MySQL Toolbar: Create New Script
Select JavaScript or Python to launch the MySQL code editor for the selected language.
MySQL JavaScript and Python Code Editors
Use the code editor to write and execute JavaScript or Python queries with MySQL Server 5.7 and higher,
or as before, use SQL queries.
Figure 1.7 MySQL Editor: Script Template
Select MyJs Script or MyPy Script to launch the MySQL code editor for the selected language.
6

MySQL JavaScript and Python Code Editors
Figure 1.8 MySQL Editor: JavaScript Code Editor
Figure 1.9 MySQL Editor: Python Code Editor
7

8

Chapter 2 Installing MySQL for Visual Studio
MySQL for Visual Studio is an add-on for Microsoft Visual Studio that simplifies the development of
applications using data stored by the MySQL RDBMS. Many MySQL for Visual Studio features also require
that MySQL Connector/NET be installed on the same host where you perform Visual Studio development.
Connector/NET is a separate product.
The options for installing MySQL for Visual Studio are:
• Using MySQL Installer (preferred): Download and execute the MySQL Installer.
With this option you can download and install MySQL Server, MySQL for Visual Studio, and Connector/
NET together from the same software package, based on the server version. Initially, MySQL Installer
assists you by evaluating the software prerequisites needed for the installation. Thereafter, MySQL
Installer enables you to keep your installed products updated or to easily add and remove related
MySQL products.
For additional information about using MySQL Installer with MySQL products, see MySQL Installer for
Windows.
• Using the standalone Zip or MSI file: This option is ideal if you have MySQL Server and Connector/NET
installed already. Use the information in this section to determine which version of MySQL for Visual
Studio to install.
MySQL for Visual Studio Configuration Update Tool
The MySQL for Visual Studio installation updates its configuration automatically when Connector/NET
is installed on your computer. However, if you install Connector/NET after MySQL for Visual Studio, or
upgrade Connector/NET after you have installed MySQL for Visual Studio, you are prompted to run the
Configuration Update Tool.
A configuration deviation, if present, is detected by MySQL for Visual Studio when you attempt to create
an Entity Framework model or the first time you attempt to open, create, or edit a connection to MySQL.
Optionally, you can have MySQL for Visual Studio update the configuration files for you when it detects
configuration errors and provides a popup window prompting you to invoke the tool. Select Yes to run the
tool. You must restart Visual Studio after the affected configuration files are updated.
Minimum Requirements
MySQL for Visual Studio operates with multiple versions of Visual Studio, although the extent of support is
based on your installed versions of Connector/NET and Visual Studio.
Minimum requirements for the supported versions of Visual Studio are as follows:
• Visual Studio 2019 (Community, Professional, and Enterprise)
MySQL for Visual Studio 1.2.9 with Connector/NET 8.0.14
Tip
Connector/NET 8.0.18 (or later) is recommended.
• Visual Studio 2017 (Community, Professional, and Enterprise):
MySQL for Visual Studio 1.2.7 with Connector/NET 8.0.14 or MySQL for Visual Studio 2.0.5 with
Connector/NET 6.9.8
9

MySQL Connector/NET Restrictions
MySQL for Visual Studio does not support Express versions of Microsoft development products, including
the Visual Studio and the Microsoft Visual Web Developer.
The following table shows the support information for MySQL for Visual Studio.
Table 2.1 Support Information for Companion Products
MySQL for Visual
Studio Version
MySQL Connector/
NET Version
Supported
Visual Studio
Version Supported
MySQL Server
Versions
Supported
Notes
1.2 (GA) 8.0 2019, 2017, 2015,
2013, 2012
8.0, 5.7, 5.6 Support for MySQL
8.0 features
requires MySQL for
Visual Studio 1.2.8
or higher.
2.0 (RC) 8.0 2017, 2015, 2013,
2012
5.7, 5.6 Enables MySQL
Configurations
Manager and code
editors (with MySQL
5.7).
MySQL Connector/NET Restrictions
MySQL for Visual Studio is closely tied to Connector/NET, but they are two separate products that can be
used without one another. The following restrictions apply:
• MySQL for Visual Studio cannot be installed alongside any version of Connector/NET 6.6 and earlier,
which must be removed before installing MySQL for Visual Studio.
• The following MySQL for Visual Studio features require Connector/NET:
• The Entity Framework Designer
• The Application Configuration tool
• Debugging Stored Procedures and Functions
• The DDL T4 Template Macro (to generate a database from an EF Model)
10

Chapter 3 Enabling the MySQL Toolbar
The optional MySQL toolbar includes MySQL specific functionality and links to external MySQL tools such
as MySQL Workbench and MySQL Utilities. Additional actions are available from the context menu for
each data connection.
After installing MySQL for Visual Studio, the MySQL toolbar is available by selecting View, Toolbars,
MySQL from the main menu. To position the MySQL toolbar within Visual Studio, do the following:
1. From the main menu, click Tools and then Customize.
2. In the Toolbars tab, select MySQL to highlight it. The check box should have a check mark to indicate
that the toolbar is visible.
3. Select a dock location from Modify Selection. For example, the following figure shows the MySQL
toolbar in the Dock location: Left position. Other dock locations are Top, Right, and Bottom.
Figure 3.1 MySQL for Visual Studio Toolbar and Context Menu
The MySQL toolbar provides shortcuts to some of the main features of MySQL for Visual Studio:
• MySQL Script Window: Opens a new MySQL script window using the selected connection. All available
MySQL connections are listed in a submenu, which can be selected on the toolbar:
11

Figure 3.2 The MySQL for Visual Studio Toolbar: Connections
The MySQL script window supports the IntelliSense feature for easing MySQL script creation inside
Visual Studio.
• Debug MySQL Routine: Starts a debugging session on a selected MySQL stored routine inside Visual
Studio.
• MySQL Data Export Tool: Opens a new tabbed-window of the Data Export tool.
• MySQL Workbench SQL Editor: Opens a new Workbench with an SQL editor window using the current
MySQL connection, if MySQL Workbench has been installed.
• MySQL Utilities Console: Opens a new console window for the MySQL Utilities tool, if it is installed.
12

Chapter 4 Making a Connection
Table of Contents
4.1 Connect Using Server Explorer ................................................................................................... 14
4.2 Connect Using MySQL Connections Manager .............................................................................. 16
MySQL for Visual Studio leverages and extends the connection capabilities of Visual Studio to create and
store MySQL connections. To ensure access to the full set of connection options, install the most recent
version of MySQL Connector/NET on the client computer (see Minimum Requirements).
MySQL for Visual Studio provides the following two distinct release series:
• MySQL for Visual Studio 1.2 release series. Provides General Availability (GA) releases for use
with MySQL 5.6, 5.7, and 8.0 servers. Connections can be made using the classic MySQL protocol only.
Both PEM and PFX certificates are permitted with Connector/NET 8.0.16 or higher when the server
supports SSL connections. Unencrypted connections are supported by the latest versions of MySQL
Connector/NET. To add or modify MySQL data connections, use the Server Explorer management
console in Visual Studio (see Section 4.1, “Connect Using Server Explorer”).
• MySQL for Visual Studio 2.0 release series. Provides a development release series for use with
MySQL 5.6 and 5.7 servers (version 2.0.5 is the current milestone). Basic connections are supported
for both the classic MySQL protocol and X Protocol (33060 default port number). When the server
supports SSL connections, PEM and PFX certificates are permitted with X Protocol; PFX certificates
are permitted with the classic MySQL protocol. Use either MySQL Connections Manager or Server
Explorer in Visual Studio to add or modify classic MySQL protocol connections. To add or modify X
Protocol connections, use MySQL Connections Manager only (see Section 4.2, “Connect Using MySQL
Connections Manager”).
MySQL Connections Manager was introduced in the MySQL for Visual Studio 2.0 release series to
simplify the creation and management of MySQL server connections within Visual Studio. From MySQL
Connections Manager, you have the option to migrate all stored connections to MySQL Workbench (if it
is installed), making MySQL Workbench a central repository for MySQL connections.
Basic Connections in Visual Studio
A basic connection is either unencrypted or encrypted (in MySQL 8.0, SSL is enabled by default) and
the connection is made using standard TPC/IP, which is the default connection method in MySQL for
Visual Studio to connect to the MySQL RDBMS. Basic connections are easy to configure, particularly if
the client application and MySQL server are on the same host computer or operate within the same local
area network. For instructions on how to create a basic connection to MySQL from within Visual Studio,
see Basic Connections with Server Explorer or Basic Connections with MySQL Connections Manager.
SSL Connections in Visual Studio
MySQL Server uses the PEM format for certificates and private keys. Connector/NET 8.0.17 enables the
use of either PEM or PFX certificates with the classic MySQL protocol when Server Explorer in Visual
Studio (with MySQL for Visual Studio 1.2.9 or higher) is used to add or modify the data connection.
Both the MySQL server and the client must be configured to enable SSL encryption (see Using Encrypted
Connections). In addition to providing the paths to certificate files, the client can specify the SSL mode to
use for connections. When using Server Explorer, the SSL mode value is set with an advanced property.
MySQL Connections Manager provides the Use SSL Encryption drop-down list with similar values. The
following table describes the optional SSL values to select (and the files to specify) with each tool.
13

Connect Using Server Explorer
Table 4.1 SSL Mode Values
Server Explorer Connections Manager Description
None No Do not use SSL. No SSL files are
required.
Preferred If Available Use SSL if the server supports it,
but allow connection in all cases.
Preferred is the default value
with Connector/NET 8.0.11 or
higher. No SSL files are required;
however, providing the SSL CA
file (with either a .pem or .pfx
file extension) is the best practice
for connections made to MySQL
8.0 servers.
Required Require Always use SSL and deny a
connection if the server does
not support SSL. Do not perform
server certificate validation. No
SSL files are required.
VerifyCA Require and Verify CA Always use SSL. Validate the
certificate authorities (CA), but
tolerate a name mismatch.
Requires the SSL CA file. Use
either a .pem or .pfx file
extension.
VerifyFull Require and Verify
Identity
Always use SSL and fail if the
host name is not correct. Requires
valid SSL CA, SSL Cert, and
SSL Key files for PEM (.pem file
extension). Requires the SSL CA
file for PFX certificates (.pfx file
extension).
4.1 Connect Using Server Explorer
This section describes how to create a new connection with or without encryption. After a connection is
successfully established, all settings are saved for future use. When you start Visual Studio for the next
time, open the connection node in Server Explorer to establish a connection to the MySQL server again.
The instructions for setting up connections are provided in these sections.
• Basic Connections with Server Explorer
• SSL Connections with Server Explorer
To modify or delete a connection, use the Server Explorer context menu for the corresponding node. You
can modify any of the settings by overwriting the existing values with new ones. The connection may be
modified or deleted only if no active editor for its objects is opened; otherwise, you may lose your data.
Basic Connections with Server Explorer
To create a connection to an existing MySQL database:
1. Start Visual Studio and open the Server Explorer by clicking Server Explorer from the View menu.
14

SSL Connections with Server Explorer
2. Right-click the Data Connections node and then select Add Connection.
3. From the Add Connection window, click Change to open the Change Data Source dialog box, then do
the following:
a. Select MySQL Database from the list of data sources. Alternatively, you can select <other>, if
MySQL Database is absent.
b. Select .NET Framework Data Provider for MySQL as the data provider.
c. Click OK to return to the Add Connections window.
4. Type a value for each of the following connection settings:
• Server name:
The name or IP address of the computer hosting the MySQL server. For example, localhost if the
MySQL server is installed on the local computer.
• User name:
The name of a valid MySQL database user account.
• Password:
The password of the user account specified previously. Optionally, click Save my password to avoid
having to enter the password in the Modify Connections window for each connection session.
• Database name:
The database to use as the default schema. You can leave the name blank and select a default
schema later from the list of schema on the target server.
You can also set the port to connect with the MySQL server by clicking Advanced. To test connection
with the MySQL server, set the server host name, the user name and the password, and then click Test
Connection. If the test succeeds, the success confirmation dialog box opens.
5. Click OK to create and store the new connection. The new connection with its tables, views, stored
procedures, stored functions, and loadable functions now appears within the Data Connections node
of Server Explorer.
SSL Connections with Server Explorer
You can enable SSL encryption for a classic MySQL protocol connection from Server Explorer. Both SSL
PEM and PFX certificate formats are permitted. In addition, MySQL Connector/NET version 8.0.17 must be
installed on the client host.
To create a connection with SSL encryption enabled:
1. Add and test a new basic connection (see Basic Connections with Server Explorer.
To modify an existing connection, right-click the connection node within Data Connections and select
Modify Connection.
2. In the Add (or Modify) Connection window, click Advanced to open the Advanced Properties dialog
box. Advanced properties are categorized and presented in a two-column list, showing the property
name and value field (or value list). Default values are not shown.
15

Connect Using MySQL Connections Manager
3. In the Connection property category, do the following:
a. Select Connection Protocol and then select Socket from the value list (use the arrow in the value
field to open the list). This property sets the connection protocol to use standard TCP/IP.
b. Select Port and type 3306 in the value field.
4. In the Authentication property category, select Ssl Mode and choose the type of mode that best
represents your connection. For a description of each mode and the required files, see Table 4.1, “SSL
Mode Values”.
• For SSL PEM, use the Ssl CA, Ssl Cert, and Ssl Key properties to add the required files (must have
a .pem file extension).
• For SSL PFX (PKCS#12 format), use the Certificate File, Certificate Password, Certificate Store
Location, and Certificate Thumbprint properties to add the required information or files (must have
a .pfx file extension).
Click OK to close the Advanced Properties dialog box.
5. Click Test Connection and adjust the property values if needed.
6. Click OK to create and store the new or modified connection.
4.2 Connect Using MySQL Connections Manager
This section describes how to create a new connection with or without encryption. After a connection is
successfully established, all settings are saved for future use. When you start Visual Studio for the next
time, open the connection node in Server Explorer to establish a connection to the MySQL server again.
The instructions for setting up connections are provided in these sections.
• Basic Connections with MySQL Connections Manager
• SSL Connections with Connections Manager
To modify or delete a connection, start MySQL Connections Manager and select an existing connection.
You can modify any of the settings by overwriting the existing values with new ones. The connection may
be modified or deleted only if no active editor for its objects is opened; otherwise, you may lose your data.
Basic Connections with MySQL Connections Manager
To create a connection to an existing MySQL database:
1.
Click in the Server Explorer menu bar to open the MySQL Connections Manager window.
2. Click Add New Connection to create a new connection.
3. Provide a unique name for the new connection in the required Connection Name field.
4. Confirm that TCP/IP (standard) is selected as the connection method.
5. In the Parameters tab, add or modify the following information:
• Hostname: and Port:
The name (or IP address) and port number of the computer hosting the MySQL server. For example,
localhost if the MySQL server is installed on the local computer. The default port value is 3306.
16

SSL Connections with Connections Manager
• Username:
The name of a valid MySQL user account.
• Password:
The password of the user account specified previously.
• Default Schema:
A default schema name is required to open the connection. Select a name from the list.
6. Click Test Connection to verify the connection information.
7. Click OK to create and store the new connection. The new connection now appears in MySQL
Connections Manager. Optionally, select the new connection from Connections Manager to add its
tables, views, stored procedures, stored functions, and loadable functions to the Data Connections
node in Server Explorer.
SSL Connections with Connections Manager
X Protocol connections can be configured to use SSL with PEM or PFX files. Connections must be created
using the MySQL Connections Manager, which is supported by MySQL for Visual Studio 2.0.5 (or higher).
MySQL Workbench provides similar support to add PEM files, but it does not support certificates in PFX
format.
Note
X Plugin must be installed to support connections using X Protocol (see Setting Up
MySQL as a Document Store ).
In contrast, classic MySQL protocol connections support SSL PFX files only when you use MySQL
Connections Manager to configure the connection.
To create a connection to a MySQL database using SSL encryption:
1.
Click in the Server Explorer menu bar to open the MySQL Connections Manager window.
2. Add and test a new basic connection (see Basic Connections with MySQL Connections Manager) or
double-click an existing connection to modify it.
3. In the SSL tab, add a path to the SSL CA, SSL CERT, and SSL Key files within the SSL PEM area.
Click Test Connection to verify the connection information. The next figure shows an example of SSL
PEM values within this tab.
17

SSL Connections with Connections Manager
Figure 4.1 MySQL Server Connection SSL Tab
To configure SSL PFX (PKCS#12 format), select either the file-based or store-based option. Use the
.pfx file extension to enable the correct certificate format.
4. Click OK to save the connection and return to the MySQL Connections Manager window.
Note
You must close and then reopen MySQL Connections Manager to apply the
default schema.
5. Double-click the new SSL connection to add it to Server Explorer (or select the connection and click
OK). To open the JavaScript or Python code editor, right-click the connection in Server Explorer and
then select an editor.
18

Chapter 5 Editing
Table of Contents
5.1 MySQL SQL Editor ..................................................................................................................... 19
5.2 Code Editors .............................................................................................................................. 20
5.3 Editing Tables ............................................................................................................................ 22
5.3.1 Column Editor .................................................................................................................. 24
5.3.2 Column Properties ........................................................................................................... 25
5.3.3 Table Properties .............................................................................................................. 26
5.4 Editing Views ............................................................................................................................. 28
5.5 Editing Indexes ........................................................................................................................... 30
5.6 Editing Foreign Keys .................................................................................................................. 31
5.7 Editing Stored Procedures and Functions .................................................................................... 32
5.8 Editing Triggers .......................................................................................................................... 34
Making edits in MySQL for Visual Studio.
After you have established a connection, for example, using the Connect to MySQL toolbar button,
you can use auto-completion as you type or by pressing Control + J. Depending on the context, the
auto-completion dialog can show the list of available tables, table columns, or stored procedures (with
the signature of the routine as a tooltip). Typing some characters before pressing Control + J filters the
choices to those items starting with that prefix.
5.1 MySQL SQL Editor
The MySQL SQL Editor can be opened from the MySQL toolbar or by clicking File, New, and File from the
Visual Studio main menu. This action displays the New File dialog.
Figure 5.1 MySQL SQL Editor - New File
From the New File dialog, select the MySQL template, select the MySQL Script document, and then click
Open.
The MySQL SQL Editor will be displayed. You can now enter SQL code as required, or connect to a
MySQL server. Click the Connect to MySQL button in the MySQL SQL Editor toolbar. You can enter the
connection details into the Connect to MySQL dialog that is displayed. You can enter the server name,
user ID, password and database to connect to, or click the Advanced button to select other connection
19

Code Editors
string options. Click the Connect button to connect to the MySQL server. To execute your SQL code
against the server, click the Run SQL button on the toolbar.
Figure 5.2 MySQL SQL Editor - Query
The results from queries are displayed in the Results tab and relevant information appears in the MySQL
Output pane. The previous example displays the query results within a Result Grid. You can also select
the Field Types, Execution Plan, and Query Stats for an executed query.
5.2 Code Editors
This section explains how to make use of the code editors in MySQL for Visual Studio.
Introduction
MySQL for Visual Studio provides access to MySQL objects and data without forcing developers to leave
Visual Studio. Designed and developed as a Visual Studio package, MySQL for Visual Studio integrates
directly into Server Explorer providing a seamless experience for setting up new connections and working
with database objects.
The following MySQL for Visual Studio features are available as of version 2.0.5:
• JavaScript and Python code editors, where scripts in those languages can be executed to query data
from a MySQL database.
20

Getting Started
• Better integration with the Server Explorer to open MySQL, JavaScript, and Python editors directly from
a connected MySQL instance.
• A newer user interface for displaying query results, where different views are presented from result sets
returned by a MySQL server like:
• Multiple tabs for each result set returned by an executed query.
• Results view, where the information can be seen in grid, tree, or text representation for JSON results.
• Field types view, where information about the columns of a result set is shown, such as names, data
types, character sets, and more.
• Query statistics view, displaying information about the executed query such as execution times,
processed rows, index and temporary tables usage, and more.
• Execution plan view, displaying an explanation of the query execution done internally by the MySQL
server.
Getting Started
The minimum requirements are:
• MySQL for Visual Studio 2.0.5
• Visual Studio 2012
• MySQL 5.7.12 with X Plugin enabled (Code editors are not supported for use with MySQL 8.0 servers.)
To enable X Plugin for MySQL 5.7:
1. Open a command prompt and navigate to the folder with your MySQL binaries.
2. Invoke the mysql command-line client:
mysql -u user -p
3. Execute the following statement:
mysql> INSTALL PLUGIN mysqlx SONAME 'mysqlx.dll';
Important
The mysql.session user must exist before you can load X Plugin.
mysql.session was added in MySQL 5.7.19. If your data dictionary
was initialized using an earlier version you must run the mysql_upgrade
procedure. If the upgrade is not run, X Plugin fails to start with the following error
message:
There was an error when trying to access the server with
user: mysql.session@localhost. Make sure the user is
present in the server and that mysql_upgrade was ran after
a server update.
Opening a Code Editor
Before opening a code editor that can run scripts against a MySQL server, a connection needs to be
established:
21

Using the Code Editor
1. Open the Server Explorer pane by clicking View.
2. Right-click the Data Connections node and select Add Connection.
3. In the Add Connection window, make sure the MySQL Data Provider is being used and fill in all the
information.
Note
To enter the port number, click Advanced and set the Port among the list of
connection properties.
4. Click Test Connection to ensure you have a valid connection, then click OK. The new connection with
its tables, views, stored procedures, and functions now appears within the Data Connections list of
Server Explorer.
5. Right-click the connection, select New MySQL Script, and then select the language of the editor
(JavaScript or Python) to open a new MySQL script tab in Visual Studio.
To create a new editor for existing MySQL connections, you need only to do the last step.
Using the Code Editor
An open editor includes a toolbar with the actions that can be executed. The first two buttons in the toolbar
represent a way to connect or disconnect from a MySQL server. If the editor was opened from the Server
Explorer, the connection will be already established for the new script tab.
The third button is the Run button, the script contained in the editor window is executed by clicking it and
results from the script execution are displayed in the lower area of the script tab.
5.3 Editing Tables
MySQL for Visual Studio contains a table editor, which enables the visual creation and modification of
tables.
The Table Designer can be accessed through a mouse action on table-type node of Server Explorer. To
create a new table, right-click the Tables node (under the connection node) and choose Create Table from
the context-menu.
To modify an existing table, double-click the node of the table to modify, or right-click this node and choose
the Design item from the context menu. Either of the commands opens the Table Designer.
22

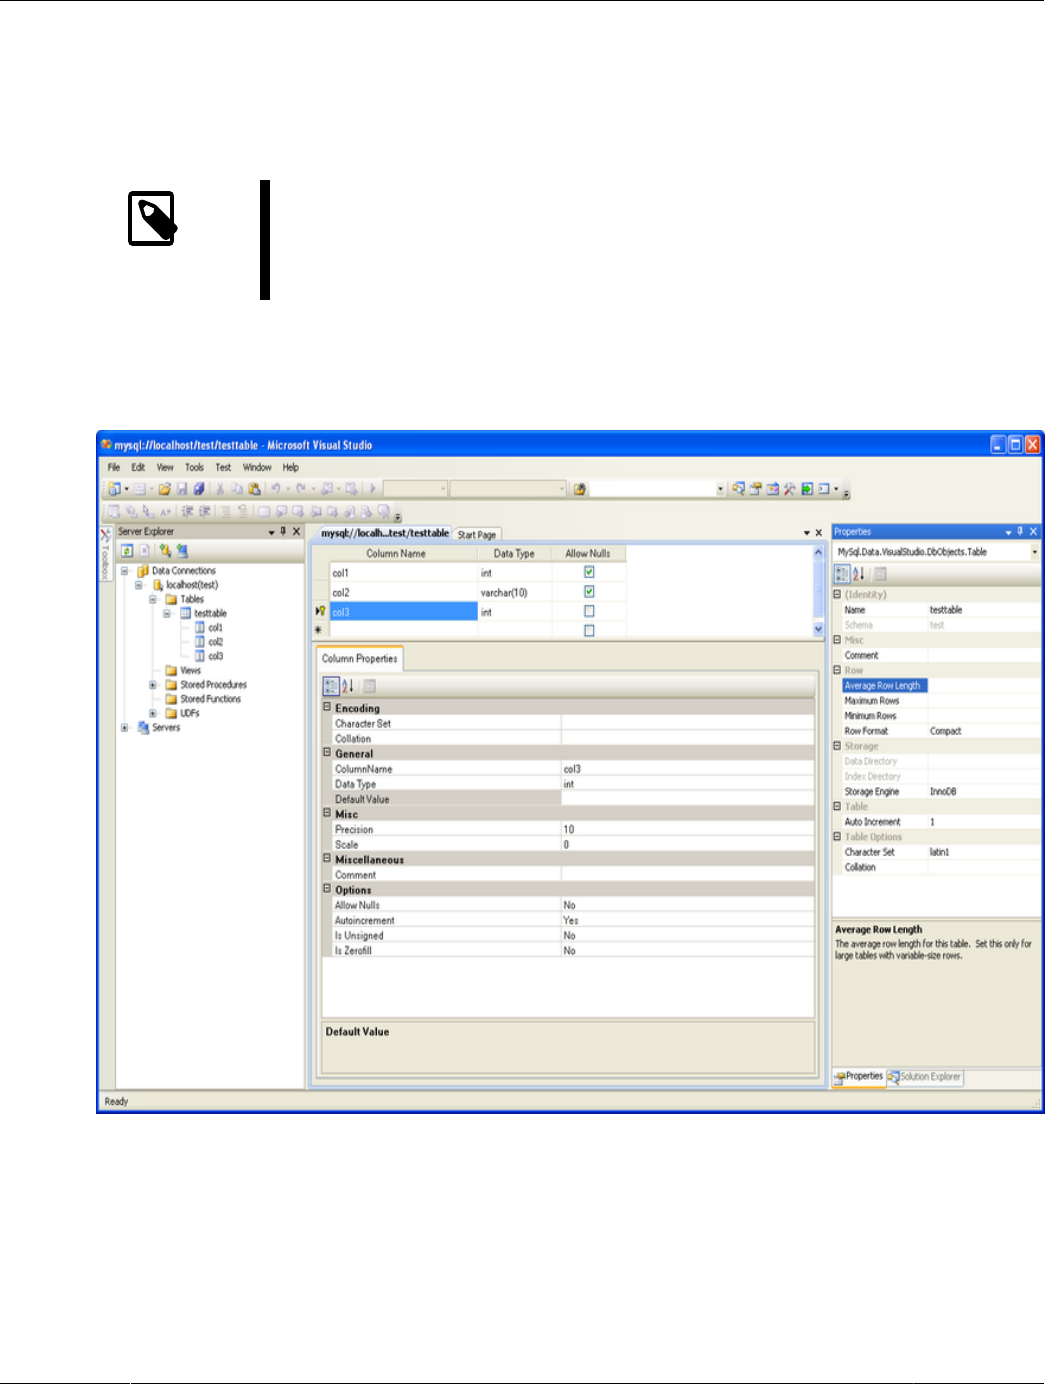
Editing Tables
Figure 5.3 Editing New Table
Table Designer consists of the following parts:
• Columns Editor - a data grid on top of the Table Designer. Use the Columns grid for column creation,
modification, and deletion. For additional information, see Section 5.3.1, “Column Editor”.
• Indexes/Keys window - a window opened from the Table Designer menu to manage indexes.
• Relationships window - a window opened from the Table Designer menu to manage foreign keys.
• Column Properties panel - a panel near the bottom of the Table Designer. Use the Column Properties
panel to set advanced column options.
23

Column Editor
• Properties window - a standard Visual Studio Properties window, where the properties of the edited
table are displayed. Use the Properties window to set the table properties. To open, right-click on a table
and select the Properties context-menu item.
Each of these areas is discussed in more detail in subsequent sections.
To save changes you have made in the Table Designer, press either Save or Save All on the Visual
Studio main toolbar, or press Control + S. If you have not already named the table, you will be prompted to
do so.
Figure 5.4 Choose Table Name
After the table is created, you can view it in the Server Explorer.
Figure 5.5 Newly Created Table
The Table Designer main menu lets you set a primary key column, edit relationships such as foreign keys,
and create indexes.
Figure 5.6 Table Designer Main Menu
5.3.1 Column Editor
You can use the Column Editor to set or change the name, data type, default value, and other properties
of a table column. To set the focus to a needed cell of a grid, use the mouse click. Also you can move
through the grid using Tab and Shift + Tab keys.
24

Column Properties
To set or change the name, data type, default value and comment of a column, activate the appropriate
cell and type the desired value.
To set or unset flag-type column properties (NOT NULL, auto incremented, flags), select or deselect the
corresponding check boxes. The set of column flags depends on the data type of the column.
To reorder columns, index columns or foreign key columns in the Column Editor, select the whole column
to reorder by clicking the selector column on the left of the column grid. Then move the column by using
Control+Up (to move the column up) or Control+Down (to move the column down) keys.
To delete a column, select it by clicking the selector column on the left of the column grid, then press the
Delete button on a keyboard.
5.3.2 Column Properties
The Column Properties tab can be used to set column options. In addition to the general column
properties presented in the Column Editor, in the Column Properties tab you can set additional properties
such as Character Set, Collation and Precision.
25

Table Properties
Figure 5.7 Column Properties Panel
5.3.3 Table Properties
To bring up Table Properties select the table and right-click to activate the context menu. Select
Properties. The Table Properties dockable window will be displayed.
26

Table Properties
Figure 5.8 Table Properties Panel
The following table properties are listed under table properties, and many are fully described in the SHOW
TABLE STATUS MySQL documentation.
• Auto Increment: The next AUTO_INCREMENT value.
• Average Row Length: The AVG_ROW_LENGTH value.
• Character Set: The Charset value.
• Collation: The Collation value.
• Comment: Table comments.
• Data Directory: The directory used to store data files for this table.
• Index Directory: The directory used to store index files for this table.
• Maximum Rows: Value of the MAX_ROWS property.
• Minimum Rows: Value of the MIN_ROWS property.
• Name: Name of the table.
27
Editing Views
• Row Format: The ROW_FORMAT value.
• Schema: The schema this table belongs to.
• Storage Engine.
Note
In MySQL 5.5 and higher, the default storage engine for new tables is InnoDB.
See Introduction to InnoDB for more information about the choice of storage
engine, and considerations when converting existing tables to InnoDB.
The property Schema is read-only.
Figure 5.9 Table Properties
5.4 Editing Views
To create a new view, right-click the Views node under the connection node in Server Explorer. From the
node's context menu, choose the Create View command. This command opens the SQL Editor.
28

Editing Views
Figure 5.10 Editing View SQL
You can then enter the SQL for your view, and then execute the statement.
To modify an existing view, double-click a node of the view to modify, or right-click this node and choose
the Alter View command from a context menu. Either of the commands opens the SQL Editor.
All other view properties can be set in the Properties window. These properties are:
• Catalog: The TABLE_CATALOG.
• Check Option: Whether or not the WITH CHECK OPTION clause is present. For additional information,
see The View WITH CHECK OPTION Clause.
• Definer: Creator of the object.
• Definition: Definition of the view.
• Is Updatable: Whether or not the view is Updatable. For additional information, see Updatable and
Insertable Views.
• Name: The name of the view.
• Schema: The schema which owns the view.
• Security Type: The SQL SECURITY value. For additional information, see Stored Object Access
Control.
Some of these properties can have arbitrary text values, others accept values from a predefined set. In the
latter case, set the desired value with an embedded combobox.
29

Editing Indexes
The properties Is Updatable and Schema are read-only.
To save changes you have made, use either Save or Save All buttons of the Visual Studio main toolbar, or
press Control + S.
Figure 5.11 View SQL Saved
5.5 Editing Indexes
Indexes management is performed using the Indexes/Keys dialog.
To add an index, select Table Designer, Indexes/Keys... from the main menu, and click Add to add a
new index. You can then set the index name, index kind, index type, and a set of index columns.
30

Editing Foreign Keys
Figure 5.12 Indexes/Keys Dialog
To remove an index, select it in the list box on the left, and click the Delete button.
To change index settings, select the needed index in the list box on the left. The detailed information about
the index is displayed in the panel on the right hand side. Change the desired values.
5.6 Editing Foreign Keys
You manage foreign keys for InnoDB tables using the Foreign Key Relationships dialog.
To add a foreign key, select Table Designer, Relationships... from the main menu. This displays the
Foreign Key Relationship dialog. Click Add. You can then set the foreign key name, referenced table
name, foreign key columns, and actions upon update and delete.
To remove a foreign key, select it in the list box on the left, and click the Delete button.
To change foreign key settings, select the required foreign key in the list box on the left. The detailed
information about the foreign key is displayed in the right hand panel. Change the desired values.
31

Editing Stored Procedures and Functions
Figure 5.13 Foreign Key Relationships Dialog
5.7 Editing Stored Procedures and Functions
To create a new stored procedure, right-click the Stored Procedures node under the connection node in
Server Explorer. From the node's context menu, choose the Create Routine command. This command
opens the SQL Editor.
Figure 5.14 Edit Stored Procedure SQL
32

Editing Stored Procedures and Functions
To create a new stored function, right-click the Functions node under the connection node in Server
Explorer. From the node's context menu, choose the Create Routine command.
To modify an existing stored routine (procedure or function), double-click the node of the routine to modify,
or right-click this node and choose the Alter Routine command from the context menu. Either of the
commands opens the SQL Editor.
Routine properties can be viewed in the Properties window. These properties are:
• Body
• Catalog
• Comment
• Creation Time
• Data Access
• Definer
• Definition
• External Name
• External Language
• Is Deterministic
• Last Modified
• Name
• Parameter Style
• Returns
• Schema
• Security Type
• Specific Name
• SQL Mode
• SQL Path
• Type
Some of these properties can have arbitrary text values, others accept values from a predefined set. In
both cases, these values cannot be set from the properties panel.
You can also set all the options directly in the SQL Editor, using the standard CREATE PROCEDURE or
CREATE FUNCTION statement.
To save changes you have made, use either Save or Save All buttons of the Visual Studio main toolbar, or
press Control + S.
33

Editing Triggers
Figure 5.15 Stored Procedure SQL Saved
To observe the runtime behavior of a stored routine and debug any problems, use the Stored Procedure
Debugger. For additional information, see Chapter 11, Debugging Stored Procedures and Functions.
5.8 Editing Triggers
To create a new trigger, right-click the node of the table in which to add the trigger. From the node's
context menu, choose the Create Trigger command. This command opens the SQL Editor.
To modify an existing trigger, double-click the node of the trigger to modify, or right-click this node and
choose the Alter Trigger command from the context menu. Either of the commands opens the SQL Editor.
To create or alter the trigger definition using SQL Editor, type the trigger statement in the SQL Editor using
standard SQL.
Note
Enter only the trigger statement, that is, the part of the CREATE TRIGGER query
that is placed after the FOR EACH ROW clause.
All other trigger properties are set in the Properties window. These properties are:
• Definer
• Event Manipulation
• Name
34

Editing Triggers
• Timing
Some of these properties can have arbitrary text values, others accept values from a predefined set. In the
latter case, set the desired value using the embedded combo box.
The properties Event Table, Schema, and Server in the Properties window are read-only.
To save changes you have made, use either Save or Save All buttons of the Visual Studio main toolbar,
or press Control + S. Before changes are saved, you will be asked to confirm the execution of the
corresponding SQL query in a confirmation dialog.
To observe the runtime behavior of a stored routine and debug any problems, use the Stored Procedure
Debugger. For additional information, see Chapter 11, Debugging Stored Procedures and Functions.
35

36

Chapter 6 Using the ADO.NET Entity Framework
ADO.NET Entity Framework provides an Object Relational Mapping (ORM) service, mapping the relational
database schema to objects. The ADO.NET Entity Framework defines several layers, these can be
summarized as:
• Logical - this layer defines the relational data and is defined by the Store Schema Definition Language
(SSDL).
• Conceptual - this layer defines the .NET classes and is defined by the Conceptual Schema Definition
Language (CSDL)
• Mapping - this layer defines the mapping from .NET classes to relational tables and associations, and is
defined by Mapping Specification Language (MSL).
MySQL Connector/NET integrates with Visual Studio to provide a range of helpful tools to assist
development.
A full treatment of ADO.NET Entity Framework is beyond the scope of this manual. If you are unfamiliar
with ADO.NET, review the Microsoft ADO.NET Entity Framework documentation.
Tutorials on getting started with ADO.NET Entity Framework are available. See Tutorial: Using an Entity
Framework Entity as a Windows Forms Data Source and Tutorial: Data Binding in ASP.NET Using LINQ
on Entities.
37

38

Chapter 7 MySQL Application Configuration Tool
Table of Contents
7.1 Entity Framework ........................................................................................................................ 40
7.2 Web Providers ............................................................................................................................ 41
7.3 Using the MySQL Connection String Editor .................................................................................. 46
The MySQL Application Configuration tool (previously named MySQL Website Configuration) enables you
to configure options for the following categories with MySQL as the database provider: entity framework,
membership (advanced or simple), roles, profiles, session state, site map, and web personalization. With
this MySQL for Visual Studio feature, you can configure multiple provider pages in sequence and the tool
modifies your configuration files accordingly.
Editing configuration files manually can be problematic. The MySQL Application Configuration tool
simplifies the task by providing the relevant options for each web (or application) project in a graphical,
wizard-like format that permits you to navigate among the provider categories. The tool then adds,
modifies, or removes entries from the App.config file, which applies to settings for non-web projects
only, and the Web.config file for your web-based projects.
The MySQL Application Configuration tool appears as a small icon on the Solution Explorer toolbar in
Visual Studio, as shown in the following figure. The icon is visible only when a project is active (with a
connection to MySQL), and Connector/NET is installed. Clicking the MySQL Application Configuration icon
launches the tool and displays the options for setting up Entity Framework support.
Figure 7.1 MySQL Application Configuration Tool
The remainder of this chapter describes each item that you can configure using the MySQL Application
Configuration tool.
39

Entity Framework
7.1 Entity Framework
The MySQL Application Configuration tool downloads the latest entity framework and MySQL Connector/
NET assemblies from the NuGet gallery to keep the assembly versions synchronized. After the
configuration is applied, the tool adds the following references to your project:
• EntityFramework
• EntityFramework.SqlServer
• MySql.Data
• MySql.Data.EntityFramework
Unlike the other web providers supported by this tool, the entity framework options can be applied to
either non-web or web applications. The context of your project determines which configuration file the tool
updates. The next sections describe the details for setting options with non-web and web projects.
Note
MySQL for Visual Studio does not support Entity Framework Core. For the current
support profile, see Minimum Requirements.
Setting Options for Non-Web Applications
The MySQL Application Configuration tool synchronizes the latest version of MySQL Connector/NET and
Entity Framework 6 assemblies and then adds the required references to your application's App.config
file. When started in the context of a non-web application, the tool lists entity framework as the only item
and MySQL for Visual Studio 1.2.9 (or higher) is a prerequisite. For an example of when you might use the
tool, see Tutorial: Using an Entity Framework Entity as a Windows Forms Data Source.
To enable the tool, select Use MySQL with Entity Framework, ensure that Entity Framework 6.x is
selected, and then click Finish (see the figure that follows).
Figure 7.2 MySQL Application Configuration Tool for Entity Framework (non-web)
40

Setting Options for Web Applications
Setting Options for Web Applications
In the context of a web application, entity framework is the first page of options that you can enable. After
enabling (or skipping) the entity framework option, the wizard-like tool steps through several additional web
provider pages (see Section 7.2, “Web Providers”). You can enable entity framework alone and skip the
other web providers, or selectively enable other providers in the same session.
With MySQL for Visual Studio 1.2.9 (or higher) installed, Entity Framework 6 is the only version to select,
as the following figure shows. Previous versions of MySQL for Visual Studio permit you to configure your
application to use Entity Framework 5 or 6. (Prior to version 1.2.9, this tool was named MySQL Website
Configuration.) The current version of MySQL Connector/NET no longer supports Entity Framework 5.
To include entity framework options, select Use MySQL with Entity Framework, ensure that an Entity
Framework version is selected, and then click Next to advance to the membership provider options. To
skip configuring entity framework options, deselect the Use MySQL with Entity Framework check box.
Figure 7.3 MySQL Application Configuration Tool for Entity Framework (web)
For information about the options on the membership (or simple membership), roles, profiles, session
state, site map, and web personalization pages, see Section 7.2, “Web Providers”.
7.2 Web Providers
The MySQL Application Configuration tool establishes MySQL as the database provider for one or more
web providers by making changes to your application's Web.config file. You can choose only one of
the two membership providers: membership or simple membership. All of the other web providers may
be enabled independently or together. The configuration entries for each web provider managed by the
MySQL Application Configuration tool are included in the sections that follow.
• Membership Provider
• Simple Membership Provider
• Roles Provider
41

Web Providers
• Profiles Provider
• Session State Provider
• Site Map Provider
• Web Personalization Provider
Web-provider pages share several common elements, as the membership provider page shows.
Figure 7.4 MySQL Application Configuration Tool - Membership
Check box to enable the provider. Web providers are enabled when you select the check box on the
page. When selected, the page enforces requirement-checking specific to the provider. For example, if
you enable any provider, the configuration file for you application must include a connection string. If the
connection string is missing, the tool returns a warning when you attempt to move to the next provider. To
skip (or disable) an individual web provider, deselect the check box.
Name. Each enabled web provider requires a value to specify the application name. If you do not
provide a value, then the default value creates an application name for you. The value is associated with
the applicationName property in the Web.config file.
Connection String. The Web.config file stores a single connection string for all of the MySQL web-
providers. Each web-provider page includes an area for entering a connection string, however only the last
entry is saved. For example, if you set it in the first web provider and also set it on the third web provider,
the connection string from the third provider page is saved. You can enter a connection string directly in
the text box provided or click Edit to use a visual editor to help you sort and select the various connection
string options (see Section 7.3, “Using the MySQL Connection String Editor” ).
Autogenerate Schema. Select the Autogenerate Schema option check box to ensure that the
necessary schemas are created automatically for the web provider being configured. These schemas are
used to store MySQL web provider information. The database used for storage is the one specified in the
connection string.
Write exceptions to event log. Select the Write exceptions to event log option check box to ensure
that exceptions generated by the application are written to the Windows event log.
42

Membership Provider
Membership Provider
In addition to the standard membership provider, there is also a simple membership provider. You can only
choose one of these two membership providers. To use the membership provider, select Use MySQL to
manage my membership records to enable the page. You can now enter the name of the application
that you are creating the configuration for. You can also enter a description for the application. The
Autogenerate Schema and Write exceptions to event log options can be selected for this web provider.
After setting up a membership provider, a new section is added to the web configuration file.
<membership defaultProvider="MySQLMembershipProvider">
<providers>
<remove name="MySQLMembershipProvider" />
<add name="MySQLMembershipProvider" type="MySql.Web.Security.MySQLMembershipProvider,
MySql.Web, Version=8.0.18.0, Culture=neutral, PublicKeyToken=c2222fc22222c44d"
applicationName="/" description="MySQL default application" connectionStringName="LocalMySqlServer"
writeExceptionsToEventLog="False" autogenerateschema="False" enableExpireCallback="False"
enablePasswordRetrieval="False" enablePasswordReset="True" requiresQuestionAndAnswer="True"
requiresUniqueEmail="False" passwordFormat="Clear" maxInvalidPasswordAttempts="5"
minRequiredPasswordLength="7" minRequiredNonalphanumericCharacters="1" passwordAttemptWindow="10"
passwordStrengthRegularExpression="" />
</providers>
</membership>
With one of the membership providers configured, click Next to advance to the roles provider page.
Simple Membership Provider
The simple membership provider options are similar to those of the membership provider, but with fewer
properties in the configuration file. To enable, check the Use MySQL to manage my simple membership
records.
Note
The simple membership provider is not supported by MySQL Connector/NET 8.0
and cannot be enabled if you have the 8.0 version of the connector installed.
The MySQL simple membership provider handles the website membership tasks with ASP.NET.
This provider is a simpler version of the ASP.NET Membership provider, and it can also work with
OAuth Authentication. For additional information about using OAuth authentication, see Adding OAuth
Authentication to a Project.
The required configuration options for the simple membership provider are: a name for the connection
string and a connection string that contains a valid database with a local or remote MySQL server instance,
a user table to store the credentials, and column names for the User ID and User Name columns.
Select the Auto Create Tables option to create the required tables when adding the first user to the table.
After setting up a membership provider, a new section is added to the web configuration file.
<membership defaultProvider="MySQLSimpleMembershipProvider">
<providers>
43

Roles Provider
<clear />
<remove name="MySQLSimpleMembershipProvider" />
<add name="MySQLSimpleMembershipProvider"
type="MySql.Web.Security.MySQLSimpleMembershipProvider, MySql.Web, Version=6.10.8.0, Culture=neutral,
PublicKeyToken=c2222fc22222c44d"
applicationName="/" description="MySQL default application"
connectionStringName="LocalMySqlServer"
writeExceptionsToEventLog="False"
autogenerateschema="False"
enableExpireCallback="False"
userTableName="Users"
userIdColum="UserId" userNameColum="UserName" autoGenerateTables="True" />
</providers>
</membership>
After setting up one of the membership providers, click Next to configure the roles provider page.
Roles Provider
Click Use MySQL to manage my roles to enable this provider page. The page includes the following
options to edit: the connection string, the application name, and a description of the provider. The
Autogenerate Schema and Write exceptions to event log options can be selected for this web provider.
After setting up a roles provider, a new section is added to the web configuration file.
<roleManager defaultProvider="MySQLRoleProvider">
<providers>
<remove name="MySQLRoleProvider" />
<add name="MySQLRoleProvider" type="MySql.Web.Security.MySQLRoleProvider, MySql.Web, Version=8.0.18.0, Culture=neutral,
PublicKeyToken=c2222fc22222c44d"
applicationName="/" description="" connectionStringName="LocalMySqlServer"
writeExceptionsToEventLog="False" autogenerateschema="False" enableExpireCallback="False" />
</providers>
</roleManager>
Click Next to configure the profiles provider page.
Profiles Provider
Click Use MySQL to manage my profiles to enable this provider page. The page includes the following
options to edit: the connection string, the application name, and a description of the provider. The
Autogenerate Schema, Write exceptions to event log, and Callback for session end event options
can be selected for this web provider.
After setting up a profiles provider, a new section is added to the web configuration file.
<profile defaultProvider="MySQLProfileProvider">
<providers>
<remove name="MySQLProfileProvider" />
44

Session State Provider
<add name="MySQLProfileProvider" type="MySql.Web.Profile.MySQLProfileProvider, MySql.Web, Version=8.0.18.0,
Culture=neutral, PublicKeyToken=c2222fc22222c44d"
applicationName="/" description="" connectionStringName="LocalMySqlServer"
writeExceptionsToEventLog="False" autogenerateschema="False" enableExpireCallback="False" />
</providers>
</profile>
Click Next to configure the session state provider page.
Session State Provider
Click Use MySQL to manage my ASP.Net session state to enable this provider page. The page includes
the following options to edit: the connection string, the application name, and a description of the provider.
The Autogenerate Schema and Write exceptions to event log options can be selected for this web
provider.
After setting up a session provider, a new section is added to the web configuration file.
<sessionState mode="Custom" cookieless="true" regenerateExpiredSessionId="true" customProvider="MySqlSessionStateProvider">
<providers>
<add name="MySqlSessionStateProvider" type="MySql.Web.SessionState.MySqlSessionStateStore, MySql.Web,
Version=8.0.18.0, Culture=neutral, PublicKeyToken=c2222fc22222c44d"
applicationName="/" description="" connectionStringName="LocalMySqlServer"
writeExceptionsToEventLog="False" autogenerateschema="False" enableExpireCallback="False" />
</providers>
</sessionState>
Click Next to configure the site map provider page.
Site Map Provider
The site map provider builds a site map from a MySQL database, and builds a complete tree of the
SitemapNode objects. It also provides methods so that the generated nodes can be read from the site
map. Click Use MySQL to manage my ASP.NET site map to enable this provider page.
The required configuration options: A name for the application and a connection string that contains a
valid database with a local or remote MySQL server instance. The Autogenerate Schema and Write
exceptions to event log options can be selected for this web provider.
After setting up the site map provider, a new section is added to the web configuration file.
<siteMap defaultProvider="MySqlSiteMapProvider">
<providers>
<remove name="MySqlSiteMapProvider" />
<add name="MySqlSiteMapProvider" type="MySql.Web.SiteMap.MySqlSiteMapProvider, MySql.Web, Version=8.0.18.0,
Culture=neutral, PublicKeyToken=c2222fc22222c44d"
applicationName="/" description="" connectionStringName="LocalMySqlServer" writeExceptionsToEventLog="False"
autogenerateschema="False" enableExpireCallback="False" />
</providers>
45

Web Personalization Provider
</siteMap>
Click Next to proceed to the web personalization configuration page:
Web Personalization Provider
The web personalization provider is used when a website application needs to store persistent information
for the content and layout of the Web Parts pages that are generated by a Web Parts personalization
service. This provider should be used along with the membership, roles, and profiles providers. Click Use
MySQL to manage my ASP.NET personalization provider to enable this provider page.
The required configuration options: A name for the application and a connection string that contains a
valid database with a local or remote MySQL server instance. The Autogenerate Schema and Write
exceptions to event log options can be selected for this web provider.
After setting up the web personalization provider, a new section is added to the web configuration file.
<webParts>
<personalization defaultProvider="MySQLPersonalizationProvider">
<providers>
<remove name="MySQLPersonalizationProvider" />
<add name="MySQLPersonalizationProvider" type="MySql.Web.Personalization.MySqlPersonalizationProvider,
MySql.Web, Version=8.0.18.0, Culture=neutral, PublicKeyToken=c2222fc22222c44d"
applicationName="/" description="" connectionStringName="LocalMySqlServer" writeExceptionsToEventLog="False"
autogenerateschema="False" enableExpireCallback="False" />
</providers>
</personalization>
</webParts>
When you have selected the web personalization options, click Finish to write the changes for all web
provides to the Web.config file and close the tool.
7.3 Using the MySQL Connection String Editor
The MySQL Connection String Editor lists and describes all supported connection-string options for the
version of MySQL Connector/NET that you have installed. To open the editor from any web-provider page
(see the Connection String entry box), click Edit.
By default, the editor lists connection-string options by category (see the figure that follows). Alternatively,
you can sort the list alphabetically using the sorting buttons provided. The main list consists of options on
the left and values on the right of a split area. To add a text value, such as the database name, select the
option in the list (Database, in this example), and then type the name of the database (sakila) after the
cursor. Some connection-string options have predefined values and show a down arrow when selected.
When you select a connection-string option, a brief description is shown in an information box below the
list. After you add an option value and then select another option, the editor appends the new option/value
pair to the existing connection string. Click OK to return to the web-provider page, which now includes the
modified connection string.
46

Using the MySQL Connection String Editor
Figure 7.5 MySQL Application Configuration Tool - Connection String Editor
Note
Defined connection strings are automatically loaded and available in editor, whether
they were created manually in web.config for each application or previously using
this tool.
47

48

Chapter 8 MySQL Project Items
Table of Contents
8.1 MySQL ASP.NET MVC Items ..................................................................................................... 49
8.2 MySQL Windows Forms Items .................................................................................................... 58
This two-part tutorial uses MySQL MVC Item templates to set up a MVC web application. In the second
part of the tutorial, a Windows Forms Item with MySQL connectivity is created.
Minimum Requirements
• MySQL 5.5 installed on a host that is accessible.
• MySQL for Visual Studio 1.2.5.
• Visual Studio 2012, the professional edition.
• MySQL Connector/NET is required to use web providers in the generated web application.
8.1 MySQL ASP.NET MVC Items
To add a MySQL MVC Item to an existing MVC project, first add a MySQL Entity Framework model. Skip
this step if you have already done this.
Configure the project to use MySQL with an Entity Framework. There are two ways to do this:
• Manually add the references needed (EntityFramework, MySql.Data &MySql.Data.Entity), and add the
required configuration to the web.config configuration file
• Or (preferred), take advantage of the MySQL Website Configuration tool, which allows either Entity
Framework 5 or 6 with MySQL. For additional information about this tool, see Chapter 7, MySQL
Application Configuration Tool.
Once you have configured the project to use MySQL with Entity Framework, proceed to create the model
using the standard ADO.NET Entity Data Model wizard. For MySQL MVC Item Templates, you need to
add the model under the "Models" folder, as illustrated below:
49

MySQL ASP.NET MVC Items
Figure 8.1 ADO.NET Entity Data Model
50

MySQL ASP.NET MVC Items
Figure 8.2 Choose or create a new MySQL connection
51

MySQL ASP.NET MVC Items
Figure 8.3 Creating a new MySQL connection
After selecting the MySQL connection, you need to select the database objects to include in the model.
Important
The Pluralize or singularize generated object names option must remain
unchecked, otherwise the MySQL MVC Item Template will not function properly.
52

MySQL ASP.NET MVC Items
Figure 8.4 Selecting the database object to include in the model
Click Finish to generate the model, as demonstrated below:
53

MySQL ASP.NET MVC Items
Figure 8.5 Creating the MySQL Entity Framework model
Now, generate a new MySQL MVC Item. Right-click on the project, and select Add New Item from the
contextual menu.
Figure 8.6 Add New Item
This launches the Add New Item wizard. The MySQL menu offers two options: MySQL New MVC Item
and MySQL New Windows Form. Select MySQL New MVC Item, and then click Add.
54

MySQL ASP.NET MVC Items
Figure 8.7 The MySQL menu options
This opens the MVC Item Template dialog. Now select the MySQL model and entity that you want to use
to create the MVC item. The model dropdown list is populated based on all the MySQL Entity Framework
models available in the project, entities dropdown list is populated with entities available for the selected
model.
55

MySQL ASP.NET MVC Items
Figure 8.8 MySQL MVC Item Template Dialog
Figure 8.9 MySQL MVC Item Template
After selecting the model and entity to create the item, click Finish, and a new controller and view
matching the selected entity will be added to the project. These contain the necessary back end code to
render the entity data.
56

MySQL ASP.NET MVC Items
Figure 8.10 New controller and view added to the project
You can now execute the application. In our example we used the Sakila database and generated an Actor
controller:
Figure 8.11 The Actor View
57

MySQL Windows Forms Items
8.2 MySQL Windows Forms Items
This portion of the tutorial describes how to create a Windows Form with MySQL connectivity. The item
template to use for this operation is named MySQL New Windows Form. To open the Add New Item
window, right-click your windows form application and select MySQL from the list of installed items.
The item template for adding a new MySQL Windows Form is similar to the MySQL MVC item template
(see Section 8.1, “MySQL ASP.NET MVC Items”), but with three major differences:
• You can create the MySQL Entity Framework model under the root path of the project.
Figure 8.12 A MySQL Entity Framework model created in a Windows Form Application
• When selecting the desired entity, you can also select the layout type in which the new form will display
the entity data.
Figure 8.13 The "MySQL Windows Form" Item Template dialog, with the layout options
58

MySQL Windows Forms Items
• A Resources folder is added to the project that contains images used by the icons for the generated
form.
Figure 8.14 The Resources Folder and New Form
The new form will have all the necessary back-end code to display the entity data, with the user interface
(UI) based on the previously selected layout.
Figure 8.15 The "frmactor" Form in Design Mode
59

MySQL Windows Forms Items
Figure 8.16 The "frmactor" Form to Display Data
60

Chapter 9 MySQL Data Export Tool
MySQL for Visual Studio has a data export tool that creates a dump file for a MySQL database.
Figure 9.1 MySQL for Visual Studio Data Export Tool: Main Window
Creating a Dump of an existing MySQL Database
To open a new window for the MySQL Data Export tool, you must first create a new connection using the
Server Explorer window inside Visual Studio. After the connection is established, a contextual menu can
be opened by right clicking on the connection node. From the menu, choose the MySQL Data Export
option. A new tab opens for the current connection. You can then select one or more databases to include
in the dump.
61

Creating a Dump of an existing MySQL Database
Figure 9.2 MySQL for Visual Studio Data Export Tool: Connection Context Menu
Follow these steps to create a dump for the MySQL Databases:
1. Select all the databases and their objects to be included in the dump.
62

Creating a Dump of an existing MySQL Database
Figure 9.3 MySQL for Visual Studio Data Export Tool: Selecting a Database
2. It is very important to select the desired settings for the dump: whether the dump will include the data,
whether the insert operations will be logged in extended mode, and so on. In the main window of the
63

Creating a Dump of an existing MySQL Database
MySQL Database Export tool are shown the basic options for the dump. Also, by clicking on the
Advanced button, more specific options can also be selected.
Figure 9.4 MySQL for Visual Studio Data Export Tool: Advanced Options
64
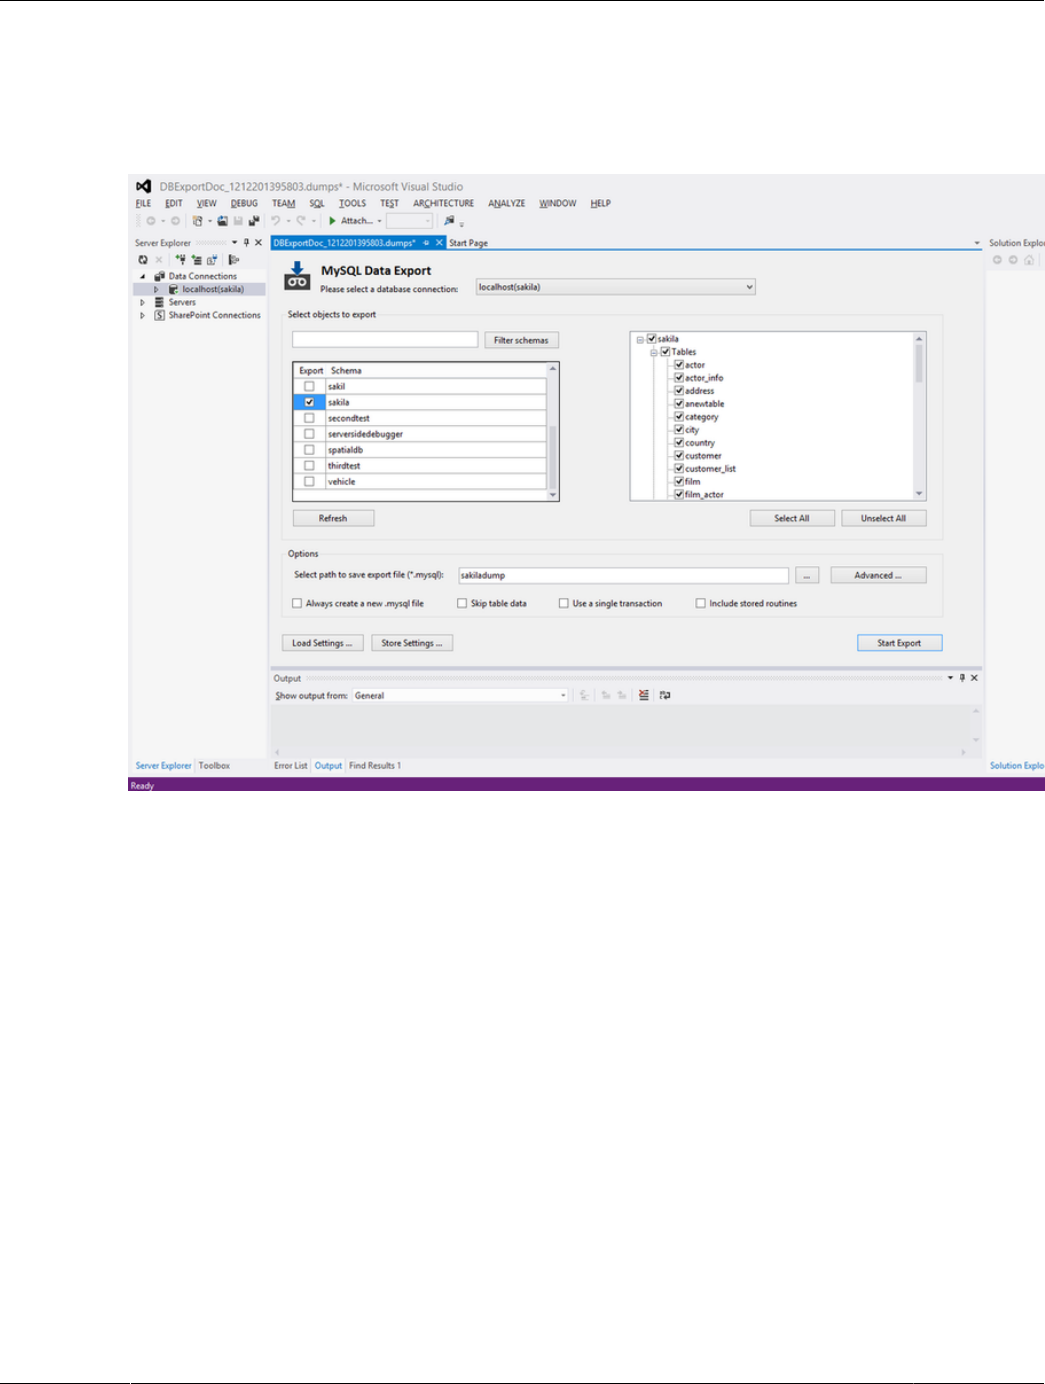
Creating a Dump of an existing MySQL Database
3. When the selection of the options is done, give a name to the result file that will be created. If no path is
given for the result file, the default path to be used is My Documents under the user's folder.
Figure 9.5 MySQL for Visual Studio Data Export Tool: Generating the Dump File
65

Creating a Dump of an existing MySQL Database
4. A filter can be applied on the list of schemas for the selected connection. With it, the user can easily
locate the databases to be included in the dump.
Figure 9.6 MySQL for Visual Studio Data Export Tool: Filtering the Schemas
66

Creating a Dump of an existing MySQL Database
5. After selecting the options and the name for the dump file, the user can click the Export button, which
generates the dump.
Figure 9.7 MySQL for Visual Studio Data Export Tool: Viewing the Generated Script
Each dump can have different settings. After configuring the dump operation, the settings can be saved
into a setting file for later use. This file includes: the connection selected, the name of the file for the dump,
and the database or databases and the objects selected for dumping. The file extension for the setting file
is .dumps.
67

Creating a Dump of an existing MySQL Database
Figure 9.8 MySQL for Visual Studio Data Export Tool: Saving a Setting File
A saved setting file can be loaded into the MySQL Data Export tool by clicking the Load Settings button.
Figure 9.9 MySQL for Visual Studio Data Export Tool: Opening a Setting File
68

Chapter 10 DDL T4 Template Macro
Convert an Entity Framework model to MySQL DDL code. Starting with a blank model, you can develop an
entity model in Visual Studio's designer. Once the model is created, you can select the model's properties,
and in the Database Script Generation category of the model's properties, the property DDL Generation
can be found. Select the value SSDLToMySQL.tt(VS) from the drop-down list.
Figure 10.1 DDL T4 Template Macro - Model Properties
Right-clicking the model design area displays a context-sensitive menu. Selecting Generate Database
from Model from the menu displays the Generate Database Wizard. The wizard can then be used to
generate MySQL DDL code.
69

Figure 10.2 DDL T4 Template Macro - Generate Database Wizard
70

Chapter 11 Debugging Stored Procedures and Functions
The stored procedure debugger provides facilities for setting breakpoints, stepping into individual
statements (Step Into, Step Out, Step Over), evaluating and changing local variable values, evaluating
breakpoints, and other debugging tasks.
Privileges
The debugger recreates at the start of each debug session a serversidedebugger database in your
server. This database helps to track the instrumented code and implement observability logic in the
debugged routine. Your current connection needs to have privileges to create that database, and its
associated stored routines, functions, and tables.
The debugger makes changes behind the scenes to temporarily add instrumentation code to the stored
routines that you debug. You must have the ALTER ROUTINE privilege for each stored procedure,
function, or trigger that you debug. (Including procedures and functions that are called, and triggers that
are fired, by a procedure that you are debugging.)
Starting the Debugger
To start the debugger, follow these steps:
1. Choose a connection in the Visual Studio Server Explorer.
2. Expand the Stored Procedures folder. Only stored procedures can be debugged directly. To debug
a user-defined function, create a stored procedure that calls the function.
3. Click on a stored procedure node, then right-click and from the context menu choose Debug Routine.
Figure 11.1 Choose a Stored Routine to Debug
71

Usage
Usage
At this point, Visual Studio switches to debug mode, opening the source code of the routine being
debugged in step mode, positioned on the first statement.
If the initial routine you debug has one or more arguments, a pop-up will show up with a grid (a row per
each argument and three columns: one for the argument, one for the argument value (this is editable) and
one for nullifying that argument value (a check box). After setting up all the argument values, you can press
OK to start the debug session, or Cancel to cancel the debug session.
Figure 11.2 Setting Arguments (1 of 2)
72

How the Debugger Functions
Figure 11.3 Setting Arguments (2 of 2)
How the Debugger Functions
To have visibility into the internal workings of a stored routine, the debugger prepares a special version
of the procedure, function, or trigger being debugged, instrumented with extra code to keep track of the
current line being stepped into and the values of all the local variables. Any other stored procedures,
functions, or triggers called from the routine being debugged are instrumented the same way. The debug
versions of the routines are prepared for you automatically, and when the debug session ends (by either
pressing F5 or Shift + F5), the original versions of the routines are automatically restored.
A copy of the original version of each instrumented routine (the version without
instrumentation) is stored in the AppData\Roaming\MySqlDebuggerCache
folder for the current Windows user (the path returned by calling
System.Environment.GetFolderPath(Environment.SpecialFolder.ApplicationData)
in .NET, plus appending MySqlDebuggerCache. There is one file for each instrumented routine, named
routine_name.mysql. For example, in Windows 7, for a user named fergs, the path is C:\Users
\fergs\AppData\Roaming\MySqlDebuggerCache.
Two threads are used, one for the debugger and one for the routine being debugged. The threads run in
strict alternation, switching between the debugger and the routine as each statement is executed in the
stored routine.
73

Basic Debugging Operations
Basic Debugging Operations
The debugger has the same look and feel as the standard Visual Studio debuggers for C#, VB.NET or C+
+. In particular, the following are true:
Locals and Watches
• To show the Locals tab, choose the menu item Debug, Windows, Locals.
The Locals tab lists all the variables available in the current scope: variables defined with DECLARE at
any point in the routine, argument parameters, and session variables that are referenced.
• If the last step operation changes the value of a local, its value will be highlighted in red (until another
statement is executed or stepped.
• You can change the value of any local.
• To show the Watch tab, choose the menu item Debug, Windows, Watch.
To define a watch, type any valid MySQL expression, optionally including function calls. If the watch
evaluation makes sense in the current context (current stack frame), it will show its value, otherwise it
will show an error message in the same row the watch was defined.
• When debugging a trigger, in addition to any locals declared or session variables referenced, the new
and old object (when applicable) will be listed. For example in a trigger for INSERT, for a table defined
like:
create table t1( id int, myname varchar( 50 ));
the locals will list the extra variables new.id and new.myname. For an UPDATE trigger, you will also
get the extra variables old.id and old.myname. These variables from the new and old objects can be
manipulated the same way as any ordinary local variable.
74

Basic Debugging Operations
Figure 11.4 Debugging a Trigger
Call Stack
• To show the Call Stack tab, choose the menu item Debug, Windows, Call Stack.
• The stack trace (in the Call Stack tab) will list all the stack traces, one for each routine invocation. The
one with a yellow mark is the current stepping point. Clicking in another will activate in the editor the tab
for that routine source, highlighting in green the last statement stepped.
75

Basic Debugging Operations
Figure 11.5 Call Stack
Stepping
• Stepping of a new routine starts in the first executable instruction (excluding declares, handlers, cursor
declarations, and so on).
76

Basic Debugging Operations
Figure 11.6 Debug Stepping
77

Basic Debugging Operations
Figure 11.7 Function Stepping (1 of 2)
78

Basic Debugging Operations
Figure 11.8 Function Stepping (2 of 2)
• To step into the code of a condition handler, the condition must be triggered in the rest of the MySQL
routine.
• The next statement to be executed is highlighted in yellow.
• To continue stepping, you can choose between Step Into (by pressing F11), Step Out (by pressing F10)
or Step Over (by pressing Shift + F11).
• You can step out of any of functions, triggers or stored procedures. If you step from the main routine, it
will run that routine to completion and finish the debug session.
• You can step over stored procedure calls, stored functions, and triggers. (To step over a trigger, step
over the statement that would cause the trigger to fire.)
• When stepping into a single statement, the debugger will step into each individual function invoked by
that statement and each trigger fired by that statement. The order in which they are debugged is the
same order in which the MySQL server executes them.
• You can step into triggers triggered from INSERT, DELETE, UPDATE, and REPLACE statements.
• Also, the number of times you enter into a stored function or trigger depends on how many rows are
evaluated by the function or affected by the trigger. For example, if you press F11 (Step Into) into
an UPDATE statement that modifies three rows (calling a function for a column in the SET clause,
thus invoking the function for each of the three rows), you will step into that function three times
in succession, once for each of the rows. You can accelerate this debug session by disabling any
79

Basic Debugging Operations
breakpoints defined in the given stored function and pressing Shift + F11 to step out. In this example,
the order in which the different instances of the stored function are debugged is server-specific: the
same order used by the current MySQL server instance to evaluate the three function invocations.
Breakpoints
• To show the Breakpoints tab, choose the menu item Debug, Windows, Breakpoints.
• The Breakpoints tab will show all the breakpoints defined. From here, you can enable and disable
breakpoints one by one or all at once (using the toolbar on top of the Breakpoints tab).
• You can define new breakpoints only in the middle of a debug session. Click in the left gray border of
any MySQL editor, or click anywhere in a MySQL editor and press F9. In the familiar Visual Studio way,
you press F9 once to create a breakpoint in that line, and press it again to remove that breakpoint.
• Once a breakpoint is defined, it will appear enabled (as filled red circle left to the current row if that line
is a valid statement to put a breakpoint) or disabled (as a non-filled red circle left to the current row if that
row is not valid to put a breakpoint).
• To define conditional breakpoints, after creating the breakpoint, right click in the red dot and choose
Condition.... There you can put any valid MySQL expression and state if the condition is Is True or Has
changed. The former will trigger the breakpoint every time the condition is true, the latter every time the
condition value has changed. (If you define a conditional breakpoint, it is not enough to step into the line
with the breakpoint defined to trigger such a breakpoint.)
Figure 11.9 Conditional Breakpoints
80

Other Features
Figure 11.10 Expressions and Breakpoints
• To define pass count breakpoints, after creating the breakpoint, right click in the red dot and choose Hit
Count.... In the pop-up dialog, define the specific condition to set. For example, break when the hit
count is equal to and a value 3 will trigger the breakpoint the third time it is hit.
Other Features
• To abort the debug session (and the execution of the current call stack of routines), press Shift + F5.
• To run the routine to completion (or until next breakpoint hit), press F5.
• For all functionality you can use (in addition to the shortcuts documented), see the options in the Debug
menu of Visual Studio.
Limitations
• Code being debugged must not use get_lock or release_lock MySQL functions, since they are
used internally by the debugger infrastructure to synchronize the debugger and the debugged routine.
• Code being debugged must avoid using any transaction code (START TRANSACTION, COMMIT,
ROLLBACK) due to the possibility of wiping out the contents of the debugger tables. (This limitation may
be removed in the future).
• You cannot debug the routines in the serversidedebugger database.
• The MySQL server running the routine being debugged can be any MySQL server version after 5.0, and
running on any supported platform.
81

Keyboard Shortcuts
• Always run debug sessions on test and development servers, rather than against a MySQL production
server, because debugging can cause temporary performance issues or even deadlocks. The
instrumented versions of the routines being debugged use locks that might not pertain to the rest of the
production code.
Keyboard Shortcuts
The following list summarizes the keyboard shortcuts for debugging:
• F9 Toggles breakpoints
• F11: Step into once
• F10: Step over once
• Shift + F11: Step out once
• F5: Run
• Shift + F5: Abort current debug session
82

Appendix A MySQL for Visual Studio Frequently Asked
Questions
Questions
• A.1: How do I know if MySQL for Visual Studio is installed?
Questions and Answers
A.1: How do I know if MySQL for Visual Studio is installed?
Open Visual Studio and go to View, Toolbars, and look for (and enable) the MySQL toolbar. Or, open
MySQL Installer and look for the MySQL for Visual Studio product.
83

84
